1. Cut rib rack in half to get 3-4 ribs per rack. Leave fat back on. Season/coat your ribs with Grandpa's Thunder Powder or Arghhh Powder depending on how spicy you want your coating, then let sit on counter 1 hour. Even better: In refrigerator overnight!
2. Cooking- 250°-300° in grill , 30 coals, use thermometer. Pile up on side of grill, wet wood on coals, trap down to regulate heat.
3. Ribs on – meat side down, fat on top, cook ribs 1 hour.
One hour add more coals and flip ribs, add 20 coals and another wood block, cook another hour.
BBQ Texas Beef Ribs
Also works for Baby Back Pork ribs
Instructions
1. Cut ribs to 3 or 4 per section
2. Use 1 tsp rub per section. Leave fat on the back, let sit on counter 1 hours.
3. Grill temp is KEY! 250° – 300°, 2 – 2 ½ hours
(30 coals). Pour coals to one side – preheat 5 min, put meat on opposite side.
4. Ribs – fat layer facing up, vent grill 2/3 open, maintain temp, cook 1 hour, put 20 more coals on and another steam log on, flip ribs, cook another hour.
5. Start testing for doneness, cook up to 45 more minutes. Done when you stick w/ fork and it releases fairly easily.
Baby Back Ribs
Put your ribs on a baking sheet and cover loosely with foil.
Bake at 300º for 2 hours on lower oven rack
Meanwhile, cut 10 roma tomatoes in half and place on another baking sheet
Cut one sweet onion into pieces and put it on the baking sheet as well
Sprinkle with salt, garlic powder, dried oregano and basil
Put on top oven rack for another hour – leaving ribs on the lower rack
After another hour, remove tomatoes and run through a food mill
Discard the pulp, and mix tomato and onion puree with 1/2 C brown sugar, 1/2 C apple cider vinegar and 1/2 C water
Put 2 TBL butter and the tomato mixture into a pan and bring up to near boil, reduce heat, then simmer for 20 minutes
Remove ribs from oven and turn heat up to 500º
Put tomato mixture on the ribs, and when the oven is up to heat, put them in for about 20 minutes or until brown sugar starts to char
This is something that I like to use for pizza toppings and to add an extra bit of heat to hot wings. It has the heat of crushed red pepper, but doesn’t get stuck in your teeth and gums. Just a bit of salt enhances the flavor too. This is also good for meat seasoning.
INGREDIENTS
1/2 C ground cayenne pepper
1/2 C ground red pepper
1/4 C sumac
1/2 C salt (fine or course)
2 TBL garlic powder
2 TBL onion powder
1 TBL black pepper
1 TBL cumin
Mix all of the above together well and store in a sprinkle jar.
Tony Chachere’s Creole Seasoning
Recipe By : Tony Chachere
WEBMASTER NOTE: You can buy this amazing seasoning mix already packaged for you at www.tonychachere.com but for those of you who want to try to make it yourself, Tony himself has provided the recipe, which is presented here. My modifications (are in parentheses)
INGREDIENTS
26 ounces salt
1 1/2 ounces black pepper — ground
2 ounces red pepper — ground – – (I use red chili powder)
1 ounce garlic powder — pure
1 ounce chili powder – – (I use cayenne pepper powder)
1 ounce Monosodium glutamate — (Accent)
STEP BY STEP
Mix well and use like salt.
When it’s salty enough, it’s seasoned to perfection.
For barbecue and fried foods: Season food all over.
Cook as usual.
WEBMASTER NOTE : Tony Chachere is from Opelousas, Louisiana. He was 11 years old when his first cookbook came out. This is the first recipe in his “Cajun Country Cookbook”. In the cookbook, he says “THIS RECIPE IS WORTH THE PRICE OF THE BOOK”. He’s right.
Right after the cookbook came out, everyone was making this and storing it in those large plastic ice cream cartons. Within a short while, he started marketing this himself. Now you can find the green cans of this stuff all over the country. Where I’m from, this is the only seasoning anyone uses. That sounds kind of strange, but try it and you’ll see.
There might be such a thing as “too complex.” Tony’s Creole Seasoning is simple and really great. It suits the palate of 90% of Middle America. It is better than salt and pepper, but doesn’t pack quite the kick as Grandpa’s Thunder Powder. I personally like a huge kick, that’s why I invented Thunder Powder, but as a staple in our house, Tony’s still has a place. My recipe that is a bit less spicy is Grandpa’s Dry Rub and a lot less spicy than Grandpa’s Arghhhh Powder.
Robert Andrews (Grandpa of Grandpa Cooks and Webmaster)
BBQ Dry Rub Marinate
This mix is adapted from Alton Brown’s Pork Rib Dry Rub recipe
INGREDIENTS
1/4 C FLAVOR MIXTURE – See below
1 C (packed) brown sugar
1/2 C salt
1/4 C chili powder
STEP BY STEP
FLAVOR MIXTURE – Makes 1/4 Cup of seasoning
2 tsp salt
1 teaspoon each – Modify to your own tastes
Black pepper
Cayenne pepper powder
Onion powder
Garlic powder
Ground mustard
Ground coriander
Ground tarragon
1/2 tsp each – Modify to your own tastes
Ground bay leaf or Old Bay Seasoning
Ground clove
Ground cumin
Ground nutmeg
Ground ginger
Thyme
NOTES
For a dry rub, you basically need salt, sugar and heat.
I create the Flavor Mixture separately, because it is good for many things: Soup, sandwiches, pizza, etc.
I changed things up just a bit in my recipe to suit my personal preferences
Buccaneer Dry Rub
This is a good rub to use on hamburgers, wings, ribs, etc.
INGREDIENTS
3 TBL coarse salt
3 TBL brown sugar
1 TBL garlic powder
1 TBL onion powder
1 tsp black pepper
1 tsp cinnamon
1 tsp alspice
1 tsp cayenne
Kansas City Dry Rub
There is a mix called Sticky Fingers Dry Rub, but this is actually what Grandpa’s Thunder Powder was based on, so just use Grandpa's Thunder Powder or Arghhh Powder depending on how spicy you want your coating.
It sounds simplistic, but ribs are ribs. OK, not really, but tips for beef ribs can also apply to pork ribs and short ribs. Here is a collection of recipes that I’ve collected, led by the best recipe. Mine.
Bring to a boil, reduce heat and let simmer 60 minutes.
This makes enough sauce to baste 4 lbs. of baby back ribs.
For quicker sauce, buy ‘off the shelf’ BBQ sauce and add to whatever above ingredients you have on hand to give it that ‘home cookin’ taste.
Third Party Recipes
The information below this section is from a third party. It is part of Grandpa's Personal Recipe box. Feel free to browse, but know that this information is from someone else.
The information below this section is from a third party. It is part of Grandpa's Personal Recipe box. Feel free to browse, but know that this information is from someone else.
– Grandpa’s Recipe Box: CLICK HERE
Many of the professional recipes have you starting out with a roux. This is one of the recipes that Grandma contributed to the website. See optional roux note if you want to experiment.
Mother Sauces
BECHEMEL
Take ¼ C each flour and butter, and heat until it starts to brown
Whisk in 2 C of whole (hot) milk gradually – ¼ C at a time
Stir to completely incorporate before adding more milk
MOURNAISE
Add shredded cheese to your Bechemel
½ C cheddar and ½ C Gruyere
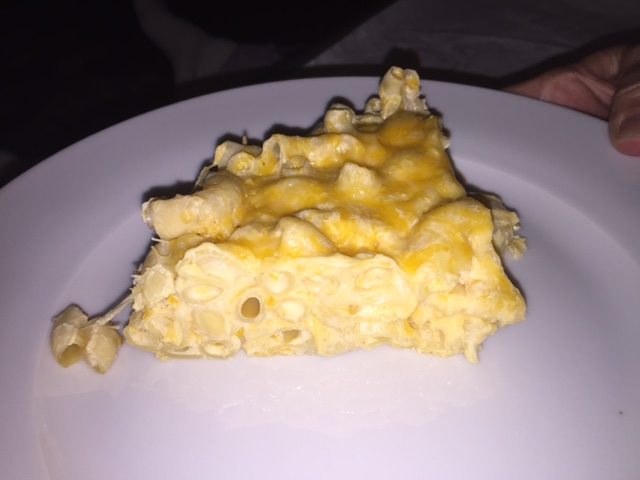
For basic Mac and Cheese mix cooked pasta in with your Mournaise
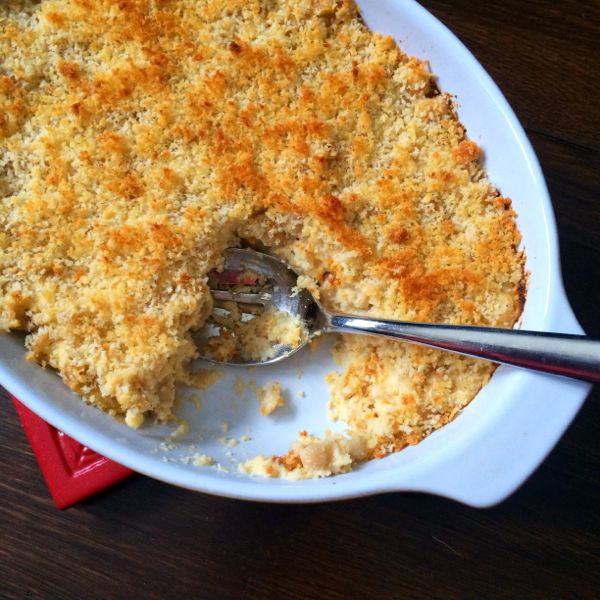
When ready to serve, top with Panko and bake at 350º for about 20 minutes
Create roux with butter, flour, onion, Worcestershire, paprika
Put chopped scallions in the mix
Add 4 C Half and half
Cook pasta, toss with 3/4 of the shredded cheese
Put mixed pasta, scallions and cheese into baking dish
Pour cream cheese over top
Topping 2 C cheese blends, french fried onions
25 minutes @ 350º
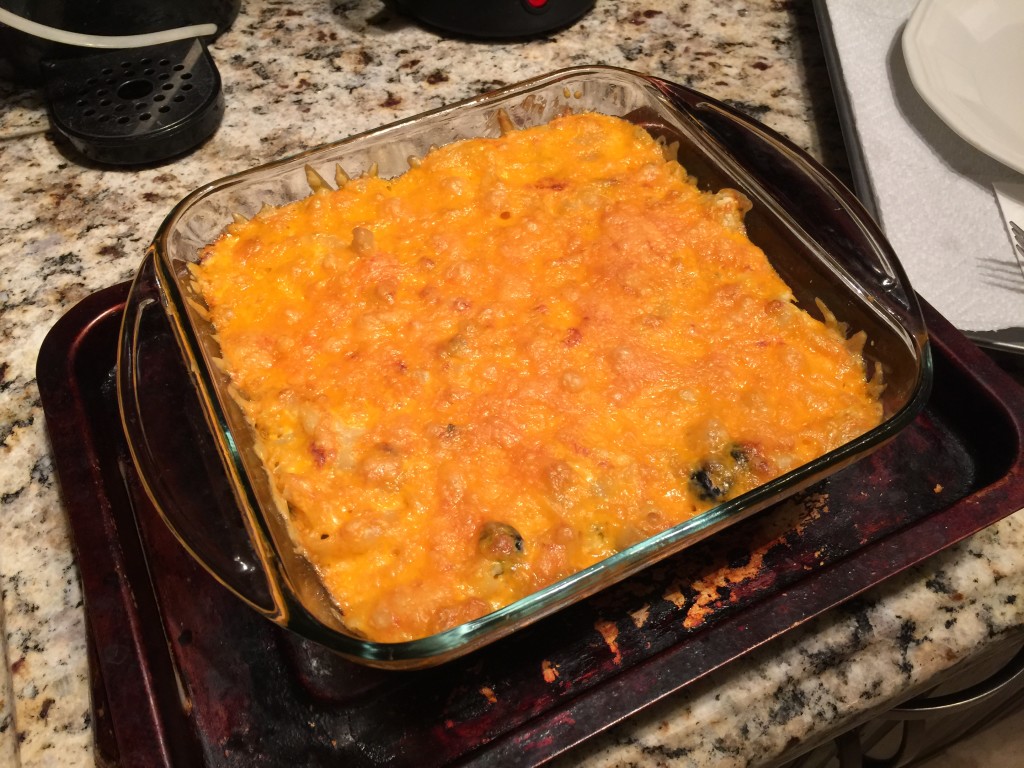
Macaroni and Cheese by Lydia’s Italy
Mix together one cup each grated cheddar cheese and grated fontina cheese
Pour enough milk in to see the visible milk line through the cheese . Kind of like you would do if you were making a quiche
And several leaves of sage and one Bay leaf
Set aside for one hour
Put in stove-top / oven-safe casserole dish at low heat
start cooking in salted water big elbow macaroni or rigatoni noodles . Cook only al dentė
Topping
Coarsely great part of a French loaf
Melt butter in the pan
And bread crumbs to toast
Set aside to cool
Using slotted spoon or spider strainer to bring pasta into cheese mixture. Don’t worry about completely straining because you want some of the pasta water mixed in.
Cook together for a few moments stirring occasionally
Toss grated Parmesan in with the breadcrumbs
In greased baking dish, sprinkle some breadcrumb mixture in the bottom.
Spoon noodle mixture onto breadcrumbs as the next layer removing leaves
Top pasta with more breadcrumbs
Bake at 425° uncovered about 25 minutes
Stovetop Mac and Cheese – ATK
1.5 C water
1 C milk
Bring water and milk to a low boil, then reduce heat
Add 8 oz (weighed) elbow macaroni
Simmer 6-8 minutes
Add 1 C Deluxe American Cheese – bulk grated, not prewrapped
Take off heat
Stir in 1 C shredded Extra Sharp Cheddar
Add 1/2 tsp Dijon mustard and cayenne pepper to taste
Cover and let meld – serve hot
Mac and Cheese – ATK
1 lb pasta
3 tbl butter
stale bread
1/2 tbl dried mustard
1 tsp salt
¼ tsp cayenne
5 cu milk
½ lb sharp chedder
½ lb Monterey Jack
Cook pasta in plenty of water to al dente. Make bread crumbs with stale bread strips, put in blender w/3 tbl butter, pulse to 1/8” pieces (set aside). Drain pasta. In pot add 5 tbl butter and melt till foam subsides, whisk in 6 tbl flour, cook until tawny color, add ½ tbl dried mustard, 1 tsp salt, ¼ tsp cayenne and 5 cu milk. Bring to boil, reduce heat and cook 3-5 min till thickened. Stir into sauce, ½ lb sharp chedder, ½ lb Monterey jack, toss in pasta and cook for 6 min. Transfer to baking dish, top w/bread crumbs. Broil 2 minutes on middle rack.
Let set 5 min, then serve.
Mac and Cheese – Composite
1 CU uncooked pasta (or 2 CU cooked)
1 CU Milk
1 CU diced French bread
Onion (diced)
¼ tsp cayenne
1/2 tsp Mustard
1 TBL SALTED Butter
2 TBL flour
Bread crumbs
1/4 CU each Cheeses (Sharp Cheddar, Mozzerella or Monterey Jack, Parmesean)
Instructions
1. Cook pasta in plenty of water to al dente.
2. Make bread crumbs with French bread,
put in blender w/ 3 tbl butter, pulse to 1/8” pieces (set aside).
3. Drain pasta. In pot add 2 TBL butter and melt till foam subsides,
add grated onion and cook until it starts to turn translucent
whisk in 2TBL flour, cook until tawny color, add ½ tsp dried mustard, scant salt, ¼ tsp cayenne and 1 cu milk.
4. Bring to boil, reduce heat and cook 3-5 min till thickened.
5. Stir into sauce – grated cheeses,
toss in pasta and cook for 6 min.
6. Transfer to baking dish, top w/ bread crumbs.
7. Bake 10 minutes at 425 degrees or until the cheese/bread starts to brown
Citric Acid Powder – 1/4 tsp – You can substitute 1 TBL bottled lemon juice – Cannot substitute Ascorbic Acid
Lemon Juice – 1 TBL – You can substitute 1/4 tsp citric acid powder – Cannot substitute Ascorbic Acid
Ascorbic Acid – You can substitute lemon juice or citric acid powder, but not the other way around
Liquid Measurements / Volume
1 Gallon = 4 QT = 8 PT = 16 C =128 OZ = 3.8 L
1 QT = 2 PT = 4 C = 32 OZ = .95 L = 950 ml
1 PT = 2 C = 16 OZ = 480 ml
1 C = 8 OZ = 240 ml
1 OZ = 30 ml = 28.5 gm
100 ml = 3.4 OZ = 1/2 C minus 1 TBL
250 ml = 1 C plus 2 TBL
1 IMPERIAL Gallon = 1.2 US Gallons = 4.5 L
Dry Measurements
16 TBL = 1 C
1/3 C = 5 TBL + 1 tsp
4 TBL = 1/4 C = 12 tsp = 2 OZ = 60 ml
2 TBL = 1 FL OZ = 30 ml
1 TBL = 3 tsp = 1/2 FL OZ = 15 ml
1 tsp = 5 ml = 1 CC
Weight / Mass
1 OZ = 28.4 gm
1 KG = 2.2 LB =
1 LB = .45 KG
100 gm = 3.5 OZ
250 gm = 8.8 OZ
Temperature
Degrees Celsius to Fahrenheit :: Multiply by 1.8 (or 9/5) and add 32º
Fahrenheit to Celsius :: Subtract 32º and multiply by 0.55 (or 5/9)
–
Fry temperature = 350º – 370º F :: Lower than 350 your food will be greasy. Above 370º and it will burn.
Burnt Sugar = 350º F = 177º C – Becomes bitter
Brown Sugar – Liquid Caramel = 338º – 350º F
Clear Liquid Sugar Concentrate (Karo) = 320º – 335º F
– High Fructose Corn Syrup – The chemical chain is not good for us, but tastes REALLY good.
Hard Crack Stage = 300º – 310º F (eg) Hard Tack, Lollipops
Soft Crack Stage = 270º – 290º F (eg) Taffy
Hard Ball Stage = 250º – 265º F (eg) Gummy Bears
Firm Ball Stage = 245º – 250º F (eg) Caramels
Soft Ball Stage = 235º – 240º F (eg) Fudge
Thread Stage = 230º – 235º F
Jams and Jellies = 220º – 225º F
212º F = 100º C – Steam – has more kinetic energy than the water – will cause severe and more painful burning. Will have the same effect as 230º liquid.
212º F = 100º C – Hot water – will cause burning
162º F – Skin will be destroyed on contact – scarring will occur
131º F – Second degree burning will occur
125º F = 52º C – Painful burning will occur
108º F = 42º C – Hottest bath that is marginally safe
98.6º F = 37º C
68º F = 20º C
32º F = 0º C
-40º F = -40º C – Not useful, but interesting!
-109º F = -78º C = Temperature of Dry Ice – Causes tissue damage in 5 seconds
In Phoenix, you can garden year-round. If you get tomatoes in early enough in the fall, you can get another harvest in. If you are a bit late, you wind up with three large bowls of green tomatoes! Here is what I did with them.
Use Green Tomato Pie to create Green Tomato Tartlets using Puff Pastry
Green tomatoes WILL eventually ripen. They will not have the full flavor of a vine-ripened tomato, but will be just as good as supermarker ‘maters. This can take anywhere from one to five weeks. You can speed up the ripening process by putting them in a paper bag with a banana. The ethylene gas (a natural growth hormone) from the banana will speed the tomato ripening process.
Shop locally and seasonally. Buy firm but not mushy. Don’t refrigerate or it will kill the flavor.
Heat butter in a sauce pan at medium low heat. DO NOT STIR.
Once it has completely melted, let rest a few minutes
– During this time the solids will precipitate to the bottom of the liquid
Skim off any foam that has formed on top.
You now have clarified butter
Keep cooking until the solids in the bottom begin to turn brown
You now have ghee
Carefully pour off the ghee, leaving the solids behind.
Ideally, pour it through cheesecloth for even cleaner ghee
This will give a cleaner taste to whatever you are cooking. It is also less likely to burn. Just a dash of EVOO will also help inhibit burning. If you are a purist, pour the butter through cheesecloth.
Wash and rub a little canola oil into it before first use.
Don’t heat the pan empty. At least put a little oil into the pan.
Don’t use cooking spray. There is a propellant that will build up and destroy your pan. If you must, get a spritzer bottle and put canola into it.
Don’t let the temperature EVER exceed 450. Ideally, I never even exceed 400º This Thermapen is one of the best investments you could make. You will use it nearly every single day.
Don’t let food dry on the surface of your pan. When the temperature has dropped to 250º (or below) wipe it off with a wash cloth and hot water. I usually don’t even like to use soap on mine.
If you can’t clean it immediately, at least fill it with water to minimize the chemical effects of the remaining cooking oil residue.
If you do use soap on your pan, occasionally wipe in a little canola oil (See Tip #1)
Never ever EVER use abrasive cleansers or pads on your pan.
Never put your teflon or ceramics into the dishwasher. The hot water is OK, but the drying cycle will kill your pan.
For stubborn stains, use a mixture of baking soda and water. mix and apply the paste. Leave for an hour, then wipe off. Repeat if needed.
If your pan has a wooden handle, season it VERY occasionally by wiping with canola oil
Season a hot pan (250º) occasionally with a paper towel and olive oil (See Tip #1)
Never use metal cookware (spatula, whisk, spoon, etc) when cooking with your non-stick pan
THE PENNY TRICK – If you are boiling water, put a penny in the bottom of your pan. If it boils dry (which will ruin your pan) the penny will start to rattle because of the boiling water beneath the penny. The rattling will tell you your pan is nearly empty (usually) before your pot is destroyed.
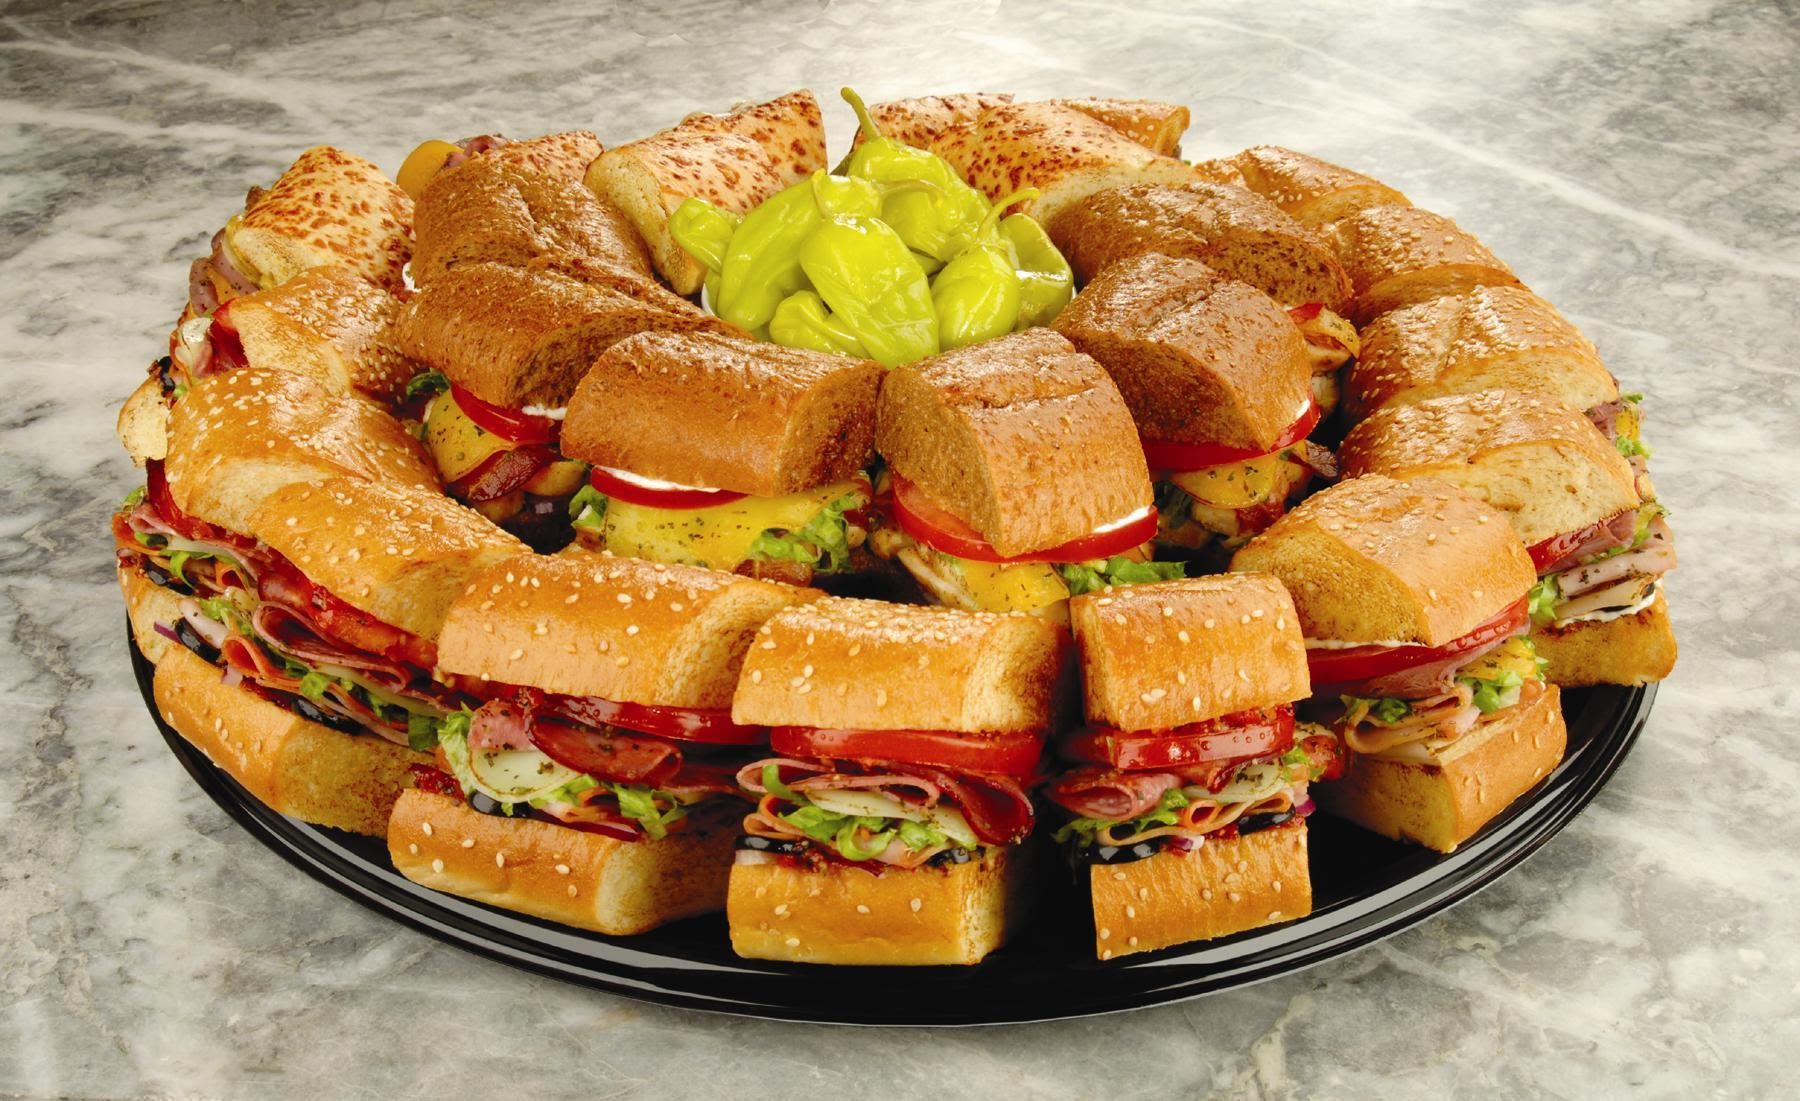
If you want to be a hit at your next party or potluck, consider making a six foot sub. HINT: It is not really six foot long, it just looks that way.
INGREDIENTS
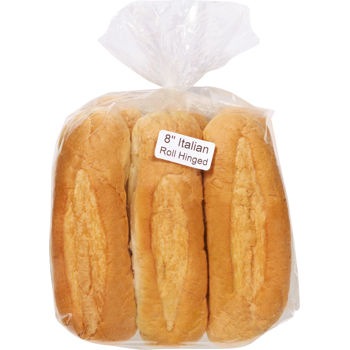
6-8 sub sandwich rolls
about 24 slices of provalone cheese
24 slices of ham
30 slices of salami
1 onion – sliced very thin
2 bell peppers – cut into very thin strips
1 head of iceberg lettuce – shredded
4 tomatoes – sliced thin
EVOO
Optional – Dijon mustard or ketchup
STEP BY STEP
Here is the key: Cut the tips off all of your sub rolls. They will eventually fit together (end to end) so that they look like one huge sub (see below).
Cut them lengthwise into sandwich buns
Put thin layer of onions on the subs
Spread lettuce onto the subs
Put tomato and bell peppers on the lettuce
Add your meats, and end with your cheese
Optional – Put on a baking tray and place under the broiler for about 30 seconds to melt the cheese
Set them up on a large tray (as shown to the right) and cover with a towel
• Single Acting: 1 teaspoon = 1/4 teaspoon baking soda + 5/8 teaspoon cream of tartar – 1/2 tsp of cornstarch if you are not using it right away
Confectioner sugar ?!?
• Double Acting: Releases gas twice – Hard to do in the home
Baking Soda
There is NO substitute for baking soda
Basil
Substitute peas
Bread Wheat Flour
Xanthan Gum – Helps do the task that gluten does
Other gluten-free wheat flour substitutes are garbanzo beans, teff, sorghum and quinoa flours
Butter
• Replace half the amount of butter in your recipe with applesauce; if the recipe calls for one cup of butter, use half a cup of butter and half a cup of applesauce. If you don’t mind a denser, more moist bread, replace all the butter with applesauce to cut even more calories and fat.
• Use Greek yogurt cup for cup to replace all or part of your butter
• Canola oil can be used in place of melted butter.
Buttermilk
1 cup = 1 tablespoon lemon juice or vinegar plus enough regular milk to make 1 cup (allow to stand 5 minutes in the fridge)
Chili Sauce
1 cup = 1 cup tomato sauce, 1/4 cup brown sugar, 2 tablespoons vinegar, 1/4 teaspoon cinnamon, dash of ground cloves and dash of allspice
Chocolate, Unsweetened
1 ounce = 3 tablespoons cocoa plus 1 tablespoon butter or regular margarine or vegetable oil
Cornstarch (for thickening)
1 tablespoon = 2 tablespoons flour
You must cook longer than you would with cornstarch.
Cream
• 1 C = 1/3 cup melted unsalted butter + 3/4 cup milk.
• 1 C = 1/3 cup melted unsalted butter + 3/4 cup low-fat milk + 1 TBL flour or cornstarch.
• 1 C = 1 cup skim milk + 2 TBL cornstarch.
• 1 C = 1/6 cup melted butter + 7/8 cup half-and-half.
1/2 C = One egg yolk to 1/2 cup of oil. Plus 1 tsp Dijon and salt
Miso
Soybean allergy:
Parmesan – from Italy
Substitute American Parmesan if mixed
Peanut Butter
Substitute cashew butter,
Pine Nuts
Substitute walnuts
Sugar, Confectioners’ or Powdered
1 cup = 1 cup granulated sugar plus 1 tablespoon cornstarch; process in a food processor using the metal blade attachment until it’s well blended and powdery.
Tahini
Ground up sesame seeds
Tomato Juice
1 cup = 1/2 cup tomato sauce plus 1/2 cup water
Wine, Red
Any amount = The same amount of grape juice or cranberry juice
Wine, White
Any amount = The same amount of apple juice or white grape juice
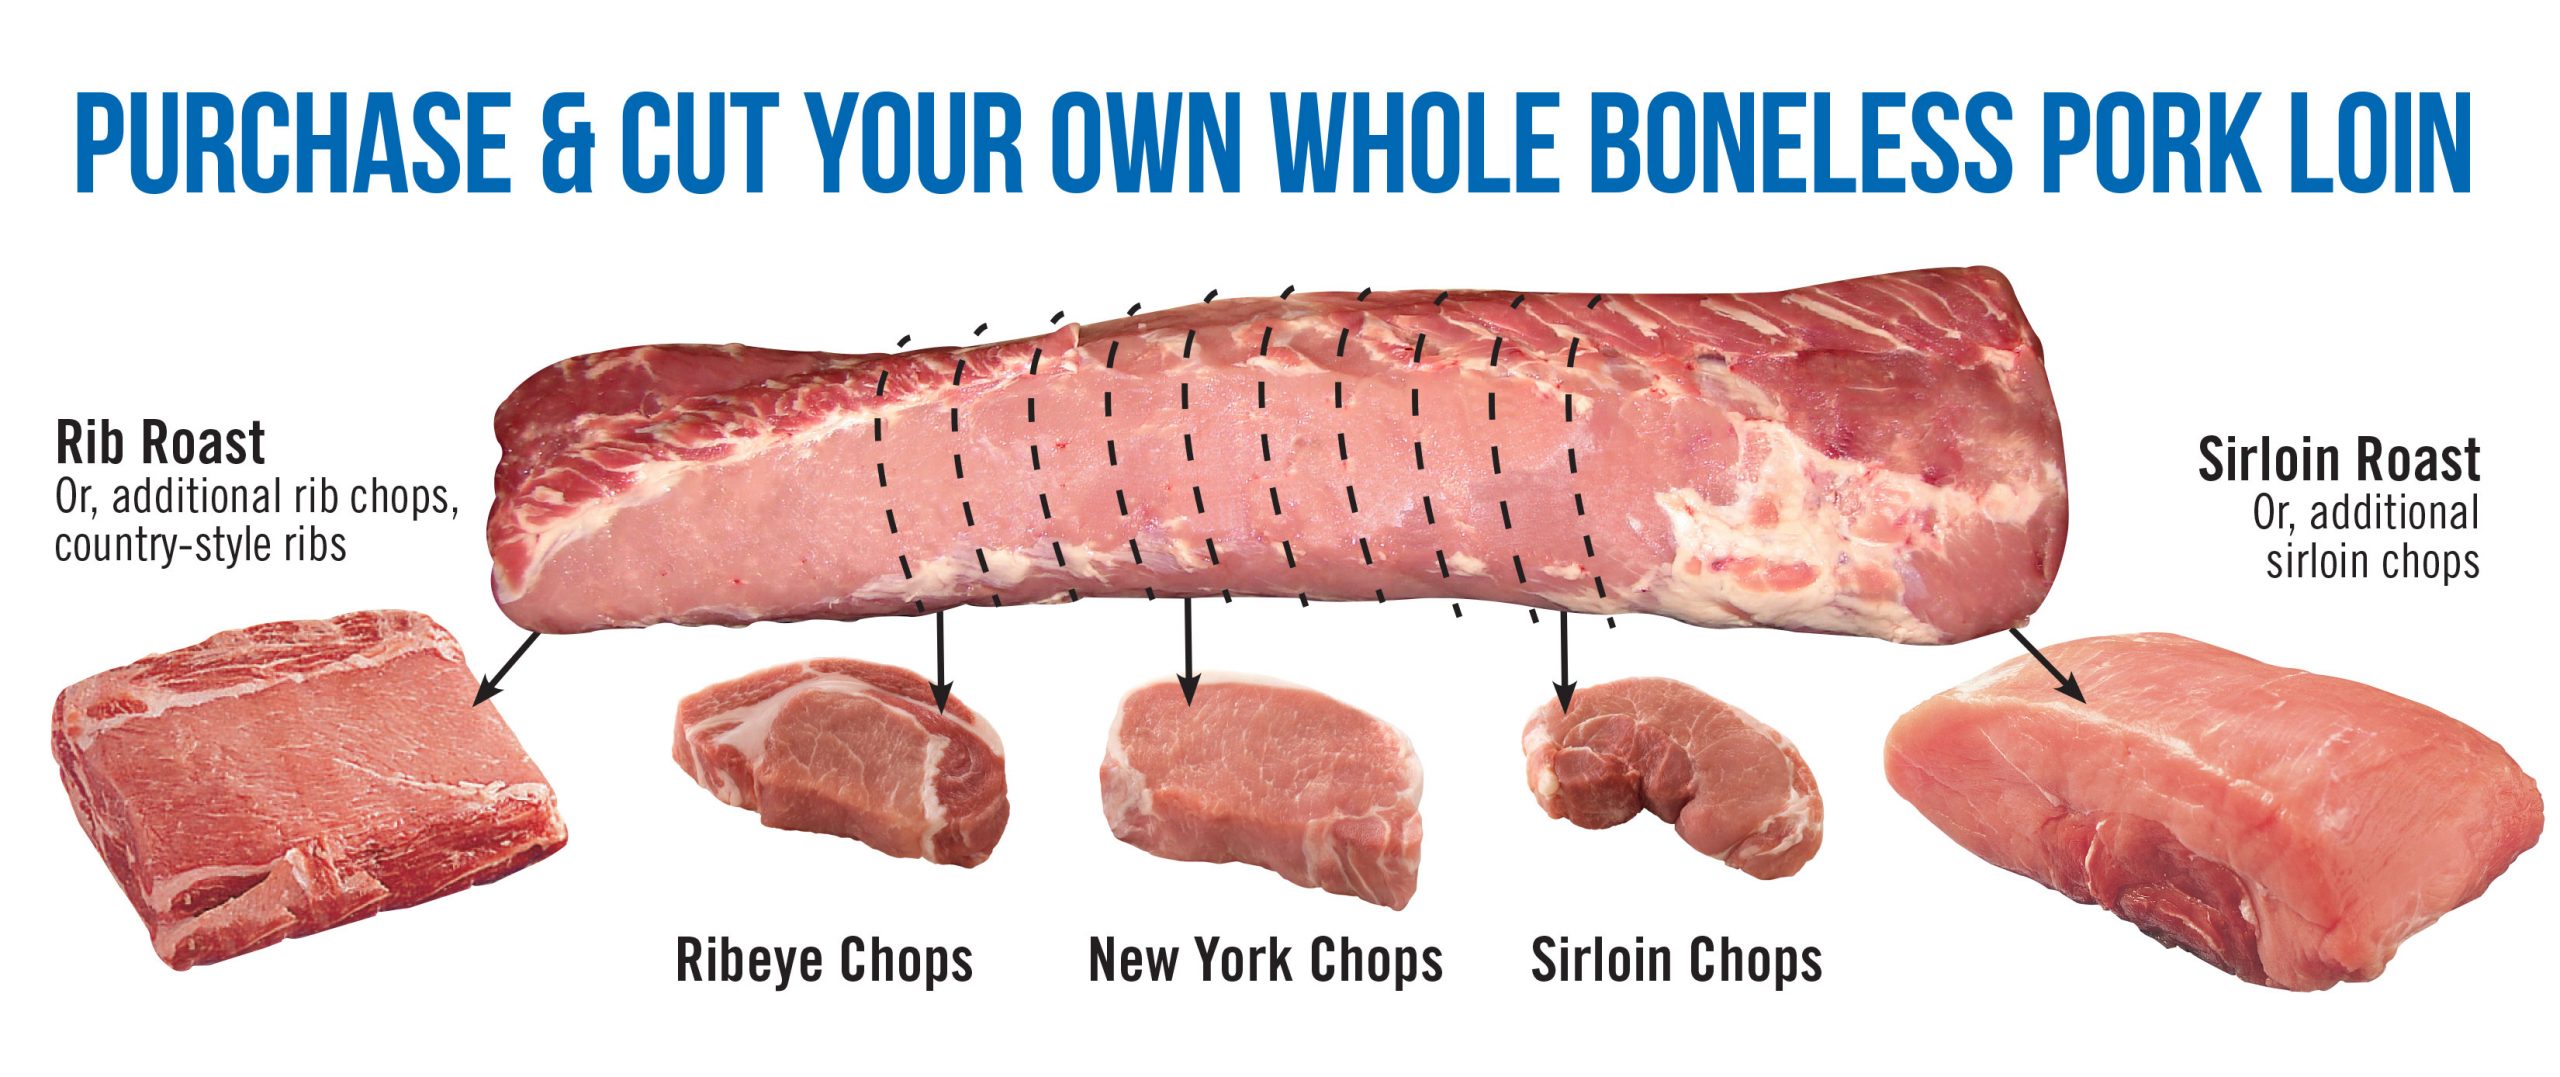
All Pork Chops are taken from the loin – or the back
Shoulder chop is closest to the head
Lots of muscles and connective tissue
Good for braising and slow cooking, but not for pan frying
The rib chop is next – This is the front part of the center cut
Cut these thick and cook with fast dry heat – like a BBQ grill
Good for stuffing since it is an entire muscle
The tenderloin and loin chop – This is the back of the center cut
The pork equivalent of the T-bone and Porterhouse
The loin and tenderloin cook at different rates
Wrap the tenderloin with foil for the first half of the cooking process
The sirloin chop is near the back of the hog
Most amount of muscles and connective tissue
Good for braising and slow cooking, but not for pan frying
Bone-in means more flavor. Unless you have a specific reason, always use bone-in pork chops.
Frenching the pork chop means to scrape the meat off the bone to create a “handle.”
Consider a two-day brine otherwise it will taste dry – Bring 2 C apple cider to about 185º :: and add 1 C brown sugar, 1 C salt, 8 cloves, bay leaf, 1 tsp corriander and 1 TBL peppercorns, 1 TBL dry mustard. Add 1.5 C ice after all solids are dissolved. Let cool, then marinate 24-48 hours in the fridge. This will really enhance the flavor of your pork chops.
A very easy recipe. Use the above link or CLICK HERE
Novice Pork Chop
Season 2 bone-in pork chops with salt and pepper
Heat 2 TBL EVOO in a hot cast iron skillet
Sear pork chops till brown
Flip chops, then cook 1 minutes more
Set pork chops aside on a plate
Add minced garlic, onion, tomatoes, kalamata olives, capers and one chopped anchovy to the hot skillet.
When softened, add pork chops back into the pan.
Cook at 450º for 5 minutes
Fancy Pork Chop
INGREDIENTS
2 (bone-in) pork chops, 1 inch thick (with pockets for stuffing)
BRINE – Let soak in brine overnight
1/2 C orange juice
1 TBL Worcestershire
1/4 C white vinegar
2 TBL sugar or Karo syrup
STUFFING
1 TBL butter
2 TBL onion, finely chopped
1 apple, finely chopped
2 TBL water
1 tsp celery – finely chopped
1/2 tsp salt
1/4 tsp pepper
DREDGE INGREDIENTS
2 eggs – beaten
1/2 C flour
1/2 C bread crumbs
STEP BY STEP
Mix brine in a baggie. Marinate pork chop overnight, or at least 6 hours.
PREPARE YOUR MEAT
When you are ready to cook, drain baggie and pat pork chop dry
Put pork chops in freezer to firm up
Heat oven to 350 degrees.
CREATE YOUR STUFFING
Place butter in saucepan and saute onions in large skillet
Add apple and celery and saute 1 minute
Add all remaining stuffing ingredients to skillet
STUFFING YOUR PORK CHOP
Remove pork chops from freezer and cut a pocket in them
Fill pork chops with prepared stuffing.
Fasten edges with wooden picks.
COAT YOUR PORK CHOP
Dip pork chop in egg, then flour, then again in egg, then in bread crumbs
Place stuffed chops flat side down in single layer on top of a draining rack in a shallow baking pan
Cover pan tightly with foil.
Bake in moderate oven at 350 degrees about 1 hour.
Uncover and continue baking another 30 minutes
VARIATIONS
Serve with cinnamon apple wedges or hot spiced applesauce
Braised Pork Chop
You can also use this recipe with ribs.
INGREDIENTS
4 pork loin or rib chops, about 1/2 inch thick
1 teaspoon salt
1/4 tsp. pepper
1/4 cup pineapple juice, apple juice or water (Try a can of pineapple slices)
STEP BY STEP
Cook pork chops over medium heat until brown: drain. Sprinkle with salt and pepper. Reduce heat; pour juice on pork. Cover and simmer untildone, 20 to 25 minutes.
My special touch with this recipe is to place pineapple slices on the chops and leave them while they simmer. I also salt and pepper to taste.
This recipe comes from a 30 year old Betty Crocker cookbook, so there’s no calorie information.
With boning knife stick into middle to create pocket as small as possible.
Use pastry bag inject stuffing.
Sear in hot oil 7-8 minutes, toast mustard seed in pan.
Rosemary Sauce
1 tbl oiol, 1 shallot, 1 clove garlic, ¾ beef stock, ½ cu red wine, 1 tsp Dijon, salt/pepper. Reduce/whisk, add 1 tbl cornstarch to thicken, 1 tbl butter.
Top w/ chives, rosemary, mustard seed
Pork Chop with Mushroom Stuffing
Ingredients
2 tsp olive oil
2 TBS green onions
4 oz mushrooms (coarsely chopped)
2 tsp fresh rosemary or oregano
pinch of salt & black pepper
2 TBS Worcestershire sauce
2 pork chops WITHOUT marbeling
Instructions
1. Saute green onions
2. Add mushrooms and spices – cook 3-5 minutes
3. Make a pocket in each pork chop – Cut into, but not through
4. Spoon stuffing mixture into pork chop
5. Secure with wooden toothpicks
6. Grill as usual
7. Remove toothpicks before serving
Variations: Use brown crimini mushrooms for better mushroom flavor
Grandpa’s Stovetop Pork Chop
This is great for when you are on vacation and only have a skillet.
Ingredients
2 pork chops, 1 inch thick
1 Granny Smith apple (peeled, cored, diced)
1/2 small onion (sliced very thin)
1 tsp grated ginger
a few shakes allspice
a few shakes cayenne
1 CU appled cider
3 TBL brown sugar
1/8 tsp. Pepper
Instructions
1. Brine the pork chops (soak in salt water 1 hour)
2. Heat oil in dutch oven to smoke point
3. Put pork chop in and cover – cook 3 minutes
4. Flip pork chop – cook 3 more minutes
5. Remove pork chop from pan, cover with foil, set aside – let rest
– PREPARE SAUCE
6. Put onions into hot pan for two minutes
7. Add diced apple pieces – cook five minutes
8. Add all dry spices – cook three minutes
9. Add apple cider – cook until reduced and slightly thickened (about 5 minutes)
10. Dump any pork chop drippings back into pan and mix
Variations Serve with steamed asparagus
Notes Serve with cinnamon apple wedges or hot spiced applesauce
DO NOT USE FRESH EGGS. Eggs should be at least near (or past) their last day of sale. This is not an expiry date. They plan on eggs being in your fridge for a couple of weeks after his date.
The time allows the shell to separate from the membrane making them much easier to peel.
Put a dozen eggs (room temperature) into a deep pot, and add cold tap water until covering the eggs with an extra 2-3 inches of water
Add 2 TBL salt and 1/4 cup white vinegar to water and stir until salt is dissolved.
Turn burner on highest heat possible. Watch closely to make sure it does not come up to a rolling (or roiling) boil. If you have an immersible thermometer, you are looking for about 205º
Meanwhile, prepare bowl of water containing about four cups of ice cubes, for when eggs are done. Set aside.
When water starts to steam or lightly boil, turn heat to low and start timing
Cover and let cook for 10 minutes
(optional) Every 2 minutes or so, use a tongs to gently stir and rotate egg (to center yolk)
At the eight minute mark, put water into your bowl of ice
At 10 minute mark, use a slotted spoon to carefully transfer eggs from the hot water into the ice water.
Let cool for 15 minutes.
Eggs are done.
Drain, dry and refrigerate.
Peeling Tips
Start peeling from the fat end – the air sac usually makes this end float
If you peel within 24 hours, they will peel more easily. Any longer than that and the moisture evaporates through the shell, and makes them harder to peel.
Use eggs that are several days past their “Sell by” date. These are older eggs, and the membrane has begun to let go. They will peel more easily.
THE STEAM METHOD
Another method that produces consistent results because the temperature is highly regulated is to put 1-2 inches of water in a steamer. Put the eggs into the basket, but don’t put the basket on the steamer yet. Bring the water up to a boil, and THEN put the basket back on the steamer and cover.
Eggs should be room temperature.
For large eggs, time 13 minutes exactly, then remove the eggs to a bowl of iced tap water to cool – about 30 seconds. 12 minutes will give you a softer white and creamy yolk. 15 minutes will give you a drier yolk and very firm white. Peel underwater.
2 TBL butter, 2 TBL flour, 1 C chicken stock or milk
Create a lid with puff pastry – Dock the crust – Alternate, cut moons or shapes
Bake before filling at 350º for 5 minutes
Basic Chicken Pot Pie
This recipe is much like the one shown below. You may use my ingredients, but be sure to watch the video for some important tips. Ingredients – Filling
4 TBL butter
1/4 C AP flour
1-1/2 C chicken broth (or 1 can CampbellsCream of Potato Soup instead of above three ingredients) IN A SEPARATE MIXING BOWL, COMBINE
1 small carrot – diced small
1/2 C baby peas
1 small stalk celery – diced small (or 1 C mixed veggies instead of above three ingredients – Skip to Step 7)
1 C shredded chicken
1/2 C shredded cheese
4-6 black olives – diced – Optional
Ingredients – Crust
1 C AP flour
1/2 tsp salt
1 tsp baking powder
1/4 C shortening
3 TBL cold butter
2 TBL granulated sugar
1/4 C ice water (or prepared pie crust from the grocery store)
You will also need one egg yolk and one egg white (separated) in two separate bowls.
A pastry brush will be helpful, but you can use your fingers at the pastry brush step. Step by Step
Bring sauce pan up to medium heat
FILLING – – – –
Add butter to hot pan
As soon as butter is melted, add flour
As soon as flour starts to ball, add half your broth
Stir until it starts to turn smooth
Add the rest of your broth
Stir until it starts to thicken
When it has thickened (per video below) add it to the mixing bowl with your chopped veggies
CRUST
Pulse flour, salt, baking powder, shortening and butter in a food processor till combined
Add 1/4 C ice water all at once and pulse until a ball forms
Dump onto the counter to finish kneading
Separate into 4 pieces and let rest five minutes
Meanwhile, spoon your filling into ramekins for cooking
Roll out your crust to a near circle. If necessary, cut slightly bigger than diameter across top of ramekin.
NOTE: My cutter was the exact size of my ramekin top, so I cut it, then rolled it more to make it slightly larger
Brush the bottom with egg white and press into your pot pie filling, pressing around the edge
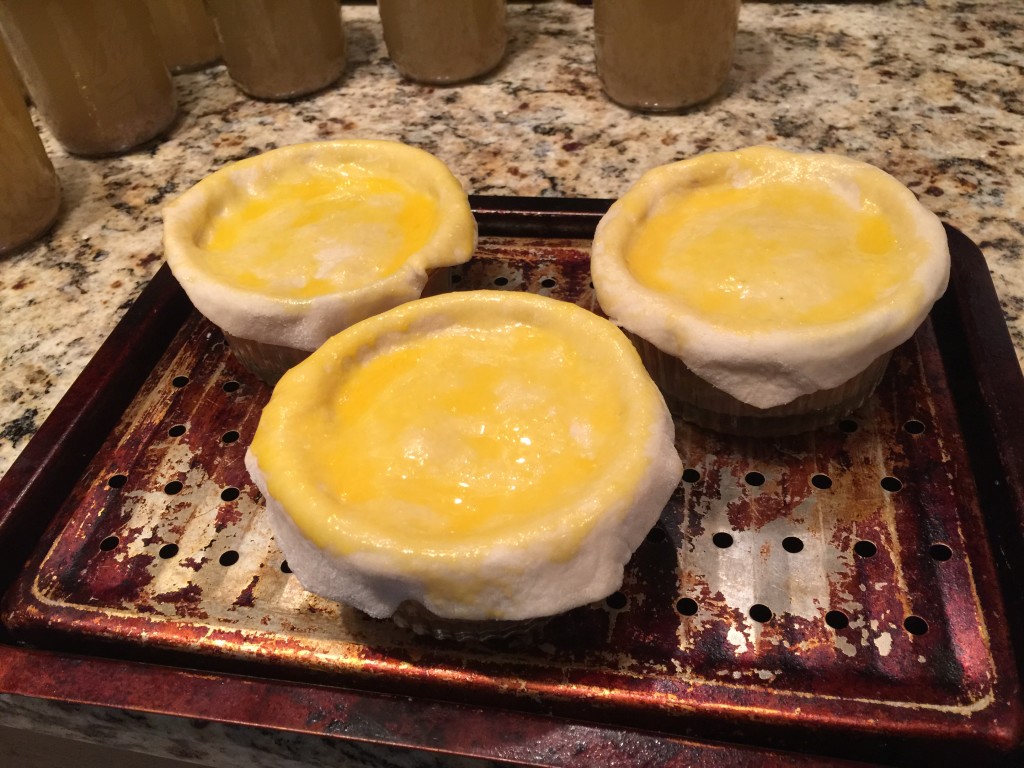
Brush the top with egg yolk
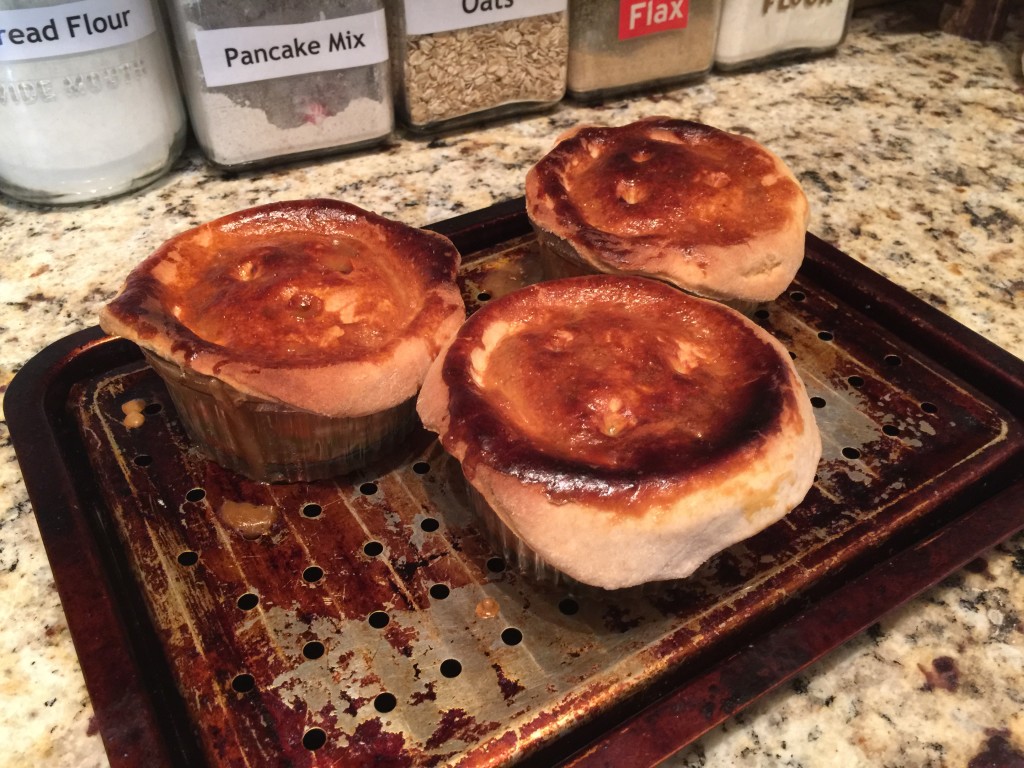
Poke holes in the top so that steam can escape, otherwise your pie crust will fail.
Bake at 350º for 35 minutes until browned
Let rest five minutes before serving, or cool on counter and refrigerate for reheating later.
Scratch Chicken Pot Pie
1 C chopped onion (1/4 inch pieces)
1 C chopped celery (1/4 inch pieces)
1 C chopped carrot (1/4 inch pieces)
1/2 C melted butter
1 C frozen tiny English peas (canned peas, in a pinch)
1/4 C AP flour
2 C chicken broth
1 C whole milk
1 tsp salt
1/4 tsp pepper
4 C diced cooked chicken
2 pkg. frozen puff pastry, thawed
1 egg yolk
1 TBL whole milk
1. Saute onion, celery and carrot in butter for 10 minutes.
2. Stir in peas and flour, cook 1 minute, stirring constantly.
3. Gradually add broth and 1 cup whole milk; cook over medium heat, stirring constantly, until thick and bubbly.
4. Stir in salt and pepper.
5. Add chicken, stirring well.
6. Ladle chicken mixture into cooking ramikins – just to the top
7. Set aside.
8. Roll pastry sheets to 1/8 inch thickness.
9. Cut pastry 1/2 inch larger than bowl(s).
10. Combine egg yolk and 1 tablespoon milk.
11. Brush one side of pastry. Place brushed side down over bowl(s), folding edges under and pressing firmly to sides of bowl.
12. Brush top with remaining egg mixture.
13. Bake at 350 degrees for 35 minutes until top is puffed and browned.
Chicken Pot Pie – From a whole chicken
Piece an entire chicken.
Use dark meat (legs and thighs) or light meat (breast and back)
Place into stock pot with cut up carrots, celery, onion and garlic
Pour one can of chicken stock into pot, then add water until it covers the chicken
Bring up to simmer over medium high heat
When it starts to simmer, reduce heat to medium low and simmer for 30 minutes
Strain out solids, retaining liquid
Set both aside to cool
To prepare dough:
(Bisquick or Puff Pastry is also acceptable)
Add to a food processor:
– 1 1/2 C flour
– pinch of salt
– 1 stick of cold butter – cubed
– 8 ounces of cold cream cheese – pieces
Pulse together until it forms crumbs
– Add 1 egg yolk
– Drizzle in water until it STARTS to come together
Remove from food processor and finish on a floured surface (the counter)
Wrap in plastic wrap and refrigerate for an hour to 24 hours
To prepare vegetables:
Cut butternut or acorn squash into 1/2 inch cubes
Cut 1/4 onion into pieces
Cut 1/2 stalk celery into 1/4 inch pieces
Cut carrots into 1/4 inch pieces
Toss in EVOO and salt and bake on baking sheet for 30 minutes at 350 degrees
Cut string beans into 1/2 inch pieces
Add a small can of peas (or fresh if you desire)
To finish up:
Set dough on counter to start to come up to room temperature
Shred or cube chicken
Make a roux (see recipe here) with the leftover strained chicken stock – be sure to stir constantly
Mix chicken, fresh veggies and cooked veggies together
Roux should be thickened, but not pasty or lumpy
– If necessary, thin by whisking in 1/2 C chicken stock
Flatten dough to about 1/4 inch
Fill ramekin with veggie mixture
Label roux over top of veggies about 1/2 to 3/4 of the way up
Top with dough, brush with melted butter and trim edges
Poke holes (or a smiley face) into top of crust to let steam vent
Bake at 350 degrees for about 35 minutes
Third Party Recipes
The information below this section is from a third party. It is part of Grandpa's Personal Recipe box. Feel free to browse, but know that this information is from someone else.
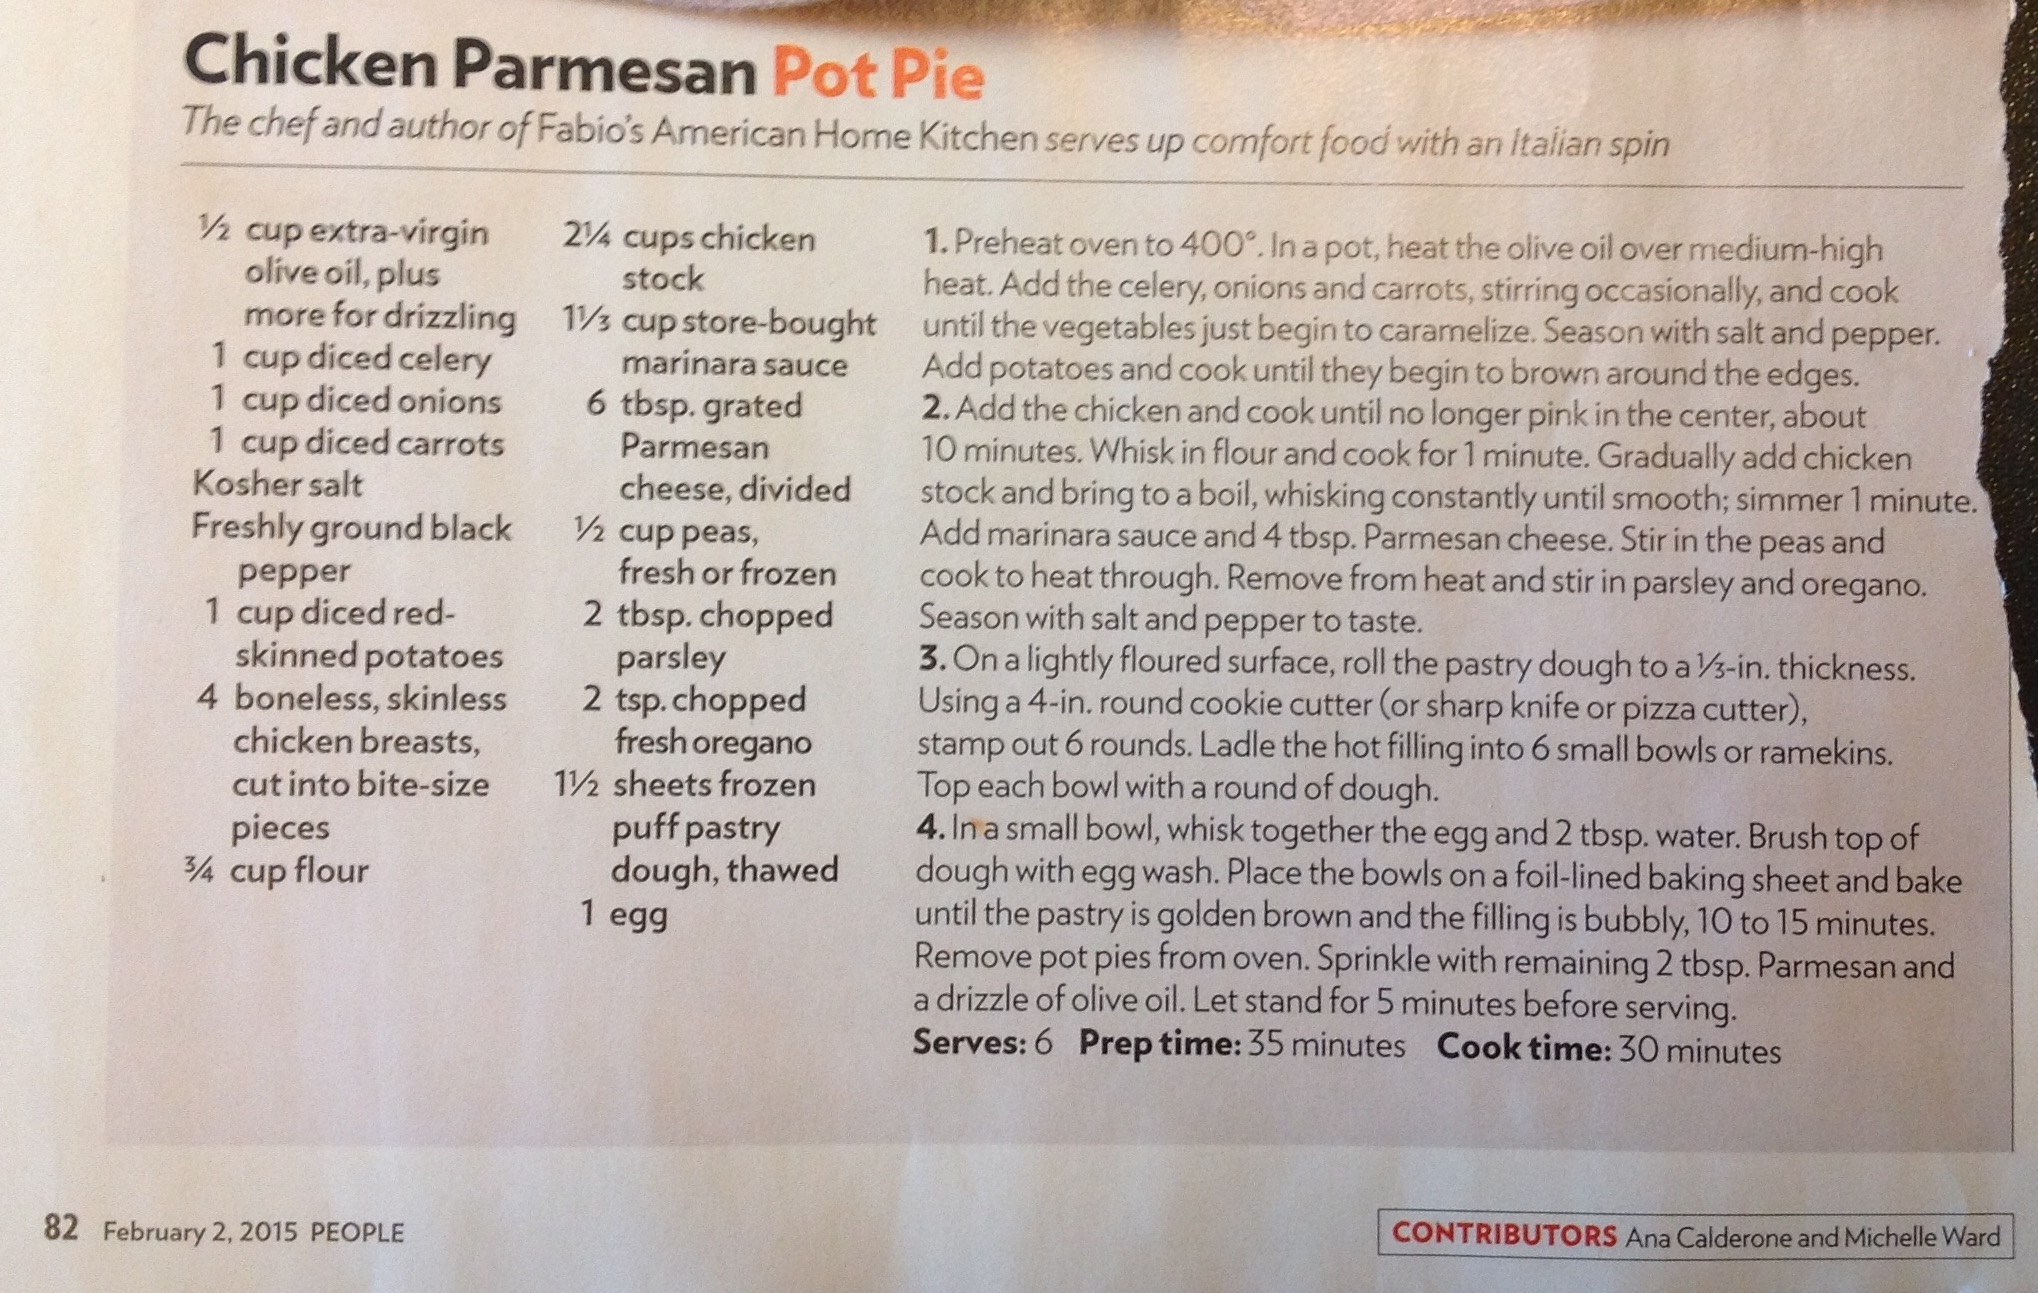
Clipped from People Magazine
Easy Chicken Pot Pie
1 can cream of chicken soup
1 PKG (about 8 OZ) frozen vegetables
1 CU cubed or shredded cooked chicken or turkey
1/2 CU milk (or less)
1 egg
1 CU Bisquick
1 prepared pie plate
Instructions
1. Mix soup, vegetables and chicken in bowl, then pour into 9″ pie plate
2. Mix milk, egg and Bisquick (very thick) and spread over chicken mixture
3. Bake @ 400 degrees for 30 minutes or until golden
Special Steps
Variations If you are feeling energetic, cut your own vegetables: onion, broccoli, bell pepper, carrot, green beans, Anaheim chilies
 Ingredients