No-Bake Cheesecake

You know, when you get a bagel, you sometimes have a left-over cream cheese.  
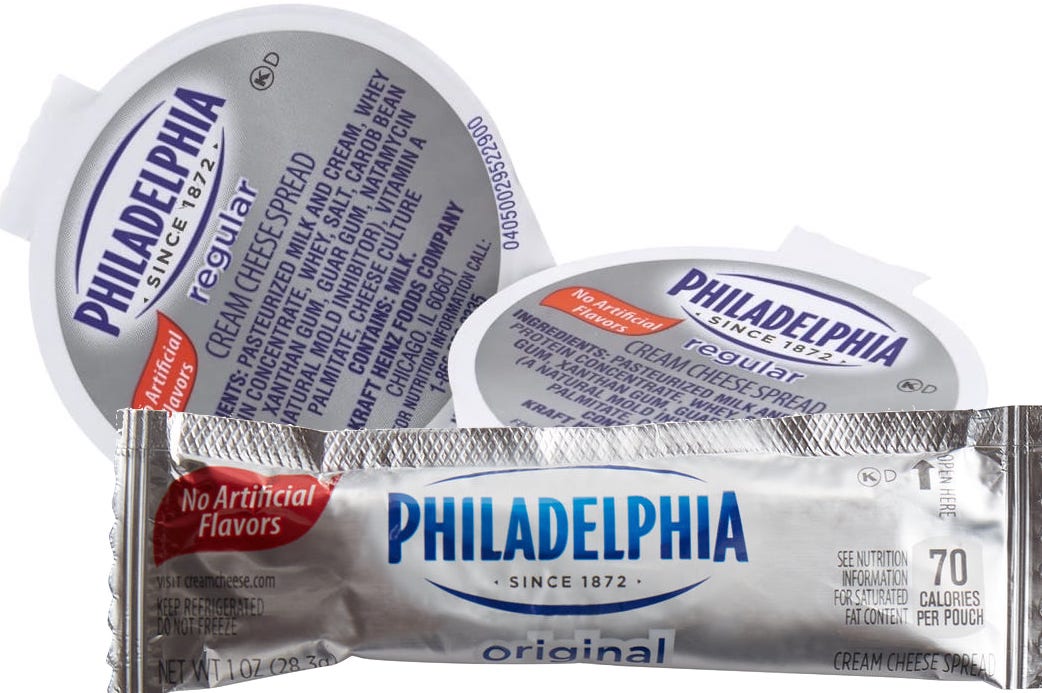
This is a way you can put them to really good use.

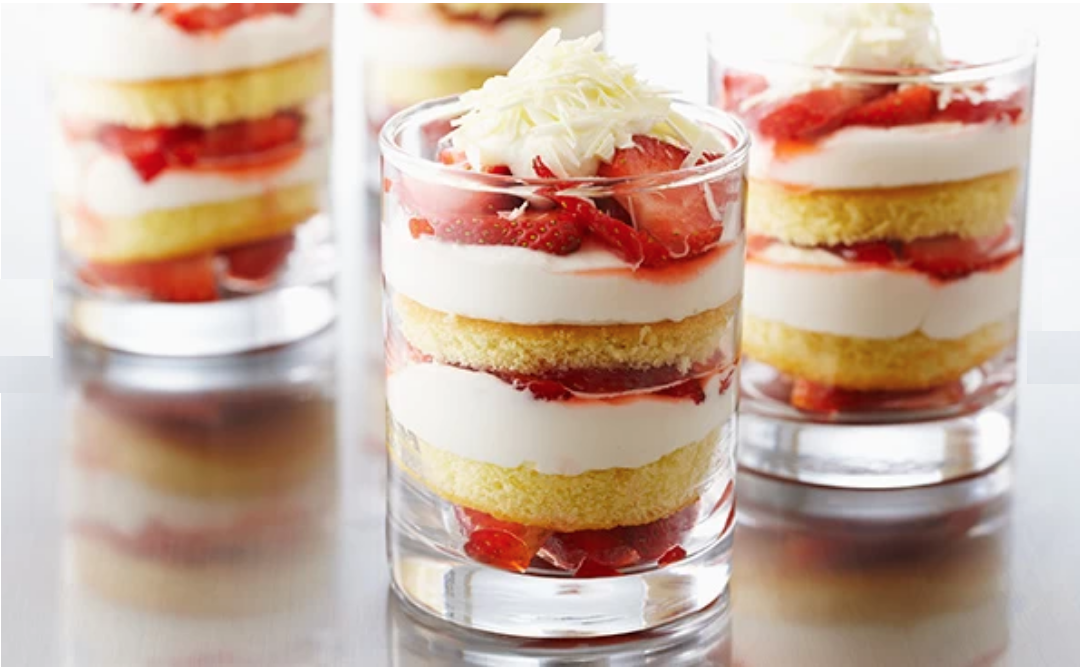
Here is a baked cheesecake recipe using mostly the same ingredients.  It’s easy, but has to set overnight in the fridge, so allow extra time for that.

NOTE:  We are going to use a graham cracker crust for this cheesecake.  Here is a video of the same process making a larger cheesecake.  SallysBakingAddiction.com

Graham Cracker Crust

(larger recipe is shown in {{ brackets }}

  • 4 Graham Crackers   {{ 2.5 C graham crackers }}
  • 1 TBL butter (melted)  {{ 1/2 C butter }}
  • 3 TBL Brown Sugar (packed)  {{ 1 C }}
  1. Pulse grahams and brown sugar in a food processor
  2. Drizzle in melted butter while running
  3. Pack (bottom and sides) into lightly greased baking ramekin or miniature bread pan    {{ springform pan}}
  4. Put into freezer for at least an hour, or even overnight.
  5. Alternately, buy small frozen graham crackers crusts.
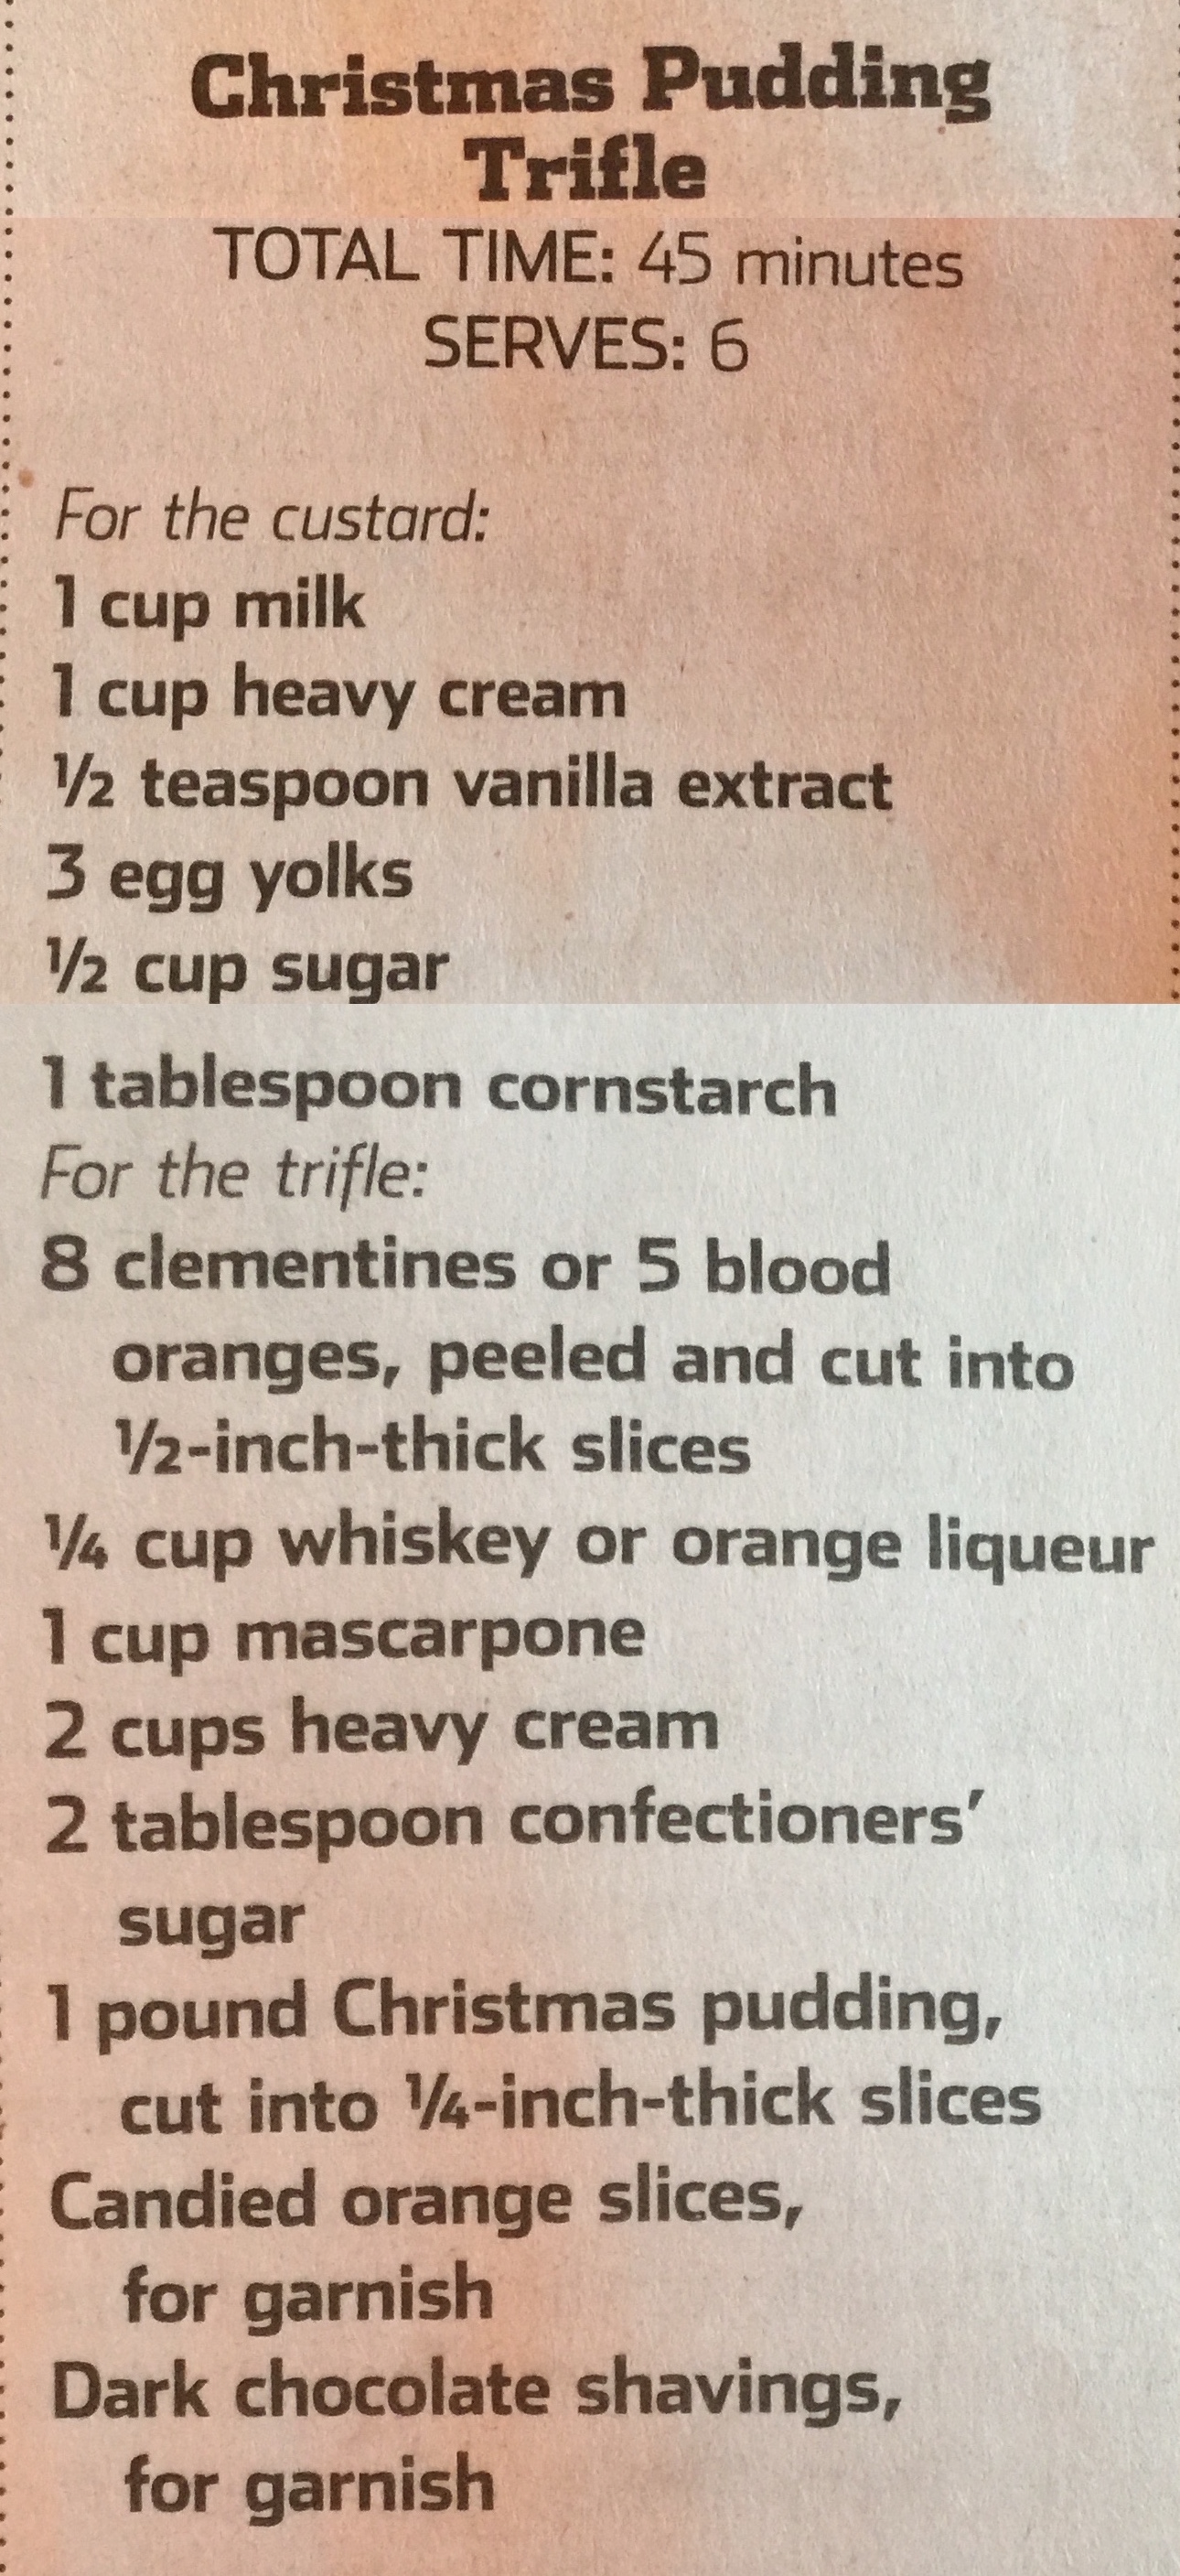
Ingredients for pie

  • 6 oz (6 mini tubs) full fat Cream Cheese.  DO NOT use Cream Cheese Spread – room temperature  
    {{ 1 block Philadelphia Cream Cheese }}
  • 2 TBL butter – softened  {{ 1 stick }}
  • 1/2 C powdered sugar  {{ 2 C }}
  • 1 tsp each sour cream, lemon juice
  • Splash vanilla
  • 1 tsp brown sugar   {{ 1/4 C }}
  • 1/4 C crushed pineapple  {{ 20 oz can }} drained
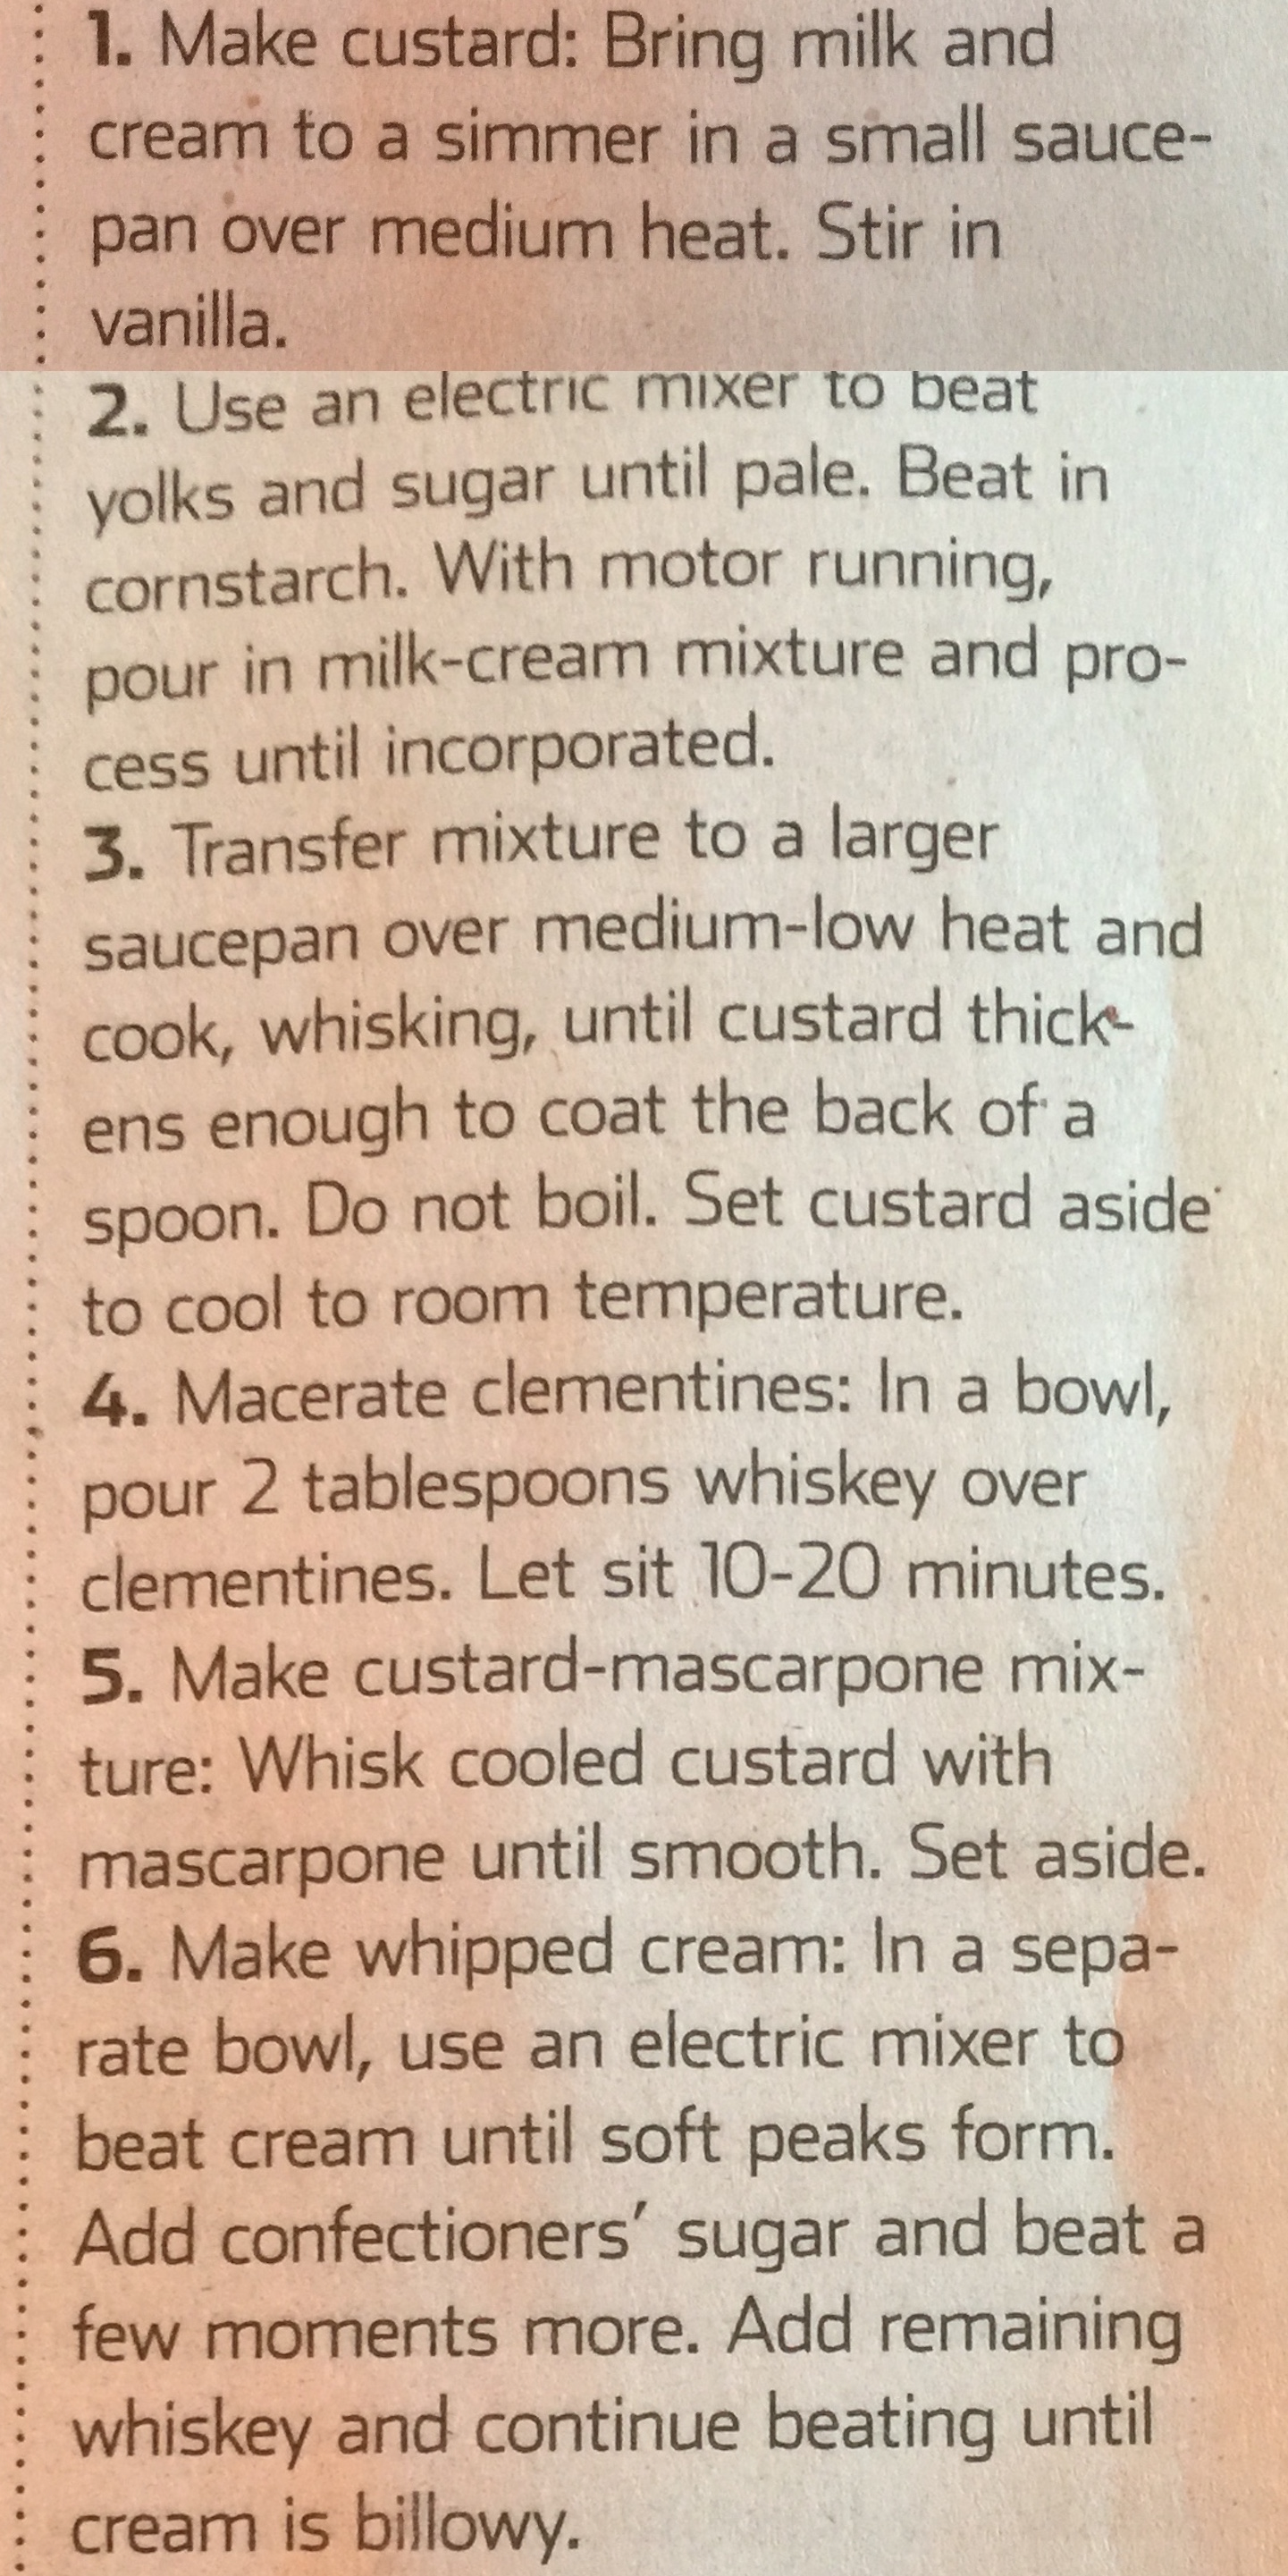
    COOL WHIP MIXTURE
  • 1/4 C Cool Whip  {{ 10 oz }} or start from heavy cream
  • Some of your crushed pineapple from above
  1. Beat COLD heavy cream into heavy peaks.  Do not skimp on this step.   •   Add confectioner sugar as you near completion
  2. In a separate bowl, combine softened cream cheese  (DO NOT use Cream Cheese Spread) with sour cream, lemon juice, vanilla and brown sugar
  3. Gently fold cream and sugar mixture in a large bowl.
  4. Combine and pour into pie crusts
  5. Use an offset spatula or back of a teaspoon to smooth the cake
  6. App pineapple if desired
  7. Cover with plastic wrap, and refrigerate for at least 6-8 hours, but overnight is better.
  8. This WILL NOT freeze well. 

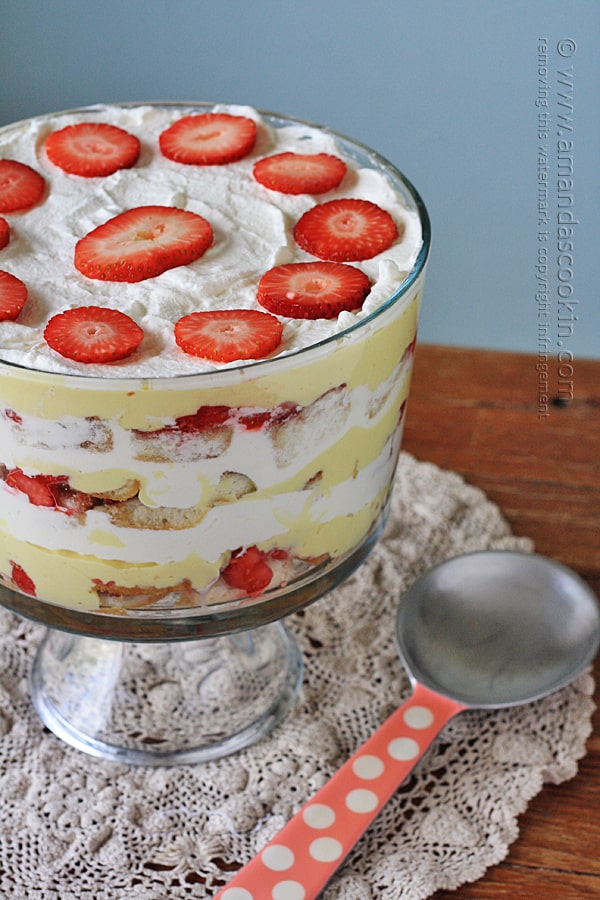
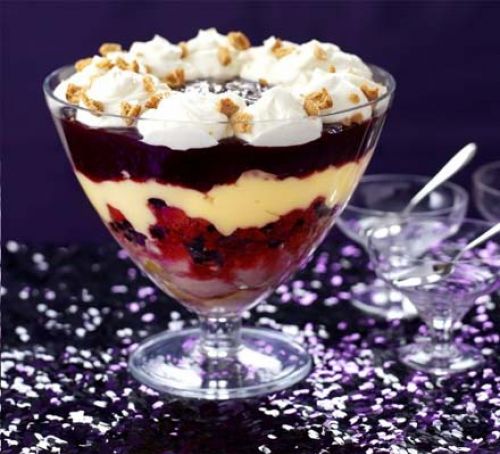
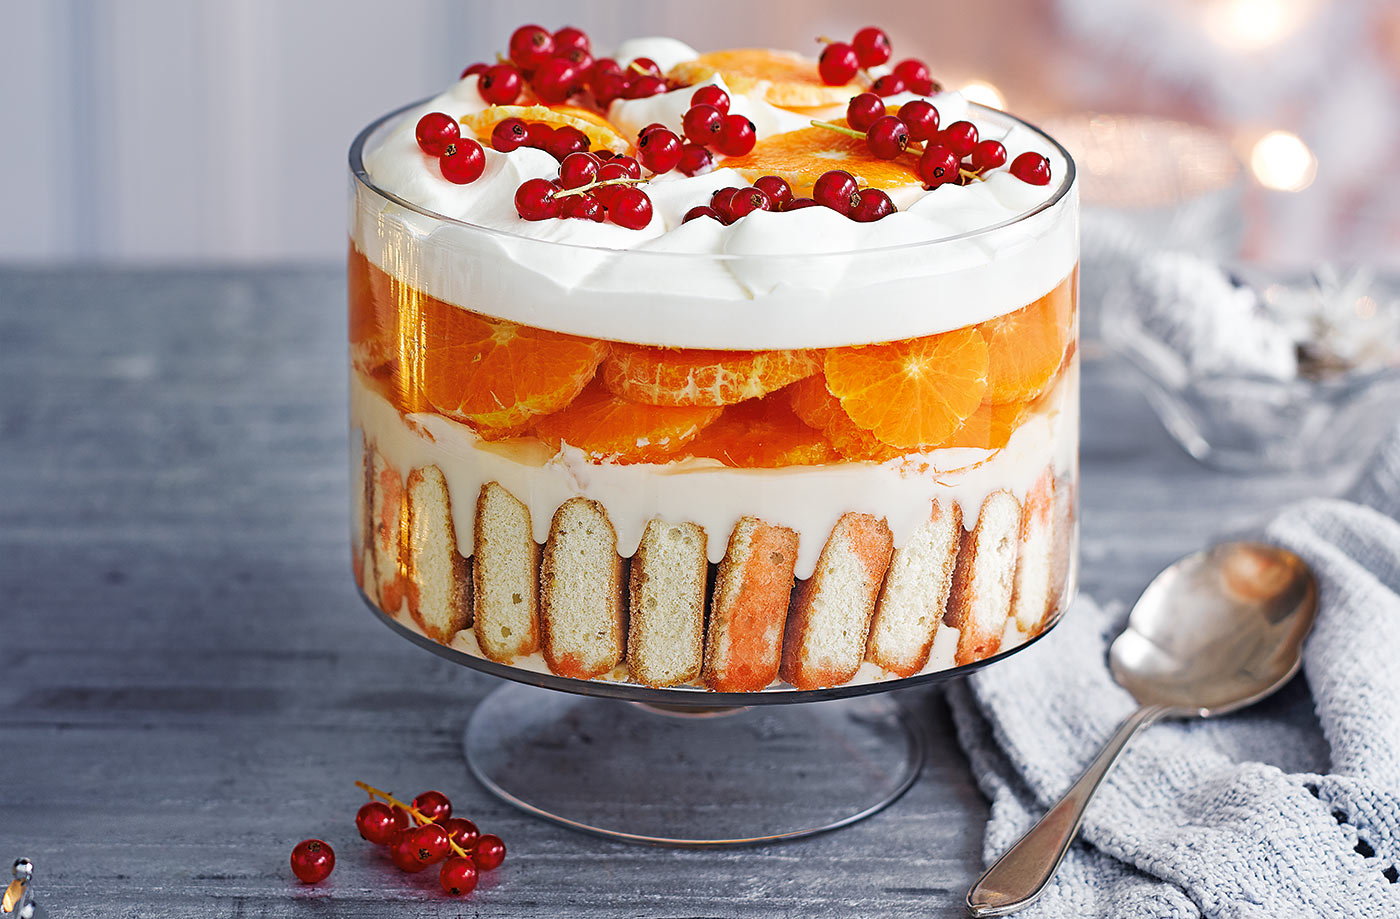
    OPTIONAL:  Before serving decorate with whipped cream, lemon curd, strawberry sauce, raspberry sauce, blueberry sauce, fresh berries or salted caramel.
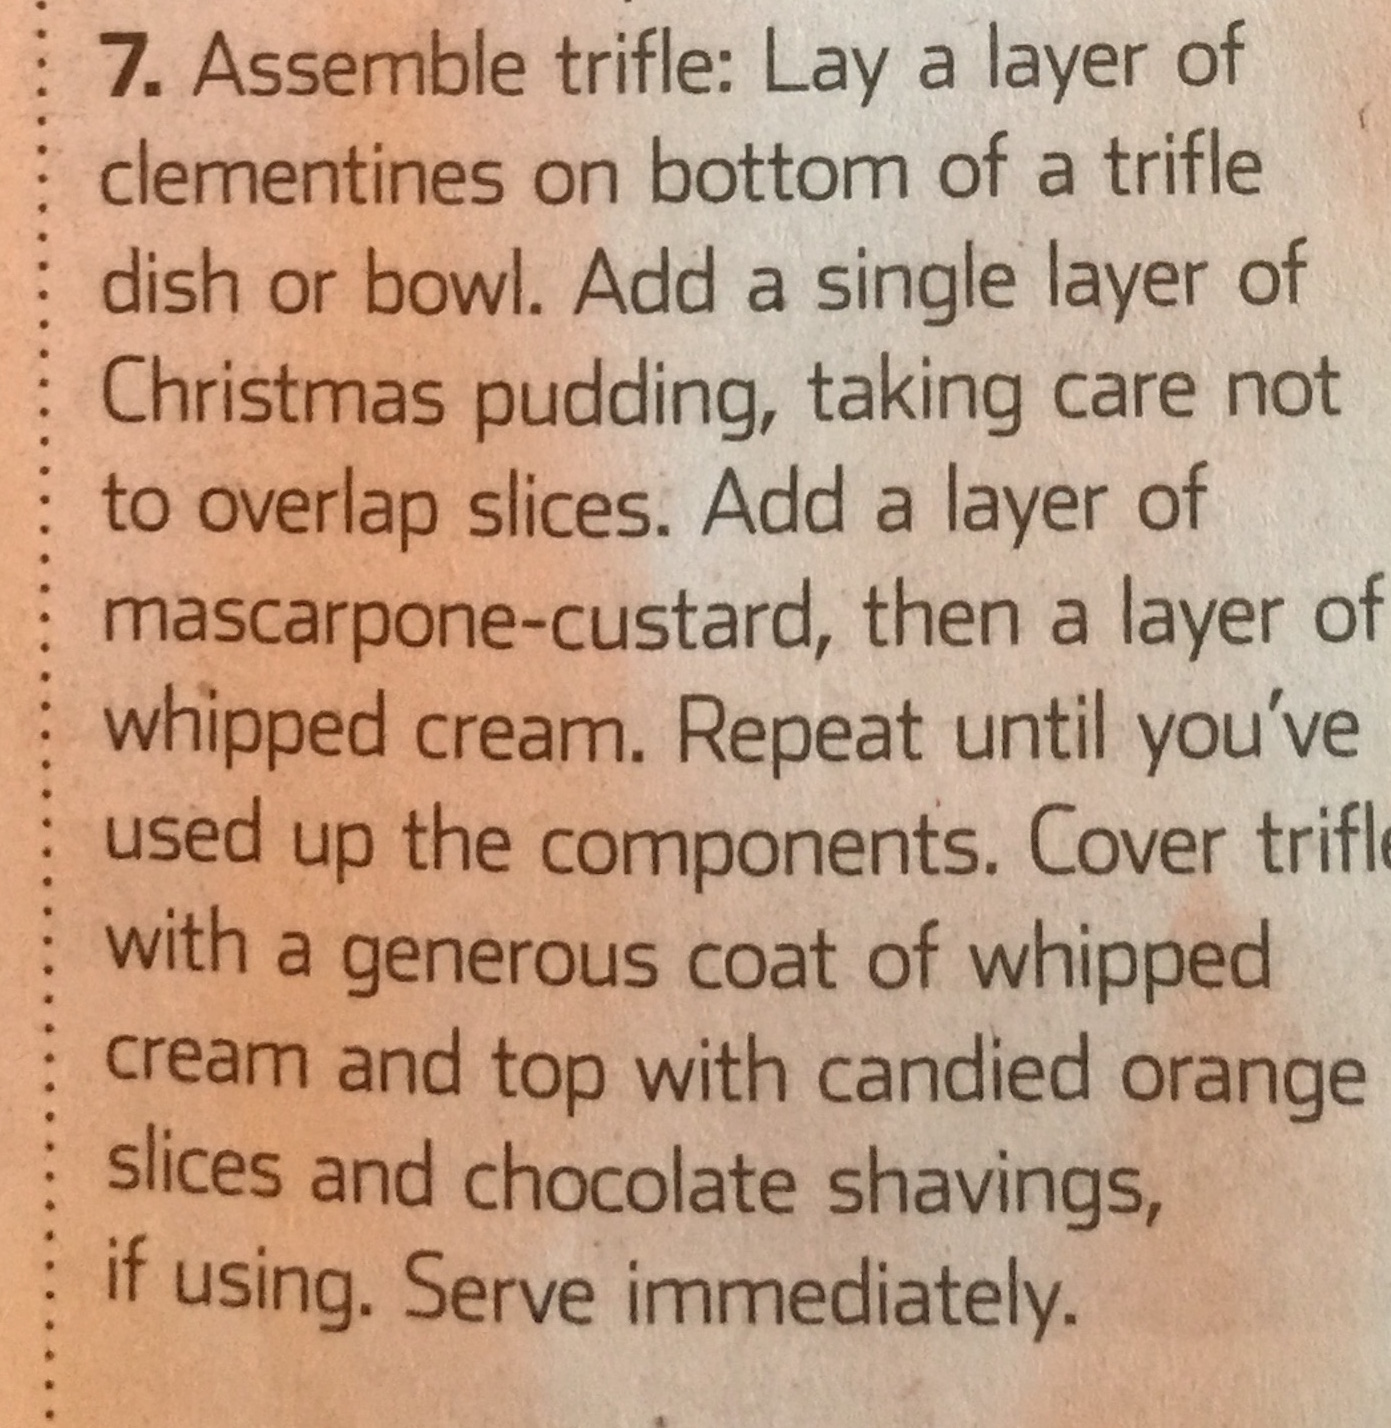
 

Cheesecake

  • 1 and 1/4 cups (300ml) heavy cream or heavy whipping cream
  • three 8-ounce blocks (680g) full-fat cream cheese, softened to room temperature
  • 1/2 cup (100g) granulated sugar
  • 2 Tablespoons (15g) confectioners’ sugar
  • 1/4 cup (60g) sour cream, at room temperature
  • 2 teaspoons lemon juice
  • 1 teaspoon pure vanilla extract


McMicrowave Egg Sandwiches

This is intended to be served on Thomas English muffins, but you can adapt to whatever you want to use.

    1. Find a micro-wave safe ramekin slightly bigger than your muffin
      • If you are serving on bread, find a square ramekin or baking dish
    2. Beat one, and only one, egg – Place in lightly greased ramekin
      • This does not work for two eggs
    3. Cover ramekin with an inverted dinner plate
    4. Microwave for 60 seconds
    5. While it cooks, prepare your muffin.
    6. You are ready to eat

Variations:

    • You can mix in cooked and crumpled bacon or sausage.  Add 10 seconds
    • You can mix in chopped black olives.  Add 15 seconds
    • You can mix in shredded cheese.  Add 15 seconds
    • You can top with sliced cheese after cooking

Beatitudes LLL Class Recipes


Your Life A-Z Agenda


Dump Cake

This is a good dessert and a “Help me” recipe for when your grandkids come to visit.

INGREDIENTS

  • 1 can Dole crushed pineapple
  • Greased baking dish
  • Banana or blueberry topping
  • OPT:  Pecans
  • 1 tsp cinnamon
  • 1 box Pillsbury, Duncan Hines, or Betty Crocker white or yellow cake mix
    • Ingredients on cake mix box, mixed together
  • 6 tabs cold butter (3 halved Bistro butters)

STEP BY STEP

  1. Pour a can of crushed pineapple or pineapple slices in the bottom of a greased baking dish
  2. Top with slices of banana and/or blueberries
  3. Add pecans and cinnamon
  4. Carefully pour on prepared cake mix
  5. Top with tabs of cold butter
  6. OPT:  rings of pineapple
  7. Bake for 35-45 minutes @ 350º

Clotted Cream

  • 1-2 C heavy cream – pasteurized, but not ultra pasteurized
  1. Fill coffee filter basket with heavy cream to brim
  2. Refrigerate 6-8 hours and let the whey separate out
  3. Collect the whey for other uses – bread perhaps
  4. Cream will be thickened
  5. Srape down the sides and repeat the straining process
  6. Continue until it looks like softened cream cheese
  7. Serve with Strawberries

Grandpa’s Coffee Cup Turtle Cake

  • 12 oz mug
    DRY INGREDIENTS
  • 3 TBL Flour
  • 3 TBL Sugar
  • 1/4 tsp Baking powder
  • 2 TBL Unsweetened Cocoa Powder
  • 2 TBL Chocolate Chips
  • 3 caramels (cut into pieces)
  • Optional:  2 TBL lightly crushed pecans
    WET INGREDIENTS
  • 3 TBL Milk
  • 1 Egg
  • 1/4 tsp vanilla
  • 1 TBL melted butter
  1. Mix together dry ingredients in a mixing bowl
  2. Fold in with wet ingredients
  3. Pour carefully into coffee cup cleaning any that gets on the sides
  4. Nuke for 60 seconds if you have a powerful microwave, or 90 seconds if you have a standard microwave
  5. Go 20 seconds more if still not cooked
    DO NOT OVERCOOK or cake will become tough
  6. Let cool a few minutes before eating
  7. Optional:  Top with whipped cream, marshmallow cream, or melted caramel sauce

CREDIT:  Based on the Chocolate Mud Cake as demonstrated by author Gemma Stafford, and as cooked with her mom Suzanne

Dinner Fruit Salad

Fruit all cut approximately the size of a grape – 1/2 C each of your choice of any five of the following, cut into small bite sized pieces.

INGREDIENTS

  • Grapes – seedless
  • Granny Smith apple
  • Pineapple
  • Banana
  • Mango
  • Papaya
  • Orange
  • Pear
  • Strawberries
  • Walnuts
  • Pieces of Krab (artificial crab)

Mix together binders before tossing all the fruit in the binder

BINDERS

  • 1 tsp vanilla
  • 1 tsp lemon juice
  • 1/4 C Mayonnaise (Miracle Whip)
  • 1/2 C plain yogurt
  • 1 TBL honey
  • Salt and pepper to taste

STEP BY STEP

  1. Mix binder ingredients
  2. Cut fruit
  3. Gently toss together
  4. Better if it melds for an hour in your fridge

Toll House Cookies

INGREDIENTS

  • 2 cups all-purpose flour
  • 1 C cake flour
  • 1 tsp baking powder
  • 1 teaspoon baking soda
  • 1 teaspoon salt
  • 1 cup (2 sticks) butter, softened
  • 3/4 cup granulated sugar
  • 3/4 cup packed brown sugar
  • 1 teaspoon vanilla extract
  • 3 large eggs
  • 1 C NESTLÉ® TOLL HOUSE® Semi-Sweet
  • 1 C dark Chocolate Morsels
  • 1 cup chopped nuts (optional)
  1. PREHEAT oven to 375° F.
  2. COMBINE flour, baking soda and salt in a small bowl.
  3. Beat butter, granulated sugar, brown sugar and vanilla extract in large mixer bowl until creamy.
  4. Add eggs, one at a time, beating well after each addition.
  5. Gradually beat in flour mixture.
  6. Stir in morsels and nuts.
  7. Drop by rounded tablespoon onto ungreased baking sheets.
  8. Refrigerate 1-12 hours
  9. BAKE at 350º for 9 to 11 minutes or until golden brown.
  10. Cool on baking sheets for 2 minutes; remove to wire racks to cool completely.
    PAN COOKIE VARIATION:
  11. Preheat oven to 350° F.
  12. Grease 15 x 10-inch jelly-roll pan.
  13. Prepare dough as above.
  14. Spread into prepared pan.
  15. Bake for 20 to 25 minutes or until golden brown.
  16. Cool in pan on wire rack.
  17. Makes 4 dozen bars.
    SLICE AND BAKE COOKIE VARIATION:
  18. PREPARE dough as above.
  19. Divide in half; wrap in waxed paper.
  20. Refrigerate for 1 hour or until firm.
  21. Shape each half into 15-inch log; wrap in wax paper.
  22. Refrigerate for 30 minutes.* * May be stored in refrigerator for up to 1 week or in freezer for up to 8 weeks.
  23. Preheat oven to 375° F.
  24. Cut into 1/2-inch-thick slices; place on ungreased baking sheets.
  25. Bake for 8 to 10 minutes or until golden brown.
  26. Cool on baking sheets for 2 minutes; remove to wire racks to cool completely.
  27. Makes about 5 dozen cookies.

Creamed Spinach

  1. Remove stems from spinach leaves
  2. Wash the spinach in a large bowl of standing water
  3. Dry using a salad spinner
  4. Wilt the spinach in 1 TBL of hot oil or lard
  5. Set the spinach aside and sweat thinly sliced onions and minced garlic
  6. Set these aside as well
  7. Create a roux with 3 TBL AP flour and 3 TBL butter
  8. Simmer until it barely starts to darken
  9. Whisk in 3/4 C milk adding only 1/4 C at a time
  10. Add 3/4 C grated Parmesan cheese and a pinch of nutmeg
  11. Add the onion into the roux
  12. Add the spinach back in
  13. Add more milk for consistency if desired
  14. Leave on low until time to serve

Casseroles – COLLECTION INDEX

CLICK HERE TO SEARCH ENTIRE SITE FOR CASSEROLES

COLLECTIONS

•  Casserole Tips and Tricks

•  French Toast Casserole

BREAKFAST CASSEROLES

•  Breakfast Casserole Collection

LUNCH and DINNER CASSEROLES

•  Spinach Casserole

ETHNICALLY POSITIONED CASSEROLES

•  Mexican Casserole

•  Enchilda Casserole

•  Chile Relleno Casserole

•  Chinese Casserole

MEAT CASSEROLES

•  Easy Saturday Night Beef Casserole

•  Chicken Roll Casserole

•  Chicken Casserole

•  King Ranch Casserole

•  Chicken Enchilada Casserole

VEGETABLE CASSEROLES

Three Green Bean Casseroles

•  All variations of Campbells famous recipe

••    The Original Recipe

••    Grandpa’s Twists

••    My Mom’s Variation

•  Spinach Casserole • ONETWO

•  Polenta Casserole

Broccoli and Cheese Dipping Sauce

  1. Cut broccoli into finger food sized florets
  2. Blanche broccoli for 30-45 seconds
  3. Plunge into ice water to stop the cooking process
  4. Put onto paper towel to drain
  5. In a pot, combine the following
    • 2 TBL butter
    • 1.5 TBL flour
      • stir until it starts to brown
    • add 1.5 C milk
      • stir until it starts to thicken
    • add 1 C grated sharp cheddar cheese
    • 2 oz cream cheese
    • to taste:  salt, pepper, mustard powder, cayenne pepper
  6. Serve hot dip with cooled broccoli

Peach and Papaya Salad

Ingredients

  • DRESSING
    • 1/2  C Papaya – chopped
    • 1 TBL White balsamic vinegar
    • 1 TBL Sugar
    • 1 TBL Olive oil – drizzled to emulsify
  • Granola
  • 1 TBL flax seed
  • 1 TBL Sesame seeds
  • 1/2 C ripped Arugula
  • 1/2 C ripped Romaine
  • 1/2 C Sorrel
  • 1 C Papaya (diced)
  • 1 Peach (cut into wedges)
  • a few Cherry tomatoes
  • 2-6 black olives

PREPARE THE DRESSING

  • 1.Make a puree of the papaya .
  • 2.Add White Balsamic Vinegar to the puree.
  • 3.Adjust the acidity by adding the sugar.
  • 4.Blitz in a blender at slow speed along with olive oil till an emulsion is formed.
  • 5.Set aside in a refrigerator.SALAD ASSEMBLY
  • 1.In a bowl, add the leaves and add a tbsp. of the dressing.
    Toss to mix well and put on the base of the serving dish.
  • 2.Combine the rest of the ingredients with 2 Tbsp of dressing and place on top of the leaves.
  • 3.Break the granola into little pieces and put on top of the salad.

A Very Basic Pickle Overview

There are two types of pickles.  Fermented and Infused.

Fermented refers to things like Kimchi, Kosher Dill Pickles and Sauerkraut.  It depends on the action of bacteria to create lactic acid.

Infused pickles depend on adding an acid to the pickling liquid.

CLICK HERE FOR PICKLE COLLECTION INDEX

The basic ingredients are vinegar, sugar, salt.  The amounts and flavoring ingredients vary depending on they type of pickle you are making.

I prefer apple cider vinegar

  • Heat to simmer and pour over items to be pickled
  • Double ingredients if necessary.
  • Cucumbers should be firm, green, still have a bit of the stem and not much yellow
INGREDIENT SWEET PICKLES SOUR PICKLES DILL PICKLES
cucumber or other vegetable 5 5 10
water 1 C 1 C to cover
apple cider vinegar 1 C 1 C none
rice wine vinegar none 1/2 C none
Vidalia onion sliced thin 1/2 1/2 none
sugar 1 1/2 C 1/2 C none
pickling salt * pinch 2-3 TBL 5-6 oz
whole yellow mustard seed 1/2 tsp 1 tsp none
turmeric, celery seed, pickling spice 1/2 tsp each 1 tsp none
garlic – crushed none 4 cloves 2 cloves
dill none none 1 tp
dill fronds none none 1 bunch
crushed red pepper none none 1 TBL
black pepper none none 1 TBL

* Although pickling salt is chemically identical to Kosher salt, pickling salt is much finer than Kosher salt.  It will dissolve readily in warm water, while Kosher salt will generally require a higher heat.  Also pickling salt is denser, so 1 tsp pickling salt is about the same as 1 1/2 tsp Kosher salt.  For larger amounts, 6 TBL Kosher salt is the same as 4 TBL pickling salt.

STEP BY STEP for sweet and sour pickles

  1. Collect vegetables that you want to pickle.
  2. Cut veggies into similarly sized pieces
  3. Bring to simmer over medium heat :: water, sugar, and vinegar
  4. Rinse veggies very well with massive amounts of water
  5. Place in canning jar
  6. Cover with hot vinegar mixture.
  7. Let set overnight on the kitchen counter.  Move to refrigerator next day.
  8. If whole, let cure for five days.  Slices or chips will be ready in just one full day.
  9. Keep in fridge for up to 2-3 months.  Can if you want them to last until next growing season.

STEP BY STEP for kosher dill pickles

  1. Dissolve salt in water, then mix in other dry spices
  2. Stack pickles up on end in a crock
  3. Top with water mixture until they start to float – then add another 1-2 C water
  4. Place a couple clean stones on top to keep them submerged
  5. Cover loosely, and let rest on counter at 68-72º (max75º) for 72 hours
  6. After three days, skim off scum and any white fuzz or material that may appear.  Add water if necessary to keep them submerged.
  7. Wipe off rim, clean cover, and then replace.
  8. In 10 days, pickles will be “mostly” done.
  9. Refrigerate for three days, scraping off any scum that appears
    YOU NOW HAVE A POLISH DILL PICKLE
  10. Put into a new clean glass jar and strain all solids, then cover again with the liquid.  After 3-4 weeks you will have KOSHER DILLS
  11. These will keep for about 2 months


Strawberry Bites

INGREDIENTS

  • 12 large strawberries
  • 1/3 C cream cheese
  • 1/2 C confectioner sugar
  • 1/2 C chocolate flakes or pieces

STEP BY STEP

  1. Mix together cream cheese, confectioner sugar and chocolate
  2. Cut out stem and center of a large strawberry
  3. Cut off the tip so they can be set flat on the tray.
  4. Pipe the mixture into the center
  5. OPT:  Sprinkle with Turbinado Sugar or colored sprinkles

NOTE:  You can use a baggie with a TINY snip off the corner as a piping bag.


Lemonade Copycat Recipes

INGREDIENTS

  • 1 1/2 C lemon juice (fresh squeezed)
  • 3 C water – add to lemon juice
  • 1/2 C water in measuring cup
  • 4 C ice in a pitcher
  • 1 C sugar
  • OPT:  Sprigs of mint

STEP BY STEP

  1. Heat 1/2 C water in the microwave until it is hot to the touch, but not boiling (about 45 seconds)
  2. Add sugar and stir to dissolve
  3. Pour hot water into pitcher over ice
  4. Add lemon (seeds removed) and 1 C water
  5. Refrigerate at least 1 hour to chill
  6. You can serve with strips of lemon peel in the glass, or even better a sprig of mint.

Microwave Jam

  • 1 C Strawberries
  • 1 C Blueberries
  • 1/2 C Raspberries
  • 1/2 C Blackberries
  • 1 C sugar
  • 1 TBL lemon
  1. This will quadruple in size.  Be sure to use a large microwave safe bowl or an 8 cup measuring cup – or cut recipe in half and use a 4 cup measuring cup.
  2. Remove all non-edible parts of the berries
  3. Toss all berries with sugar and let rest 30 minutes
  4. Microwave 5 minutes, then remove and stir
  5. Microwave 5 more minutes, then remove and stir
  6. Continue to microwave in 2 minute segments stirring between each segment
  7. Repeat until it starts to look syrupy – even if it looks a little thin, that’s OK
  8. If you feel it is still not quite ready to gel, cook an additional minute.
  9. Don’t overcook though, or it will crystallize.
  10. Transfer to canning jars and keep in refrigerator for up to three months.  Once jar is opened, use within three weeks.

Variations

You can use peaches too, but you will have to add 1 TBL pectin.  Strawberries have natural pectin.  So do the peels of Seville Oranges (aka Ornamental Oranges)


Simple Dumplings, Potstickers, etc.

  • This is good for a Sunday Evening light dinner.  This recipe is geared to 10-20 or so dumplings.

    Wrappers
  • Use commercial potsticker, dumpling, won ton wrappers or eggroll wrappers.  You can make your own… but why?  Buy Gyoza wrappers; they are the best.

    Stuffing / Filling
  • 1/2 C Shredded Napa cabbage
    • Toss with 1/4 tsp salt and put in a bowl for 15 minutes, then rinse well
  • 3 oz protein:  Leftover meatloaf, hamburger, stir fry, Reuben, even chopped sausage, etc.
  • 2 TBL chopped scallion
  • 2 TBL chopped red bell pepper
  • 1 egg – lightly beaten
  • 1 tsp soy sauce
  • 1 tsp sesame oil
  • 1 tsp light brown sugar
  • 2 tsp butter
  • 1 tsp rice wine
  • 2 tsp Hoisin sauce
  • 1 tsp grated ginger
  • scant salt
  • scant Grandpa’s Thunder Powder

Step by Step

  1. Prepare egg wash – 1 egg and 1 TBL water – Mix and set aside
  2. Pulse proteins and cabbage together three times in a food processor to mix, or just mix with a fork
  3. Squeeze all the excess water from your cabbage mixture and put it into the food processor – don’t run yet
  4. Add soy, toasted sesame oil, butter, Chinese rice wine or dry sherry, Hoisin, grated ginger, salt, Thunder Powder
  5. Pulse only 6 times in food processor – You want them mixed, but not pulverized
  6. Chop 1 scallion into 1/4 inch pieces and add to food processor
  7. Now you can pulse them together 2 more times
  8. Ball up 1-2 tsp of filling
  9. Place filling in the center of the ball and egg wash the border
  10. Bring opposite sides together and pinch to secure – leaving the ends open
  11. Bring one side over top of the hole and secure to the middle of the other side.
  12. Do that with the other end as well.  Shape into a crescent.  This will create the traditional dumpling shape.
  13. Or heck… just fold them and press lightly with a fork to seal

    NOTE:  These balls freeze really well.   Just be sure to thaw them out overnight in the refrigerator before cooking.  You can also complete the dumplings and freeze them after assembly.  In that case, you will cook them from frozen – just add one extra minute in the skillet.

    WHEN YOU ARE READY TO COOK

    TRADITIONAL
  14. Spread 1 TBL oil and 1 TBL butter around on the bottom of a cold large skillet – one with a lid
  15. Nest the dumplings (pot stickers) around the pan and turn the heat to medium.  Once that you start to hear or see a sizzle, start timing four minutes.
  16. After four minutes, add 1/2 C chicken stock to the skillet, bring to a boil, then cover and reduce to medium-low heat.
  17. Simmer/steam for 4 minutes.
  18. Remove lid, turn heat back to medium, and let the rest of the water evaporate – about 1-3 minutes.
  19. Carefully remove from the pan, and serve with the browned side up.

    ALTERNATIVE
  20. Spread 1 TBL oil and 1 TBL butter around on the bottom of a cold large skillet 
  21. Turn heat to medium
  22. After butter has melted, put the dumplings into the pan and cook for 40-60 seconds per side
  23. Keep flipping until they start to brown
  24. Serve with grated parm and some EVOO

Here are some dipping sauce options:

  • Soy sauce (chk ingredients: No Hydrolyzed Vegetable Proteins)
  • Black vinegar
  • Sichuan chili oil

Here are a couple of GrandpaCooks recipes that you can use for your dipping sauce.

A Mexican Empanada is essentially a potsticker.

Orange Drink

INGREDIENTS

  • Two oranges
  • Potato Peeler
  • 1 TBL Karo Syrup
  • Blender
  • Strainer

STEP BY STEP

  1. Peel the orange off an orange, but leave the white pith.
  2. Cut up and remove as many seeds as possible, but not necessary to get them all, since we will be straining it.
  3. Add 1 Tablespoon of Karo syrup
  4. Put into a blender, and then run through a food mill or strainer
  5. Serve over ice

Avocado Salsa

Ají de Aguacate

  1. Prepare and set aside 3 hard boiled egg
  2. Wash and combine the following and pulse in a food processor
    • 6 scallions
    • 2 Anaheim chiles (seeds out)
    • 1 habañero chili (seeds out)
    • 1 C packed cilantro
    • 2 TBL white vinegar
    • 1 tsp salt
  3. Remove, roughly chop and combine the following
    • 2 avocados
    • 2 TBL lime juice
    • 2 hard boiled eggs
    • 2 chopped Roma tomatoes
  4. Combine everything and crush together
  5. Plate in a large family-style serving bowl
  6. Roughly chop the third egg and put it on top along with some of the chives and cilantro

Trifle

SEE A SIMPLE RECIPE AT THE BOTTOM OF THIS PAGE

From AmandasCookin.com

This is a very simple and elegant dessert.  You can make a large trifle that will serve everyone, or individual dessert cup trifles.

From BBCGoodFood.com

A TRIFLE is a general category of recipe, kind of like “a casserole” – “a burrito” – or “a beverage.”

From RealFood.Tesco.com

It simply describes a layered desert, usually with a cake layer, a pudding layer, a fruit layer and a few other layers thrown in for good measure.

From taste.co.au

I’ve included photos from other websites so that you can get an idea of what a trifle is, and create your own.  You will see that the key is to maintain distinct layers.  If you browse all of these GOOGLE IMAGES you will see that some trifles are not clearly labeled at all, which makes it not really a trifle.

CLICK ON AN IMAGE FOR AN ENLARGEMENT

Food Network Canada

A simple recipe that you can follow, if you want a no-fail first attempt.

SIMPLE TRIFLE

  1. First, decide if you want one large dramatic trifle to share, or individual trifles.  You definitely want it to be clear glass though.  Be very careful to not fill any layer too deeply, or you will run out of space.
  2. SPONGE LAYER:  Traditionally you use Lady Fingers in a trifle, but you can buy angel food cake or use the recipe below and it will be just as tasty.  You can also simply use Vanilla Wafers.  Use a knife and cut prepared angel food cake into 1/2 to 1 inch slices.
  3. If you want to try to make your own sponge layer, here is a recipe for LADY FINGERS.
  4. If you don’t have a biscuit cutter, a single biscuit cutter is a good addition to your arsenal.  Cut circles from the angel food cake.  If they are too big for your container, cut them into geometric shapes and put them against the wall of your glass.
  5. PUDDING LAYER:  Spoon pudding into the bottom of your glass to hold your sponge in place.  Pudding can be from scratch or even a box instant pudding.  Both will work well.
  6. COOKIE LAYER:  You can use crushed Oreo’s or Graham Crackers.  You can even use granola.  The thing is that you want something with crumbly pieces to create a completely different texture.
  7. FRUIT LAYER:  For this, you want a soft fruit like peaches, strawberries, kiwi, and so forth.  The fruit should be in bite-sized pieces.
  8. WHIPPED CREAM LAYER:  You really don’t want to use spray canned whipped cream, as it breaks down too quickly.  Cool Whip is not a bad choice, but making your own whipped cream is actually pretty easy.  CLICK HERE for a simple three-ingredient whipped cream.
  9. OPTIONAL:  CREAM CHEESE LAYER:  Alternately, you can use Cream Cheese, Yogurt, cooked (cooled) Vanilla Pudding, and powdered sugar.
  10. FRESH FRUIT:  Top the whipped cream with something like blueberries, strawberries, cherries, etc.  Something small and colorful.
  11. GARNISH:  You can garnish with more crushed cookies, or even chopped nuts if you want.  You can also place a single mint leaf on the very top for an elegant presentation.

STEP BY STEP – OVERVIEW

  1. For a large trifle, put a layer of angel food cake in the bottom
  2. Add a layer of your white mixture cream cheese or whipped cream.
  3. Stack strawberries against the side so they can be seen
  4. Add strawberry pieces and blueberries
  5. Repeat with layers of cake, cream mixture, more fruit
  6. Finish with a layer of cake, cream mixture, and decoratively place fruits

Chef’s Notes

DO NOT USE ANYTHING BELOW THIS LINE IN MY COOKBOOK.


These notes are gleaned from PBS The Great British Baking Show

  • A Trifle should have well-defined layers
  • Trifles are a West Wales staple – placed on tables several times each week
  • Trifles traditionally use lady fingers for the cake layers
  • Another option is Vanilla Wafers
  • Use a shallow disk to serve many and to all all flavors in a single serving
  • Biscuits need to absorb the liquid without disintegrating
  • Many of the chefs used lemon meringue or lemon curd – The custard should be thick
  • Recipe 1: layers of biscuit/cake, strawberry, whipped cream and blueberry
  • Recipe 2: Recipe featured a praline circle on the top
  • Recipe 3: bananas, strawberries, mangos with Lemon Macaroons on top
  • Recipe 4: Ginger cake with fruit and creme anglaise
  • Recipe 5: Spray the layers with cointreau
  • Recipe 6: Peach, almond and ginger – with browned butter
  • Recipe 7: Cake layer was a lemon Swiss roll
  • Recipe 8: Amaretti Bisquits on top
  • Recipe 9: Chef used a jelly layer

If you are interested, you can MAKE YOUR OWN LADY FINGERS rather than using pound cake


Recipe from Wall Street Journal

Dec 20, 2016 – CLICK ON IMAGES TO ENLARGE
Trifle 1 Trifle 2 Trifle 3
What they are calling their Christmas Pudding was defined in a previous publication. You can use slices of Angel Food Cake, Vanilla Wafers, or more traditionally Lady Fingers. This goes over GREAT at parties. Make sure you assemble it into a clear glass bowl or the WOW factor is lost.


HTML Snippets Powered By : XYZScripts.com