McMicrowave Egg Sandwiches

This is intended to be served on Thomas English muffins, but you can adapt to whatever you want to use.

    1. Find a micro-wave safe ramekin slightly bigger than your muffin
      • If you are serving on bread, find a square ramekin or baking dish
    2. Beat one, and only one, egg – Place in lightly greased ramekin
      • This does not work for two eggs
    3. Cover ramekin with an inverted dinner plate
    4. Microwave for 60 seconds
    5. While it cooks, prepare your muffin.
    6. You are ready to eat

Variations:

    • You can mix in cooked and crumpled bacon or sausage.  Add 10 seconds
    • You can mix in chopped black olives.  Add 15 seconds
    • You can mix in shredded cheese.  Add 15 seconds
    • You can top with sliced cheese after cooking

Huevos Salsa Martajada

  1. Roast tomato, onion and poblano pepper at 450º for 20-30 minutes
  2. Peel tomato and pepper
  3. Pulse half the roasted vegetables in a food processor very briefly with a bit of salt
  4. Put pulsed veggies into a skillet and add the other half of the roasted veggies
  5. Simmer 10 minutes
  6. Meanwhile, scramble 6-12 eggs so that they are still glistening (very soft scrambled)
  7. Put the eggs into the salsa and mix just slightly
  8. Serve with some sort of soft bread

Tamagoyaki – Rolled Egg

Search YouTube for several recipes and techniques.

  1. Beat 1 egg
  2. Put into hot pan with 1 tsp olive oil
  3. OPTION:  Sprinkle as little as possible spinach, chives, etc
  4. As soon as glisten is gone, roll it as small as possible
  5. Push to the side of the pan and add another beaten egg, allowing the liquid egg to run under and adhere to the first
  6. Add your optional ingredients – VERY sparsely
  7. Roll the first egg roll around the second flat and cooked egg, creating a larger roll
  8. Push to the side, and add a third beaten egg, allowing it to flow under the roll
  9. Do not add any extra ingredients this time.
  10. When the bottom is cooked, but the top still has a bit of glisten, roll your log over the third egg – creating one large rolled egg.
  11. Turn out of the pan onto a sheet of waxed paper
  12. Form into a square shape – and let rest about 3 minutes
  13. Unwrap (discard the paper) and cut the ends off.  This will create a nice section in which you can see the layers of rolled egg.
  14. Cut the log in half – creating two pieces
  15. Cut each of the two pieces into thirds – creating a total of six pieces
  16. Plate and garnish with basil, cilantro or chives

Juevos Martajada (eggs with salsa)

We will start with Salsa Martajada, and then extend this into a great egg recipe.

  1. Cook 6 Roma tomatoes and 1/2 onion pieces and garlic cloves coated in oil under the broiler.  About 10 minutes or until blackened
  2. Either put 2 banana peppers and 2 poblano peppers under the broiler as well, or peel them using a flame (which I prefer) Instructions here.
  3. Once all above ingredients have been processed, pulse them in a food processor only until in chunky but small pieces, NOT pureed.
  4. Add 1 tsp salt, 1/2 tsp chile powder or cayenne
  5. This is good just like this for chips, etc.

Juevos Martajada

  1. Lightly (soft) scramble two eggs
  2. Add 1-2 TBL salsa martajada
  3. Serve with a flour tortilla

Egg Citing Ideas

Egg in a Hole

  • Start with a nice fat piece of garlic bread, brioche, etc.
  • Use a 2 1/2 in biscuit cutter to cut a hole into the egg
  • Butter the bread – both the hole and the bread – on both sides
  • Cook one side over medium heat
    • – Sprinkle with garlic, onion or GTP
    • Optional:  add sauteed onion or chorizo
  • Flip, add an egg into the hole
  • Top with shredded cheese
  • Cook another 2 minutes

Poached Eggs

  • Break egg into a strainer – discard water
  • Transfer to bowl – yolk intact
  • Add 2 TBL vinegar
  • Bring up to boil, then reduce to a simmer
  • Swirl hot water to create vortex
  • Put egg into water
    • 2 min soft – 3 min hard
  • Remove and tap strainer on paper towel
  • HINT:  If many of them, put into ice water
    • 30 seconds to warm it up

Poached Egg Brunch

  • In skillet add 1 TBL EVOO and a few cloves of garlic
  • Add asparagus and cook 3-5 minutes
  • Plate proscuitto
  • Top with asparagus
  • Add poached egg
  • Spritz with lemon
  • Add some shaved Parmesan

Hard Boiled Eggs

  • Use old eggs
  • Bring water up to boiling, then reduce to simmer
  • Slide eggs into water
    • 6, 8 or 10 minutes depending on how well cooked you like them
  • Transfer to ice bath, and peel – dipping frequently

Egg Florentine

  • Slice of fresh tomato on plate
  • Bring water to boil
  • Blanche spinach for about 60 seconds
    • Place on tomato
  • Poach egg 2 minutes – place on spinach
  • Top with grated Parmesan cheese

Egg on Toast

  • Prepare and butter your toast
  • Prepare your egg – poached or fried
  • Serve on the toast

Steamed Egg

  • Put egg into small oiled glass bowl
  • Put into shallow water bath – nearly boiling
  • Cover
  • Let steam for 3-6 minutes

Egg Nests aka Cloud Eggs

  • Separate 2 eggs – yolk from whites
  • Beat whites to stiff peaks w/ dash of cream of tartar
  • Form into nests on parchment paper
  • Option:  Put mushroom cap into nest
  • Bake 450º for 8-10 minutes
  • Put yolk into nest (or mushroom cap)
  • Bake another 3 minutes
  • Serve on ekmek

Seared Scrambled Eggs

  • Cook sliced Portobello (or brown crimini ) mushrooms in butter
  • Add diced tomatoes
  • Meanwhile, toast a slice of French bread
  • Scramble 3 eggs in 1-2 TBL COLD butter
  • Whisk/mix in hot skillet
  • Take off the heat just when it starts to congeal
  • Add 1/2 tsp cream or creme fresh
  • Season with salt and pepper at the last minute
  • Top with chives and drizzle with EVOO

Hash Browns with Egg

  • Grate or dice finely one russet potato
  • Fry in 1 TBL butter and 1 TBL EVOO in very hot skillet
  • Optional:  Add pieces of corned beef or cut up pieces of bacon
  • Add diced onion when potato starts to brown
  • Add diced tomato when onion becomes translucent
  • Optional:  Add 1 tsp tomato paste when most liquid is gone
  • Create one or two nests in the potatoes
  • Add egg(s)
  • Optional:  Sprinkle lightly with shredded cheese
  • Cover skillet
  • Turn off heat and let egg cook on residual heat 1 minute
    2 minutes if you don’t like runny yolks

Hamburger Eggs and Cheese

  • Oil a cupcake pan
  • Press hamburger into the cups
  • Bake at 400º for 15 minutes
  • Remove and add grated cheese
  • Bake another 5 minutes
  • Put egg into the cup and put back into oven
  • Close door and turn off the oven
  • Egg is finished in 10-15 minutes

Egg Basket

  • Cut puff pastry into slices
  • Weave a pattern and place over top of a small bowl
  • Bake 375º for 25 minutes
  • Remove and take from bowl
  • Invert and add chopped ham, cheese and a whole egg
  • Bake another 10 minutes

Hollandaise Wanna-be

  • Separate 4 eggs (set whites aside for another day)
  • In double boiler, add 4 tabs of COLD butter and yolks
  • Add 1/2 tsp vinegar, lemon zest, a bit of black pepper
  • Stir until egg starts to thicken, but not congeal
  • Pour over English muffin topped with ham or spinach
    and then topped with a poached egg

Frittata – COLLECTION

Spelled by some Fritatta, but according to Google, my title spelling is correct.


New Life Frittata

New Life Frittata

Adding New Life to Old Food is the basis for one of my books. This is one of my favorite recipes from it.

Zucchini Frittata

Zucchini Frittata

North American Frittata

North American Frittata

Spanish European Frittata

Spanish European Frittata

Goat Cheese Frittata

Goat Cheese Frittata

Mini Breakfast Frittata

Mini Breakfast Frittata

Quiche – COLLECTION

Also TORTA ESPANOLA

A quiche is basically a custard with different ingredients mixed in. Here are some recipes. Where specified, many of these recipes use a BASIC CUSTARD.

For a dessert custard, use the above ingredients PLUS 1 TBL sugar or honey

Quiches frequently (but not always) are in a pastry crust.  Here is a link to a pastry crust.  I only have one.  I personally prepare it without a crust, which allows me to deviate from the form and use  a cupcake pan.

PASTRY DOUGH


VARIATION – Basic 1 egg per 1/2 C liquid (Half and Half for a dense quiche)

  • Bacon, leeks, gruyere
  • Caramelized onions – lots
  • Artichoke hearts, spinach (dry), Parmesan cheese
  • Sauteed mushrooms, Swiss cheese
  • Alternate Cheddar Cheese
  • Chicken, goat cheese, sun dried tomato
  • Blanched asparagus, smoked salmon
  • Spam and cheddar cheese
  • Ham, spinach and a strong flavored cheese

Bake at 350º covered for about 45 minutes (toothpick test) then uncover and let cook 15 more minutes


Third-Party Quiche Recipes


The information below this section is from a third party. It is part of Grandpa's Personal Recipe box. Feel free to browse, but know that this information is from someone else.

• Leek and Stilton Quiche

https://www.grandpacooks.com/recipes/leek-and-stilton-quiche/


• Hash Brown Potato Quiche

Hash Brown Potato Quiche


• Mushroom, Gruyere and Spinach

Mushroom, Gruyere and Spinach Quiche


• Breakfast Quiche

Breakfast Quiche


• Brunch Quiche

Brunch Quiche


• Lunch or Dinner Quiche

Lunch or Dinner Quiche


• Spinach Breakfast Quiche

Spinach Breakfast Quiche


• Kale and Mustard Greens Quiche

Kale and Mustard Green Quiche


• Torta Española

Tortilla Española


• Quiche Florentine

Best Quiche Florentine

Egg Taco

You have PROBABLY had a taco some time in your life, or at least heard of one, so are familiar with the concept. With this breakfast recipe, you eliminate the taco shell and replace it with an egg.

INGREDIENTS{CAPTION}

  • 1 egg for each taco
  • 1 thin slice of toast
  • 1-2 tsp salsa
  • a few sprigs of cilantro

STEP BY STEP

  1. Heat your non-stick skillet to a low heat – about 300º
  2. Beat the egg and pour it into the pan, allowing it to spread itself thin into a pancake
  3. Let the pancake “dry out” until it looses it’s shine
  4. Carefully flip the pancake and put shredded cheese onto it
  5. Slide the pancake onto your plate and top with salsa, bread and cilantro
  6. Enjoy!

{CAPTION}{CAPTION}

Tips: Eggs

All About Eggs

Egg Categories Demystified

  • CONVENTIONAL :: The lowest price for a reason.  Four hens per one square foot.  Injury and infection are outweighed by the higher egg production.  Chickens are usually artificially induced into laying more eggs than their body was intended.  When chickens die, they are sometimes unable to lay down, and are held up by the other chicken bodies.  Brand:  Usually store brands and the eggs that are occasionally on sale for a dollar a dozen.
  • ORGANIC :: All this means is that the chickens are not fed hormones, pesticides and antibiotics.  They are still frequently crammed into living spaces.
  • CAGE FREE :: Not in cages, but still usually confined to a barn.  Space is a bit better, with 1 square foot per bird.  Often little to no exposure to sunlight.
  • FREE RANGE :: Conditions are getting better, but eggs are getting more expensive.  The birds are allowed to roam outdoors, similar to what they should expect.  Space is still limited though, and “free to roam outdoors” may mean one small door for thousands of birds.  Also, birds must be antibiotic free.  Brand:  Pete and Gerry’s and Organic Valley
  • PASTURE RAISED :: Dozens to hundreds of square feet per bird.  Usually from smaller farms, just because of the space the birds get.  This is what egg production was a hundred years ago.  The egg yolks are darker, and the eggs taste better.  Brand:  Vital Farms and Simple Truth
  • CERTIFIED HUMANE :: A non-government category.  These birds are monitored by a watch group called Certified Humane, one of the most respected animal welfare groups in the world.
  • NUTRIENT ENHANCED :: Similar to Certified Humane, but not monitored.  Birds are given a nutritionally balanced vegetarian feed.  Recycled, processe, hormones or antibiotics are also avoided.  Brand:  England’s Best
  • ————–
  • AA :: Freshest – white is firm, yolk is round and sturdy.  Good for over easy, poached and hollandaise sauces
  • A :: A week or two old – white is aceptable, and yolk is starting to sag.  Good general purpose egg, but use within the week.
  • B :: Old – White is beginning to look milky and sad.  Yolk will break easily.  HOWEVER, these eggs make the best Hard Boiled Eggs because the white has lost its attachment to the shell.
  • ————–
  • Keep eggs in the fridge at (or near) 40º – An egg on the counter ages about 7x faster than eggs in the fridge.  Storing eggs in their original carton ON THE SIDE will help the yolk stay centered.  Also, pasturized eggs are complete safe these days to eat poached, over easy, or even raw.

Hard Boiled Eggs

There are many ways to hard boil an egg. Here are several methods. Try them all, and pick your favorite

  • Grandpa’s Way of Doing It

    • It doesn’t matter if you start with cold or room temperature eggs.  Put eggs into a large pot, and cover (by two inches) with water.  Bring the water up to a quick boil, then cover and leave for 15 minutes.  After 15 minutes, dump the hot water and cover the eggs with ice and then run cold water into the pot.  Let set for at least 5-10 minutes
    • Start with eggs that are at least a week old, preferably about 10 days. This gives time for the albumin, the white, to separate from the shell membrane.
    • Least amount of sticking will happen if you peel under slow running water tap.
    • In my family, we put a pencil or grease-marker circle around the eggs to show that they have been hard-boiled.
    • Test an unmarked egg to see if it is hard boiled or raw, by SPINNING the egg on its point. A raw egg will not spin, while a hard-boiled egg will spin like a top.
    • When you hard-boiled eggs, and air sac is usually on the fat and. Start peeling here.
    • Eggs should always be stored pointy end down.
    • Refrigerate cooked eggs for up to two weeks.
  • Third Party Hints


    The information below this section is from a third party. It is part of Grandpa's Personal Recipe box. Feel free to browse, but know that this information is from someone else.
    • It will take longer to heat up a cold than a warm egg to the desired temperature. Start with an egg that has been brought to room temperature (set out on counter 1 hour)
    • Alton Brown notes that carefully cooking an egg at 67 degrees Celsius (153°F) yields a yolk that bends to the scientist’s will. 10 minutes in boiling water—is not ideal. 212 degrees Fahrenheit is far higher than the temperature at which the egg whites and the yolks coagulate. – (My personal preference is water heated to about 185 degrees)
    • Egg white begins to set at 145º
    • Egg yolks set at about 158º
    • Egg white firms completely at 180º
    • AB says that because the yolk contains fat, it floats above the aqueous white, both in the shell and in a beaker. To achieve a centered yolk, one must rotate the egg while cooking it.
    • As eggs cook, their balled-up proteins uncoil into strands, and the strands bind together to form an intricate mesh that traps water. In essence, the proteins form a gel, a liquid dispersed in a solid. Boiling causes too many egg proteins to bind and form dense meshes, “so there is less sensation of water in the mouth,” says Alton Brown (Good Eats). Voilà: rubbery egg whites and sandy, grayish yolks.
    • IF YOU ARE GOING TO USE THEM RIGHT AWAY, at the tail end of the cooking process, shake them against the side of the pan to lightly crack the shell to let water in. This will make them easier to peel.  DO NOT do this if you are planning on storing the eggs for later use.

Cooking with Eggs

  • Large eggs are the standard for cookbooks. If you use a medium or extra large egg, adjust the recipe accordingly.
  • 1 egg is 1.5 ounces – two is 3.0 ounces – three is 4.5 ounces

Storing Eggs

  • Eggs, fresh from the chicken, do not have to be refrigerated if used within a week or so.  Look for tell-tale signs such as a bit of chicken poop or feathers.  This is actually good news.  Just be sure to wash it before cracking it.
  • United States markets wash the eggs, which remove the protective coating. Refrigerate these eggs – or at least don’t set out for more than a few days.  Warm them to room temperature an hour before cooking.

Using Egg Whites

  • When egg whites are beaten, the whites stretch and trap air bubbles.  The smaller and more even the size of the bubbles; the more stable the foam.
  • Large bubbles break more quickly, and the foam collapses faster.
  • A large whisk with many fine wires will create smaller bubbles and a better foam.
  • Whites foam better when beaten at a cool temperature: About 65-75º
  • Whites will generally increase about 8-10 times in volume
  • If whites are underbeaten, they haven’t stabilized enough to hold bubbles.  Overbeaten, and the bubbles are stretched too far and will pop easily.  When overbeaten, you will see cottony bits of solidified (coagulated) egg whites.
  • Plain whipped whites make a fragile and short-lived foam.  Even their own weight will cause the bubbles to burst.
  • Bubbles that burst become liquid again, and will not whip up again.
  • Cream of Tartar or a little white vinegar will stabilize the foam.  Use about 1/8 tsp cream of tartar for 1 large egg white.
  • Sugar also strengthens the egg white protein, but you should still use cream of tartar.
  • Once a foam is established, 1 TBL every 30-45 seconds will dissolve uniformly.
  • If sugar is added too quickly, it won’t dissolve and your whites will be grainy.
  • If sugar is added BEFORE the foam is established, the whites can’t incorporate enough air to make a stiff foam.
  • Even a slight bit of egg yolk will keep your egg whites from foaming.  Even oil on the side of your bowl or your whisk will prevent the whites from foaming.
  • Use a large bowl.  Whisking in a small bowl will allow the bubbles to escape as quickly as they form.
  • A copper bowl is best.  In a metal bowl, the simple action of beaters or whisks will increase the temperature enlarging the bubbles.  Copper will transfer the heat rapidly from the whites, keeping them cooler.  Copper ions will also help bubbles to form.

Grandpa’s Hard Boiled Eggs

Consistent Results

Summary: Start cold, Bring to boil, Finish in 15.

      1. DO NOT USE FRESH EGGS.  Eggs should be at least near (or past) their last day of sale.  This is not an expiry date.  They plan on eggs being in your fridge for a couple of weeks after his date.
        • The time allows the shell to separate from the membrane making them much easier to peel.
      2. Put a dozen eggs (room temperature) into a deep pot, and add cold tap water until covering the eggs with an extra 2-3 inches of water
      3. Add 2 TBL salt and 1/4 cup white vinegar to water and stir until salt is dissolved.
      4. Turn burner on highest heat possible.  Watch closely to make sure it does not come up to a rolling (or roiling) boil.  If you have an immersible thermometer, you are looking for about 205º
      5. Meanwhile, prepare bowl of water containing about four cups of ice cubes, for when eggs are done. Set aside.
      6. When water starts to steam or lightly boil, turn heat to low and start timing
      7. Cover and let cook for 10 minutes
      8. (optional) Every 2 minutes or so, use a tongs to gently stir and rotate egg (to center yolk)
      9. At the eight minute mark, put water into your bowl of ice
      10. At 10 minute mark, use a slotted spoon to carefully transfer eggs from the hot water into the ice water.
      11. Let cool for 15 minutes.
      12. Eggs are done.
      13. Drain, dry and refrigerate.

Peeling Tips

  1. Start peeling from the fat end – the air sac usually makes this end float
  2. If you peel within 24 hours, they will peel more easily.  Any longer than that and the moisture evaporates through the shell, and makes them harder to peel.
  3. Use eggs that are several days past their “Sell by” date.  These are older eggs, and the membrane has begun to let go.  They will peel more easily.

THE STEAM METHOD

Another method that produces consistent results because the temperature is highly regulated is to put 1-2 inches of water in a steamer.  Put the eggs into the basket, but don’t put the basket on the steamer yet.  Bring the water up to a boil, and THEN put the basket back on the steamer and cover. 

Eggs should be room temperature.

For large eggs, time 13 minutes exactly, then remove the eggs to a bowl of iced tap water to cool – about 30 seconds.  12 minutes will give you a softer white and creamy yolk.  15 minutes will give you a drier yolk and very firm white.  Peel underwater.


BASIC CUSTARD

This base recipe can be used alone, or for Bread Pudding, Pumpkin Custard, Personal Custards, and much more. It is a recipe that you MUST know, because you will use it throughout your life so often.

INGREDIENTS

  • 4 Eggs
  • 2 additional egg yolks
  • 1 C Sugar
  • 1/2 Brown Sugar
  • 1/4 C whiskey or rum
  • Dash Vanilla
  • Grandpa’s CinnaSugar®
  • Merest dash of salt
  • Zest and juice from one orange
  • 1 C whole or lowfat milk – NOT skim, because you need the fats to gel properly
  • 1/2 C Cream (Traditionally you should use just cream * I substitute 1/3 milk instead of cream to keep it healthier)
  • Optional:  Mix in 1/2 C dried fruit

You can also use Half and Half rather than the milks listed on the previous two lines.

  • Optionally:  grated orange peel and/or ginger

STEP BY STEP

  1. Cream together eggs and sugar
  2. Mix in vanilla, cinnamon, nutmeg, salt and orange
  3. Mix with milk and cream
  4. If you are using this as part of another recipe that uses custard, you will probably add whatever those ingredients are right about here.
  5. Pour into greased ramekins
  6. Optional: top with dried cherries or raisins
  7. Bake at 350º for 35-45 minutes.  For a creamier custard, bake at 325º for 1.5 – 2 hours.  Internal temperature should be about 170º

Optional Topping . Crème Anglaise or Brandy Cream Sauce


Strata – Several Recipes

Onion and Gruyere Strata

  1. Slice one Vadalia, Maui or sweet onions thinly
  2. Add 2 tsp sugar, and salt and pepper to taste
  3. Put over low heat with 2 TBL butter
    While that cooks
  4. In a separate bowl, combine
    • 6 dozen eggs – beaten
    • 1/2 C chopped Spinach
    • 1/2 C Gruyere – grated
    • OPT: 1/4 C Cheddar, Mozzarella or Monterey Jack
    • Salt, pepper, nutmeg, Dijon mustard to taste
    • OPT:  Scallions, thyme
    • 1 tsp Grandpa’s Thunder Powder
    • 1/2 C Cream
    • 1 C Milk
  5. Add the sauteed onions to the spinach mixture
  6. Toss above spinach mixture with 1 C French bread crumbs or croutons – mix to combine
  7. Pour into a lightly greased baking casserole
  8. Bake at 325º for 60 minutes
  9. Put butter knife into the center.  If it comes out wet, cook for another 15 minutes; if it comes out fairly clean, go to next Step.
  10. Sprinkle more shredded cheese over top
  11. Return to oven for another 10 minutes

This feeds 3-4 people

Breakfast Monte Cristo Lasagna

Makes six individual personal lasagnas

Softened butter
One 1 1/4-pound loaf bakery white bread—crusts removed, bread sliced (about 18 slices)
1/4 cup grainy mustard
1 pound thinly sliced Virginia ham
2 tablespoons chopped tarragon, plus more for garnish
3/4 pound Gruyère cheese, coarsely shredded (3 cups)
3 cups milk
4 large eggs
Freshly ground black pepper

Preheat the oven to 375°
Butter individual ramikens
Arrange a slice of bread in the bottom of the dish
Spread with mustard.
Add a layer of ham
Sprinkle with Tarragon and a scant handful of Gruyère cheese
Repeat the layering, leaving off the last layer of cheese.

In a medium bowl, whisk the milk with the eggs and season generously with black pepper.
Pour the custard evenly over the dish, pressing the bread to absorb the liquid.
Pat the remaining cheese on top and cover with a sheet of buttered parchment paper.
Bake the lasagna in the center of the oven for 30 to 35 minutes, until bubbling and browned around the edges.
Remove the parchment and turn on the broiler.
Broil for about 3 minutes, just until the top is golden and bubbling.
Let rest for 10 minutes, then serve.

The unbaked strata can be refrigerated overnight.
Let sit on counter for 30 minutes before putting into oven

Deviled Eggs

Easy, Good, Better, Best

See also my page on How to Hard-Boil Eggs


Deviled Egg tips

  • For a smooth filling, push yolk through sieve. For a more rustic filling, crush with a fork.
  • Yolks tend to stick to your knife. Cut your egg in half with dental floss. This will give a clean cut.
  • Six eggs will produce 12 deviled eggs. I always prepare eight eggs to allow for some breaking.
  • If making deviled eggs, use a plastic bag as a pastry bag to get fancy star-bursts of the egg yolk topping.
  • After cracking eggs, let them set in a bowl of water for 10 minutes. This will loosen the shell.
  • Store peeled hard boiled eggs in a sealed container of water in the refrigerator.  They tend to pick up smells from other foods.

Easy – Fail Safe

Prepare your Hard-Boil Eggs

  • Let fully cool – great if they can be refrigerated overnight before the next steps.
  • Cut 6 eggs in half lengthwise – creating 12 halves.
  • Carefully remove yolk and put into mixing bowl.
  • Crush yolks with a fork
  • Mix in 1 TBL each of mayo and mustard (I prefer to use dijon)
  • Mix well with half teaspoon each of dry mustard, salt and vinegar
  • Spoon yolk mixture into egg halves.
  • Sprinkle lightly with paprika and refrigerate up to two days
  • When serving (if for a potluck) keep the egg tray on a very damp frozen towel

Good

Prepare as above (in Easy) but add a dash of Tabasco
Put egg yolk mixture into the corner of a plastic bag
Cut the tip off, and use this to pipe filling into the white egg half.
Top some with alternate toppings: paprika, tarragon, Parmesan cheese, wasabi and chives, chipotle and cilantro, capers, etc. Use your imagination.


Better

Rather than Tabasco, use a teaspoon of prepared horseradish
Also, add a teaspoon of sour cream
Top with chives, toast points, parsley, cilantro, caviar, etc. Use your imagination.

Best

This is the receipe that I usually use
Even I like to break it up though. Don’t be afraid to use your imagination.

I like to add a dash of Worchestershire Sauce
Sometimes I top the egg with a dash of Choloula
Another topping is fresh grated garlic or onion
I like to sprinkle ground cayenne pepper rather than paprika

Alternate Topping Suggestions

  • Green Olives
  • Black Olives
  • Red Bell Pepper
  • Anchovies
  • Taco Chip
  • Mint Leaf
  • Spinach
  • … and so forth – again… use your imagination


Poaching Eggs

Standard Poached Eggs

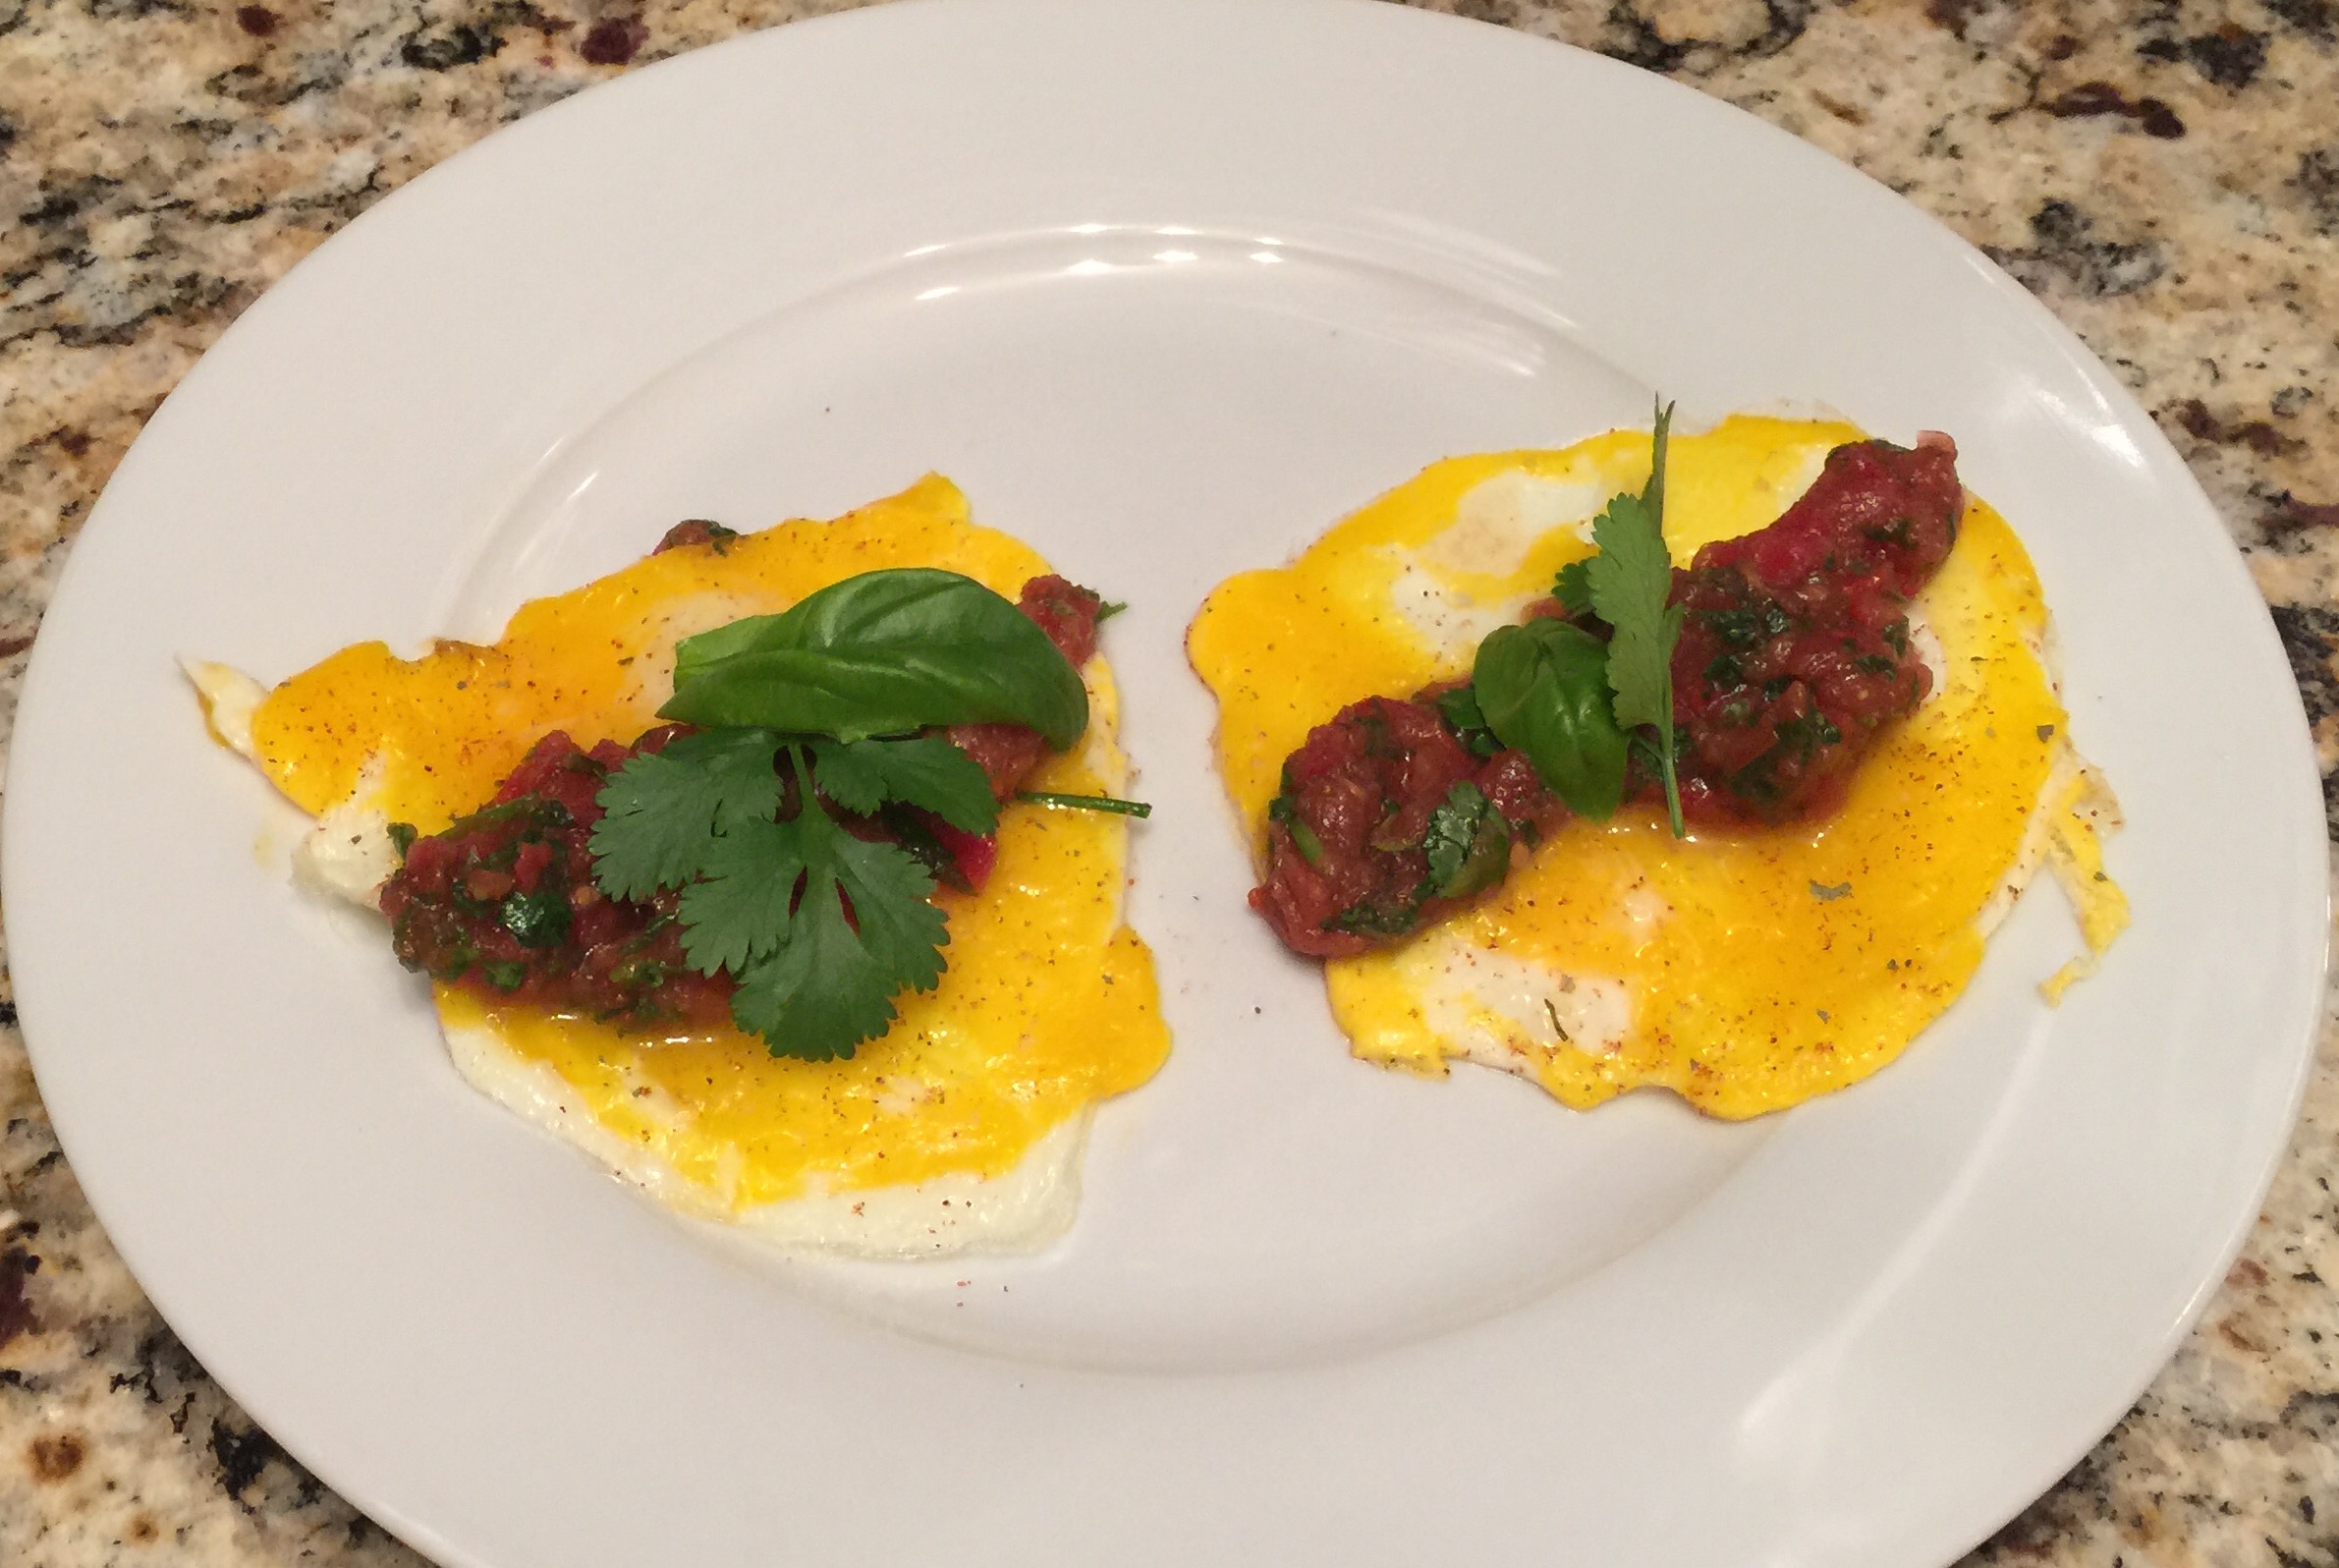
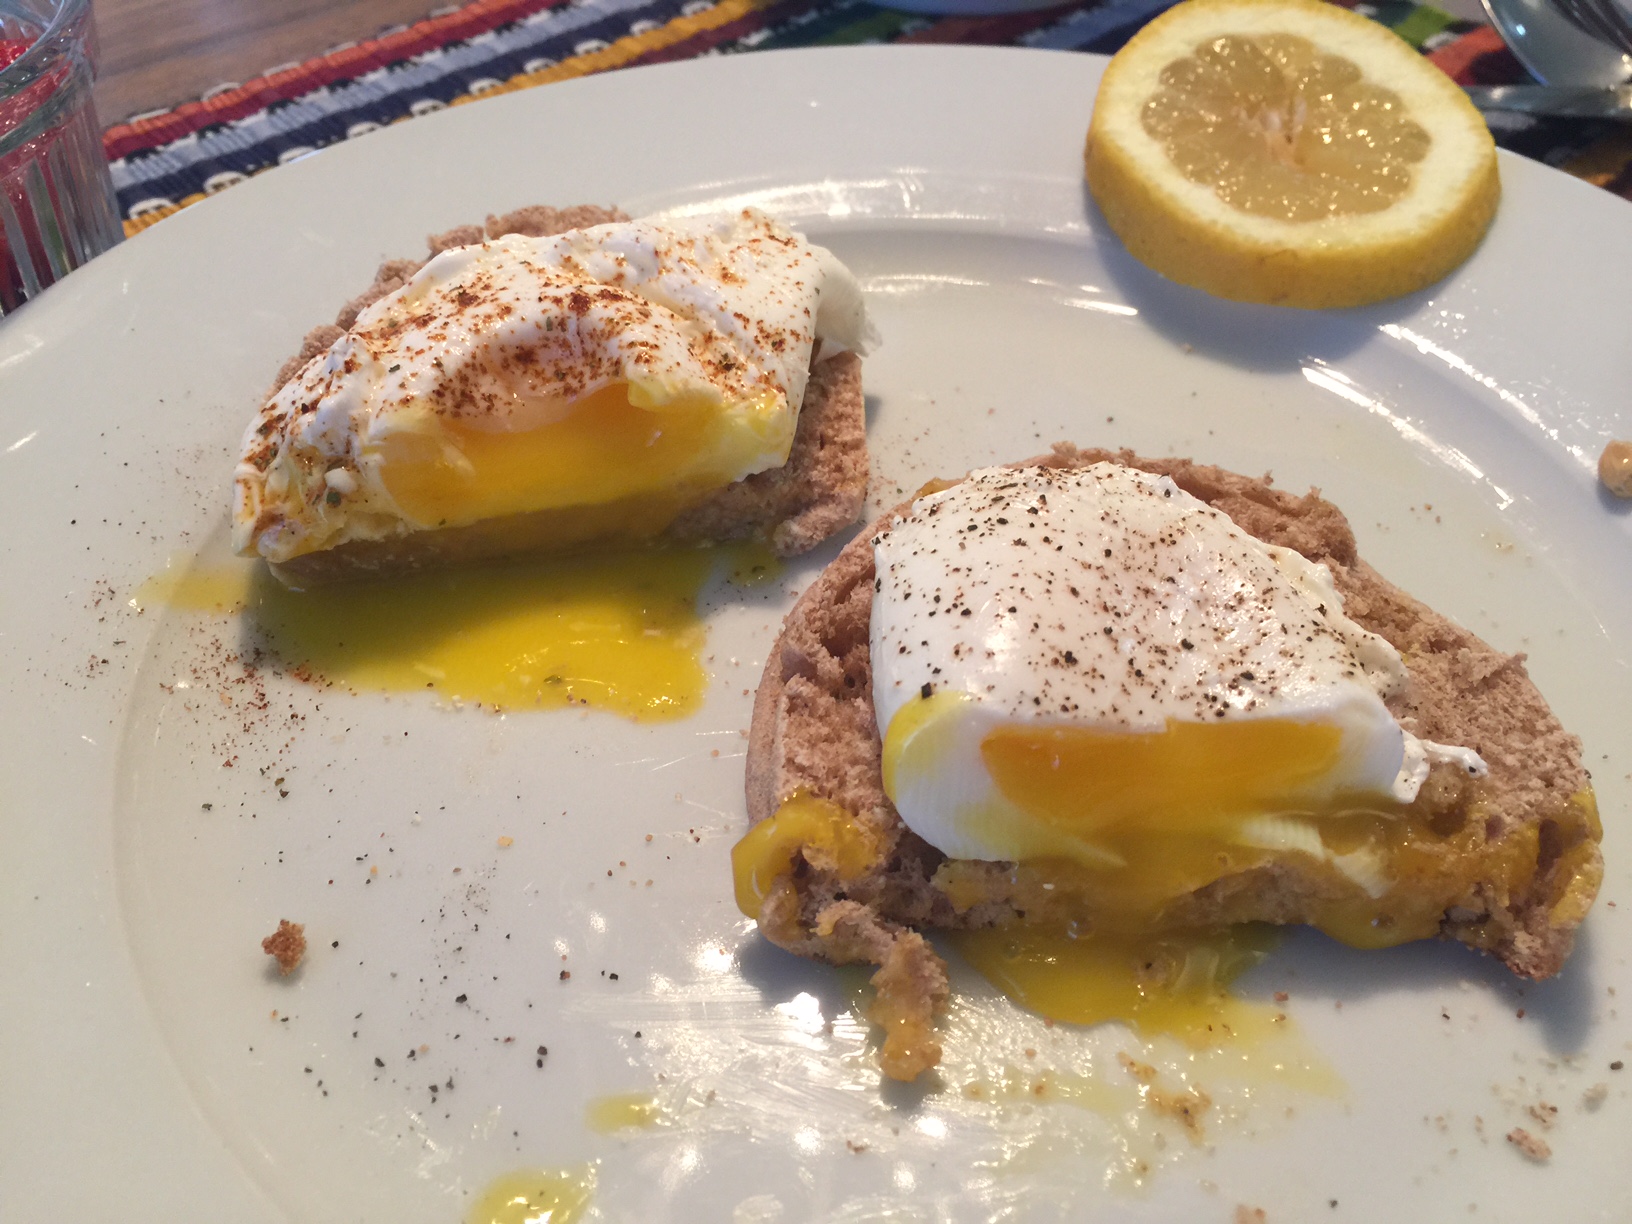
Egg on the left (of the photo on the right) was cooked for 2 1/2 minutes, and has a fully runny yolk. Egg on the right was cooked for three minutes, and has a soft yolk that is only slightly runny.

INGREDIENTS

Fresh COLD eggs
Large pot of simmering (nearly boiling) water (approx 200 degrees)
2 TBL white vinegar and 2 TBL salt

STEP BY STEP

1. Bring large pan of salted water to boiling, then reduce to the merest simmer
2. Add vinegar as a stabilizer
3. Break egg into a dampened bowl (just ran under the faucet and the water dumped)
4. Carefully stir the water to create a SOFT swirling motion
5. Gently slip the egg into the center of the vortex
6. Let cook 2.5 – 3 minutes and remove with a slotted spoon
NOTE: You can discard the loose membrane that floats free from the body of the egg.
7. After you remove it from the water, put it onto a no-lint tea towel to drain slightly.  This keeps it from getting your English muffin wet.
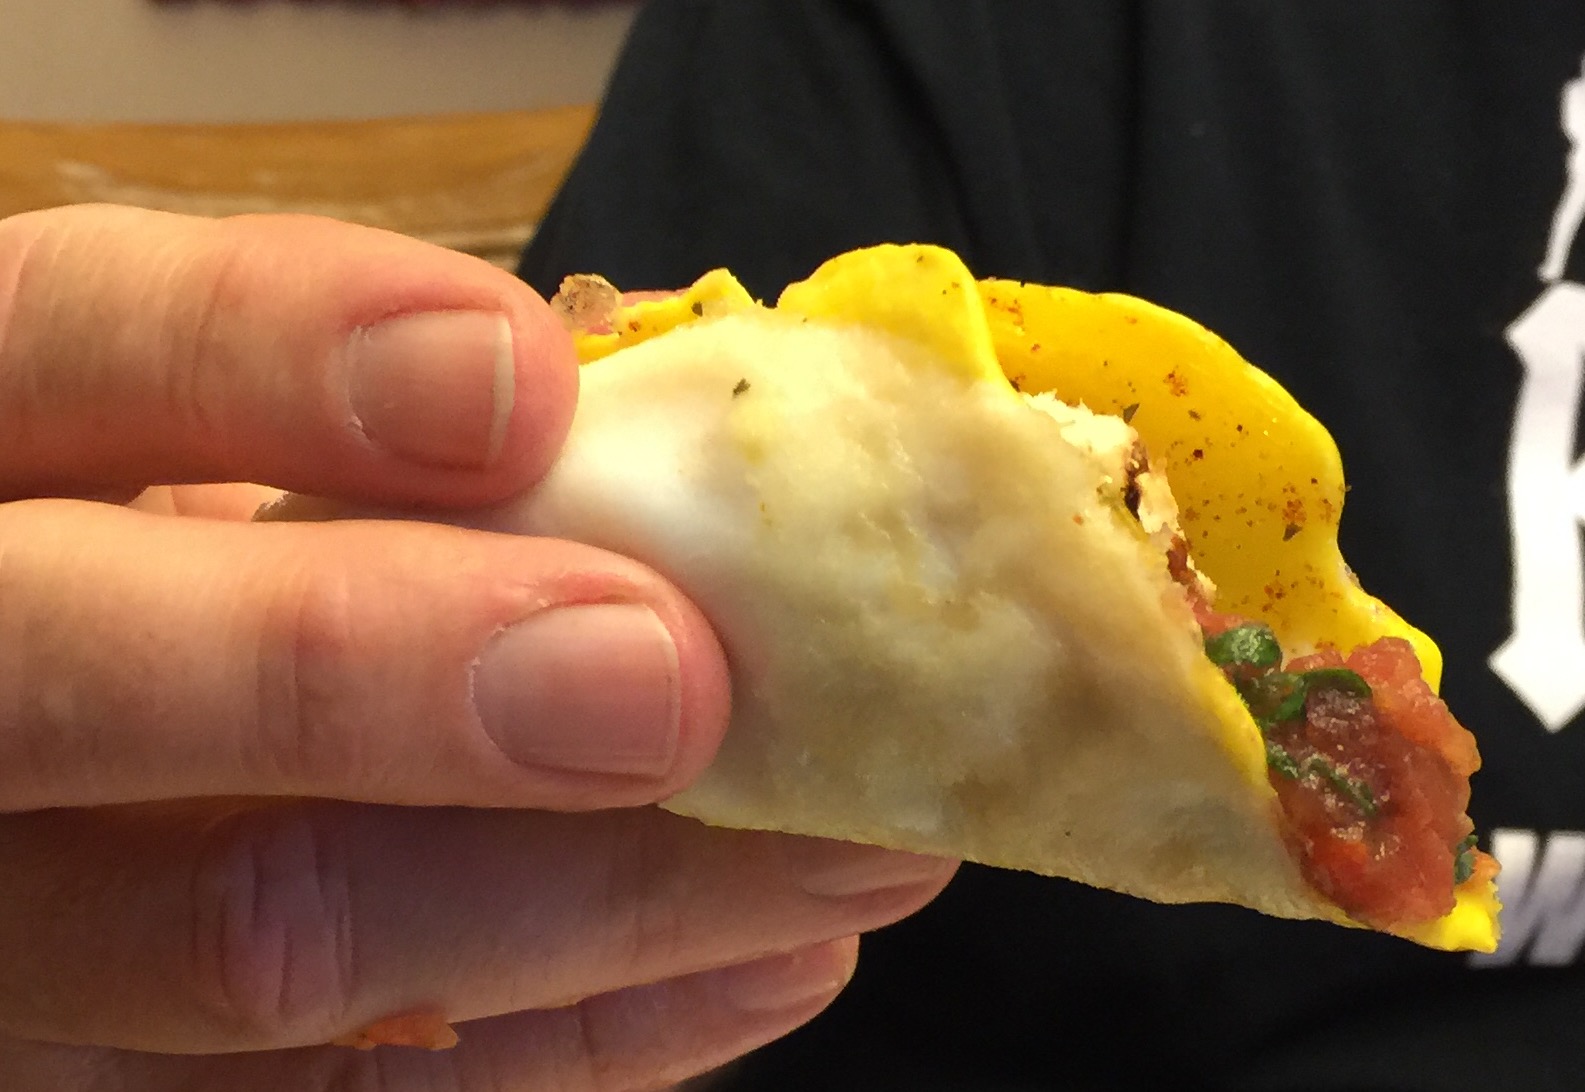
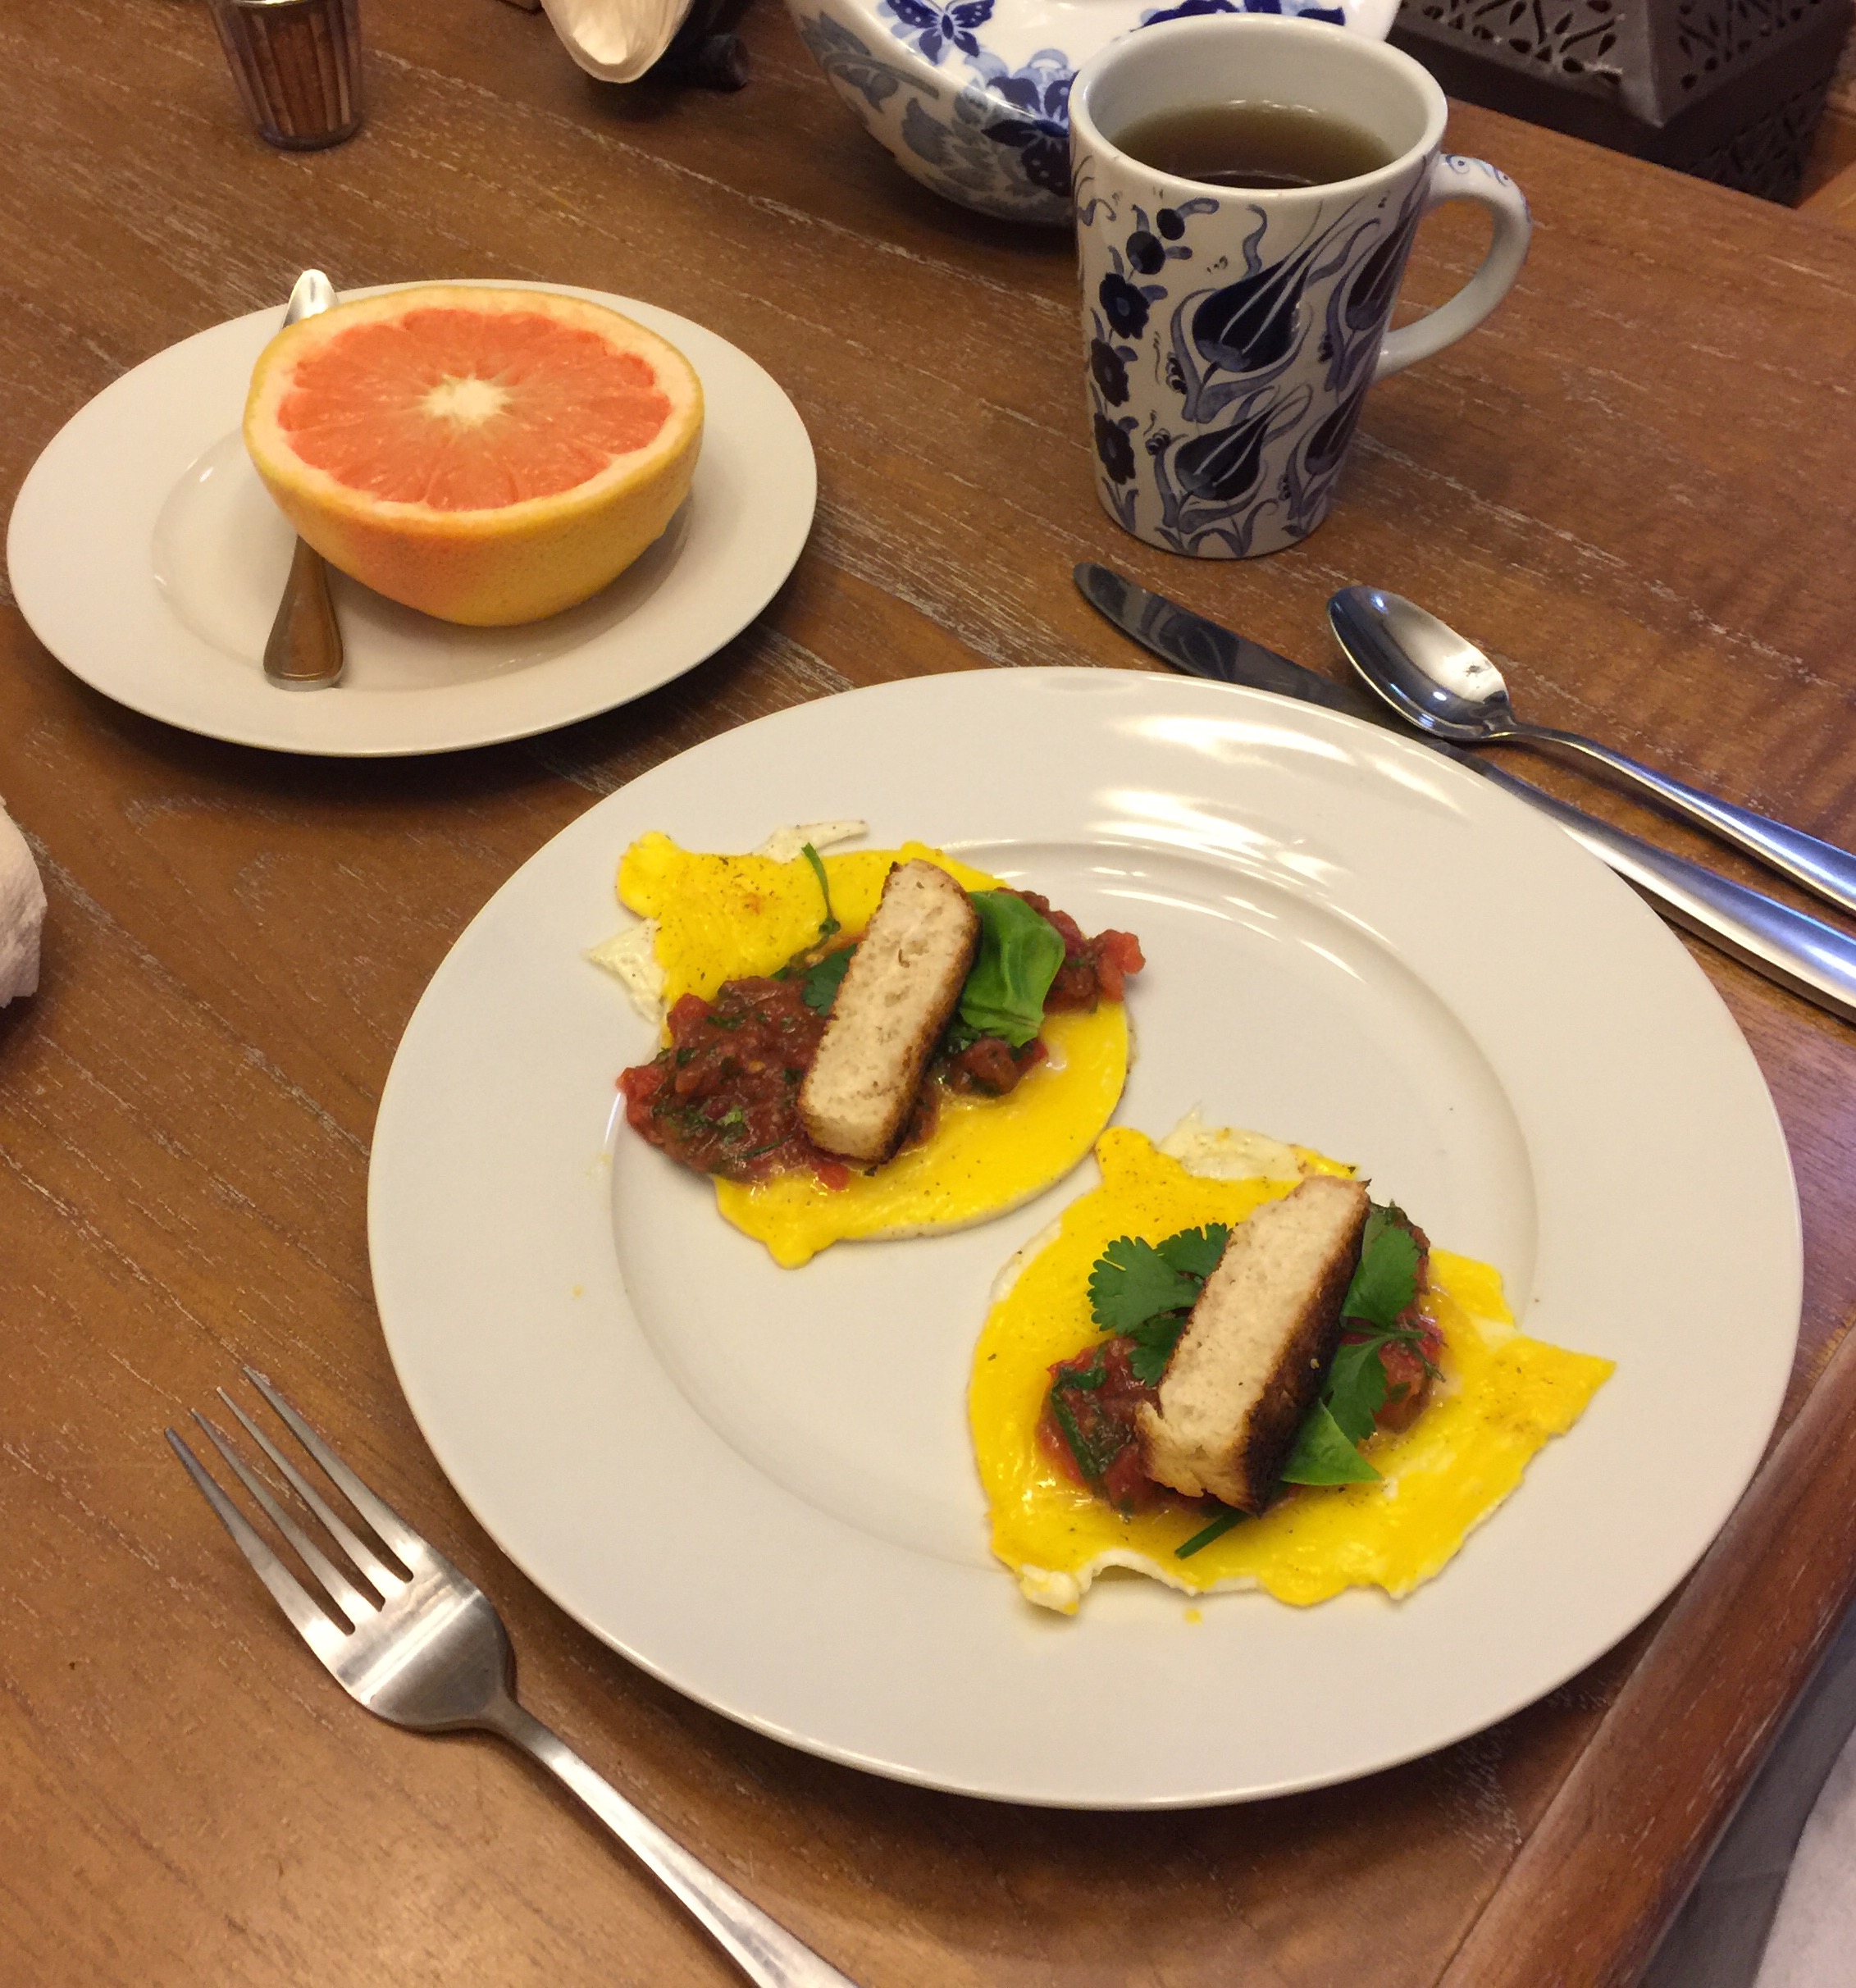
8. Serve on toast with a slice of avocado, some feta cheese, and salsa on the side

Poaching Eggs in the Shell

  1. Start with fresh and cold eggs
  2. Put eggs into room temperature water
  3. Heat water quickly over medium high heat
  4. When water reaches 170º turn burner down to simmer and keep temperature between 165º and 180º
  5. Let cook for exactly 12 minutes (for soft poached)
    Increase to 15 minutes if you like them just a BIT tighter.
  6. Remove to ice bath for 60 second
  7. Crack egg directly onto toast or English muffin.
    (The white that is retained in the shell is the part the floats around when you poach using the first method on this page.  Edible, but not attractive.)
  8. Optionally, serve with hashed browns

Poaching in a Custard Cup

  1. Put custard cups in the bottom of a large pot
  2. Add water so that water comes about one inch above rim of cup
  3. Add 1/4 C white vinegar and 1 tsp kosher salt
  4. Bring water to 205-210 degrees (almost boiling)
  5. Break eggs into a cup outside pot in case the yolk breaks
  6. Slip eggs into custard cups at 30 second intervals
  7. Start timing egg poaching cycle with the first egg.
    NOTE:  It might take extra time to poach your egg to your liking since it is “enclosed.”  Start with four minutes per egg.
  8. After removing the first egg, remove the next egg 30 seconds later
  9. Test this on yourself, before you expose your guests to it.

Commercial Egg Poacher

My wife prefers an Egg Poacher, and I am not covering that preparation here because it is very easy:  Put eggs into the poacher, add some water and press a button.  On the up side, you get nearly perfect poached eggs every time.

Here is the one she uses:   West Bend Egg Poacher  – – available from Amazon for about $35.  Very easy, and very consistent.  This can also be used for hard-boiling eggs, although she uses it just for poaching.

TIPS AND TRICKS

  • You do not need to refrigerate eggs IF they have not been cleaned and processed.  If you get them in a typical supermarket and there are no feathers or poop on them, refrigerate them because the protective coating is gone.
  • Don’t use raw eggs past the “marked date” from the package for anything other than fully cooked eggs.
  • The white of fresh eggs will stay more intact than the white of older eggs, which tend to spread out, so use fresh eggs for poached eggs.
  • Another tip is to break the egg into a colander, and allow the loose white to strain.  Poach only the remaining white and yolk
  • Carmelize onions and serve on English muffin, spinach, ham and cheese. Top with poached egg.
    COOKING FOR A LARGE GROUP?
  • You can par boil them ahead and put into ice water to store.  Cook for only two minutes, the remove to ice water.  To reheat them, just put back into boiling water for two minutes.  This is how cruise ships and hotels do their poached eggs.
  • If you are serving a large group all at the same time, after cooking put them into water at 150º until ready to plate.
  • To cook four eggs at a time, put four custard cups into a boiling pot of water.  Put eggs into each up at 15 second intervals.  Remove the first at 3 minutes, then the others at 15 second intervals.  Put into an ice bath to stop cooking.  Refrigerate up to 8 hours.  Reheat for two minutes in boiling water.

Another good recipe is poaching eggs in marinara sauce.  Heat your canned crushed tomatoes (San Marzano) to boiling.  Cook about three minutes.  Reduce to a simmer and put your whole eggs into the sauce.  Cover and cook for 2 1/2 minutes.  Scoop out tomato with egg in the center and put on toast.


Steaming Eggs

You can put eggs into the basket of a standard steamer.  8 minutes for soft, 10 for medium, and 12 for solid yolks.


Need to test and debug

  • Put water, enough to cover custard cups by 1/2 inch
  • Add 3 TBL vinegar and 1 tsp salt
  • Bring to boiling
  • Prep a bowl of ice and water
  • Use fresh eggs
  • Put egg into the custard cup
  • Add others 30 seconds apart
  • Set water to 205º
  • Cook 5 minutes each

Southern Scramble

Southern Scramble
Southern Scramble

INGREDIENTS

  • One egg per person
  • One mustard green leaf per person

STEP BY STEP

  1. Chiffonade washed and dried mustard greens, set aside
  2. Beat egg until thoroughly mixed
  3. Cook eggs over low heat until “soft” scrambled
  4. Add mustard greens and continue to stir (occasionally) until greens are wilted
  5. Add salt and pepper (to taste) and plate

SERVING SUGGESTIONS

  • Serve with wedges of flour tortilla and a spoonful of diced green chilies or jalapenos.
  • For the heat-intolerant, thinly sliced tomatoes would also go very well on this plate.

NOTE

A CHIFFONADE is a technique in which larger leafs (spinach, basil, mustard greens) are efficiently cut into long, thin strips. You should stack the leaves and roll them tightly, then cut across the rolled leaves every 1/16 inch or so with a sharp knife. Gently fluff the cut pieces which will give you a lot of thin ribbons.

Published in Grandpa’s Corner – IRC Volume 1, Issue 7

HTML Snippets Powered By : XYZScripts.com