- PREP for TWO PEOPLE
- Shred hashed browns – I prefer Yukon gold potatoes
- Shred 1/2 C mozzarella cheese
- Grate 2 TBL Parmesan cheese (even the green bottle is OK)
- Mix cheeses in a small mixing bowl
- Break one egg each in small bowls for quick deployment
- Put 2 TBL water into a small bowl also for quick deployment
- COOKING THE HASHED BROWNS
- Cook hashed browns in a lightly oiled skillet
- Flip till browned
- Put onto plate – the next step goes quickly
- COOKING THE EGGS
- Re-oil skillet
- Put half cheese mixture in two piles onto skillet
- Put one egg onto each pile
- Add the water and cover skillet
- Start timing two minutes
- At the two-minute mark, remove the cover
- Evaluate eggs. Whites should be cooked – just barely though
- NOTE: They will appear to be less cooked than they really are. Don’t cook for more than another 30 seconds, or the yolk will be hard.
- Use teflon spatula to remove eggs to the top of your hashed browns
Category: Medallion Recipe
Grandpa’s Ketchup
The Whitehouse Recipe is a fun part of history, and makes pretty good ketchup (or should I say catsup) but this variation has a few twists added by Grandpa.
|
Step by Step
- Combine all ingredients (except sugar and vinegar) in a large heavy pan
- Rinse can/jar of tomato paste into pan with 2 TBL water, TWICE
- Bring the mixture to the boil, then reduce to a slow simmer.
- Cook over a medium heat for 20 minutes stirring often and carefully.
- Add brown sugar and vinegar and cook until it starts to thicken (10-40 minutes) stirring frequently
- Leave to cool a full half hour
- Run through a food mill’s finest settings for the ketchup
- Run through the next larger food mill screen for a nice spread for crostini
- Pour the ketchup mixture through a funnel into suitable bottles
- Use it as you would any commercial tomato ketchup
- Stored in the fridge this ketchup will keep for a month.
Note: Before Step 6 if you put it (while hot) into sterilized canning jars (and sterilized canning lids) you can store it for up to a year.
Grandpa’s Breakfast Bread
 INGREDIENTS
- 1/2 C AP flour – sifted
- 1/2 C tapioca, almond flour, teff, etc
- 1/2 tsp Salt
- 1 tsp Clarified Butter
- 1/2 Cup Water
– - 1/4 C canola oil – in hot skillet
Optional: Substitute wheat flour, but pulverize it in a food processor
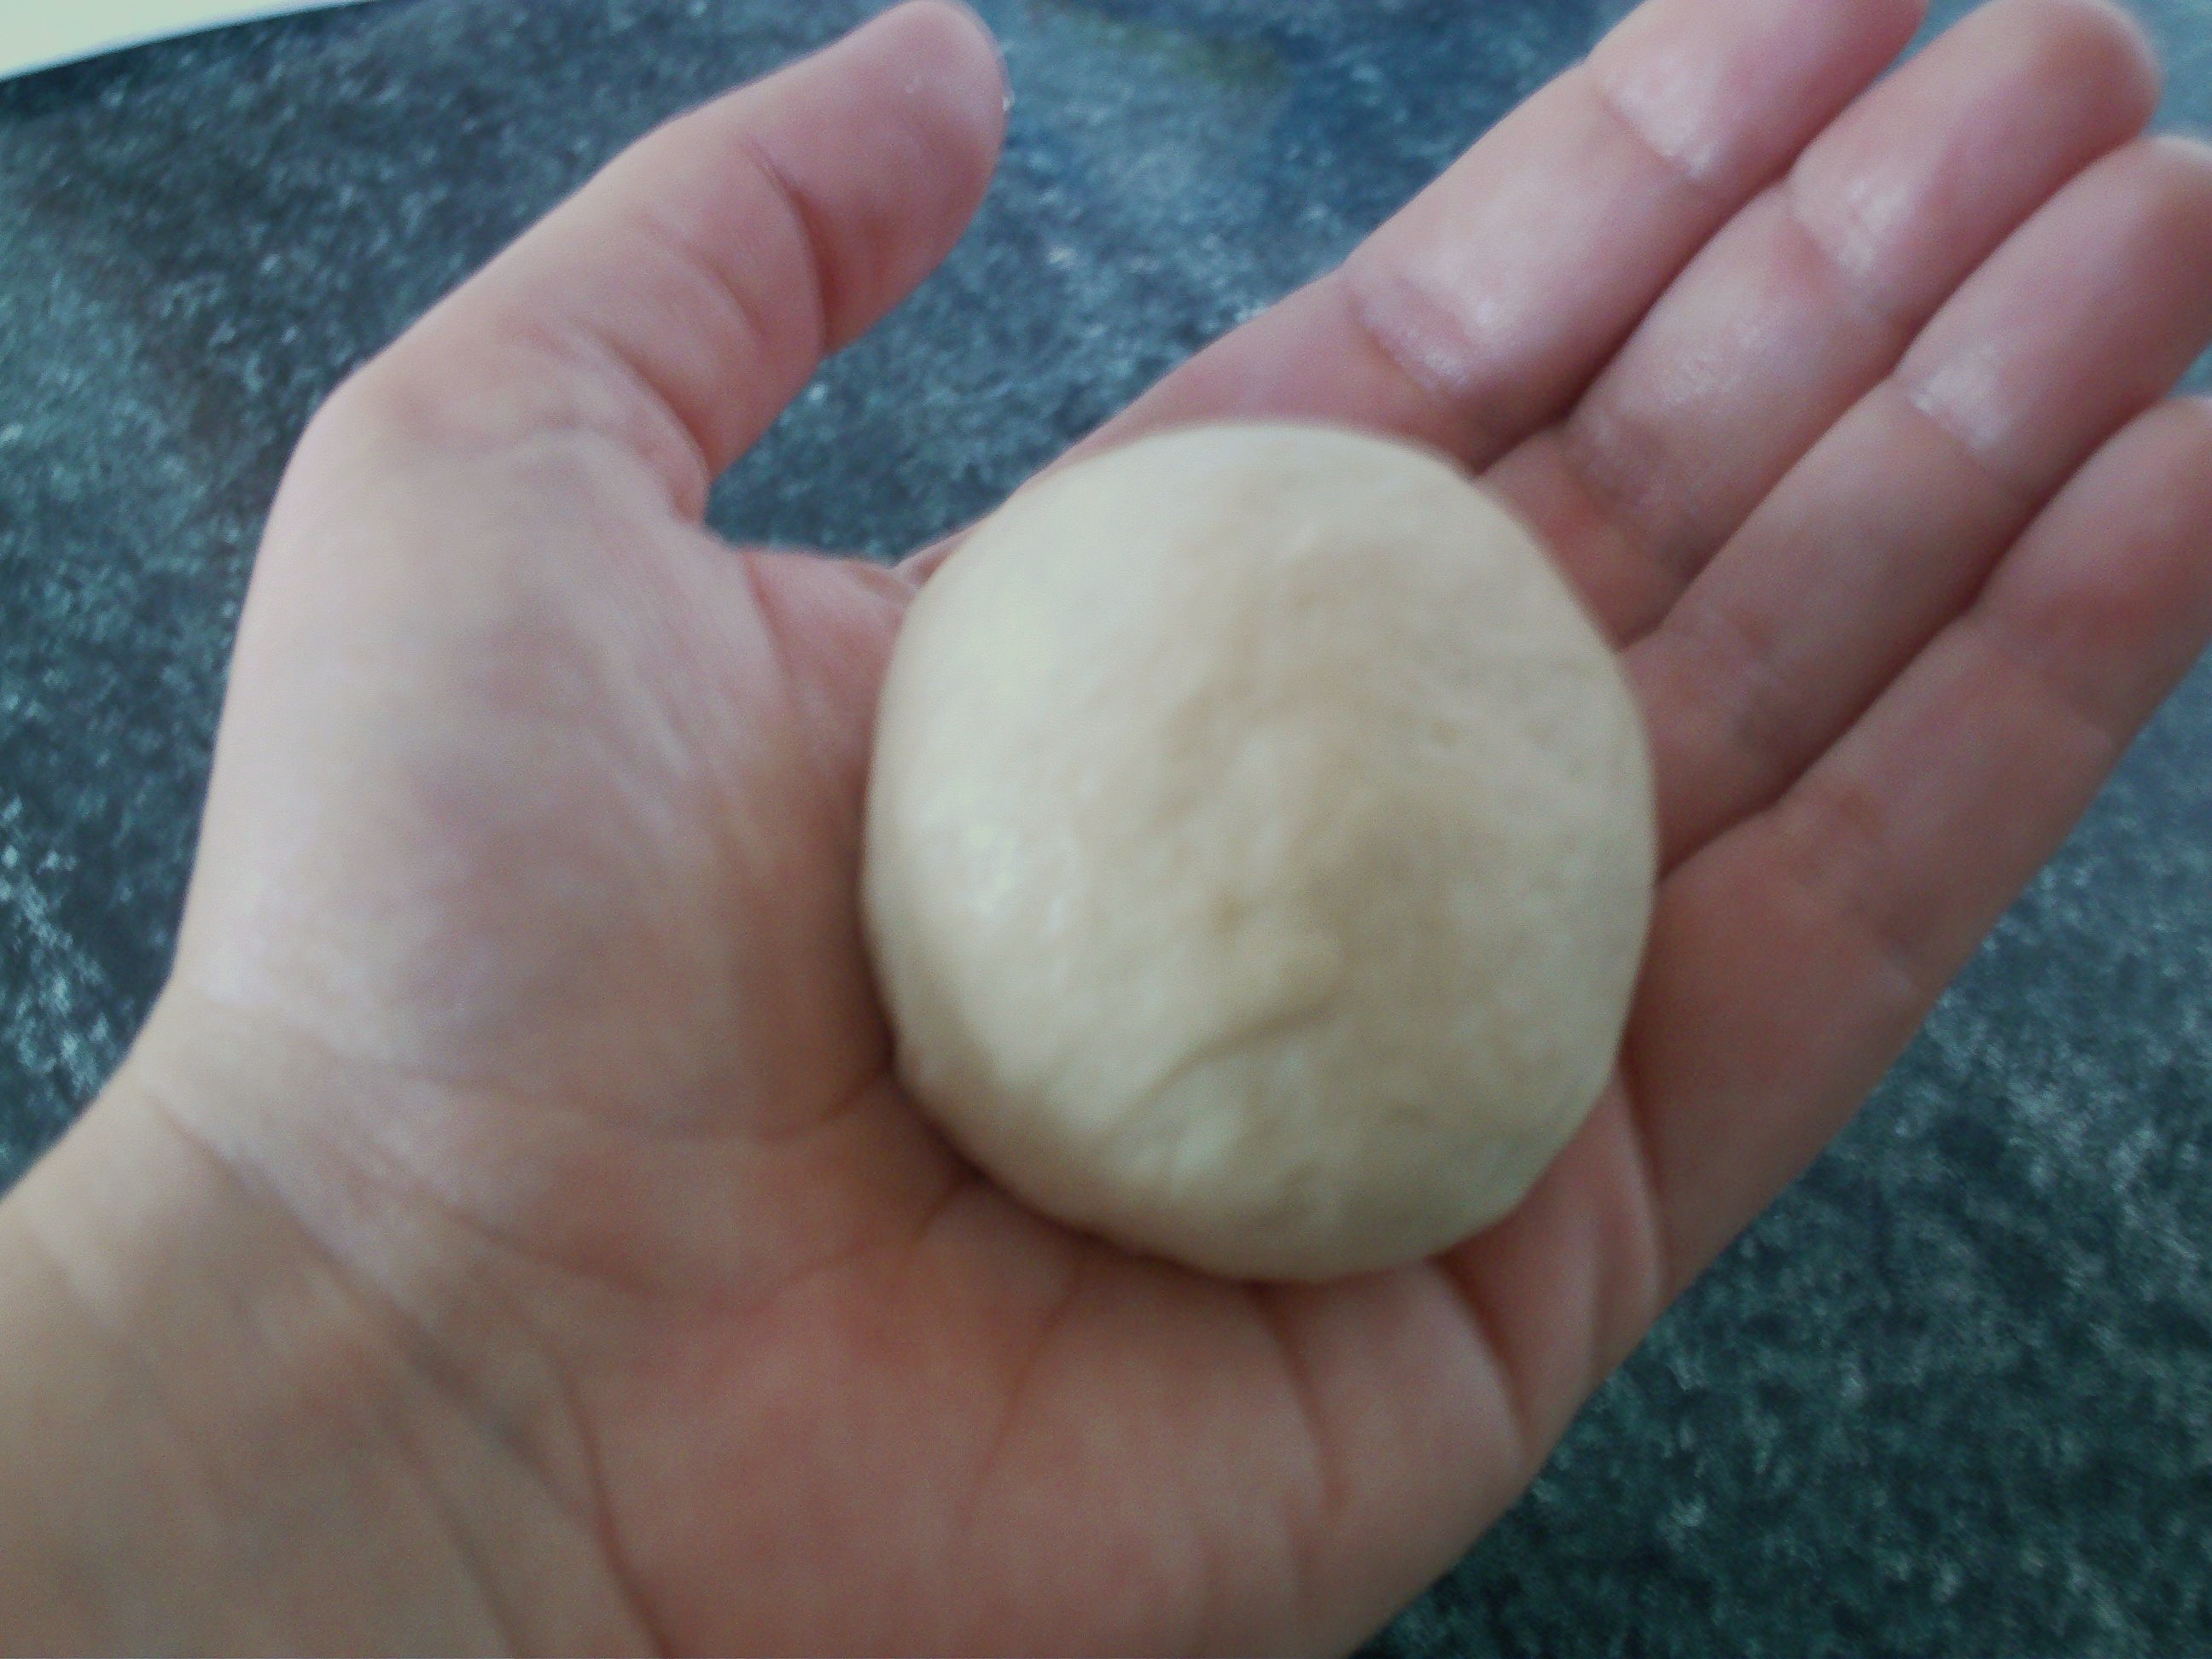
STEP BY STEP
- Combine flour and salt
- Mix butter into flour
- Drizzle water only until large crumbles begin to form
Add water 1 tsp at a time until a ball STARTS to form
If you add too much water, the dough will be sticky - Ball should NOT be sticky. If it is, add more flour.
- Cut the dough ball into eight pieces and roll into balls
- Flatten balls with hands
- Using a small lightly oiled tortilla press, or parchment paper circles
- Squeeze till flatter
- Heat 1/4 C canola oil to about 360º – 400º
- Carefully slide disks into oil and cook until browned
- Set aside on newspaper topped with a paper towel, blotting top with paper towel
- Serve hot as a side, with an egg on top, or make a breakfast sandwich
ALTERNATE PREPARATION STARTING WITH STEP 8
- Squeeze in tortilla press, then spray lightly with canola and put TWO disks together, the press again.
- You will NOT be frying these, but rather heating them in a dry pan.
- Carefully put the combined disks on a hot dry skillet and cook each face 20-30 seconds
- Flip and carefully remove one disk from the other
- Cook the “insides” that are now free from each other
- These are more like mini tortillas
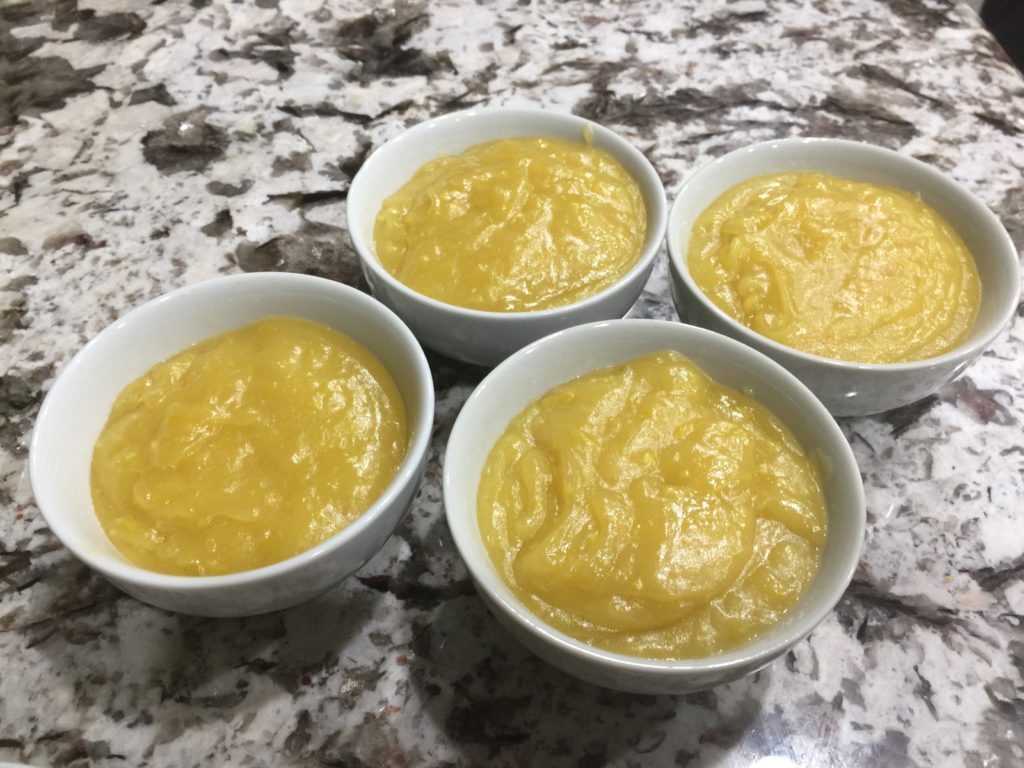
Bird’s Custard Powder – Pudding
INSTRUCTIONS
Grandpa’s Custard for Two
A microwave oven actually does a better job of preparing this than a stovetop. Microwave instructions are in bold italic letters.
- 2 rounded (or 3 level) TBL Birds Custard Powder
- 1 TBL Granulated Sugar
- 1 C (8 oz) milk
- 1/4 tsp vanilla
- optional: 1 egg yolk
- optional: 1/2 C cooked white rice
- optional: raisins
- optional: flavoring syrup
- Mix custard powder with sugar
- Mix 1-2 TBL cold milk and vanilla into custard powder
- OPT: Add egg yolk to the mixture
- Heat larger portion of milk to a simmer (about 90 seconds in microwave)
- Temper hot milk into the custard mixture
– Pour hot milk into the colder slurry, stirring continually – then return the tempered mixture into the remaining hot milk - Add rice if making rice pudding or prickly pear syrup for a SW flavor
- Return to pan and cook, stirring until thickened, or put into microwave for 11 second intervals. Start with 4 cycles. 5 might be necessary, especially if preparing with rice.
- Whisk in your raisins or 1/2 tsp flavoring syrup
- Pour into serving bowl and let cool 5 minutes.
Step by Step Instructions from the label on the Box/Can
BIRD’S CUSTARD POWDER
- 1/4 Birds Custard Powder
- 1-2 TBL Granulated Sugar
- 1 pt (16 oz) milk
- Mix custard powder with sugar
- Mix 2 TBL cold milk into custard powder
- Heat larger portion of milk to a simmer
- Temper hot milk into the custard mixture
- Return to pan and cook, stirring until thickened
Vanilla Cream Sauce
-
- Mix 2 TBL water, 2 tsp corn starch, 2 level TBL Bird’s Custard
- Micro 1/2 C milk for 60 seconds
- If not foaming (scalded) micro 15 more seconds
- Add 2 TBL butter to milk
- Temper hot milk into BIrd’s concentrate and then return to the hot liquid
- Micro at 10 second intervals until thickened
- Add a few drops of vanilla, then stir
Homemade Custard Powder
GRANDPA’S CUSTARD POWDER
- 4 oz (1/2 C) Confectioner sugar
- 1/4 C dried milk powder
- 1/4 C corn starch
- 1/4 maple sugar (fine is preferred)
- 1 teaspoon of salt
- 1 tsp almond powder or instant pudding of your choice
- OPTIONAL: 3 oz Dutch cocoa plus 1/4 additional confectioner sugar
- OPTIONAL: Quarter teaspoon of Carmencita Colorante
RECIPE:
- To 1 C mix, add 1 C milk and 1/2 C heavy cream
- Whisk together, then bring to boil over medium heat
- Simmer on low for about 4 minutes or until thickened
- Stir in 1/2 tsp vanilla and sieve into cups
- Refrigerate at least an hour
What does Temper mean?
TEMPER BRINGS HOT AND COLD TOGETHER
Tempering is a way to mix hot and cold liquids and keep them from forming lumps. The most common thing where lumps can be prevented is gravy. We’ve all had lumpy gravy, but if the flour had been TEMPERED into the liquid, lumps would not have formed.
As far as eggs, that is another very common thing needing tempering. When you add a hot liquid to your eggs, or add your eggs to a hot liquid, you will generally end up with scrambled eggs. The goal is to combine the ingredients of two different temperatures.
Tempering is quite easy. It just takes you an extra minute of cooking time, but the results are worth it. In the case of Birds Custard Powder, if you just put the powder into the hot liquid lumps will form. If you dump the mixture into the hot liquid all at once lumps will form.
To temper the two together, pour the hot liquid into the colder liquid VERY VERY SLOWLY while whisking continually. You can speed up a little bit as you continue to pour, but never EVER stop whisking.
Once the liquids are combined, continue to cook until thickened. Not too quickly again because haste makes waste… and lumps will form.
IP BBQ Ribs
- Marinate ribs overnight with 1/2 C EVOO, 2 TBL Grandpa's Thunder Powder or Arghhh Powder, 6 cloves of garlic, 1/4 C ketchup, 1 tsp hot mustard, 1/4 C apple cider vinegar, 2 TBL sugar and 1 TBL soy sauce – optional 1/4 tsp liquid smoke
- Add marinate liquid and 1 C water
- If rib rack fits around perimeter of pot, stand upright – bones in, meat side out – otherwise, cut to fit and lay flat. Use Steam Rack to keep them out of the water
- I like to wrap two potatoes (with skin on) in foil – more on that later…
- Pressure cook (medium) for 25 minutes
- 10 minute natural release, then release steam
– They will be very tender, but not browned - Spread with sauce and place on broiler or grill until seared and caramelized – about 4 minutes
- While ribs finish, use a paper towel to remove skin from potato
- Add 4 TBL butter, 1/2 tsp salt and crush to mix
- Add JUST ENOUGH milk to make creamy mashed potatoes. Mix well.
Too much milk, and they will be runny.
Date and Raisin Quick Bread
Ingredients
- 1 C dried pitted dates
- ¾ C orange juice
- 2 C flour – OK to sub 1/2 wheat flour
- ½ C sugar
- 1 tsp baking powder
- ½ tsp baking soda
- ¼ tsp clove
- ¼ tsp salt
- 2 egg
- ¼ C canola or rapeseed oil
- ¾ C fresh (not hard) raisins
Step by Step
- Rough chop dates
- Put into sauce pan with orange juice
- Bring up to a simmer
- Turn off heat and let rest 30 minutes
- Meanwhile, mix next six dry ingredients
- Toss raisins in with the dry ingredients
- Mix eggs in with the cooled mixture
- Fold cooled mixture in with the dry ingredients
DO NOT OVER-MIX - Pour into lightly greased baking dishes
- Bake at 350º for 45 minutes (small dishes) to 60 minutes (large baking pan)
- Cool before turning out
Breakfast Biscuits
INGREDIENTS
2 cups GRANDPA’S BISCUIT MIX (shown below)
2/3 cu buttermilk
OPT: 1/4 C shredded Cheddar cheese
Splash more milk ONLY if it doesn’t come together when you knead in Step 3. If it’s too wet, add a bit more biscuit mix or use dried milk.
DON’T OVER-MIX OR YOUR BISCUITS WILL BE TOUGH
STEP BY STEP
- Add milk to biscuit mix. Stir with a spoon to combine.
- Turn out on a floured surface.
- Turn over onto itself 8 times to create layers
- Roll or pat to ½ inch thickness.
- Cut into 2 or 3 inch rounds.
- Push down, THEN turn. Don’t turn as you push, or you will seal the edges together and your biscuits will not rise
- Place on a greased baking sheet with sides just barely touching
- Otherwise they will spread, not rise
- Don’t use a teflon baking sheet
- Put a small dent in the center to help create flat tops
- Brush the tops lightly with melted butter
- Bake at 450° for about 10 minutes.
- Turn pan and cook another 5-8 minutes
Biscuit Mix
Freeze well, bake without thawing
Grandpa’s Banana Ginger Bread
INGREDIENTS FOR TWO SMALL LOAVES
FIRST BOWL:
- 1/4 CU softened margarine
- 1/4 CU white granulated sugar
- 1/4 CU brown sugar
- 1 eggs
- 1/2 tsp vanilla
- 2 TSP lemon juice
- 1-2 over-ripe bananas – mashed
SECOND BOWL:
- 1/2 CU white flour
- 1/2 CU wheat flour
- 1/4 CU spelt (optional)
- or 1/4 CU more white flour
- 1/2 tsp baking soda
- 1/4 tsp baking powder
- 1/4 tsp salt
- 1 TBL granulated ginger – chopped
- NOTE: I prefer to pulse the ginger with a bit of the sugar to make small chunks of ginger.
STEP BY STEP
1. Preheat oven to 350º F
2. IN FIRST (LARGE) BOWL – – Cream butter and sugars together
3. Add eggs, one at a time, beating until smooth after each egg
4. Mix in mashed bananas, vanilla, and lemon juice
5. IN SECOND BOWL sift and mix all dry ingredients together and add ginger
6. Add dry mixture to first bowl, stir to moisten. Do not over-mix.
7. Transfer to greased loaf pans (or pans lined with wax paper)
8. Lay a sheet of foil loosely over the top, and bake 60 minutes.
9. Remove foil after baking 60 minutes, and continue to bake for 15 more minutes.
10. Let stand ten minutes before removing from pan
11. Place released loaf on cake rack to cool
This will make TWO 2½ x 4½ baking dishes
Options:
1. Replace the ginger with chopped walnuts
2. Add raisins, dates, or dried cranberries rather (or in addition to) the ginger
3. We like to add ¼ C raw oatmeal to ours, and cut back on the wheat flour a bit
Grandma’s Mac and Cheese
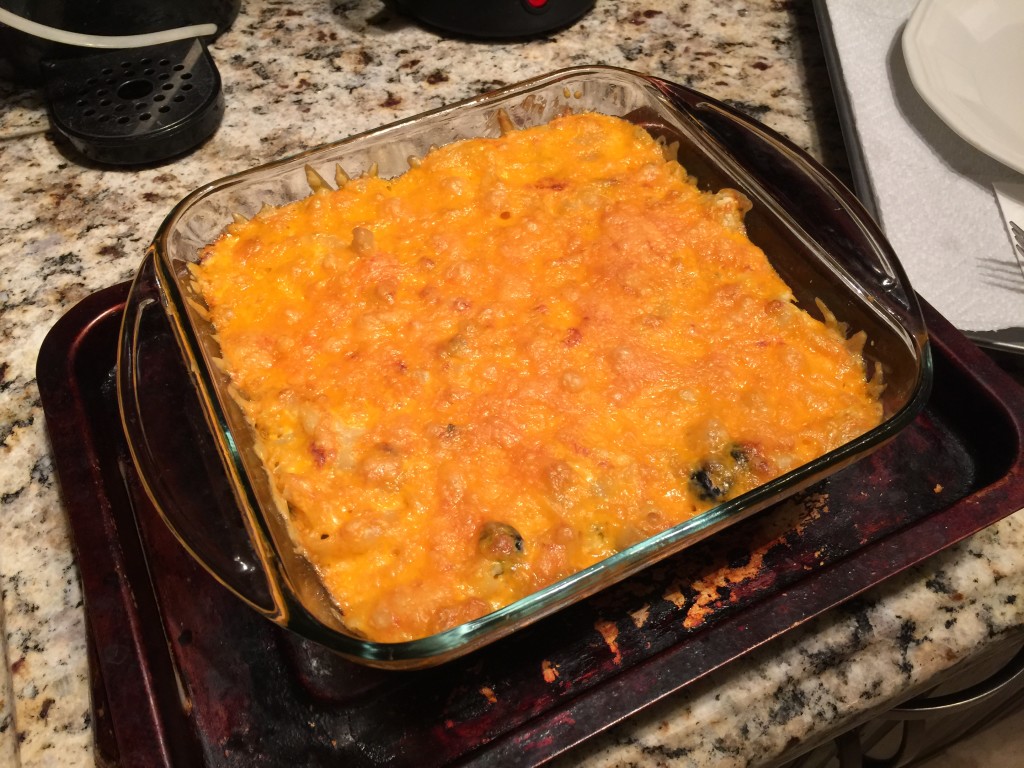 Ingredients to feed 6 or 12 people
- 2 C large elbow macaroni
- 1 C sour cream
- 1 C shredded Colby – mixed in
- 2 C shredded Colby – for topping
Grandma likes to use 1 C coarsely chopped black olives when she makes this, but you can leave the olives out if you don’t like them.
| Put in whatever you want. You can use bell peppers, green chilies, artichoke hearts… whatever ! |
Optional Roux 1. In a saucepan, melt 2 TBL butter over medium heat. 2. Stir in 2 TBL flour to make a roux. 3. Add 1 C milk to roux a splash at a time, stirring constantly. 4. Stir in cheese, and cook over low heat until cheese melts and the sauce thickens. * This will replace Step 3 below. |
Step by Step
- Cook the macaroni to taste
- Drain macaroni and put into large mixing bowl
- Mix together 1 C cheese and 1 C sour cream
- Add 1 C chopped black olives
- Stir macaroni and cheese mixture together
- Grease casserole dish
- Pour mixture into baking dish, and pat it down
- Top with as much shredded Colby as will fit in the casserole
- Bake at 350º for 20 minutes
- Let rest five minutes before serving
Oh, one more thing…
-
Serves 6 as a main course or up to 12 when served as a side
Basic Lemon Curd
Also called Zabaglione by the Italians, who claim to have invented it.
Basic Lemon Curd
This does not follow all of the rules, but it is about as easy as you can get. I like easy, and this is the way I do it.
You will need a double boiler or a bowl which fits into a saucepan to make lemon curd. This restricts the temperature from never getting hotter than 212º – which is actually too hot for lemon curd, so you still need to be careful. 202º is the perfect water temperature. This also reduces the risk for scorching. You CAN do it in a sauce pan alone, but your chances of failure increase greatly.
The eggs will need to heat between 150º and 170º – NEVER exceed 175º
INGREDIENTS
- lemon zest and juice of 4 lemons
( about 1/2 C ) - 6 egg yolks
Reserve the whites for an omelet - 1/2 cup Karo Syrup
- 1 dash of salt
- 1/4 C ( 1/2 stick – 8 TBL ) butter ( cut into tabs )
- 2 TBL corn starch
- Scant vanilla or Grand Marnier at the very end
STEP BY STEP
NOTE: Just the yolk makes custard. Yolk plus lemon makes lemon curd.
- Wash lemons.
- Info: The lemons and the eggs should be at room temperature. Roll the lemons firmly on a table as a preparation for extracting the maximum quantity of juice from them.
- Grate rind, leaving white pith
- Info: Using a citrus zester or a fine microplane grater, remove the yellow portion of the lemon rind, leaving behind the white pith (the white part under the rind which is bitter). Put the grated peel (also known as the zest) into a large mixing bowl.
- Squeeze juice from lemons into the mixing bowl. Don’t worry about the seeds and the pulp, we will be straining in Step 14. Plus, the seeds have a bit of pectin in them, which will help with your custard creation.
- Mix together eggs, sugar, salt, corn starch in a large mixing bowl. Your mixing bowl should be a larger diameter than your stock pot. We will be using the bowl as a double boiler. Cream together the eggs and dry ingredients. This will break apart the strings of white.
- Pour the egg into the large mixing bowl.
- Fill a large stock pot about 2 inches with water and bring to a rapid boil, then reduce the heat to a light simmer. As I mentioned 202º – 205º is the perfect temperature
- Cut your butter into pieces and put into your mixing bowl. This will become your “wok” bowl.
- Put your mixing bowl on top of the pot to create kind of a low-temperature wok. This is called a double-boiler.
- Everything (except the vanilla) should now be in your double-boiler. You need to stir VERY frequently. About every 15 seconds, at least.
- When butter has completely melted, stir continually.
- Cook over double boiler until thickened ( 10-15 minutes ) then add your vanilla. Mixtures continues to thicken upon standing. If the temperature of the egg mixture rises above 175 the egg will cook and develop clumps. Ideally, keep the egg mixture temperature between 150 and 170º. The clumps can be removed in Step 14 if this happens.
- Put in about 1/2 tsp of vanilla or Grand Marnier.
- Put bowl into an ice bath and stir until temperature drops.
- Strain the custard into a measuring cup, lined with a plastic bag.
- Cut the merest tip from the bag, and pipe into bowls or dump into tart crust (see recipes at top of this page)
- Cool at least an hour before serving
NOTES and ADDITIONAL INFORMATION
- Lemon curd is a summer treat which isn’t difficult to prepare.
- You can transfer the curd to a clean jar or store in the refrigerator, covered with wax paper.
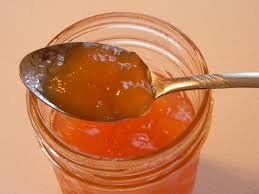
- Use the lemon curd to fill tarts, as a pie filling, or spread on crackers, toast or waffles.
- You can also just serve this in a little bowl as a side dish.
Ghee – aka – Clarified Butter
- Heat butter in a sauce pan at medium low heat. DO NOT STIR.
- Once it has completely melted, let rest a few minutes
– During this time the solids will precipitate to the bottom of the liquid - Skim off any foam that has formed on top.
- You now have clarified butter
- Keep cooking until the solids in the bottom begin to turn brown
- You now have ghee
- Carefully pour off the ghee, leaving the solids behind.
- Ideally, pour it through cheesecloth for even cleaner ghee
This will give a cleaner taste to whatever you are cooking. It is also less likely to burn. Just a dash of EVOO will also help inhibit burning. If you are a purist, pour the butter through cheesecloth.
Tips: Non-Stick Skillets
This includes teflon, ceramic, and all surfaces that claim to be non-stick.
Please also review my post: Care of your Cast Iron Skillets
Teflon Tips
Teflon, Ceramic and other non-stick finishes need to be taken care of. Here are some tips that you may find useful.
- Wash and rub a little canola oil into it before first use.
- Don’t heat the pan empty. At least put a little oil into the pan.
- Don’t use cooking spray. There is a propellant that will build up and destroy your pan. If you must, get a spritzer bottle and put canola into it.
- Don’t let the temperature EVER exceed 450. Ideally, I never even exceed 400º This Thermapen is one of the best investments you could make. You will use it nearly every single day.
- Don’t let food dry on the surface of your pan. When the temperature has dropped to 250º (or below) wipe it off with a wash cloth and hot water. I usually don’t even like to use soap on mine.
- If you can’t clean it immediately, at least fill it with water to minimize the chemical effects of the remaining cooking oil residue.
- If you do use soap on your pan, occasionally wipe in a little canola oil (See Tip #1)
- Never ever EVER use abrasive cleansers or pads on your pan.
- Never put your teflon or ceramics into the dishwasher. The hot water is OK, but the drying cycle will kill your pan.
- For stubborn stains, use a mixture of baking soda and water. mix and apply the paste. Leave for an hour, then wipe off. Repeat if needed.
- If your pan has a wooden handle, season it VERY occasionally by wiping with canola oil
- Season a hot pan (250º) occasionally with a paper towel and olive oil (See Tip #1)
- Never use metal cookware (spatula, whisk, spoon, etc) when cooking with your non-stick pan
THE PENNY TRICK – If you are boiling water, put a penny in the bottom of your pan. If it boils dry (which will ruin your pan) the penny will start to rattle because of the boiling water beneath the penny. The rattling will tell you your pan is nearly empty (usually) before your pot is destroyed.
Cast Iron Pizza
Get a large ball of pizza dough from your favorite pizza place. About $5. Yes Grandpa takes shortcuts some of the time.
- 3 TBL butter
- 1/2 C onion
- Fontina cheese
- Mozzarella cheese
- Marinara pizza sauce
- 2-3 types of mushrooms
- Roll pizza dough into COLD cast iron pan.
- Make sure dough is kind of up on the side of the cast iron skillet to hold ingredients in.
- Idea: Cut thin logs of mozzarella and roll up into the crust for dipping.
- Lay mozzarella cheese as first ingredient
- Add onion and mushrooms
- Tops with a few spots of marinara (not too much)
- Put some tabs of butter and fontina cheese on top
- Optional: Pepperoni or sausage
- Bake at 550º for 14-16 minutes.
Grandpa’s Hard Boiled Eggs
Consistent Results
Summary: Start cold, Bring to boil, Finish in 15.
-
-
- DO NOT USE FRESH EGGS. Eggs should be at least near (or past) their last day of sale. This is not an expiry date. They plan on eggs being in your fridge for a couple of weeks after his date.
- The time allows the shell to separate from the membrane making them much easier to peel.
- Put a dozen eggs (room temperature) into a deep pot, and add cold tap water until covering the eggs with an extra 2-3 inches of water
- Add 2 TBL salt and 1/4 cup white vinegar to water and stir until salt is dissolved.
- Turn burner on highest heat possible. Watch closely to make sure it does not come up to a rolling (or roiling) boil. If you have an immersible thermometer, you are looking for about 205º
- Meanwhile, prepare bowl of water containing about four cups of ice cubes, for when eggs are done. Set aside.
- When water starts to steam or lightly boil, turn heat to low and start timing
- Cover and let cook for 10 minutes
- (optional) Every 2 minutes or so, use a tongs to gently stir and rotate egg (to center yolk)
- At the eight minute mark, put water into your bowl of ice
- At 10 minute mark, use a slotted spoon to carefully transfer eggs from the hot water into the ice water.
- Let cool for 15 minutes.
- Eggs are done.
- Drain, dry and refrigerate.
- DO NOT USE FRESH EGGS. Eggs should be at least near (or past) their last day of sale. This is not an expiry date. They plan on eggs being in your fridge for a couple of weeks after his date.
-
Peeling Tips
- Start peeling from the fat end – the air sac usually makes this end float
- If you peel within 24 hours, they will peel more easily. Any longer than that and the moisture evaporates through the shell, and makes them harder to peel.
- Use eggs that are several days past their “Sell by” date. These are older eggs, and the membrane has begun to let go. They will peel more easily.
THE STEAM METHOD
Another method that produces consistent results because the temperature is highly regulated is to put 1-2 inches of water in a steamer. Put the eggs into the basket, but don’t put the basket on the steamer yet. Bring the water up to a boil, and THEN put the basket back on the steamer and cover.
Eggs should be room temperature.
For large eggs, time 13 minutes exactly, then remove the eggs to a bowl of iced tap water to cool – about 30 seconds. 12 minutes will give you a softer white and creamy yolk. 15 minutes will give you a drier yolk and very firm white. Peel underwater.
Basic Pizza Dough
INGREDIENTS to make FOUR 6-8 inch pizzas.
Simply double ingredients to make more pizzas or larger pizzas.
- 1 C warm water – about 105º ±
- 1-1/2 tsp dry yeast
- 1 tsp sugar
- 3 C bread flour
- 1 tsp sea salt
- 1/4 C olive oil
STEP BY STEP
- Mix water, yeast and sugar in a glass bowl
- Let feed 5 minutes
- Sift together flour and salt ( keep 1/2 C flour aside )
- Combine flour with yeast and EVOO
- Put 1/2 C flour on the counter
- Mix until a ball forms, then dump onto counter
- Add more flour if necessary
- Mix until flour is gone and dough ball is elastic
- Place in greased bowl and turn to cover ball
- Let rise on counter about 45 minutes
- Punch dough down to get rid of internal bubbles
- Turn out onto floured surface and cut into (approximately) 100 gm balls – baseball sized
- Let rise on counter for another hour
- Form into disks, leaving the border puffly
- Sprinkle baking sheet with cornmeal
- Put disk onto baking sheet
- Bake at 450 for 10-12 minutes
Dough may be wrapped in plastic and kept in the refrigerator for up to two days. Let come up to room temperature and cover to let rise for at least 4 hours.
Freeze for up to a month. Allow to thaw overnight in the refrigerator, then proceed as with the refrigerated balls.
Grandpa’s Arghhhh Powder
This is something that I like to use for pizza toppings and to add an extra bit of heat to hot wings. It has the heat of crushed red pepper, but doesn’t get stuck in your teeth and gums. Just a bit of salt enhances the flavor too. This is also good for meat seasoning.
INGREDIENTS
- 1/2 C ground cayenne pepper
- 1/2 C ground red pepper
- 1/4 C sumac
- 1/2 C salt (fine or course)
- 2 TBL celery salt
- 2 TBL garlic powder
- 2 TBL onion powder
- 2 TBL garlic powder
- 1 TBL black pepper
- 1 TBL cumin
Mix all of the above together well and store in a sprinkle jar.
- See also: Tony’s Creole Seasoning
- For something geared for dry rub BBQ, try Grandpa’s Dry Rub.
- If you like it a bit spicier, try Grandpa’s Thunder Powder.
- For a spicier version, see Grandpa’s Arghhh Powder.
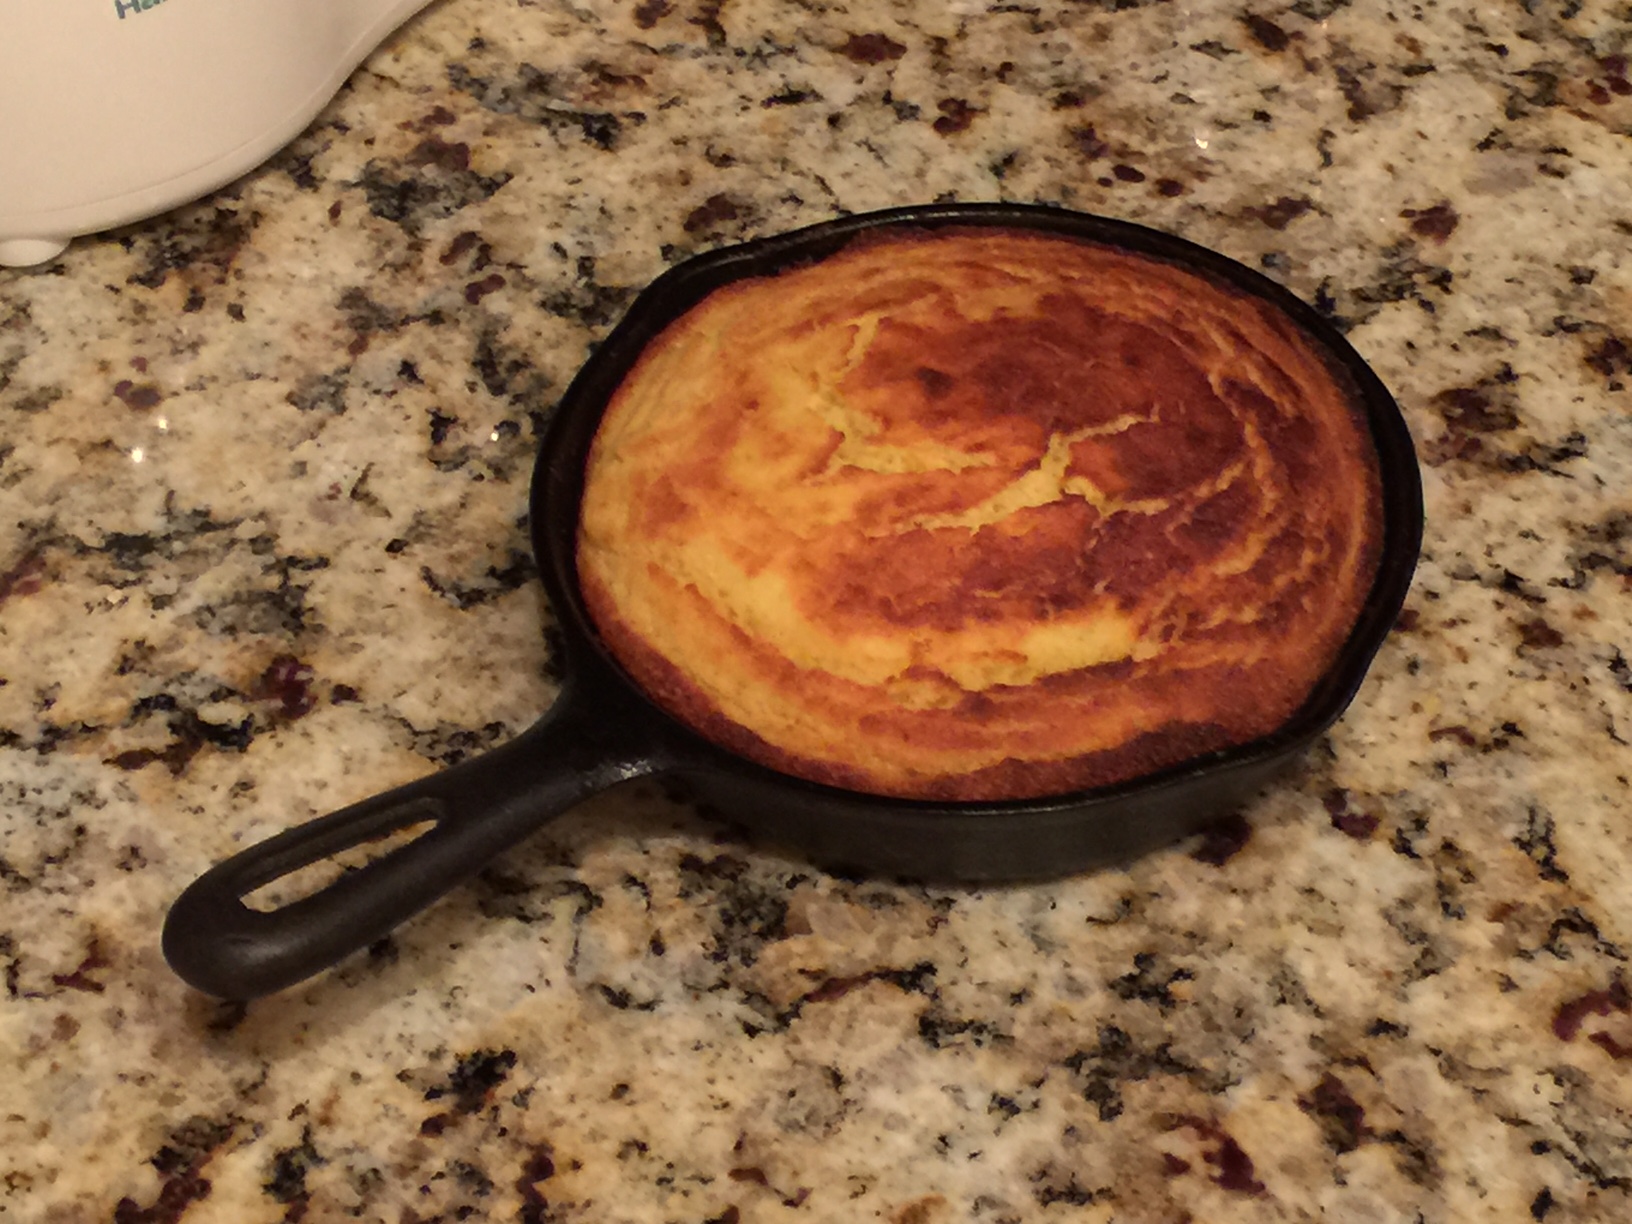
Grandpa’s Cornbread
See THIS LINK FOR LOTS MORE
INGREDIENTS
- 1 can creamed corn
- If you don’t have creamed corn, use 1 can kernel corn and 3 TBL butter and 3 TBL cream.
- If you don’t have cream, use 6 TBL butter.
- 1/4 cup honey
- 1/4 C Gruyere cheese
- 1/4 C Monterey Jack cheese
- 1 small can Hatch Green Chiles
- 1 cup buttermilk
- 1/4 C room temperature butter (in addition to . . . )
- 4 large eggs, slightly beaten
- DRY INGREDIENTS
- 1 cup all-purpose flour
- 1/2 C potato or almond flour
- 1 cup yellow cornmeal (fine ground)
- 2 pieces crisped crumpled bacon
- 1 tablespoon baking powder
- 1/2 teaspoon salt
 OPTIONS
- Combine wet ingredients
- Combine dry ingredients separately
- Substitute in a bit of whole wheat flour, raw oatmeal or flax.
STEP BY STEP
- Grease a 9-inch square pan.
- Preheat oven to 400°F
- In two separate bowls, fold wet and dry ingredients
- Gradually FOLD the milk mixture into the dry ingredients stirring just until dry ingredients are moistened. – DO NOT OVERMIX
- For tender cornbread, do not overmix.
- Pour into HOT prepared cast iron 6 inch pan.
- Put 1 TBL butter into pan until it completely melts
- Fill no more than 3/4 full
- Bake 20 for 25 minutes at 400º or until the cornbread is lightly golden brown.
If you like a moister interior, to for 425º for 16-20 minutes - Let rest 5 minutes for a clean turn-out
A very cool way to cook this, is to preheat your cast iron skillet before pouring in the cornbread batter. Pour in the rendered bacon drippings, and bring it up to heat. At 400°, dump in your cornbread batter and continue with recipe. This will give it a very nice crispy crust.
.903 Grapefruit Pruning Jelly
 Why do they call it Grapefruit? Because it grows in clumps like grapes. CLICK HERE to read more.
Definition: bouquet garni – A bag (frequently in a cheesecloth) that is used for infusions, and removed later as the recipe progresses. CLICK HERE to read more.
For the health of your tree, you should harvest some of the fruit before it completely ripens. Pull off fruit where there are for than 5 grapes in a clump. This are actually not waste. While drinking the juice isn’t BAD for you, it can give you a tummy ache if you drink too much of it. A good solution is to make jelly that you use only a bit of at a time.
 6 C Freshly squeezed grapefruit juice from partially ripe grapefruit
guts and seeds from four Seville oranges in a bouquet garni
– IF you don’t have Seville oranges – 8 oz liquid pectin or 1 pkg sure-jell- 2 tbsp. whole allspice in a bouquet garni
- 6 drops red food color (Optional) or 1 tsp Jello or 1/2 tsp Colorante
- If you want more of a marmalade, use the skins from two of the riper grapefruits.
- – Chop one up in a food processor
- – Cut the other into small (but not minced) pieces
- 4 C sugar – added near the end
- 1/2 C corn syrup
Start a load of jelly jars in the dishwasher – Jars only, not the lids.
– Put the lids in a weak vinegar solution in a bowl. 1/4 vinegar, 1 C water
- Pour juice into a very large pot or canning kettle.
– IMPORTANT NOTE: This should hold AT LEAST four times the amount of liquid, because it is going to foam up… A LOT - Tie allspice in double-thickness square of cheesecloth; place in saucepan.
- Do the same with seeds and guts from four Seville oranges
- Add chopped fruit.
- Bring all but sugar to a boil and then simmer uncovered for an hour, to concentrate juice.
- Remove bouquet garni bags
- Add sugar and corn syrup and stir until dissolved.
- Bring to a full rolling boil until temperature is 220-223 degrees.
– Not 219… there is a chemical reaction that happens at 220 degrees - Pour into freshly washed jelly glasses immediately and seal. Leave 1/4 inch headroom.
Quick Fresh Fruit Cobbler
 Before we begin…
- Use fruit at the peak of ripeness
- Peel and slice fruit
- Measure out ingredients and set aside
- Peaches are in season first part of September
– Blanche to remove skins
Ingredients to feed 6 people
- 4 C fresh fruit – your choice (eg) peaches, berries, apples
- 2 C accent fruit (eg) cherries or raisins
Fruit Filling – Add to above fruit - 1/2 C sugar
- 3 T cornstarch
- juice and zest from one lemon
Biscuit Topping - 1 1/2 C AP flour
- 2 tsp baking powder
- 1/2 tsp salt
- 6 TBL COLD butter
- 1/2 C cold milk
- 1/4 C cold cream
Final Topping - 1/2 C rolled oats or Original Oats
- 1/2 C sliced toasted almonds
- 1 tsp salt
- 1 tsp cinnamon
- 3 TBL melted butter
- 2 TBL maple syrup
Step by Step
- Preheat oven to 400
- Clean, cut, peel and slice all fruits
- Combine sugar, cornstarch, cinnamon
- Combine fruits and toss in lemon, then in sugar-cinnamon mixture
- Place in bottom of greased baking dish
- Sift together biscuit topping dry ingredients, cut in butter, then mix with liquid.
- Add milk and stir briefly. DO NOT overmix. Keep it crumbly.
- Spoon this batter over top of the fruit in lumps – flatten lumps slightly
- Brush with heavy cream
- Sprinkle Final topping across the top
- then sprinkle with Turbinado sugar
- Bake at 375 for 35-50 minutes or until golden brown
- Let rest five minutes before cutting
Oh, one more thing…
-
The cobbler takes its name from the biscuit dough crust on top – it is rough looking or ‘cobbled.’ It originated in the U.S. sometime in the early to mid 19th century.
CLICK HERE for a free sample copies of Grandpa's Cookbooks. © 2016, 2017, 2018.
Grandpa’s French Toast
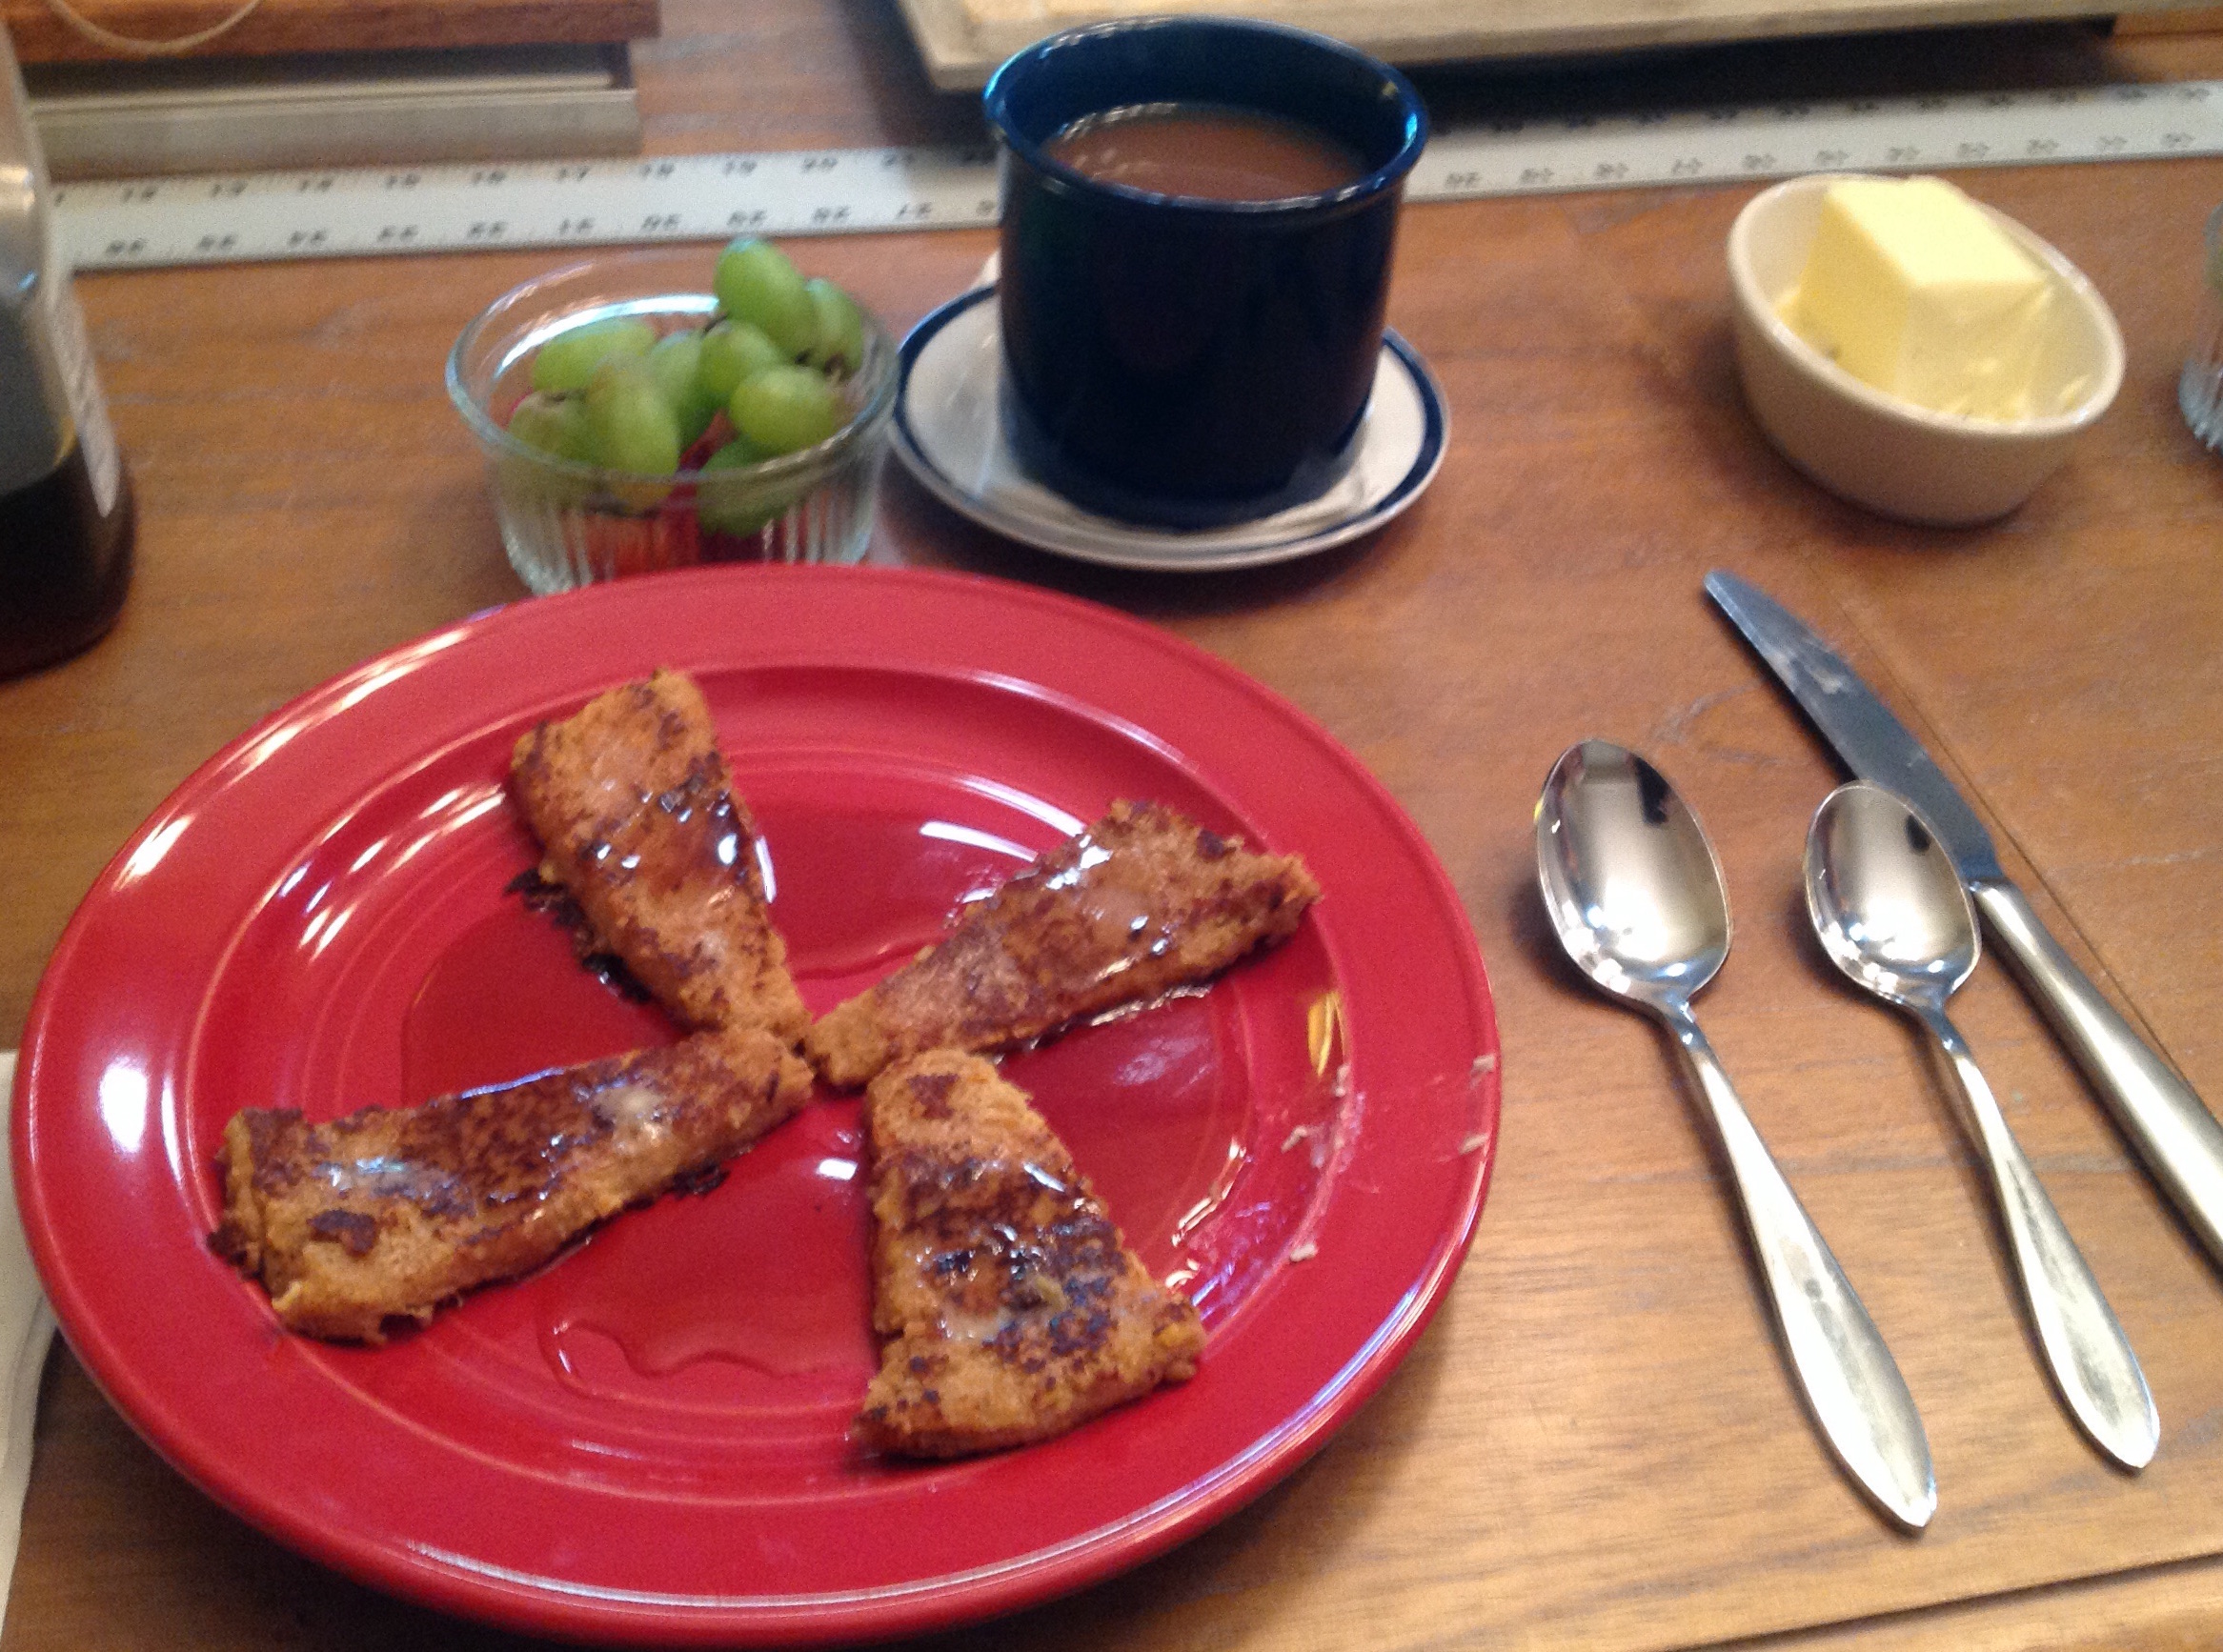 INGREDIENTS – REGULAR
- Bread – Preferably French bread, Brioche, or Challah bread
- 2 eggs
- 1/4 C buttermilk
- 1 TBL Grandpa’s CinnaSugar®
- 1 TBL sugar
INGREDIENTS – SPECIAL
- Above ingredients plus
- 2 TBL cream cheese
- Fruit Jam or Compote
STEP BY STEP
- Combine all of the above except the bread
- Cut your bread. Don’t be boring. Cut your French Toast into triangles, rectangles, or even circles.
- Use the scraps to make a French Toast Casserole.
- SPECIAL: Cut a “pocket” in the bread
- Spread inside with softened cream cheese and compote
- Dip bread and let it soak for a couple of seconds, then put into hot greased pan @ 375º
- Flip a total of 4-5 times so that it heats all the way through and gets a nice crust on it.
- Serve with butter and syrup or heat fruit in the microwave.
VARIATIONS
- Try using a bit of cardamom rather than cinnamon