https://www.youtube.com/@tastedandtested
Category: Non-Cooking Ref Matl
Tips: Airline Tickets
Skiplagged
- Skiplagged.com is a way to get cheap airline tickets.
- Another way is to get a flight from A to G through D
when your destination is actually D. Just get off the
plane. Sometimes A to D is more expensive than A to G.
Money Saving Tips
- No chicken bones? Use a salted bean broth in place of chicken or vegetable stock.
- Book flights on Sunday, with travel on a Thursday or Friday for (in general) the best airline prices
- Also, book your flights through airline hubs for even more savings.
- Many times, the place that sold you your tires will rotate them for free.
- Don’t shop Amazon by default. Check prices on Target, CostCo, Walmart and NewEgg. You can also refer to the ShopSavvy app. Amazon warehouse is also very under-utilized.
- Visit Coupons.com prior to buying big dollar items.
- Use ink-stingy fonts to save on toner. Arial uses the most. Times New Roman, Calibri and Century Gothic use the least ink.
- Likewise, use condensed or light fonts.
- Turn on background monitoring for unused apps
All about Mushrooms
 CLICK PHOTO TO ENLARGE
20 Different Types of Mushrooms
- Button Mushrooms. Button mushrooms are also called baby mushrooms or white mushrooms
- Cremini Mushrooms. (baby Portobello)
- Portobello Mushrooms
- Oyster Mushrooms
- King Oyster Mushrooms
- Chanterelle Mushrooms
- Porcini Mushrooms
- Hedgehog Mushrooms
- Maitake
- Morel Mushrooms
- Shiitake Mushrooms
- Lobster
- Enokitake
- Clamshell
- Champignon
- Honey Agaric
- Green Amanita
- Actarius Indigo
- Russula
- Toadstool
- Milk Mushroom
- Black Truffle
- Brown Cap Boletus
Eating Right and Dieting
Diet Rules
- At least one day every single week
- One vegetarian day
- No alcohol
- Oatmeal for breakfast
- One No-carb day
- Four servings of vegetables
In general . . .
- Slow down
- Don’t have to get my money’s worth
- Meet step goal
- Exercise
- Leave three bites of food on our plate
- Stop when we are full
- Put fork down between bites
- Smaller servings
Food Additives to Avoid
While FDA generally recognizes most additives on this list as ‘safe,’ there are growing concerns about the safety of many common food additives, if consumed in large quantities.
- Aluminum: A preservative in some packaged foods that can cause cancer.
- Azodicarbonamide: Used in bagels and buns. Can cause asthma.
- BHA/BHT: A fat preservative, used in foods to extend shelf life. Linked to cancerous tumor growth.
- Brominated vegetable oil: Keeps flavor oils in soft drinks suspended. Bromate is a poison and can cause organ damage and birth defects. Not required to be listed on food labels.
- Butane: Butilated Anything is bad. Put in chicken nuggets to keep them tasting fresh. A known carcinogen.
- Carrageenan: Stabilizer and thickening agent used in many prepared foods. Can cause ulcers and cancer.
- Camauba wax: Used in chewing gums and to glaze certain foods. Can cause cancer and tumors.
- Chlorine dioxide: Used in bleaching flour. Can cause tumors and hyperactivity in children.
- Disodium inosinate: In snack foods. Contains MSG.
- Disodium guanylate: Also used in snack foods, and contains MSG.
- Enriched flour: Used in many snack foods. A refined starch that is made from toxic ingredients.
- Magnesium sulphate: Used in tofu, and can cause cancer in laboratory animals.
- Monosodium glutamate (MSG): Flavor enhancer that can cause headaches. Linked in animal studies to nerve damage, heart problems and seizures.
- Olestra: Fat-like substance that is unabsorbed by the body. Used in place of natural fats in some snack foods. Can cause digestive problems, and also not healthy for the heart.
- Paraben: Used to stop mold and yeast forming in foods. Can disrupt hormones in the body, and could be linked to breast cancer.
- Polysorbate 60: A thickener that is used in baked goods. Can cause cancer in laboratory animals.
- Potassium bromate: Added to breads to increase volume. Linked to cancer in humans.
- Propyl gallate: Found in meats, popcorn, soup mixes and frozen dinners. Shown to cause cancer in rats. Banned in some countries. Deemed safe by FDA.
- Propylene glycol: Better known as antifreeze. Thickens dairy products and salad dressing. Deemed ‘generally’ safe by FDA.
- Propyl gallate: Added to fat-containing products. Linked to cancer in humans
- Recombinant Bovine Growth Hormone (rBGH): Geneticially-engineered version of natural growth hormone in cows. Boosts milk production in cows. Contains high levels of IGF-1, which is thought cause various types of cancer.
- Refined vegetable oil: Includes soybean oil, corn oil, safflower oil, canola oil, and peanut oil. High in omega-6 fats, which are thought to cause heart disease and cancer.
- Sodium nitrate: Added to processed meats to stop bacterial growth. Linked to cancer in humans. (Worst Offender)
- Sodium benzoate: Used as a preservative in salad dressing and carbonated beverages. A known carcinogen and may cause damage our DNA.
- Sulfites: Used to keep prepared foods fresh. Can cause breathing difficulties in those sensitive to the ingredient.
- Sodium carboxymethyl cellulose: Used as a thickener in salad dressings. Could cause cancer in high quantities.
Artificial Sweeteners to Avoid
Artificial sweeteners are regulated by FDA, just as food additives are, but this does not apply to products ‘generally recognized as safe.
- Aspartame S: An excitotoxin and thought to be a carcinogen. Can cause dizziness, headaches, blurred vision and stomach problems.
- Acesulfame potassium: Used with other artificial sweeteners in diet sodas and ice cream. Linked to lung and breast tumors in rats.
- Agave nectar: Sweetener derived from a cactus. Contains high levels of fructose, which causes insulin resistance, liver disease and inflammation of body tissues.
- Bleached starch: Can be used in many dairy products. Thought to be related to asthma and skin irritations.
- High fructose corn syrup: Sweetener made from corn starch. Made from genetically-modified corn. Causes obesity, diabetes, heart problems, arthritis and insulin resistance.
- Saccharin: Carcinogen found to cause bladder cancer in rats. (Worst Offender)
- Sucralose: Splenda. Can cause swelling of liver and kidneys and a shrinkage of the thymus gland.
- Tert butylhydroquinone: Used to preserve fish products. Could cause stomach tumors at high doses.
Artificial Food Colorings to Avoid
Food colorings are used to give foods a more attractive appearance, but some experts believe they cause serious health problems, including asthma and hyperactivity in children.
- Annatto: Food coloring that can cause hyperactivity in children and asthma.
- Bixin: Food coloring that can cause hyperactivity in children and asthma.
- Blue Dye #1: Used in bakery products, candy and soft drinks. Can damage chromosomes and lead to cancer.
- Blue Dye #2: Used in candy and pet food beverages. Can cause brain tumors
- Brown HT: Used in many packaged foods. Can cause hyperactivity in children, asthma and cancer.
- Caramel coloring: In soft drinks, sauces, pastries and breads. When made with ammonia, it can cause cancer in mice. Food companies not required to disclose if this ingredient is made with ammonia.
- Citrus Red Dye #1: Sprayed on oranges to make them look ripe. Can damage chromosomes and lead to cancer.
- Citrus Red Dye #2: Used to color oranges. Can cause cancer if you eat the peel.
- Green Dye #3: Used in candy and beverages. May cause bladder tumors.
- Norbixin: Food coloring that can cause hyperactivity in children and asthma.
- Orange B: A food dye that is used in hot dog and sausage casings. High doses are bad for the liver and bile duct.
- Red Dye #40: Found in many foods to alter color. All modern food dyes are derived from petroleum. A carcinogen that is linked to cancer in some studies. Also can cause hyperactivity in children. Banned in some European countries. (Worst Offender)
- Red Dye #2: A food coloring that may cause both asthma and cancer.
- Red Dye #3: A carcinogen. that is added to cherry pie filling, ice cream and baked goods. May cause nerve damage and thyroid cancer.
- Yellow Dye #5: Used in desserts, candy and baked goods.Thought to cause kidney tumors, according to some studies.
- Yellow Dye #6: A carcinogen used in sausage, beverages and baked goods. Thought to cause kidney tumors, according to some studies.
Additives That are OK to Eat
- Ascorbic Acid P
- Ascrobyl Palmitate P
- Cellulose – Shredded cheese T
- Corn syrup (in moderation) S
- Cyclamate S
- Guar Gum M
- Inulin T
- Lecithin T
- Natamycin P
- Palmitic acid P
- Phenylalanine F
- Potassium sorbate
- Riboflavin – digestion
- Xantham Gum – T – small doses
- Yeast Extract – F – small doses
B – Increases Bulk without affecting flavor
C – Coloring
F – Flavor enhancer
M – Keeps food moist
P – Preservative
S – Sweetener
T – Texture / thickener / keeps moist
Conclusion
- Avoid fast foods
- Avoid soda and sugary drinks & juice
- Eat more fruits, vegetables and grains
- Eat hormone free meat
- Drink hormone free milk
- Know what you’re eating!
Growing Vidalia Onions
Vidalia onions are from Georgia where the soil has a low sulfur content. If you plant a Vidalia anywhere else, it will eventually morph into a regular onion – which is caused cause the higher sulfur content will turn to a higher sulfuric acid content.
Vidalias are 12.5% sugar, whereas standard onions are about 7% sugar.
The F1 Granix Hybrid was created from a Vidalia. (READ THIS)
Try a Mayan Sweet or Peruvian Gold. Alternates are also Walla Walla, Maui Sweet and Texas 1015 onions.
Try planting this in soil amended to a low sulfur content (READ THIS)
Tips: Tires – What you need to know
OK, so this is not a recipe, but like I said… this site is mainly for my use.
You should replace your tires at least every six years whether they are worn or not. They degrade. Even if there’s plenty of tread left, tires should be replaced if they’re too old. Over time, the rubber will dry and crack, possibly leading to a blowout or flat tire.
You can tell the manufacture date of your tire by looking on the side. There will be DOT followed by four numbers (eg) DOT and then eventually 1418. This means they were manufactured during the 14th week of 2018 which is about mid April 2018.
The Science of Ketchup
… and other liquids.
Shear Thinning Liquids
- When you try to pour ketchup, sometimes it just won’t start until you tap the bottle on the side of the bottom.
- This is because when force is applied, the liquid becomes thinner, and flows more easily.
- Other similar liquids are mayonnaise, oyster sauce, mustard, hoisin.
- GEEK INFORMATION:
Summary: Warm ketchup flows more easily than cold ketchup.Non-Newtonian viscous shear thinning in ionic liquids We have studied the shear thinning of several protic and aprotic ionic liquids (ILs) by stress-controlled rheometry, which indicated that some ILs exist as liquid phase aggregates that can be disrupted or broken at high shear rates. Increasing the temperature shifted the onset of shear thinning to higher frequency and indicated that a smaller or less cohesive aggregate was formed. However, upon application of a sufficiently high temperature, the sample resumed the characteristics of a Newtonian fluid. (HOEt)2NH.AcOH was selected as an example of a protic ionic liquid (PIL) to probe concentration effects on liquid ordering. At water concentrations lower than one equivalent per PIL component pair, the viscosity rapidly decreased, although the onset frequency of shear thinning remained constant. The shear thinning and low viscosity regime remained until approximately 3–4 equivalents of water were added and the PIL behaved as a Newtonian fluid. The effect of water on the shear thinning of (HOEt)2NH.AcOH indicated that small dilution volumes did not alter the aggregate structure, but instead reduced the number of aggregates. Both the temperature and additive water strongly suggested that the IL aggregates were due to intermolecular hydrogen bond networks.
Shear Thickening Liquids
- When you mix water and corn starch (as a thickener in gravy for example) it flows easily.
- If you had a large amount and smacked it with your hand, it would feel quite solid.
- This is because when force is applied, the liquid becomes thicker, and flows less easily.
- Other similar liquids are
- GEEK INFORMATION:
Shear induced self-thickening in chitosan-grafted polyacrylamide aqueous solution A remarkable shear induced self-thickening of chitosan-graft-polyacrylamide aqueous solution was observed. After the polyelectrolyte solution presenting shear thinning was subjected to a high-rate shear for several minutes, their viscosities recovered and then a much higher zero shear viscosity than the original one appeared. Obviously, the self-thickening differs from conventional shear thickening or viscous recovery, as reported previously. The mechanism of self-thickening was investigated by rheological methods together with TEM, 1H NMR and DLS, etc. It was found that some aggregates exist in original chitosan-graft-polyacrylamide aqueous solution and the scale of such aggregations would become larger within several minutes after a strong shear. The thickening was proven to be the result of an enhanced scale of GPAM aggregation in aqueous solution, and the mechanism of aggregation was proven to be intermolecular hydrogen bonding effects. Besides, the shear-induced self-thickening appears to be facile, maintainable and easily controllable by changing the shear conditions.
Rheology of Liquid Foods
Liquid foods are classified and their properties discussed under various types of rheological behavior: Newtonian, pseudoplastic, shear thickening, thixotropic, and viscoelastic. Rheological data on selected liquid foods are summarized in either tabular form or in the form of equations. Wherever possible the influence of temperature, constituents, and structure on the rheological behavior is detailed. Because many foods are suspensions, the measurement of flow properties of suspensions and factors influencing their rheological behavior are also covered. Finally, the relationship between the flow behavior and the sensory evaluation of mouth feel and viscosity is discussed.
Planting Plants from Food
You don’t always have to plant from seed.
Lettuce
- Carefully cut about 2 inches above the roots, removing the outside leaves, but leaving the core.
- Put into a container of water, and refresh the water every two days.
- It will be ready for harvest in 14 days.
Green Onion
- Cut 2″ above the roots.
- Put the roots into a glass of water, and refresh the water every two days.
- Harvest in about 7 days.
- Don’t use more than 1/3 of the plant at any time.
Basil
- Cut the longest/highest leaves
- Trim off excess leaves and put into water.
- Refresh the water every two days.
- Roots will appear in about two weeks, and you can put them into soil.
Onion
- Cut off the roots and put them pieces root-down into soil.
- Cover with 1/2 to 1 inch of soil.
- You won’t be able to see them grow, so mark your calendar: 90 days to harvest.
Celery
- Cut off about 4 inches of the stem.
- Put into water and move to soil in 8-10 days.
Garlic Chives
- Cut off roots and put into water.
- You can start using the greens in about a week.
- Don’t use more than 1/3 of the plant at any time.
Mushrooms
- Remove mushroom cap for use.
- Plant stalk with the cap side barely above ground.
Potatoes
- Plant the eyes under one inch of dirt, a foot apart.
- Allow the vines to trail.
- Harvest in 90 days.
Moringa Tree Information
Wiki Information
How to Grow Your Own Moringa Tree
Moringa, the famous “miracle tree,” has many nutritional and medicinal properties and is one of the most efficient and influential plants out there. Even though it grows best in tropical and sub-tropical regions, people in many other climates can also enjoy the benefits of growing moringa in their own home with a few simple tricks.
Moringa trees can be grown from either moringa seeds or branch cuttings from a moringa tree. So unless you have a nearby friend with a healthy, well-established moringa tree who wouldn’t be opposed to lending you a branch, then seeds are the way to go. Moringa oleifera is a common variety of moringa and is a great choice for growing and consuming.
In the U.S., the only places moringa can grow outside year-round are southern areas of Florida, Arizona, California, and Texas. Depending on where you live, you may decide to grow moringa trees outside in the ground, in a pot to be kept indoors during the winter months and then to be moved outside during the summer, or in a pot permanently. Growing moringa trees in greenhouses is also an option, and is especially recommended for climates that regularly get below freezing temperatures. The optimal temperature range for moringa trees is 77-95 ˚F, but it can also survive in extreme temperatures up to 118 ˚F in the shade and down to a light frost. Altitudes lower than 1,970 ft above sea level are best, but moringa trees have been able to grow in the tropics up to 3940 ft above sea level. No matter where you decide to grow your tree, try to place it in a sunny location and give it plenty of water.
To plant moringa seeds in the ground, follow these instructions:
There is no dormancy period for moringa seeds, so you can plant mature seeds at any time.
– Find a spot with soil that is light and sandy, not waterlogged or clay-like.
– Dig a few 1 ft. x 1 ft. holes 1 ft. deep, and “back-fill” each hole a bit with soil.
– If you must plant in heavy soil, dig a hole up to three times as big as described in Step 2 and use a 1/3-sand, 2/3-soil mixture to back fill.
– Plant 3-5 seeds in each 1 ft. hole, spaced 2 inches apart.
– Be careful not to plant seeds more than ½ an inch deep.
To plant moringa seeds in a pot, follow these instructions:
Moringa trees can grow up to 50 feet tall, which is less than ideal for an indoor environment. These instructions will teach you how to grow a “dwarf” moringa tree, which is still the same plant that has just been pruned to grow less.
– Fill a pot that is 12-18 inches in diameter with loose soil.
– One pot can usually hold about five dwarf moringa trees, but it is a good idea to initially plant 7 or 8 in case a few seeds don’t sprout.
– Space out ¾- to 1-inch deep holes in the soil.
– Put a seed in each hole and lightly cover them with some soil.
– Once the plants have at least two layers of branches, it is time to start pruning. Cut back the tops of the seedlings and cut the branches back to half their length. When the tree is young, check the tree for new leaves at least once a week – new leaves usually appear on the tops and in a sort of “junction” or fork in branches – and cut these back as well.
– Pruning the tree will keep it small, and will also produce a LOT of leaves, which is all the better for you to use in your food!
If you do have the option to start your own tree from a branch cutting, follow these instructions:
– Use hard wood instead of green wood for cuttings, which should be at least one inch in diameter and at least six feet long. The best branches for cuttings are the ones that need to be cut off anyway after the tree has finished producing fruit for the year and needs to be pruned to promote new growth.
– Dig a 3 ft x 3 ft hole that is 3 ft deep and plant the cutting inside.
– Fill the hole with a sand and soil mixture. Pack soil firmly around the base of the plant.
Here are some general tips for cultivating moringa:
– Even though moringa can grow in a variety of conditions and in poor soil, using compost or manure mixed into your soil will help the tree grow.
– Be generous with watering, but don’t water too much. The soil should not be dry and cracked, but the seeds should not be drowning either. Seedlings also are a bit fragile when they have recently sprouted, so water lightly during this period. When watering a new plant that was started from a branch cutting, try to avoid watering the stem of the plant. Moringa can survive in very dry climates with little water, but regular watering during the first two months of planting seeds helps them develop properly. After the first two months, you can cut water back significantly and only water the tree when it looks like it needs water.
– All moringa trees need regular pruning to promote leaf growth, curb branching, and prevent the tree from being taller than you want it to be. If a moringa tree is left alone to grow, it will become tall with many branches and few leaves, and will only flower near the top, which is very unhelpful. A good height to aim for is 8-12 feet, and if you continue to prune the tree will keep growing lots of leaves and growing branches from the trunk instead of out the top of the tree. To prune, simply cut branches back to half their length and trim the top of the tree.
– The branch parts that you’ve removed can be chopped up into 4- to 10-inch bits and scattered underneath the moringa tree to serve as a natural mulch.
– Most moringa seeds sprout within two weeks of being planted.
– Moringa trees do not usually need fertilizer of any kind, but if yours needs a little bit of extra help, phosphorus will aid root development and nitrogen will help with leaf growth. Ammonium sulfate can also help your tree grow.
– Moringa resists a lot of pests, but termites still might give you trouble. If this is the case, use mulch with castor oil plant leaves, mahogany chips, tephrosia leaves, or Persian lilac leaves.
– If you live in a very wet climate and are growing your tree outside, Diplodia root rot can occur. To avoid this, try planting your tree on top of a small mound so that excess water can run off away from the plant.
– To harvest the pods for eating, pick them when they are about ½ an inch in diameter and come off easily.
– Older leaves are better for making moringa powder.
Resources:
- https://www.treesforlife.org/our-work/our-initiatives/moringa/faq/growing-moringa/will-the-moringa-tree-grow-in-my-area
- http://www.ilovemoringa.com/How-To-Grow-Moringa-In-Cold-Climates.html
- http://www.moringamatters.com/how-to-grow-a-dwarf-Moringa-tree.html
- https://www.treesforlife.org/our-work/our-initiatives/moringa/how-to-grow
- http://echonet.org/moringa/
- http://www.moringamatters.com/how-to-prune-moringa-trees.html
- http://miracletrees.org/growing_moringa.html
Moringa – Uses of the Plant
These seeds are ORGANIC which means that they are not chemically treated in any way.
Planting from Seeds
- First, don’t store Moringa seeds in a freezer or fridge. They are heat-loving trees, and this will destroy the ability of the seeds to germinate. Moringa seeds sprout in five to ten days.
- Store Moringa seeds in a dry, warm area in a sealed container. The perfect temperature is between 60 and 80 °F. Based on the quality of the seeds, they should last for 2-3 years.
- Moringa seeds should be dark colored and hard. If they are soft, they are old. If they’re a cream shade, they are old.
- If you planted your Moringa trees a year back, and they appear dead, they most likely are just dormant, unless they decayed with too much water or froze. Use your fingers to press on the taproot. If it’s mushy, it froze or decayed. If it’s hard, it most likely will come back up.
- Plant seeds in a sunny place. For seeds, place approximately 1/4 inch into the soil and tamp own gently.
- From our experience, Moringa’s do not like peat moss; they prefer a sand and soil mix.
- Plant seed with the most pointed end down. Plant ten seeds 2-3 inches apart. Allow to germinate and grow for a month, then select the single best plant to remain and remove the rest. The others can be carefully transplanted to a pot, where they may (or may not) continue to grow.
- Use loose soil or mixsoil with sand so that the area where the roots are growing has plenty of good drainage for the water to flow to and the away from the roots.
- Moringa Tree roots do not like to sit in water – it causes root rot.
- Watering the Moringa Tree
- daily until the root germinates
- every other day for the first two months
- after that time period, rain water is usually sufficient
- In dry climates adjust waterings to three, four and eventually every five days, adjusting every two weeks. During times that temperature exceeds 100º water every second or third day
- If the leaves (usually near bottom or middle) start to curl, then water manually.
- If the leaves start to turn yellow, the plant is getting too much water.
- Frequent fertilization isn’t necessary for this type of tree. It is well suited to hot or trropical climates and do very well in a natural, somewhat unattended growing method. Fertilize initially, and then every few weeks during the first year, then every few months after that.
Consuming Moringa Seeds
- Only consume a maximum of two seeds per time. Actually, if you are taking for the first time, begin with one per day for the first week.
- Don’t eat them on an empty stomach.
- Don’t eat if you are pregnant, or trying to get pregnant.
- Planting Moringa Seeds and edible Moringa Seeds may both be eaten BUT…
- Like organic produce you get from the grocery store or your local farmer’s market, there could be occasional pests in the seeds, so we recommend opening the seed before eating.
- Start with no more than 3 seeds.
- Slowly work your way up to no more than 10 seeds per day.
- The Planting Seeds are USDA approved and are edible, but are not FDA approved.
- It should be noted that we cannot see inside the seeds to guarantee that there is seed meat, although we have carefully selected the seeds in hopes that the meat is in each seed.
- You can make tea out of the pods, but eat only the meat of the seed.
- Eating the seed with the pod may increase your weight loss. Still, don’t eat more than two or there will be explosive consequences. HOWEVER, if you do this, make sure you wash (without any cleansing agent) and rinse the pot well in salt water prior to consuming.
Preparing Moringa to Eat
- There are four safe to eat parts of the Moringa tree, its roots, leaves, pods, and seeds. Some sites say not to eat the roots, however the pods remaining from eating the seeds, can also be used to brew tea.
- While the most common way to eat moringa is to use the plant’s leaves in salads or to powder the leaves for use in supplements or shakes, there are other parts of the plant you can eat as well. People also regularly eat the buds, flowers and pods that grow from moringa plants. Another common practice is to eat moringa seeds, both by themselves and mixed in with other food.
- Moringa seeds do not have the kind of taste you would expect from most types of seeds or nuts. However, they are most certainly edible! It is generally recommended that you eat them in small doses, as they have a “cleansing” effect on your digestive system. But when eaten in appropriate doses, they are extremely healthy and beneficial to your body.
- One of the ways you can eat moringa seeds is to pop them like popcorn. Simply fry them with some cooking oil and watch them blow up. You can eat a few and be fine, but you will likely need to slowly adjust your body to eating the seeds in this way. Again, you’ll want to be careful about the “cleansing” effects the seeds can produce.
- Moringa seeds can also be added to other foods, like stews, casseroles, soups and sauces, to give those foods an extra crunchy texture. Drying the seeds is another option, and allows you to add them into bread or muffin mixes (in the same way that people often do with poppy seeds) or to corn bread mixes.
- Just as your digestive system may need an adjustment period to get used to eating moringa seeds, so may your taste buds. Moringa seeds taste sweet when you first put them into your mouth, but soon create a bitter taste that you don’t often find in seeds or nuts. Once you have adjusted to the unique flavor, they offer you an extremely concentrated dose of minerals and vitamins.
- The best way to eat Moringa seeds and to enjoy all their health benefits is to eat them like you would eat other nuts. It is possible to consume the seeds together with dried fruits and nuts or include them in your breakfast. A proven way you can consume Moringa seeds is to pop them just like popcorn. Just fry them in a small quantity of cooking oil and watch them pop.
- You can also cook fresh Moringa as you would with peas and use the seeds as a healthy and delicious accompaniment to any food.
- Moringa seeds don’t have the sort of taste you would expect from many kinds of nuts or seeds. But they are definitely fit for human consumption.
- Moringa seeds can be boiled, baked, either shelled or in the pod, similar to green beans or peas.
What are Moringa seeds?
The Moringa plant contains thin green pods, which hang down from its branches. It’s from the pods that the seeds are removed.
Raw and fresh Moringa seeds are very tender; however, once they get dried, they get hard and begin to look like small beans. The seeds have unique wing-like structures and are grayish-white in color.
During the months of reproduction, the Moringa tree offers a multitude of seed pods, leading to plenty annually. In spite of the Moringa seeds only growing annually, it is worth the wait thanks to their significantly nutritional benefits. The seeds are viable for between one and two years, lending themselves well to an annual harvest.
Dried Moringa Oleifera Leaves
- To harvest leaves, prune tree and hang trimmed branches from a string and allow to dry naturally. Once dried, remove the leaves and crust to powder and bits.
- The end product will be natually dried Moringa Leaves and a few small stems.
- Recommended Dosage is 5-10 grams per day, in a dried form
- Start with 5 and increase slowly if desired.
- They will keep for over a year, allowing you to harves every major pruning.
- No known harmful side effects have been noted from Moringa ingestion
- Dried Moringa Leaves can be used for
- Loose leaf tea – hot or cold
- Spices for cooking – great on chicken, omelets and soups
- The benefits of Moringa are many. See graphic at the bottom of this page.
- Vitamins per gram
- 3 x the potassium in bananas
- 7x the Vitamin C as in oranges
- 25x the iron contained in spinach
- 4x the calcium contained in milk
- 4x the Vitamin A contained in carrots
- 4x more protein than eggs
- Primary distribution
- Paisley Farm and Crafts
- Lawrenceburg, TN
- Phone: 386-469-7917
- www.PaisleyFC.com
- Secondary Distribution
- NatureVibe Botanicals
- 710 Brunswick Ave
- Unit B
- Rahway, NJ 07065
- www.NatureVibe.com
Harvesting Mature Seeds
- Harvested seeds will have a 75-85% germination rate.
- Seeds are viable for up to two years after harvest.
- After two years, germination rate drops to about 20%
- After four years, seeds will probably not germinate.
Transplanting


Play Dough
Title of Recipe: Play Dough
Ingredients:
2 cups flour
1 cup salt
1 cup water
Instructions:
Mix-knead 7-10 minutes. Put in plastic bag. Shape- air dry or bake at 325° for ½ hour for ¼” thickness.
Doggie Dental Treats
Ingredients
- 2 C oatmeal (pulverized)
- 2 C whole wheat flour
- 1 tablespoon of Swanson Premium Activated Charcoal
- 2 ripe bananas
- 1/3 C peanut butter
- 4 tablespoons vegetable oil
- 1 egg
- 1/2 cup packed fresh mint
- 1/2 cup packed fresh Italian parsley
- 1 cup chicken broth or water
- Swanson GreenFoods Liquid Chlorophyll
Step by Step
- Line baking sheet with parchment (I used a baking mat).
- Combine charcoal with flour and set aside.
You’ll find brown rice flour in a lot of pet treat and pet food recipes.
Many dogs are sensitive to wheat/wheat gluten and brown rice flour is easier for them to digest. Activated charcoal is carbon that has been treated with oxygen and is able to absorb a wide range of impurities. This can be ordered in bulk on Amazon. - Put parsley, mint, oil and 1/4 cup of broth or water into food processor.
- Process until very chopped, like pesto, then add chlorophyll.
Chlorophyll helps freshen breath both by eliminating odors in the mouth and by promoting a healthy digestive tract—poor digestion being a primary reason for bad breath. The recipe I followed said 3-4 droppers-full, but since my bottle didn’t have a dropper, I guessed and used a generous teaspoon.
Pulse a few times to mix. - Add this to the flour/charcoal and mix well.
- Beat egg lightly and mix in.
- Knead, adding remainder of water or broth until you have a very sticky (yet grainy) dough ball.
- Dust the work surface with more rice flour—makes your life easier and gives the treats extra crunch.
- The recipe said to knead dough until an even green color.
- My dough was decidedly NOT green so I just kneaded until everything seemed evenly combined.
- Roll out to about 1/4 inch thick, or whatever thickness you prefer, adding flour as needed.
- Cut out with your favorite shapes.
- Bake for 45 minutes at 300º
- Flip and bake for 30 more minutes, then turn oven off. Leave door closed
- Let rest another hour, then remove from oven
- Cool and store in an air-tight container in the fridge.
Pet Treats you should Never Give Your Pet
The following treats can cause cancer in dogs.
- Milkbone Dog Biscuits – Contain BHA as a preservative – a known carcinogen
- Pup-peroni – BHA and propylene glycol, a major ingredient in anti-freeze
- Temptations – Actually can contain dead dogs and cats
- Beggin Strips – Contains food dyes not allowed in food for human consumption
- Snausages – Banned by FDA for use in cat treats – Still used in dog treats
For good information, visit the Facebook Page of Dr Karen Becker
BHA is identified as a CANCER-CAUSING agent which can be found in these following pet treats:
Posted by Dr. Karen Becker on Monday, June 26, 2017
Grandpa’s Animals – COLLECTION
Cancer-Causing Pet Treats
– Five mainstream treats that are actually bad for your dog
Hobo Dog Biscuits
– Use up your refrigerator scraps to make healthy treats
Ivermectin – Heart Gaard
(access restricted)
– Jury is still out on the efficacy of this recipe
Veggie Dog Biscuits
– A healthier option
Meat Stock
– If making this for humans, use salt. If making for your dog, OMIT SALT.
Doggie Dental Treats
– A healthy and digestible dental treat
Tips: Non-Stick Skillets
 This includes teflon, ceramic, and all surfaces that claim to be non-stick.
Please also review my post: Care of your Cast Iron Skillets
Teflon Tips
Teflon, Ceramic and other non-stick finishes need to be taken care of. Here are some tips that you may find useful.
- Wash and rub a little canola oil into it before first use.
- Don’t heat the pan empty. At least put a little oil into the pan.
- Don’t use cooking spray. There is a propellant that will build up and destroy your pan. If you must, get a spritzer bottle and put canola into it.
- Don’t let the temperature EVER exceed 450. Ideally, I never even exceed 400º This Thermapen is one of the best investments you could make. You will use it nearly every single day.
- Don’t let food dry on the surface of your pan. When the temperature has dropped to 250º (or below) wipe it off with a wash cloth and hot water. I usually don’t even like to use soap on mine.
- If you can’t clean it immediately, at least fill it with water to minimize the chemical effects of the remaining cooking oil residue.
- If you do use soap on your pan, occasionally wipe in a little canola oil (See Tip #1)
- Never ever EVER use abrasive cleansers or pads on your pan.
- Never put your teflon or ceramics into the dishwasher. The hot water is OK, but the drying cycle will kill your pan.
- For stubborn stains, use a mixture of baking soda and water. mix and apply the paste. Leave for an hour, then wipe off. Repeat if needed.
- If your pan has a wooden handle, season it VERY occasionally by wiping with canola oil
- Season a hot pan (250º) occasionally with a paper towel and olive oil (See Tip #1)
- Never use metal cookware (spatula, whisk, spoon, etc) when cooking with your non-stick pan
THE PENNY TRICK – If you are boiling water, put a penny in the bottom of your pan. If it boils dry (which will ruin your pan) the penny will start to rattle because of the boiling water beneath the penny. The rattling will tell you your pan is nearly empty (usually) before your pot is destroyed.
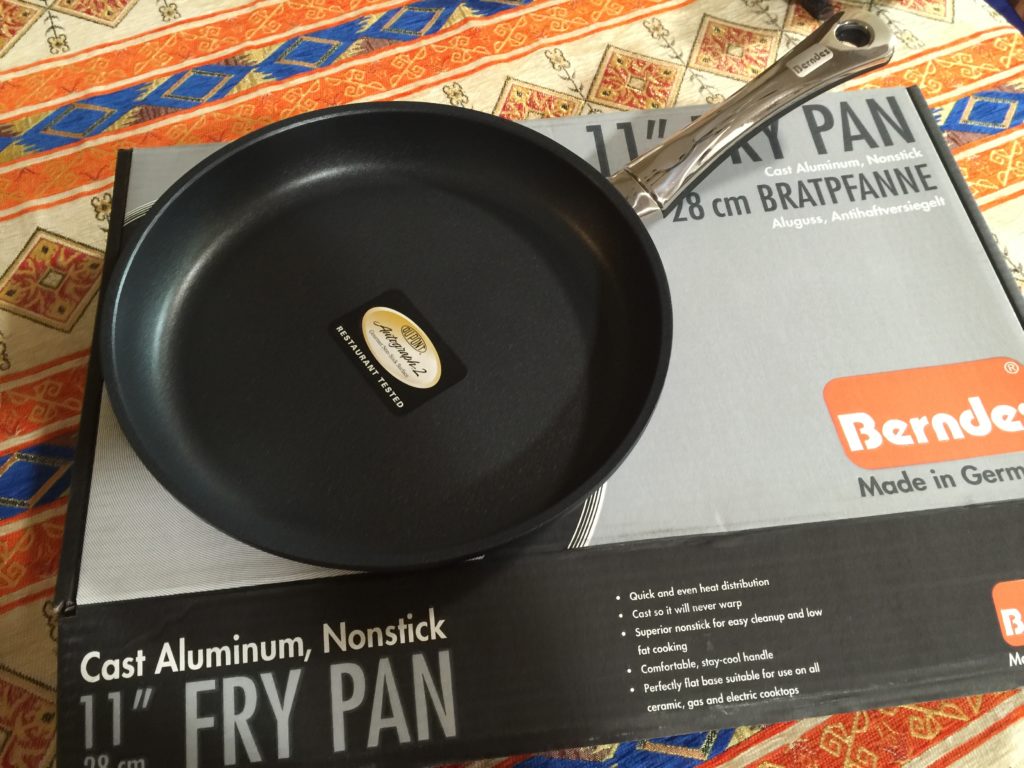
Berndes 11 inch Skillet
A SAD STORY WITH A GREAT OUTCOME – – – – –
This was a GREAT skillet, but recently (7 years after purchase) it has become unusable. We will find out if Berndes will stand behind their Lifetime Warranty. I will post their reply below. I approached them as a consumer, so they did not know that this entire situation was echoed here at Grandpa Cooks.
The First Note from Grandpa
I am the main cook in our family. I got my Berndes 11″ skillet about 6-7 years ago. I loved it. I treated it well, never used abrasives, never exceeded 450º and oiled it before each use. The non-stick finish has eroded and the skillet is no longer usable. I was going to throw it away, but see that it had a lifetime warranty. How do I take advantage of that warranty?
The First Surprise
I must say that I am truly impressed. Not only did I get a reply, but it came within about 48 hours of my original message. More to come as I have it.
The Reply from Berndes
Robert,
Hello! We are the US distributor for Berndes Cookware. We received your email from the headquarters in Germany. We see that you have a pan that is showing signs of wear. We are happy to inform you that we will go ahead and send you a replacement. If you are able please send a photo of the whole pan and measure the pan from outer rim to rim in inches. Is this a fry pan or a different pan? Please let us know this information so we can see if we have that same pan available. Also please provide your shipping address. We will await your reply.
Thanks and have a good day!
We Really Care!
Amanda Stemen
Receptionist / Client Support
Range Kleen Mfg. Inc
4240 East Rd.
Lima, Ohio USA 45807
My Reply – Berndes wanted More Information
Amanda,
What a pleasure to hear from another person from Ohio. I moved to Arizona from M arion, Ohio nearly 30 years ago. I was also pleased to get a reply so promptly.
Attached is a measured top photo. It is an 11 inch skillet. My mailing address is … (Address removed for my privacy)
Sincerest thanks,
Robert Andrews
 The Result: Berndes Just Earned a Lifelong Customer
So Maggie (my dog) started going crazy. She does that whenever a delivery person comes to the door. I had ordered two cookbooks, but nothing that I was expecting in a large box, but this was a VERY large box. I opened the box and there it was… my brand new Berndes pan – exactly like the other one, except new!
For those of you who have gone to the expense of buying quality cookware (especially non-stick) please review the rules about how to treat your precious skillets. If you are looking to invest in something with which you will be happy, give Berndes a try. Here is a link to Amazon for a quick and easy review of everything they have to offer. Thanks Berndes for a job VERY well done.
Robert Andrews
Grandpa Cooks
SEE MY POST Care of your Non-Stick Skillets
Our Garden – July 2016

This has changed a bit, so I will make notes here. Starting from the COLOR pot to the left and working my way around.
- I didn’t put any peppers in the pot with the color spots in them.
- The Basil has been replaced with Hatch Chilies
- Nothing additional in the Fig Tree basin
- Mosquito bush (citronella) is also unchanged.
- We are waiting for August to plant Eggplant starts. Meanwhile there are sunflowers there.
- The cilantro will be replaced with an Acorn Squash start. Meanwhile there are sunflowers there.
- The Armenian Cuke will be replaced with a Canary Melon, if we can find one. Meanwhile there are sunflowers there.
- Wandering Jew is just as it remains
- The next three pots will be Scallion starts, Cilantro start and a Daikon radish start.
- The pot with the corn will now be some type of cucumber, but meanwhile has sunflowers there.
- Of the two pots out front, the basil has three plants in it, and the “herbs” has a Chiltipen ( Americans erroneously call this a Chili Tepin )
Tips: Gardening
- Store your seed packets in a photo album for easy review and retrieval.
- Bake crushed egg shells at 350º for 20 minute to kill bacteria, then spread across your soil to slice the underbelly of snails.
- For those that you like, put a canning jar lid full of beer. They will drink themselves to death.
- Use Acrylic or Oil paints to create informal arts plant ID rocks
- Not the artsy type, use plastic forks and a Sharpie to create plant markers
- Coffee grounds in your soil helps repel pests AND fertilizes your garden.
- Soak your seeds for 24 hours to give them a germination jump start
- Put colored bottles around your garden for a bit of whimsey
- Use a shipping palate to create a vertical garden
- A rain gutter makes a garden trough along the top of your fence. Use spaghetti tubing for irrigation
- A gauze strip will wick water into your house plants while you are on an extended vacation
- Use a toilet paper roll as a seedling pot
- Create a water bottle sprinkler using duct tape and your garden hose
- Use cinnamon as a rooting compound to repel fungus.
Senior Discounts
Since many senior discounts are not advertised to the public, our advice to men and women over 55 is to ALWAYS ask a sales associate if that store provides a senior discount. That way, you can be sure to get the most bang for you buck. Here is a list that is good to put into your car for quick reference.
113 Stores with Senior Discounts
Restaurants
- Applebee’s: 15% off with Golden Apple Card (60+)
- Arby’s: 10% off (55+)
- Ben & Jerry’s: 10% off (60+)
- Bennigan’s: discount varies by location
- Bob’s Big Boy: discount varies by location (60+)
- Boston Market: 10% off (65+)
- Burger King: 10% off (60+)
- Captain D’s Seafood: discount varies on location (62+)
- Chick-Fil-A: 10% off or free small drink or coffee (55+)
- Chili’s: 10% off (55+)
- CiCi’s Pizza: 10% off (60+)
- Culver’s: 10% off (60+)
- Denny’s: 10% off, 20% off for AARP members (55+)
- Dunkin’ Donuts: 10% off or free coffee (55+)
- Einstein’s Bagels: 10% off baker’s dozen of bagels (60+)
- Fuddrucker’s: 10% off any senior platter (55+)
- Gatti’s Pizza: 10% off (60+)
- Golden Corral: 10% off (60+)
- Hardee’s: $0.33 beverages everyday (65+)
- IHOP: 10% off (55+)
- Jack in the Box: up to 20% off (55+)
- KFC: free small drink with any meal (55+)
- Krispy Kreme: 10% off (50+)
- Long John Silver’s: various discounts at participating locations (55+)
- McDonald’s: discounts on coffee everyday (55+)
- Mrs. Fields: 10% off at participating locations (60+)
- Shoney’s: 10% off
- Sonic: 10% off or free beverage (60+)
- Steak ‘n Shake: 10% off every Monday & Tuesday (50+)
- Subway: 10% off (60+)
- Sweet Tomatoes 10% off (62+)
- Taco Bell: 5% off; free beverages for seniors (65+)
- TCBY: 10% off (55+)
- Tea Room Cafe: 10% off (50+)
- Village Inn: 10% off (60+)
- Waffle House: 10% off every Monday (60+)
- Wendy’s: 10% off (55+)
- White Castle: 10% off (62+)
Retail and Apparel
- Banana Republic: 10% off (50+)
- Bealls: 20% off first Tuesday of each month (50+)
- Belk’s: 15% off first Tuesday of every month (55+)
- Big Lots: 10% off
- Bon-Ton Department Stores: 15% off on senior discount days (55+)
- C.J. Banks: 10% off every Wednesday (60+)
- Clarks: 10% off (62+)
- Dress Barn: 10% off (55+)
- Goodwill: 10% off one day a week (date varies by location)
- Hallmark: 10% off one day a week (date varies by location)
- Kmart: 20% off (50+)
- Kohl’s: 15% off (60+)
- Modell’s Sporting Goods: 10% off
- Rite Aid: 10% off on Tuesdays & 10% off prescriptions
- Ross Stores: 10% off every Tuesday (55+)
- The Salvation Army Thrift Stores: up to 50% off (55+)
- Stein Mart: 20% off red dot/clearance items first Monday of every month (55+)
Grocery
- Albertson’s: 10% off first Wednesday of each month (55+)
- American Discount Stores: 10% off every Monday (50+)
- Compare Foods Supermarket: 10% off every Wednesday (60+)
- DeCicco Family Markets: 5% off every Wednesday (60+)
- Food Lion: 6% off every Monday (60+)
- Fry’s Supermarket: free Fry’s VIP Club Membership & 10% off every Monday (55+)
- Great Valu Food Store: 5% off every Tuesday (60+)
- Gristedes Supermarket: 10% off every Tuesday (60+)
- Harris Teeter: 5% off every Tuesday (60+)
- Hy-Vee: 5% off one day a week (date varies by location)
- Kroger: 10% off (date varies by location)
- Morton Williams Supermarket: 5% off every Tuesday (60+)
- The Plant Shed: 10% off every Tuesday (50+)
- Publix: 5% off every Wednesday (55+)
- Rogers Marketplace: 5% off every Thursday (60+)
- Uncle Guiseppe’s Marketplace: 5% off (62+)
Travel
- Alaska Airlines: 10% off (65+)
- Alamo: up to 25% off for AARP members
- American Airlines: various discounts for 65 and up (call before booking for discount)
- Amtrak: 15% off (62+)
- Avis: up to 25% off for AARP members
- Best Western: 10% off (55+)
- Budget Rental Cars: 10% off; up to 20% off for AARP members (50+)
- Cambria Suites: 20%-30% off (60+)
- Clarion: 20%-30% off (60+)
- Comfort Inn: 20%-30% off (60+)
- Comfort Suites: 20%-30% off (60+)
- Continental Airlines: no initiation fee for Continental Presidents Club & special fares for select destinations
- Dollar Rent-A-Car: 10% off (50+)
- Econo Lodge: 20%-30% off (60+)
- Enterprise Rent-A-Car: 5% off for AARP members
- Greyhound: 5% off (62+)
- Hampton Inns & Suites: 10% off when booked 72 hours in advance
- Hertz: up to 25% off for AARP members
- Holiday Inn: 10%-30% off depending on location (62+)
- Hyatt Hotels: 25%-50% off (62+)
- InterContinental Hotels Group: various discounts at all hotels (65+)
- Mainstay Suites: 10% off with Mature Traveler’s Discount (50+); 20%-30% off (60+)
- Marriott Hotels: 15% off (62+)
- Motel 6: 10% off (60+)
- Myrtle Beach Resort: 10% off (55+)
- National Rent-A-Car: up to 30% off for AARP members
- Quality Inn: 20%-30% off (60+)
- Rodeway Inn: 20%-30% off (60+)
- Sleep Inn: 20%-30% off (60+)
- Southwest Airlines: various discounts for ages 65 and up (call before booking for discount)
- Trailways Transportation System: various discounts for ages 50 and up
- United Airlines: various discounts for ages 65 and up (call before booking for discount)
- U.S. Airways: various discounts for ages 65 and up (call before booking for discount)
Activities & Entertainment
- AMC Theaters: up to 30% off (55+)
- Bally Total Fitness: up to $100 off memberships (62+)
- Busch Gardens Tampa: $3 off one-day tickets (50+)
- Carmike Cinemas: 35% off (65+)
- Cinemark/Century Theaters: up to 35% off
- U.S. National Parks: $10 lifetime pass; 50% off additional services including camping (62+)
- Regal Cinemas: 30% off
- Ripley’s Believe it or Not: @ off one-day ticket (55+)
- SeaWorld Orlando: $3 off one-day tickets (50+)