Easy Homemade Soft Pretzels

Easy Homemade Soft Pretzels

5 Stars 4 Stars 3 Stars 2 Stars 1 Star 4.8 from 809 reviews
  • Author: Sally McKenney
  • Prep Time: 25 minutes
  • Cook Time: 15 minutes
  • Total Time: 40 minutes
  • Yield: 12 pretzels

Description

This is one of the easiest ways to prepare homemade soft pretzels for beginners, and the results are extra delicious! The dough is a family recipe and only needs to rest for 10 to 30 minutes before shaping. The quick baking soda boil gives the pretzels their traditional flavor, and I do not recommend skipping it. This recipe is also in my New York Times best-selling cookbook, Sally’s Baking 101.


Ingredients

  • 2 and 1/4 teaspoons (7ginstant or active dry yeast (1 standard packet)
  • 1 Tablespoon brown sugar or granulated sugar
  • 1 and 1/2 cups (360ml) warm water (around 100°F/38°C)
  • 1 Tablespoon (14g) unsalted butter, melted and slightly cooled
  • 1 teaspoon salt
  • 3 and 3/4–4 cups (469–500g) all-purpose flour (spooned & leveled), plus more as needed
  • coarse salt, for topping

Baking Soda Bath (See Recipe Note)

  • 1/2 cup (120g) baking soda
  • 9 cups (2.13L) water


Instructions

    1. Whisk the yeast and sugar into warm water. Cover and allow to sit for 1 minute.
    2. Whisk in the melted butter and salt. Add 3 cups (375g) of flour. Mix with a wooden spoon (or dough hook attachment if using a stand mixer) until combined. Add 3/4 cup (94g) more flour until the dough is slightly tacky and pulls away from the sides of the bowl. If it is still sticky, add up to 1/4 cup more (31g) flour, 1 Tablespoon at a time, as needed. Poke the dough with your finger—if it bounces back, it is ready to knead.
    1. Knead the dough: Keep the dough in the mixer and beat for an additional 3 to 5 full minutes, or knead by hand on a lightly floured surface for 3 to 5 minutes. (If you’re new to bread-baking, my How to Knead Dough video tutorial can help here.) If the dough becomes too sticky during the kneading process, sprinkle 1 teaspoon of flour at a time on the dough or on the work surface/in the bowl to make a soft, slightly tacky dough. Do not add more flour than you need because you do not want a dry dough. After kneading, the dough should still feel a little soft. Poke it with your finger—if it slowly bounces back, your dough is ready to rise. You can also do a “windowpane test” to see if your dough has been kneaded long enough: tear off a small (roughly golfball-size) piece of dough and gently stretch it out until it’s thin enough for light to pass through it. Hold it up to a window or light. Does light pass through the stretched dough without the dough tearing first? If so, your dough has been kneaded long enough and is ready to rise. If not, keep kneading until it passes the windowpane test.
    2. Shape the kneaded dough into a ball. Cover lightly with a towel and allow to rest for 10 to 30 minutes. (Meanwhile, I like to get the water + baking soda boiling as instructed in step 8.)
    3. Preheat oven to 400°F (204°C). Line 2 baking sheets with parchment paper or silicone baking mats. Silicone baking mats are highly recommended over parchment paper. If using parchment paper, lightly spray with nonstick spray or grease with butter. Set aside.
    4. With a sharp knife or pizza cutter, cut dough into 75g sections, which is about 1/3 cup of dough each.
    5. Roll the dough into a 20–22-inch rope. Form a circle with the dough by bringing the 2 ends together at the top of the circle. Twist the ends together. Bring the twisted ends back down towards yourself and press them down to form a pretzel shape.
  1. Bring baking soda and 9 cups of water to a boil in a large pot. Drop 1–2 pretzels into the boiling water for 20–30 seconds. Any longer than that and your pretzels will have a metallic taste. Using a slotted spatula, lift the pretzel out of the water and allow as much of the excess water to drip off. Place pretzel onto prepared baking sheet. Repeat with remaining pretzels. If desired, cover the boiled, unbaked pretzels with lightly oiled plastic wrap and refrigerate for up to 24 hours before baking (step 9).
  2. Sprinkle the tops of the pretzels with coarse salt. Bake for 12–15 minutes or until dark golden brown.
  3. Remove from the oven and, if desired, serve warm with spicy nacho cheese sauce.
  4. Cover and store leftover pretzels at room temperature for up to 3 days. See Make Ahead & Freezing Instructions in recipe Notes below for more storage info. To reheat, microwave for a few seconds, or bake at 350°F (177°C) for 5 minutes.

Notes

    1. Make Ahead & Freezing Instructions: If planning to freeze fully baked pretzels, do not top them with coarse salt before baking. Cool completely, then freeze in an airtight freezer-safe container or zip-top bag for up to 3 months. To reheat, brush frozen pretzels (no need to thaw) with water and sprinkle with coarse salt, then bake at 350°F (177°C) for 20 minutes or until warmed through, or microwave frozen pretzels until warm. The prepared pretzel dough can be covered and refrigerated for up to one day or frozen in an airtight container for 2–3 months. Thaw frozen dough in the refrigerator overnight. Refrigerated dough can be shaped into pretzels while still cold, but allow some extra time, about 1 hour, for the pretzels to puff up at room temperature before continuing with the baking soda bath and baking. You can also freeze the boiled, unbaked pretzels and here’s how: after boiling the pretzels in step 8, place them on a lightly greased parchment paper- or silicone baking mat-lined baking sheet. Freeze the pretzels for about 1 hour, then transfer them to an airtight freezer-safe container or zip-top bag (squeeze out as much air as possible from the bag before sealing) and freeze for up to 3 months. To bake, brush frozen pretzels (no need to thaw) with water and sprinkle with coarse salt, then bake at 400°F (204°C) for 15–20 minutes or until dark golden brown.
    2. Special Tools (affiliate links): Electric Stand Mixer or Glass Mixing Bowl | Wooden Spoon | Baking Sheets | Silicone Baking Mats or Parchment Paper | Pizza Cutter | Large Pot (such as a Dutch oven)
    3. Baking Soda Bath (Step 8): The baking soda bath is strongly recommended because it helps create that chewy texture and distinctive pretzel flavor. If skipping, brush the shaped and unbaked pretzels with a mixture of 1 beaten egg + 1 Tablespoon of dairy or nondairy milk. This is known as an egg wash. Sprinkle the brushed pretzels with salt. The egg wash will help the salt stick. If you don’t have an egg, simply brush with 2 Tablespoons of dairy or nondairy milk.
  1. Cinnamon Sugar Pretzels: Skip the coarse salt topping (and skip the egg wash, see note above, if you aren’t doing the baking soda bath step). Bake as directed in step 9. Meanwhile, melt 4 Tablespoons (56g) of unsalted or salted butter. Brush the baked and warm pretzels with melted butter, then dip the tops into a mix of cinnamon and sugar. I usually use 3/4 cup (150g) of granulated sugar and 1 and 1/2 teaspoons cinnamon. Cinnamon-sugar pretzels taste best the day they’re made because the melted butter topping causes them to become soggy after a few hours.
  2. Reference my Baking with Yeast Guide for answers to common yeast FAQs.
Soft & Chewy Oatmeal Raisin Cookies

Description

Soft and chewy with that trademark homemade flavor, these are the best soft and chewy oatmeal raisin cookies. Your family will love these easy oatmeal raisin cookies!


Ingredients

    • 1 cup (16 Tbsp; 226g) unsalted butter, softened to room temperature
    • 1 cup (200g) packed light or dark brown sugar
    • 1/4 cup (50g) granulated sugar
    • 2 large eggs*
    • 2 teaspoons pure vanilla extract
    • 1 Tablespoon (15ml) unsulphured or dark molasses (do not use blackstrap; I prefer Grandma’s brand)
    • 1 and 2/3 cups (209g) all-purpose flour (spooned & leveled)
    • 1 teaspoon baking soda
    • 1 and 1/2 teaspoons ground cinnamon
    • 1/2 teaspoon salt
    • 3 cups (255g) old-fashioned whole rolled oats*
    • 1 cup (140g) raisins (see Note below)
  • optional: 1/2 cup (64g) chopped toasted walnuts

Instructions

    1. Using a hand mixer or a stand mixer fitted with paddle attachment, cream the softened butter and both sugars together on medium speed until smooth, about 3 minutes. (Here’s a helpful tutorial if you need guidance on how to cream butter and sugar.) Add the eggs and mix on high until combined, about 1 minute. Scrape down the sides and bottom of the bowl as needed. Add the vanilla and molasses and mix on high until combined. Set aside.
  1. In a separate bowl, whisk the flour, baking soda, cinnamon, and salt together. Add to the wet ingredients and mix on low until combined. Beat in the oats, raisins, and walnuts (if using) on low speed. Dough will be thick, yet very sticky. Chill the dough for 30-60 minutes in the refrigerator (do the full hour if you’re afraid of the cookies spreading too much). If chilling for longer (up to 2 days), allow to sit at room temperature for at least 30 minutes before rolling and baking.
  2. Preheat oven to 350°F (177°C). Line two large baking sheets with parchment paper or silicone baking mats. Set aside.
  3. Roll balls of dough (about 2 tablespoons of dough per cookie) and place 2 inches apart on the baking sheets. I recommend using a cookie scoop since the dough can be sticky. Bake for 12-14 minutes until lightly browned on the sides. The centers will look very soft and under-baked. Remove from the oven and let cool on baking sheet for 5 minutes before transferring to a wire rack to cool completely. The cookies will continue to “set” on the baking sheet during this time.

Notes

  1. Make Ahead & Freezing Instructions: Cookies stay fresh covered at room temperature for up to 1 week. Baked cookies freeze well—up to three months. Unbaked cookie dough balls freeze well—up to three months. Bake frozen cookie dough balls for an extra minute, no need to thaw. Here’s how to freeze cookie dough.
  2. Special Tools (affiliate links): Electric Mixer (Handheld or Stand) | Baking Sheets | Silicone Baking Mats or Parchment Paper | Cookie Scoop | Cooling Rack
  3. Oats: For these oatmeal raisin cookies, I use old-fashioned whole oats. They provide the ultimate hearty, chewy, thick texture we love!
  4. Eggs: Room temperature eggs preferred. Good rule of thumb: always use room temperature eggs when using room temperature butter.
  5. Raisins: Soak your raisins in warm water for 10 minutes before using (blot very well to dry them) – this makes them nice and plump for your cookies.
  6. Adapted from Loaded Oatmeal Cookies & Oatmeal Creme Pies. Recipe originally published on Sally’s Baking Addiction in 2014.

No-Bake Cheesecake

You know, when you get a bagel, you sometimes have a left-over cream cheese.  This is a way you can put them to really good use.

Here is a baked cheesecake recipe using mostly the same ingredients.  It’s easy, but has to set overnight in the fridge, so allow extra time for that.

NOTE:  We are going to use a graham cracker crust for this cheesecake.  Here is a video of the same process making a larger cheesecake.  SallysBakingAddiction.com

Graham Cracker Crust

(larger recipe is shown in {{ brackets }}

  • 4 Graham Crackers   {{ 2.5 C graham crackers }}
  • 1 TBL butter (melted)  {{ 1/2 C butter }}
  • 3 TBL Brown Sugar (packed)  {{ 1 C }}
  1. Pulse grahams and brown sugar in a food processor
  2. Drizzle in melted butter while running
  3. Pack (bottom and sides) into lightly greased baking ramekin or miniature bread pan    {{ springform pan}}
  4. Put into freezer for at least an hour, or even overnight.
  5. Alternately, buy small frozen graham crackers crusts.

Ingredients for pie

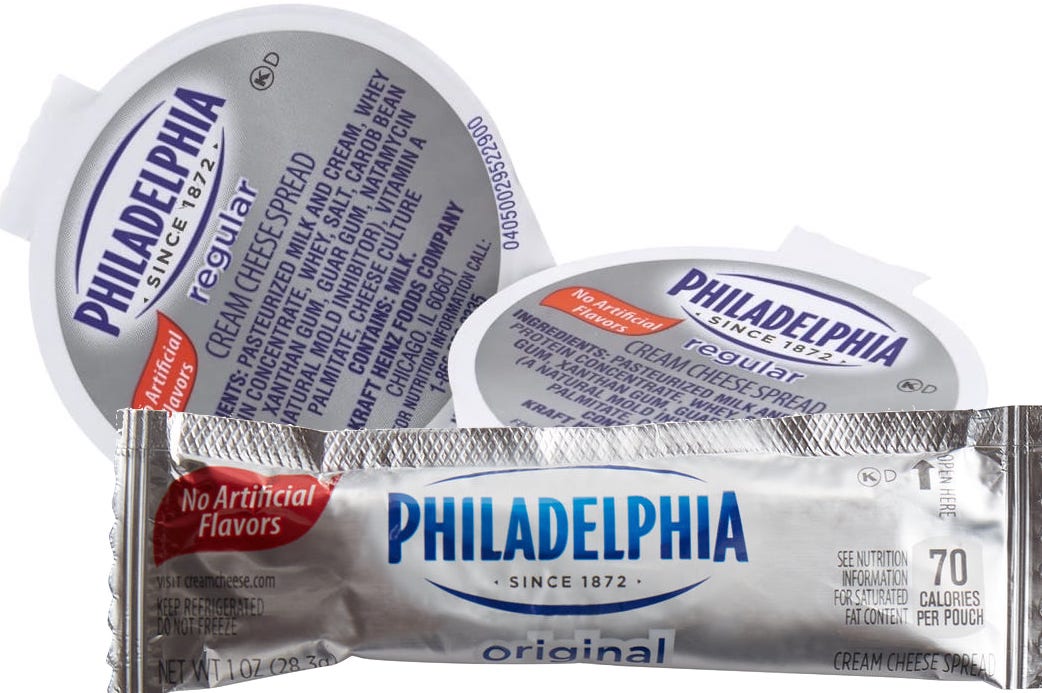
  • 6 oz (6 mini tubs) full fat Cream Cheese.  DO NOT use Cream Cheese Spread – room temperature  
    {{ 1 block Philadelphia Cream Cheese }}
  • 2 TBL butter – softened  {{ 1 stick }}
  • 1/2 C powdered sugar  {{ 2 C }}
  • 1 tsp each sour cream, lemon juice
  • Splash vanilla
  • 1 tsp brown sugar   {{ 1/4 C }}
  • 1/4 C crushed pineapple  {{ 20 oz can }} drained
    COOL WHIP MIXTURE
  • 1/4 C Cool Whip  {{ 10 oz }} or start from heavy cream
  • Some of your crushed pineapple from above
  1. Beat COLD heavy cream into heavy peaks.  Do not skimp on this step.   •   Add confectioner sugar as you near completion
  2. In a separate bowl, combine softened cream cheese  (DO NOT use Cream Cheese Spread) with sour cream, lemon juice, vanilla and brown sugar
  3. Gently fold cream and sugar mixture in a large bowl.
  4. Combine and pour into pie crusts
  5. Use an offset spatula or back of a teaspoon to smooth the cake
  6. App pineapple if desired
  7. Cover with plastic wrap, and refrigerate for at least 6-8 hours, but overnight is better.
  8. This WILL NOT freeze well. 

    OPTIONAL:  Before serving decorate with whipped cream, lemon curd, strawberry sauce, raspberry sauce, blueberry sauce, fresh berries or salted caramel.


Cheesecake

  • 1 and 1/4 cups (300ml) heavy cream or heavy whipping cream
  • three 8-ounce blocks (680g) full-fat cream cheese, softened to room temperature
  • 1/2 cup (100g) granulated sugar
  • 2 Tablespoons (15g) confectioners’ sugar
  • 1/4 cup (60g) sour cream, at room temperature
  • 2 teaspoons lemon juice
  • 1 teaspoon pure vanilla extract


Basic English Muffins


  • English Muffin Sketch – review
  • 12 oz ap flour
  • 1/4 oz active dry yeast
  • 1 TBL sugar
  • 1 tsp salt
  • 1.5 oz dried milk
  • Mix
  • – 10 oz water and 1 TBL shortening
  • Heat to 120-130º
  • Combine and Mix for 3 minutes
  • Will be gooey
  • Cover and let rise in fridge 12 hours
  • Punch down three times
  • Wipe rings and pan with crisco
  • Sprinkle inside of rings with cornmeal
  • Sprinkle on bottom of pan
  • Put into muffin rings (makes 8-10
  • Use 2 oz scoop into each ring
  • Top each with cornmeal or pulverized oatmeal
  • Rest 60-90 minutes
  • Cover with parchment and top with another pan
  • Bake at 400º for 15 minutes
  • remove parchment and pan
  • 5 more minutes or until internal temp is 195º
  • Cool 10 minutes
  • Offset spatula to remove

A Different Take from Sally’s Baking Addiction

Here’s What Works:

  • Use melted butter because recipe tests made with softened butter weren’t as flavorful.
  • Embrace a sticky dough made with *some* whole wheat flour and *some* all-purpose or bread flour.
  • You will be tempted to add more flour, but don’t. The high hydration level is key to obtaining that shaggy & airy texture inside.
  • Let the dough rise on the counter until doubled, about 2 hours. Then let it rest in the refrigerator for at least 6 hours. This time gives the muffins extra flavor, plus cold dough is MUCH EASIER to work with. (We do the same when making artisan bread, cranberry nut no-knead bread, no-knead pizza bread and olive bread.)
  • Start the muffins on the stove in a skillet or on a griddle and finish them in the oven. Cook until an instant read thermometer reads the center as 200°F (93°C). If you don’t have an instant read thermometer, cut a muffin open and if it’s still extra doughy in the center, return to the oven.

Here’s What Doesn’t Work:

  • A firm, dry dough will not produce an airy center.
  • Avoid using ALL whole wheat flour because you may end up with bread hockey pucks.
  • Do not punch down the dough after it rises.
  • Do not skip the cornmeal or semolina flour because it’s needed to coat the dough and your hands.
  • Do not flatten the shaped muffins with force because they will deflate.

Homemade English Muffins

Find lots of great tips for success online: https://sallysbakingaddiction.com/honey-wheat-english-muffins/

5 Stars 4 Stars 3 Stars 2 Stars 1 Star 4.8 from 324 reviews
  • Author: Sally McKenney
  • Prep Time: 8 hours, 45 minutes (includes dough rise)
  • Cook Time: 25 minutes
  • Total Time: 9 hours 10 minutes
  • Yield: 12 muffins

These honey wheat English muffins are completely homemade from a simple no-knead 8 ingredient dough. Though the dough rises and is ready in about 2 hours, I strongly recommend refrigerating it for at least 6 hours so your English muffins have better flavor. For best success, review recipe notes, video tutorial, and step-by-step photos (below) before starting.

Ingredients

  • 1 and 1/4 cups (300ml) milk, warmed to about 100°F (38°C)*
  • 2 teaspoons (6ginstant or active dry yeast*
  • 3 Tablespoons (64ghoney*
  • 2 Tablespoons (28g) unsalted butter, melted & slightly cooled
  • 1 large egg, at room temperature
  • 1 and 1/2 teaspoons salt
  • 1 cup (130g) whole wheat flour (spooned & leveled)*
  • 2 cups + 3 Tablespoons (280g) bread flour or all-purpose flour (spooned & leveled)*
  • cornmeal or semolina flour for handling dough (at least 1/2 cup (60g))

Instructions

    1. Prepare the dough: In a large un-greased mixing bowl, whisk the warm milk, yeast, and honey together in the bowl of your stand mixer fitted with a dough hook attachment. Cover and allow mixture to sit for about 5 minutes or until foamy on top. *If you do not own a mixer, you can do this in a large mixing bowl and in the next step, mix the dough together with a large wooden spoon/silicone spatula. A hand mixer works, but the sticky dough repeatedly gets stuck in the beaters. Mixing by hand with a wooden spoon or rubber spatula is a better choice.*
    2. Add the butter, egg, salt, whole wheat flour, and 1 cup (about 130g) of the bread flour. Whisk to combine. Add 1 more cup (130g) bread flour and beat on low speed for 2 minutes. Dough will be extremely sticky and like a loose batter. Add remaining flour, scrape down the sides of the bowl with a silicone spatula, and then beat on low speed for 1 minute to combine. Scrape down the sides of the bowl again and then fold the dough together a few times with your silicone spatula. Do not be tempted to add more flour. It’s supposed to be very sticky.
    1. Cover the dough tightly with plastic wrap or aluminum foil and set on the counter at room temperature. Allow to rise until double in size, about 2 hours. The dough will be sticking to the sides of the bowl and have a lot of air bubbles. You can continue with step 4 immediately, but for absolute best flavor and texture, I strongly recommend letting this risen dough rest in the refrigerator for at least 6 hours and up to 24 hours. Place covered dough in the refrigerator for 6-24 hours. The dough will very slightly puff up during this time, but may begin to deflate after 24 hours.
    2. Line two large baking sheets with parchment paper or silicone baking mats. One is for the shaped uncooked muffins and the 2nd is for baking the muffins.
    3. Shape the muffins: Remove cold dough from the refrigerator—no need to bring it to room temperature. Sprinkle a little cornmeal/semolina on the surface of the dough and all over your hands. Have more nearby and use whenever things begin getting super sticky. Grab a small handful of dough, about 1/3 cup of dough or 2.5-3 ounces if you have a kitchen scale, and gently form into a 1-inch thick disc that’s about 3.5 inches in diameter—doesn’t need to be perfect—and place onto lined baking sheet. You’re basically shaping them as you’d shape hamburger patties. Repeat with remaining dough for a total of about 12. Sprinkle the tops of the shaped discs lightly with more cornmeal and cover to rest for 20 minutes. (Do not extend this time or the muffins will puff too much.)
    1. Meanwhile, as the shaped muffins rest, get your stove ready. Heat a griddle to medium heat or about 325°F (163°C) or use a large skillet or cast iron skillet over medium-low heat. If your griddle/skillet/cast iron is nonstick or seasoned, there’s no need to grease it. If not nonstick, grease with a little butter. Once greased pan/griddle is heated, sprinkle lightly with cornmeal/semolina flour and begin to cook the muffins in the next step.
    2. Read this entire step before starting to cook the muffins. Using a flat spatula, carefully transfer however many muffins can fit on your pan/griddle with at least 2 inches between each because muffins will puff up as they cook. Gently flatten them around the edges with the back of your spatula, being careful to not flatten too hard which would deflate them. Cook for 7-8 minutes and then flip over, gently flatten again, and cook for another 7-8 minutes. (No need to grease or sprinkle more cornmeal/semolina when flipping.) This cook time is a general guideline because griddles/stoves/pans can heat differently and/or unevenly. You want to cook until golden brown on each side and edges seem set. If muffins seem to be over-browning quickly, slightly turn down the stove’s heat. And, as the muffins cook, you can start preheating the oven (next step). Transfer cooked muffins to the unused prepared baking sheet.
    3. Preheat oven to 350°F (177°C).
  1. Bake for 8-11 minutes or until an instant read thermometer reads the center as 200°F (93°C). If you don’t have an instant read thermometer, cut a muffin open after 8 minutes and if it’s still extra doughy in the center, return to the oven until baked through. I usually bake them for at least 10 minutes.
  2. Remove from the oven and cool for 10 minutes on the baking sheet before slicing and handling. To preserve the craggy texture, slice the honey wheat English muffins in half using a serrated knife. Or you can slice around the edges with a regular sharp knife and then pry the two halves apart with a fork. Toast halves in the toaster if desired (taste best that way!) and serve warm with desired toppings such as butter, honey butter, jam, apple butter, or other topping of choice. Muffins can also be used for breakfast sandwiches or eggs Benedict.
  3. Store leftovers covered at room temperature for up to 2 days and then transfer to the refrigerator for up to 3 days. After that, it’s best to freeze them. Freezing instructions in notes.

Notes

  1. Make Ahead Instructions: Prepare the dough through step 3 and let the dough rest in the refrigerator for up to 24 hours before continuing with step 4. No need to bring dough to room temperature before you begin to shape the muffins—cold dough is easier to work with!
  2. Make Ahead Instructions – Freezing: Baked English muffins freeze well up to 3 months. You can freeze in a large container or freezer bag or wrap individually in plastic wrap. Thaw by defrosting in the microwave or setting out on the counter to come to room temperature. For best taste and texture, slice and toast them after thawing. You can also freeze the English muffins after they come off the stove (after step 7). Cool completely and then freeze in a large container or freezer bag or wrap individually in plastic wrap for up to 3 months. Thaw and then continue with step 8.
  3. Special Tools: Stand Mixer or Large Mixing Bowl with Silicone Spatula or Wooden Spoon | Griddle or Skillet | Baking Sheets | Silicone Baking Mat or Parchment Paper | Flat Spatula | Instant Read Thermometer
  4. Milk: Whole milk is great, but you can use any milk—non dairy or dairy + any milk fat.
  5. Yeast: You can use active-dry or instant yeast. The instructions are the same no matter which you use. Note that 2 teaspoons (6g) is less than 1 standard packet.
  6. Honey: You can substitute the honey with granulated sugar, but reduce it down to 2 Tablespoons (25g).
  7. Flour: This ratio of whole wheat to white flour is best. I do not recommend using more whole wheat flour because the texture of the English muffins will change. For the white flour, you can use bread flour or all-purpose flour. I recommend bread flour for the best texture.
  8. Adapted from King Arthur Baking. I reduced the flour, reduced the butter and switched to melted, used some whole wheat flour, swapped sugar for honey, and reduced the milk.

Rib Eye Cap Steak

A note from Grandpa:

This is an expensive cut, so it is worth the extra effort to make it truly special.  It is practically Wagyu quality.  You can butterfly it, and then spread a bit of butter of the surface and roll it up (roulade) and tie it into a tube.  Cut this into disks of 1 1/2 to 2 inches, and cook in the oven at 550º until internal temperature is 125º (about 7-10 minutes)  Remove to a plate and tent with foil for 5-10 minutes.  Drizzle with melted butter infused with garlic, shallot, rosemary, and thyme.

From Snake River Farms

  • Grade: USDA Choice or higher
  • Weight: approx. 18 oz.
  • English cross origin
  • Wet-aged 21+ days for improved flavor and texture
  • Hand cut by a master butcher
  • Individually wrapped
  • Product ships frozen and will arrive frozen or partially thawed
  • Cost: approx $85 each

This rare cut is considered to be the single most delectable and flavorful steak available. Also known as the ribeye cap, deckle steak, calotte or spinalis dorsi, it is highly prized by top chefs, beef aficionados, and butchers alike. Surprisingly, a cut this spectacular is not universally known by its name, however anyone who has cut that small morsel of cap from a ribeye has realized there’s something special going on. If you look at a ribeye steak, you’ll see the large eye of meat that’s the center of the cut. Surrounding this center is the spinalis dorsi, or cap of ribeye. We carefully remove this from the entire ribeye roll to produce a beautiful cut that has the tenderness of a filet mignon, the rich marbling of a rib steak, and a mouthwatering flavor and texture all its own. The cap of ribeye is hard to find and is only available in limited quantities. Each steak is approximately 18 oz. and serves about 4 people.

“…Hands down, Double R Ranch is the best beef in the country.” ~ Eric Helner, Executive Chef, The Metropolitan Grill, Seattle, WA

Steak Temperature Guide

Here are the magic numbers you’ll need to determine when your steak is cooked to the degree of doneness you most prefer. The internal temp is when the steak should be removed from the heat. The steak will continue to cook so the temperature will rise during the rest period.

Preference Description Internal Temp
Rare Red center, very cool 110°F
Medium Rare Red, warm center 120°F
Medium Pink throughout 130°F
Medium Well Pink center 140°F
Well No pink Not recommended

*Consuming raw or undercooked meats may increase your risk of foodborne illness. The USDA recommends an internal temp of 145°F and resting for at least 3 minutes.

FEEDBACK

Best Cut Around

I received a rib cap from SRF as a gift. I seasoned with SPG, cut it in 4″ strips, rolled and tied each strip. I cooked over an open flame on my fire pit, using lump charcoal and oak. After an hour of cooking, I pulled the meat off with an IT of 125 degrees F. It was the most tender and flavorful steak I have ever had. Definitely buying this again.

SUPERB FLAVOR AND TEXTURE

The ribeye cap is my favorite cut of steak for special occasions. This is the fourth time I have ordered this piece. The flavor is superb, it has a very deep “beefy” flavor, and, if prepared correctly, exhibits melt-in-your-mouth tenderness. I cut this huge hunk of meat into two pieces, and cook them separately, one takes less time, as the cut tapers from very thick at one end to thin at the other. I reverse sear this cut, and I believe that is the only way to properly grill this hunk of meat. It ends up moist and tender on the inside, and beautifully charred on the outside.


Marshmallows

SUGAR TEMPERATURE CHART

Making your own is pretty easy

Sally’s Baking Addiction has a website with a similar recipe with much more information than I’ve provided here, including WHY you add some of these ingredients.  PS:  Her recipe differs slightly.  Try both!

  • 3/4 oz gelatin
  • 1/2 C COLD Water
  • 1/2 C warm water
  • 1.5 C granulated sugar
  • 1 C Light corn syrup
  • 2 TBL cornstarch
  • 2 tsp vanilla extract
  • 1/4 tsp salt
  1. Dissolve gelatin in cold water
  2. Let rest while you prepare hot mixture
  3. Heat water and sugar on medium high for 3-5 minutes
  4. Heat until 240º
  5. Add Light corn syrup and cornstarch to the pan
  6. Continue to heat until it goes up to 245º
  7. Take to your mixer and add to the gelatin in your mixer – POUR SLOWLY
  8. Add vanilla and salt
  9. Beat as much air in as possible, so crank the speed up to high
  10. Beat about 12 minutes – longer for a stiff marshmaallow
  11. Spray a baking tray with oil, then pour in confectioner sugar and shake to dust
    ALTERNATELY PIPE INTO LONG STRIPS THEN SNIP INTO PIECES
  12. Pour into a flat baking tray using a greased spatula
  13. Smooth it out
  14. Paint with simple syrup
  15. Sprinkle with more confectioner sugar or dip into sparkles
  16. Turn out and cut with a pizza cutter
  17. Dust with a mixture of sugar and corn starch
  18. Store for up to three weeks

Baked Beans – COLLECTION

Regular ol’ Baked Beans

2 CU prepared beans – See recipe for Dry Bean Processing
¾ lb fat salt pork or 2 strips bacon
½ tsp salt
3 TBL brown sugar
½ tsp mustard
1/2 onion – chopped small
1 TBL ketchup
1 clove garlic – minced

1 a Put pork on glass plate and cover with paper towel.
1 b Cook in microwave 30 seconds and change towels.
1 c Cook another 30 seconds.
1 d Repeat one more time if necessary – ususally not necessary
2. Put cooked pork in bottom of glass casserold dish (that has a cover available)
3. Strain beans, reserving liquid
4. Add beans into pot, burying pork
5. Mix in all other listed ingredients
6. Add Reserved Liquid (from beans) pouring over top to barely, but completely, cover – use spoon to work liquid through beans
7. Cover with glass lid and bake 2 hours at 300 degrees
8. Uncover and cook 1 more hour

Reserved liquid means the liquid in which the beans did their final soak in, and were subsequently cooked in.

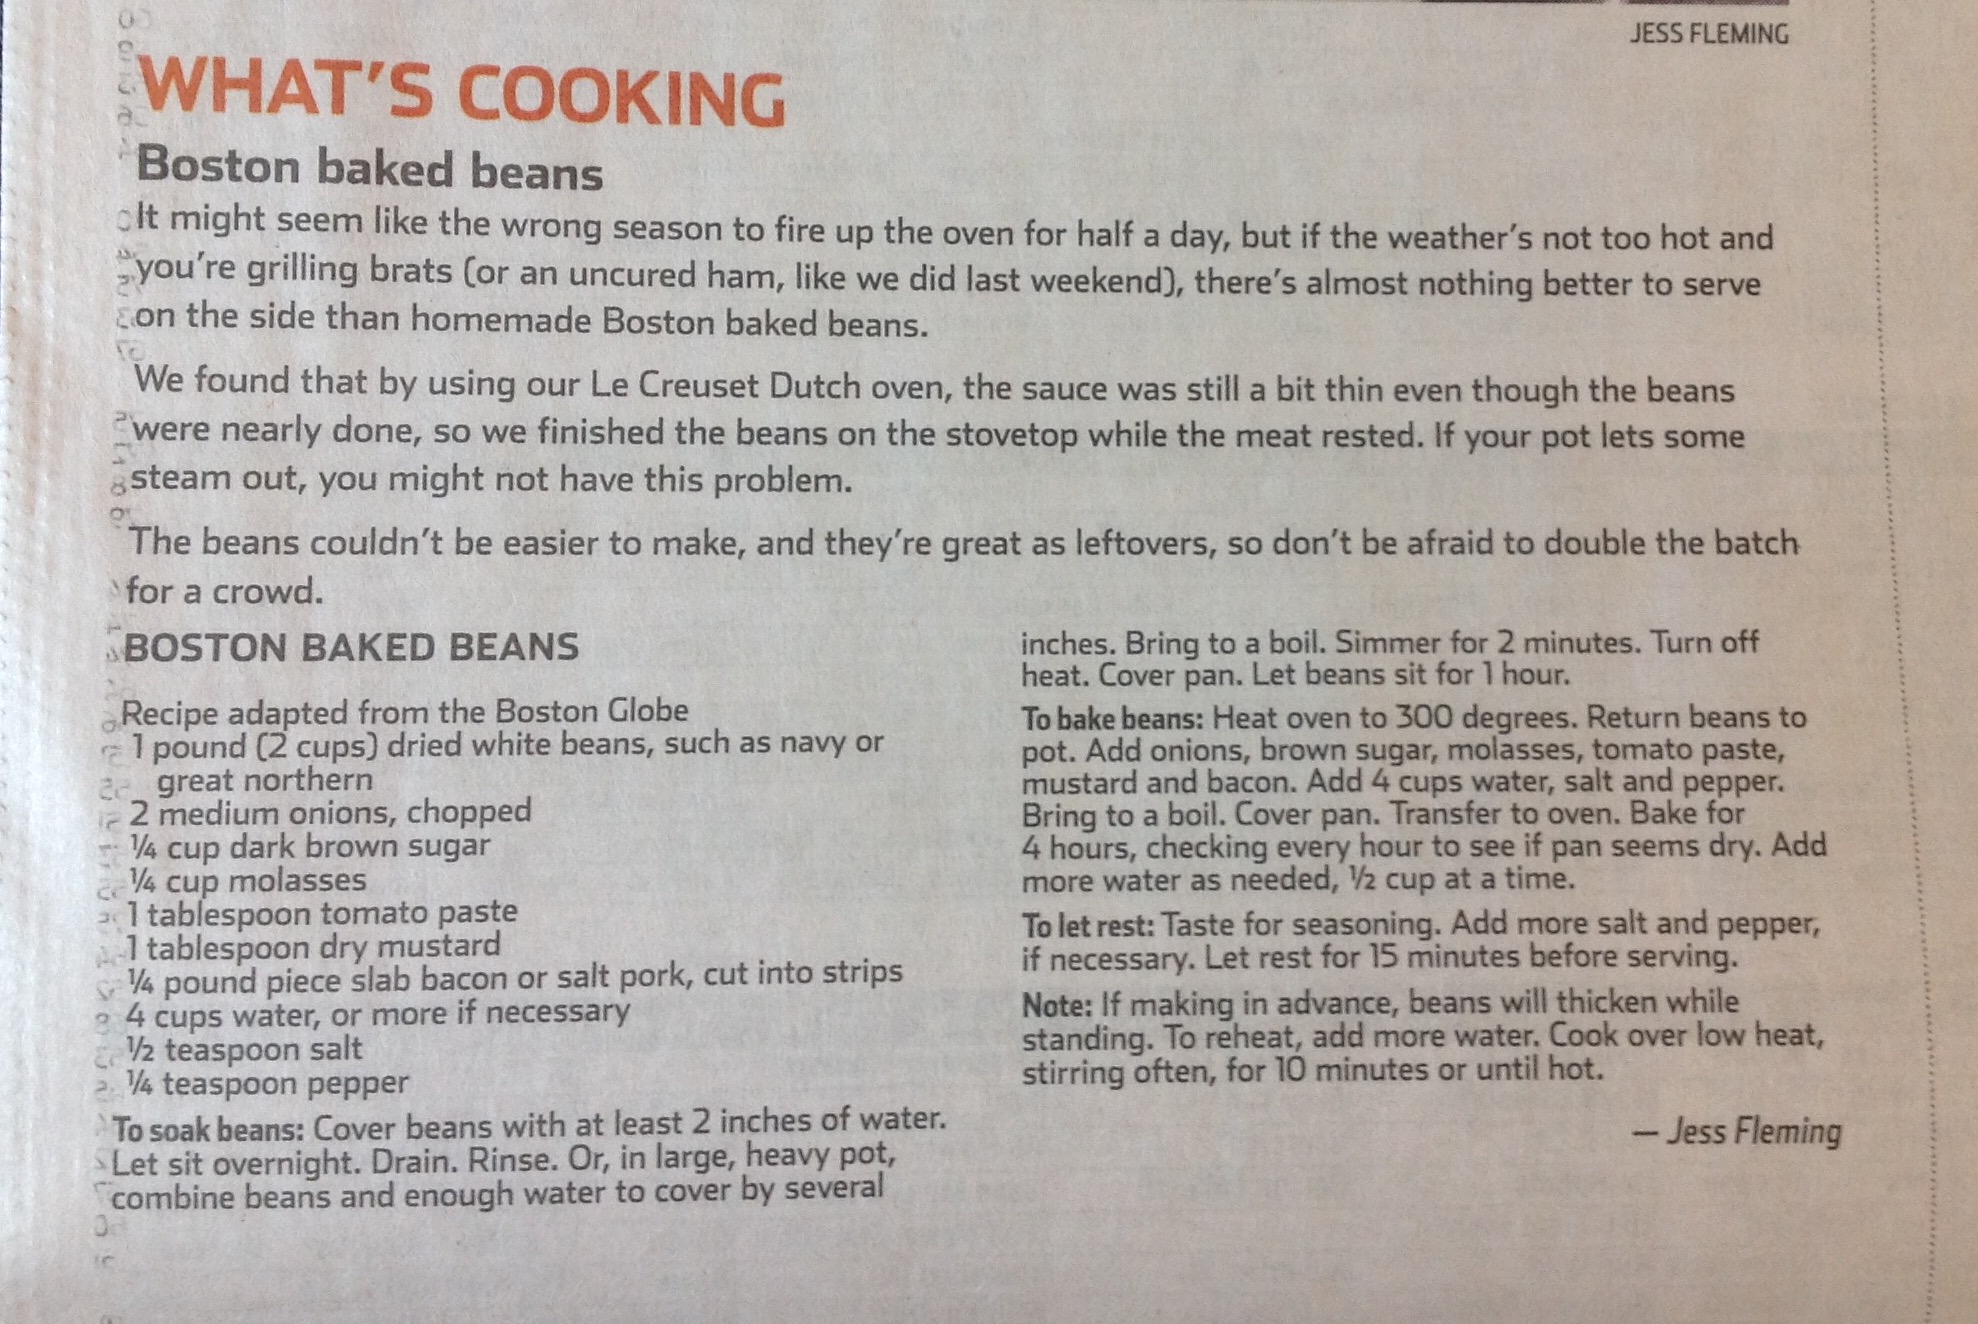
Boston Baked Beans


… From scratch.

Boston Baked Beanss (1)

https://www.grandpacooks.com/recipes/boston-baked-beans/

Boston Baked Beans (2)

https://www.grandpacooks.com/recipes/boston-baked-beans-2/

Backyard Baked Beans

https://www.grandpacooks.com/recipes/backyard-baked-beans/

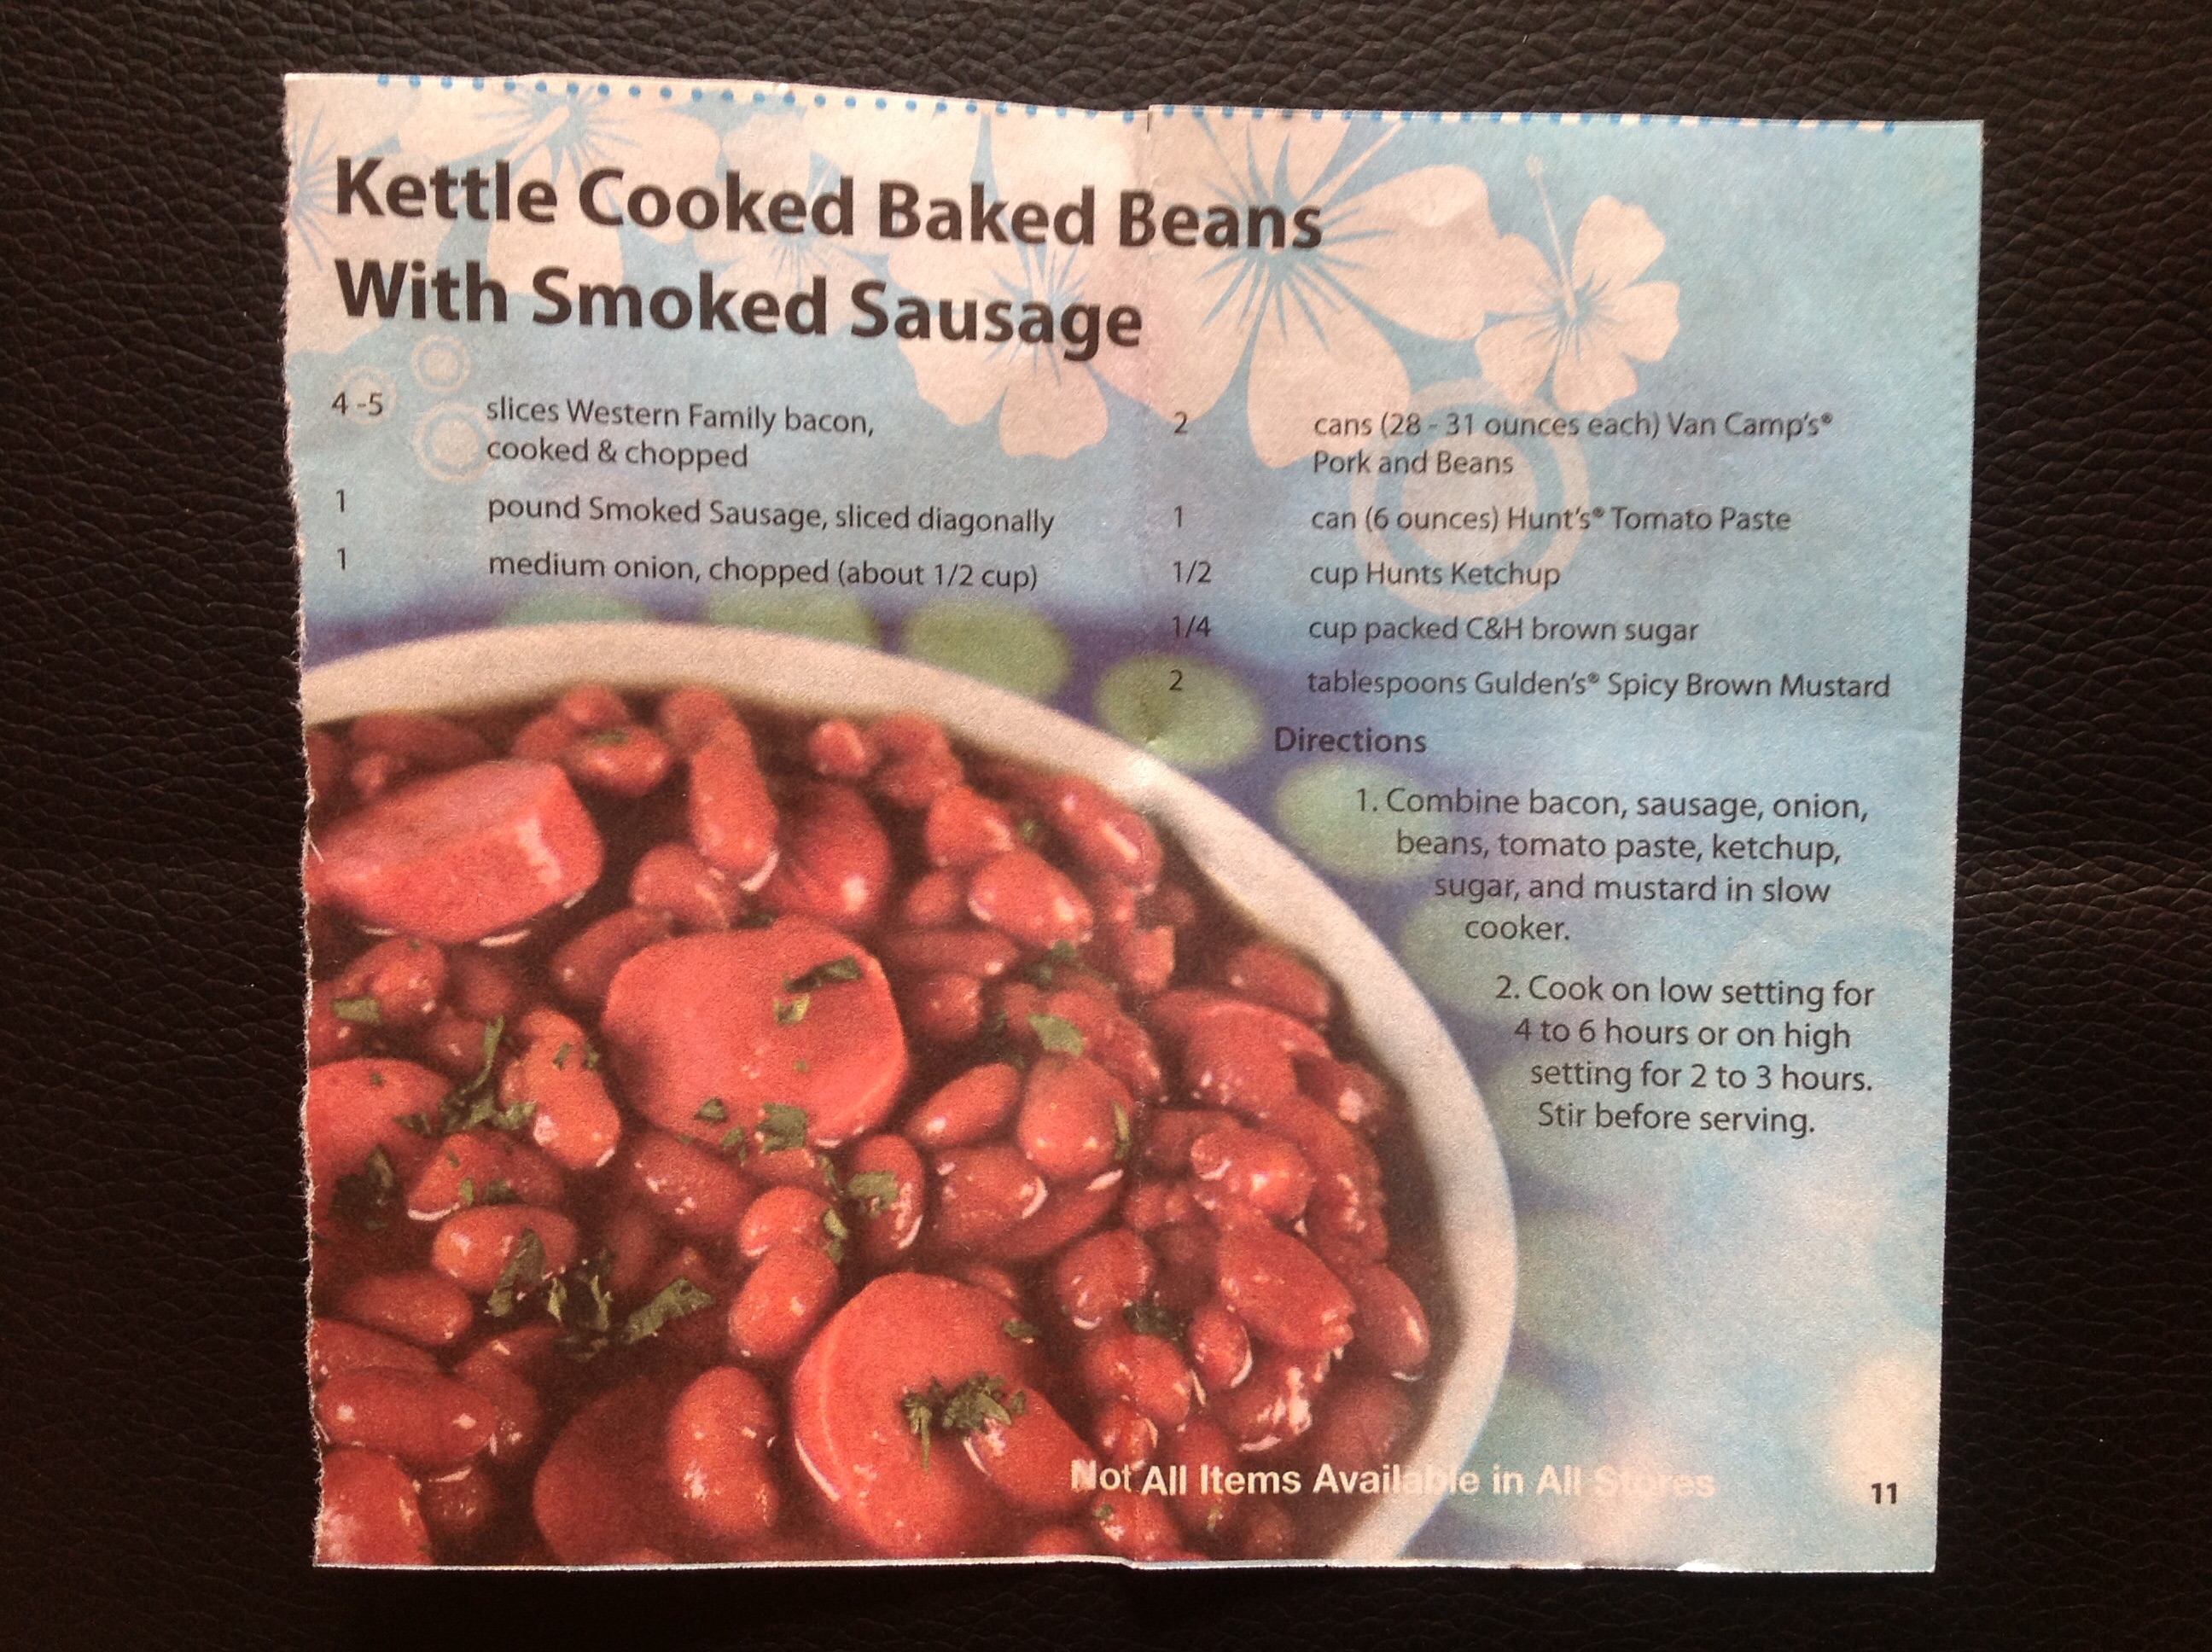
Kettle Cooked Baked Beans

image


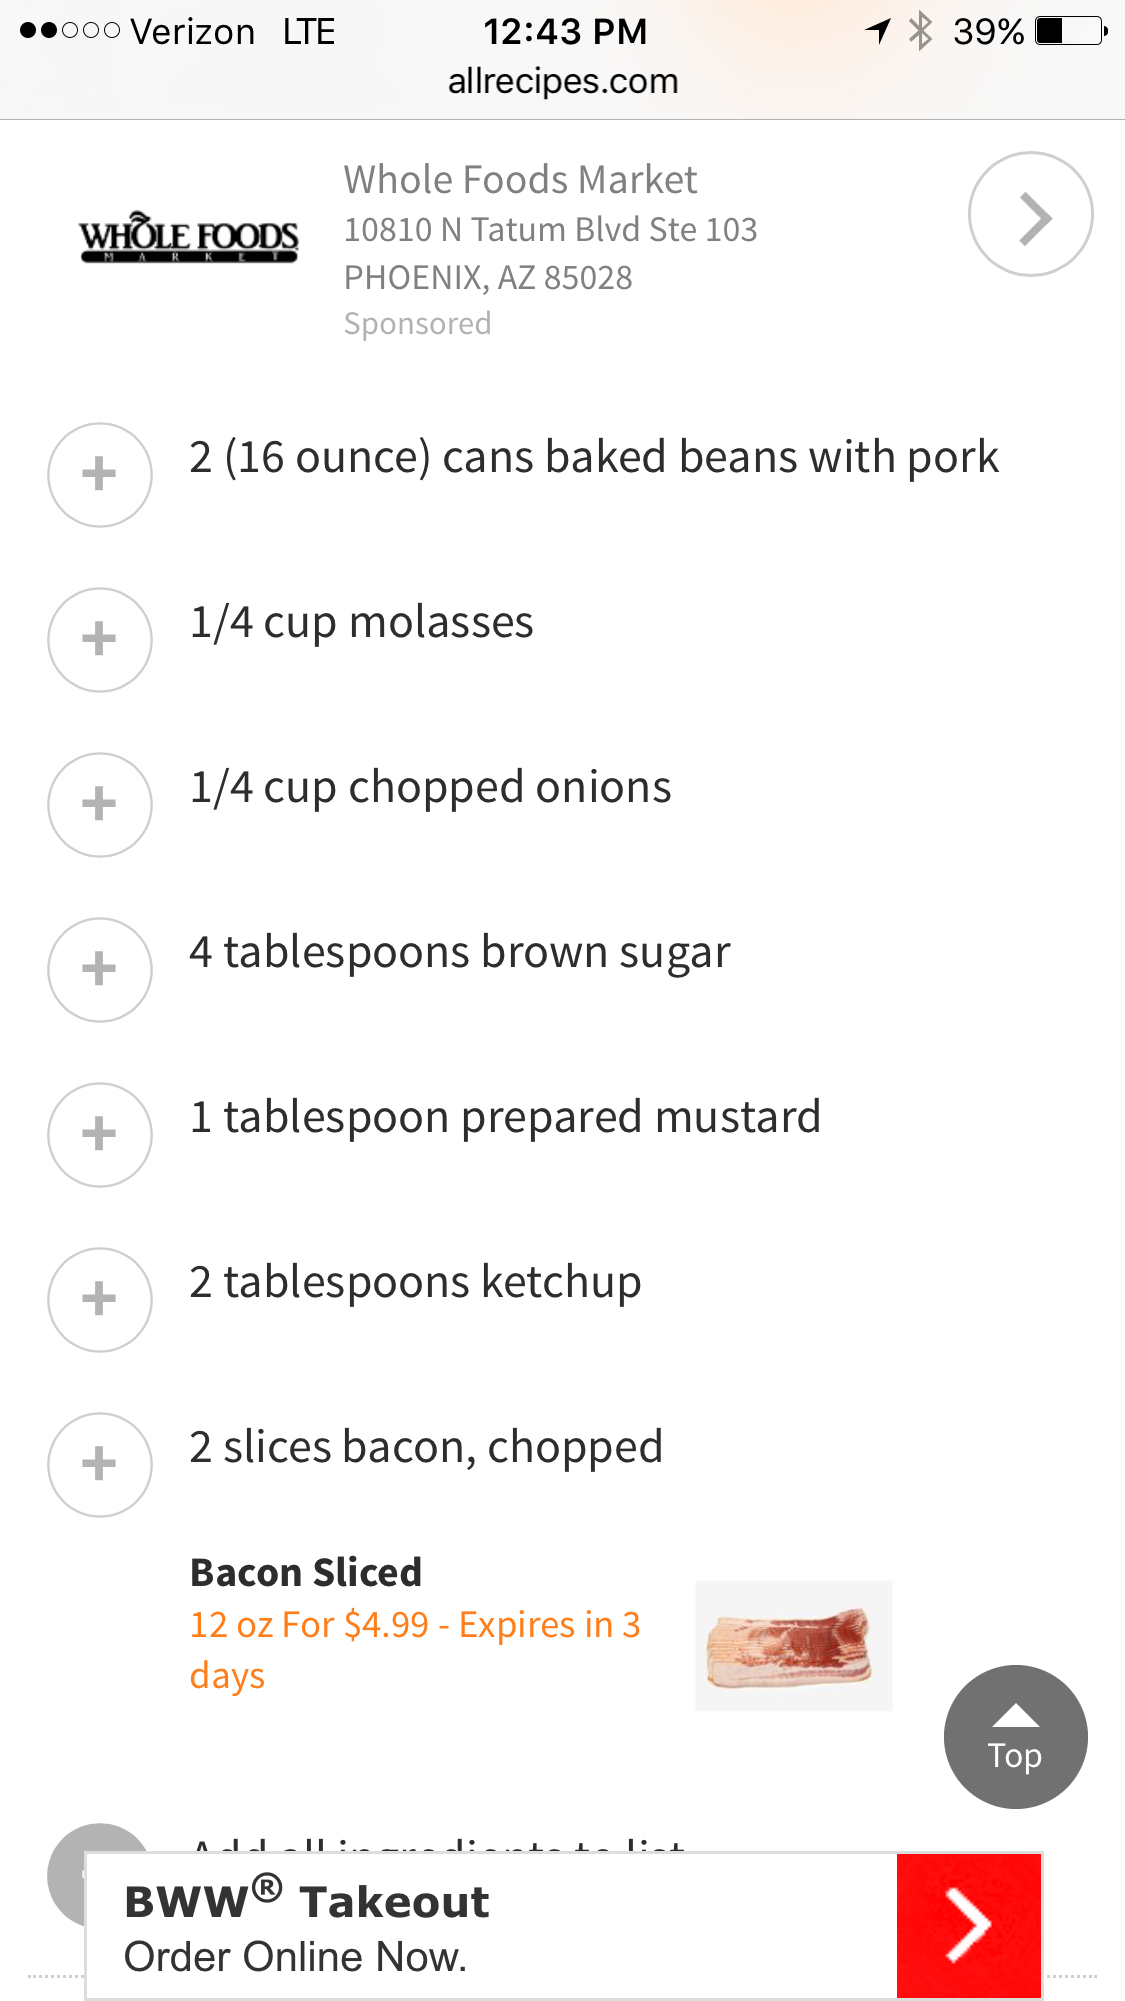
Simple Baked Beans

2015-12-19 12.43.14

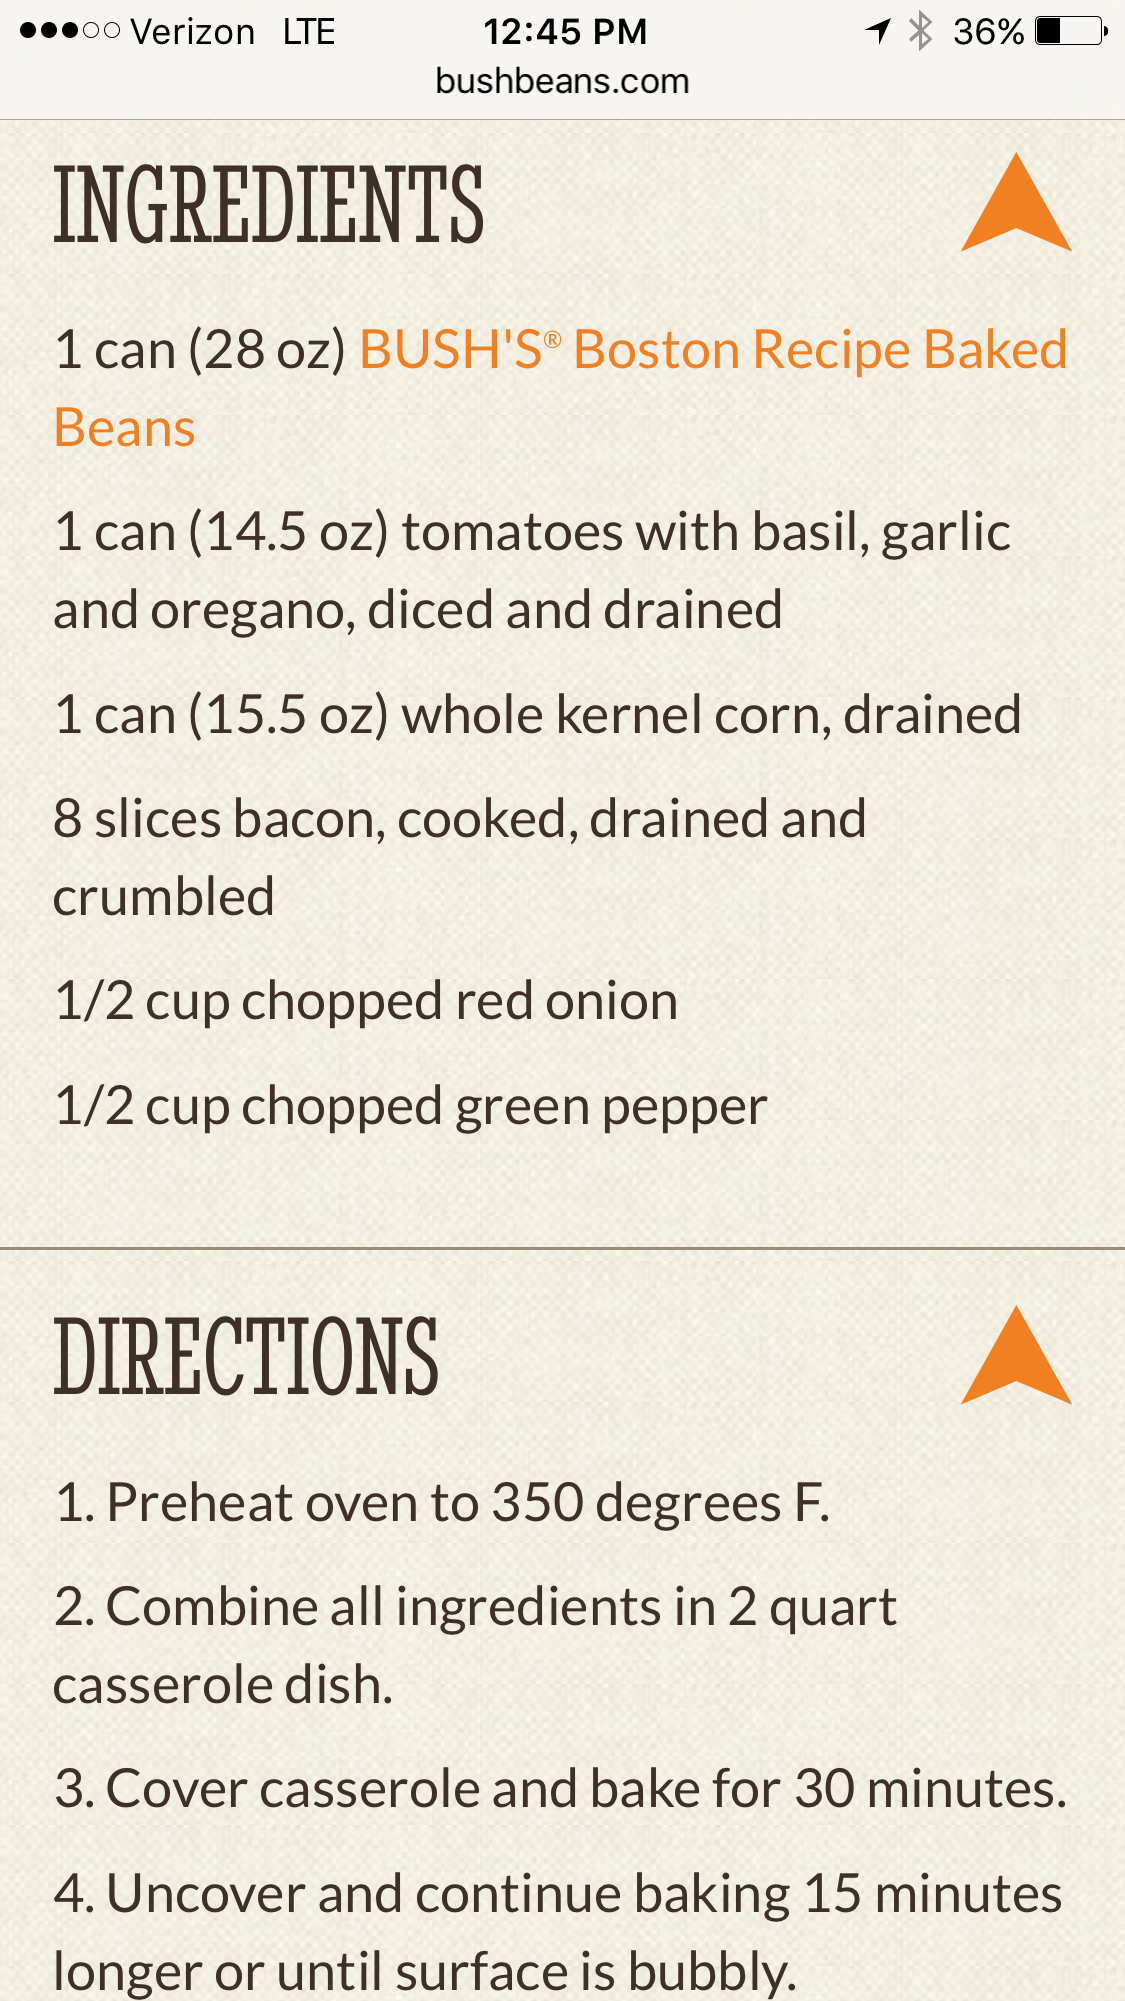
Bush’s Boston Baked Beans

2015-12-19 12.45.26


Crispy Tortilla Eggs with Avocado and Lime

CLICK HERE for Avocado Tips and Tricks.  


3 tablespoons EVOO
4 stale corn tortillas, cut into long narrow strips
2 tablespoons chopped mild onion
Salt and fresh-ground black pepper
6 eggs, beaten
1/3 cup good-quality salsa
1/3 cup crumbled mild cheese
(eg) Monterey Jack or Brick
1 avocado, sliced
1 lime, halved
1/4 cup Mexican crema, sour cream, or plain whole-milk yogurt (optional)

Instructions

1. Film a large saute pan with the olive oil, and heat over medium-high heat until the oil looks wavy. Add the tortilla strips and fry until they are beginning to crisp, about 1 minute. Don’t move them around too much; let them crisp on one side and then turn them.

2. Add the chopped onion and continue frying until the tortilla strips are crispy and nicely browned. Season with salt and pepper. Remove from the heat and spoon off any extra fat, reserving 1 tablespoon in the pan.

3. Return the pan to the burner, reducing the heat to medium. Move the majority of the strips to the edge of the pan, leaving about 3 inches clear in the center. Pour the eggs in the center and partially over the strips. Allow the eggs to set, and then gently pull them apart, letting the uncooked egg reach the surface of the pan. Once the eggs are firmly set, turn them in large pieces to finish cooking.

4. Serve with the salsa, cheese, slices of avocado, a squeeze of lime, and if you wish, the crema or sour cream.

Variations Stale tortillas are a must; fresh won’t crisp as well.

The recipe for this dish, at its most primal, begs for variations, so follow your heart: add shrimp, roasted chiles, olives, fresh herbs – you get the idea.

Notes From The Splendid Table’s How to Eat Supper:
Recipes, Stories, and Opinions from Public Radio’s Award-Winning Food Show by Lynne Rossetto Kasper and Sally Swift (Clarkson Potter/Publishers, 2008).
Copyright 2008 by American Public Media.

Breadsticks – Several Recipes and Tips

{Olive Garden Breadsticks}

From:   http://readableeatables.blogspot.com/

Oh man, I loved these! These would just complete any meal really. Pasta, soup, salad…you name it. Make these when you get a chance. Make sure you serve them hot out of the oven.

*These are a little more dense than Olive Garden’s. But the flavor is incredible and pretty right on with the garlic butter. I also updated the picture, because the other one was too dark. Enjoy 🙂

Dough:
1 1/2 cups warm water
2 Tbs sugar
1 Tbs yeast
1 Tbs salt (yes, the recipe calls for 1 Tablespoon, which I use every time and they turn out great.)
2 Tbs butter, softened
4-5 Cups flour

Topping:
3 Tbs butter melted
sea salt
1 tsp garlic powder

For the dough, pour the water into a stand mixer with the sugar and yeast, let that sit and froth for about 10 minutes. Add salt, butter, and 2 cups of flour. Mix the dough on low. Add the rest of the flour a half cup at a time, until dough scrapes the sides of the bowl clean. Mix the dough about 5 minutes on medium speed, until its soft and easy to work with.
Let the dough rest in the bowl until doubled in size, about 1 hour and then roll it out. Roll the dough out into a long log, spray a knife with cooking spray and cut the dough into 12-14 pieces. Roll those pieces into about 6 inch long snakes. Spray 2 large cookie sheets with cooking spray, ( I usually only use one) and lay the breadsticks out leaving about 2 inches between each one.
Place them in the oven with the temperature turned to 170 degrees. Let them rise for about 15 minutes, or until doubled in size.( I have also let them sit at room temp until they are doubled in size and then bake them in the oven)
Once risen, brush them with the 1 1/2 T of melted butter and sprinkle them with salt. Now preheat the oven to 400 degrees and bake them for 12-14 minutes or until golden brown. While they are baking combine the rest of the melted butter with 1 tsp garlic powder. When the breadsticks are golden brown, remove them from the oven and brush them with the butter/garlic mixture.


Other Breadstick Notes

Basic ingredients:
Flour, EVOO, Water, Yeast, Milk, Butter

Grissini Bread sticks are thin crisp bread sticks, rather than the chewy ones shown above.
Good flavor enhancers and combinations for this type of bread stick (from Greatest British Cooking Show) follow:

  • Nigella seed and Parmesan cheese
  • Poppy seed, caraway seed and Kalamata olives
  • Lemon and rosemary
  • Ras el hanout is a flavor from Africa
  • Garlic, Parmesan cheese and Bleu cheese
  • You can also entwine two different colors

Knead your dough until you achieve the Window Pane Stage, where it can stretch so thin that light goes through it.
A slow bake will drive out the moisture, making it crispier.

Grissini

    • 1 1/3 C water (warm)
    • 2 tsp yeast
      • Let rest 5 minutes
    • 1/4 C EVOO
    • 1 C AP flour – whisk to combine – this removes lumps
    • 2 C more flour
    • 1.5 tsp sea salt
      • Put on Kitchen Aid with paddle attachment
    • Change to dough hook
      • Add 3/4 C more flour
    • Mix 3-5 minutes with dough hook on medium-slow speed
    • Finish on counter, kneading by hand
    • Stretch dough into a rough rectangle
    • Put dough on surface oiled with EVOO
    • Continue to stretch until it is relatively flat
    • Roll using rolling pin to about 1/2 inch thickness
    • Brush the top with sesame oil
    • Cover with plastic wrap while still on counter
    • Cover plastic with a towel for about 90 minutes
      • You will have only one rise
      • OPTIONAL:  Sprinkle with sesame seeds or caraway seeds
    • As time nears, oil a large baking sheet with sesame oil
    • Cut into half (lengthwise) with a pizza cutter
    • Cut dough about the width of your fingers and move fingers to the baking sheet, stretching to width of baking sheet
    • OPTIONAL:  Stretch far, then twist into a spiral breadstick
    • Bake at 400º for 18-20 minutes
      • Cook until golden/tanned

From Sally’s Baking Addiction

Find it online: https://sallysbakingaddiction.com/homemade-breadsticks/

  • Water: Warm water activates the yeast. It should be about 100–110°F (38–43°C). If the water is too hot, it will kill the yeast. And your dough will be doomed.
  • Yeast: You need 2 and 1/4 teaspoons (which is 1 standard packet) of instant or active dry yeast to make this dough rise.
  • Sugar: Sugar increases the yeast activity and tenderizes the dough, especially paired with melted butter.
  • Melted Butter: Using butter instead of oil provides delicious flavor, and makes for a rich, soft dough. We’re using melted butter in both the dough and for brushing on top after baking.
  • Salt: For flavor both in the dough and the buttery topping.
  • Bread Flour: Bread flour gives these breadsticks a chewier texture, but if you only have all-purpose flour, you can use that instead.
  • Garlic Powder: We’re mixing garlic powder into the melted butter topping, and if you want extra garlicky flavor, you can include some in the dough as well.

For cheese-topped breadsticks (that you don’t need to individually shape!), see these cheesy breadsticks.

Kneading the Dough Is Key

Kneading dough is a common step in bread baking, and this particular dough definitely benefits from a long kneading step (about 8–10 minutes) to help ensure the thin breadsticks stay soft. You can knead dough with your hands or in a stand mixer. A stand mixer obviously makes the job easier, but if you don’t have one, kneading is a great stress reliever. 😉 On a lightly floured work surface, using the heels of your hands, stretch and fold the dough with gentle motion. If you’re new to yeasted doughs, my how to knead dough post and video can help with this step.

  • Why Do I Knead Dough? Kneading the dough serves a couple purposes. First, it incorporates air into the dough, which helps keep the thin breadsticks nice and soft. It also encourages the proteins in the flour and moisture in the dough to link together, forming a strong gluten network, which is essential for retaining the gas produced by the yeast. Gluten is what makes bread deliciously chewy.

You know your kneaded dough is ready to rise when it stretches without immediately tearing. After kneading, the dough will be soft and supple, and a windowpane test is always helpful. You can always poke the dough with your finger, too. If it slowly bounces back, it’s ready to rise. This is the exact same process we use to knead and test the dough for honey butter rolls.

  • What’s a Windowpane Test? Tear off a small (roughly golfball-size) piece of dough and gently stretch it out until it’s thin enough for light to pass through it. Hold it up to a window or light. Does light pass through the stretched dough without the dough tearing first? If so, your dough has been kneaded long enough and is ready to rise. If not, keep kneading.

Homemade Soft Breadsticks

5 Stars 4 Stars 3 Stars 2 Stars 1 Star 5 from 88 reviews
  • Author: Sally McKenney
  • Prep Time: 2 hours, 40 minutes (includes rises)
  • Cook Time: 18 minutes
  • Total Time: 3 hours
  • Yield: 14 breadsticks

Soft, fluffy, garlic butter-topped homemade breadsticks are the perfect accompaniment to pretty much any dinner. The dough requires 2 rises, but the 2nd rise is pretty quick as the oven preheats. Reference my Baking With Yeast Guide for answers to common yeast FAQs. 
Ingredients

    • 1 and 1/4 cups (300ml) warm water (between 100–110°F, 38–43°C)
    • 2 and 1/4 teaspoons (7g) instant or active dry yeast (1 standard packet)*
    • 2 Tablespoons (25g) granulated sugar
  • 3 Tablespoons (43g) unsalted butter, melted
  • 1 and 1/2 teaspoons salt
  • 3 and 1/3 cups (433g) bread flour (spooned & leveled), plus more as needed and for hands/work surface*
  • optional: 1/2 teaspoon garlic powder

Topping

  • 2 Tablespoons (28g) unsalted butter, melted
  • 1/4 teaspoon salt
  • 1/4 teaspoon garlic powder
  • optional for sprinkling on top: dried parsley or other favorite herb

Instructions

    1. Prepare the dough: Whisk the warm water, yeast, and sugar together in the bowl of your stand mixer. Loosely cover and allow to sit for 5–10 minutes until foamy and frothy on top. *If you do not own a stand mixer, you can do this in a large mixing bowl and in the next step, mix the dough together with a large wooden spoon/silicone spatula. It will take a bit of arm muscle. A hand mixer works, but the sticky dough repeatedly gets stuck in the beaters. Mixing by hand with a wooden spoon or silicone spatula is a better choice.*
    2. Add the melted butter, salt, 1 cup (130g) bread flour, and garlic powder, if using. With a dough hook attachment, mix on low speed for 30 seconds, scrape down the sides of the bowl with a silicone spatula, then add the remaining flour. Beat on medium speed until the dough comes together and pulls away from the sides of the bowl, about 2 minutes. If the dough seems too wet to a point where kneading in the next step would be impossible, beat in more flour 1 Tablespoon at a time until you have a workable dough. Keep in mind that dough should be soft and a little tacky, but still manageable to knead with lightly floured hands.
    1. Knead the dough: Keep the dough in the mixer and beat for an additional 8-10 full minutes, or knead by hand on a lightly floured surface for 8-10 full minutes. (If you’re new to bread-baking, my How to Knead Dough video tutorial can help here.) If the dough becomes too sticky during the kneading process, sprinkle 1 teaspoon of flour at a time on the dough or on the work surface/in the bowl to make a soft, slightly tacky dough. Do not add more flour than you need because you do not want a dry dough. After kneading, the dough should still feel a little soft. Poke it with your finger—if it slowly bounces back, your dough is ready to rise. You can also do a “windowpane test” to see if your dough has been kneaded long enough: tear off a small (roughly golfball-size) piece of dough and gently stretch it out until it’s thin enough for light to pass through it. Hold it up to a window or light. Does light pass through the stretched dough without the dough tearing first? If so, your dough has been kneaded long enough and is ready to rise. If not, keep kneading until it passes the windowpane test.
    2. 1st Rise: Lightly grease a large bowl with oil or nonstick spray. Place the dough in the bowl, turning it to coat all sides in the oil. Cover the bowl with aluminum foil, plastic wrap, or a clean kitchen towel. Allow the dough to rise in a relatively warm environment for 1.5–2 hours or until double in size. (I always let it rise on the counter. Takes about 2 hours. For a tiny reduction in rise time, see my answer to Where Should Dough Rise? in my Baking With Yeast Guide.)
    3. Line 2 baking sheets with parchment paper or silicone baking mats. Set aside.
    1. Shape the breadsticks: When the dough is ready, punch it down to release the air. Divide the dough in half—each half should weigh just under 1 pound. Working with 1 half at a time, cut 7 pieces, roughly equal in size (each piece will weigh about 2 ounces, or 55g, but don’t worry about making them exact). Using lightly floured hands and a very lightly floured work surface (you still want some grip for the tacky dough, so do not over-flour), roll each piece of dough into a log about 8 inches (20cm) long. Arrange 7 breadsticks on each prepared baking sheet. Repeat with 2nd half of dough.
    2. 2nd Rise: Cover shaped breadsticks with aluminum foil, plastic wrap, or a clean kitchen towel. Allow to rise until slightly puffy, about 20 minutes.
    3. Meanwhile, preheat oven to 400°F (204°C).
    4. Bake the breadsticks: Remove cover from breadsticks and bake for 18–19 minutes or until golden brown on top, rotating the pans (top to bottom, bottom to top) halfway through. If you notice the tops browning too quickly, loosely tent with aluminum foil.
    5. Make the topping: Melt butter, and stir in salt and garlic powder.
    6. Remove breadsticks from the oven, brush with garlic butter topping, and allow breadsticks to cool for a couple minutes before serving. Sprinkle with dried parsley or your favorite herb, if desired, and serve warm.
  1. Cover leftover rolls tightly and store at room temperature for 1 day or in the refrigerator for up to 5 days. Reheat as desired.

Notes

    1. Freezing Instructions for Baked Breadsticks: Freeze the baked and cooled breadsticks for up to 3 months. To thaw, leave out on the counter for a few hours or overnight in the refrigerator. Warm in the microwave for 30 seconds or covered on a baking sheet in a 300°F (149°C) oven for 10 minutes.
    2. Freezing Instructions for Dough: After the dough rises and you divide the dough in half in step 6, you can freeze half or some of the dough to use at a later time. Or you can simply freeze all of the dough. Lightly coat all sides of the dough you want to freeze with nonstick spray or olive oil. Place the dough into a zipped-top bag and seal tightly, squeezing out all the air. Freeze for up to 3 months. To thaw, place the frozen dough in the refrigerator for about 8 hours or overnight. When ready to use, remove the dough from the refrigerator and allow to rest for 30 minutes on the counter. Preheat the oven and continue with step 6, punching down the dough to release air if needed.
  1. Overnight/All Day Dough Instructions: Prepare the dough through step 3. Then, grease a large bowl, place dough inside, and coat all sides of dough as instructed in step 4. Cover dough and allow to rise for 8–12 hours in the refrigerator. (If it needs to be in the refrigerator for longer, use cooler water in the dough, which will slow the dough’s rise and allow for more time.) The slow rise gives the dough wonderful flavor! When ready, continue with step 5. If the dough didn’t quite double in size during this time, let it sit at room temperature for 30–45 minutes before punching down (step 6).
  2. Special Tools (affiliate links): Stand Mixer or Large Mixing Bowl and Silicone Spatula or Wooden Spoon | Whisk | Baking Sheets | Silicone Baking Mats or Parchment Sheets | Bench Scraper | Pastry Brush
  3. Yeast: I usually use instant yeast. You can use active dry yeast instead, with no changes to the preparation. Rise times will be slightly longer. Reference my Baking With Yeast Guide for answers to common yeast FAQs.
  4. Flour: If you don’t have bread flour, you can use all-purpose flour. All-purpose flour is convenient for most, but bread flour produces chewier breadsticks. The breadsticks are still soft and fluffy no matter which you use.
  5. Can I Add Cheese on Top? Yes, absolutely. Bake for just 15 minutes. Remove from the oven, carefully push the warm breadsticks together so they are touching, brush with the garlic butter topping, and then top each batch with 1/2 cup (about 55g) of shredded mozzarella or cheddar cheese (or a mix). There are 2 batches of 7 breadsticks, so you’ll need 1 cup (about 110g) of shredded cheese total. Return to the oven for 3-4 more minutes until cheese has melted and breadsticks are golden brown. Or try these flatter cheesy breadsticks.

Whole Wheat Bread

INGREDIENTS

  • 2 C lukewarm water
  • 1 pkg (1 TBL) yeast (w/1 tsp sugar)
  • 1/2 C honey (or ½ cup sugar)
  • 3 TBL oil
  • 1 TBL salt
  • 2 cup wheat flour
  • 2 cup white flour (more for kneading)
  • 2 TBL raw rolled oats

STEP BY STEP

  1. Mix everything together and dump out onto a floured surface
  2. Knead thoroughly on floured surface until smooth, keeping dough as soft as possible.
  3. Keep kneading, and adding more flour until you get a ball that is moist, but not sticky
  4. Place in greased bowls, cover and let rise until double – about 90 minutes.
  5. Shape into loaves, place in greased tin. Let rise until almost double – about 60 minutes.
  6. Bake 400° for 10 min then lower to 325° for 25-30 min.

Makes 2 loaves


From Sally’s Baking Addiction
A great site for new and seasoned bakers
Find it online: https://sallysbakingaddiction.com/whole-wheat-bread/

Success Tips to Keep in Mind

  1. You can make this loaf of bread 100% whole wheat, or replace 1 cup (about 125–130g) of the whole wheat flour with bread flour for a lighter, taller, fluffier loaf. The directions remain the same.
  2. Knead the dough for a long time, at least 8 minutes. If you have a stand mixer, use it for this recipe. This is a heavy whole grain dough, so it requires a good amount of kneading to help produce a more elastic structure.
  3. When kneading, avoid adding too much flour; a slightly tacky and soft dough is OK.
  4. Use an instant-read thermometer to check the internal temperature of the baked bread. This guarantees you won’t under-bake or over-bake the bread. It’s an incredibly helpful baking tool! The bread is done when the center of the loaf is 195–200°F (90–93°C).
  5. If you’re new to working with yeast, please review my Baking with Yeast Guide where I include practical and easy-to-understand answers to many yeast FAQs

Whole Wheat Bread

5 Stars 4 Stars 3 Stars 2 Stars 1 Star 4.9 from 1587 reviews
  • Author: Sally McKenney
  • Prep Time: 4 hours, 30 minutes (includes sponge and rises)
  • Cook Time: 38 minutes
  • Total Time: 5 hours, 10 minutes
  • Yield: 1 loaf

You need just 8 simple ingredients to make this whole wheat sandwich bread. It’s soft yet hearty and oh-so-flavorful, and store-bought sandwich bread just doesn’t compare! You can use 100% whole wheat flour, or you can swap in some bread flour for a taller, fluffier loaf. See recipe Notes for freezing and overnight instructions. You can also reference my Baking with Yeast Guide for answers to common yeast FAQs. 
Ingredients

Sponge

  • 1 cup (240ml) water, warmed to about 110°F (43°C)
  • 1/3 cup (80ml) whole milk, warmed to about 110°F (43°C)
  • 2 and 1/4 teaspoons (7g) active dry or instant yeast (1 standard packet)
  • 2 cups (260g) whole wheat flour (spooned & leveled)

Dough

  • 3 Tablespoons (63g) honey
  • 3 Tablespoons (43g) unsalted butter, softened to room temperature
  • 1 teaspoon fresh lemon juice (or apple cider vinegar)
  • 1 and 1/3 cups (173g) whole wheat flour (spooned & leveled), plus more as needed
  • 1 and 1/4 teaspoons salt
  • optional oat topping: 1 beaten egg white + 1 Tablespoon whole oats

Instructions

    1. Prepare the sponge: In a large bowl or the bowl of your stand mixer, whisk the water, whole milk, and yeast together. Add the 2 cups (260g) flour and stir with a spatula or wooden spoon until a thick batter forms. Cover lightly and allow to double in size at room temperature, about 60–90 minutes. Sometimes this can take up to 2 hours. *I do not recommend a hand mixer for this dough because the dough is too thick and heavy.*
    2. Add the remaining dough ingredients including the honey, butter, lemon juice, remaining flour, and the salt. With a dough hook attachment, or using a spatula or wooden spoon (and some arm muscle!), beat on medium speed/mix until the dough comes together and pulls away from the sides of the bowl, about 3 minutes. If the dough seems too wet to a point where kneading (next step) would be impossible, beat in more flour 1 Tablespoon at a time until you have a workable dough, similar to the photos above. Dough should be soft and a little sticky, but still manageable to knead with lightly floured hands.
    1. Knead the dough: Keep the dough in the mixer and beat for an additional 8–10 full minutes, or knead by hand on a lightly floured surface for 8–10 full minutes. (If you’re new to bread-baking, my How to Knead Dough video tutorial can help here.) If the dough becomes too sticky during the kneading process, add 1 more Tablespoon of flour at a time to make a soft, slightly tacky dough. Do not add more flour than you need; you do not want a dry dough. After kneading, the dough should still feel a little soft. Poke it with your finger—if it slowly bounces back, your dough is ready to rise.
    2. 1st rise: Lightly grease a large bowl with oil or nonstick spray. Place the dough in the bowl, turning it to coat all sides in the oil. Cover the bowl and allow the dough to rise in a relatively warm environment for 1.5–2 hours or until about double in size. (For a tiny reduction in rise time, see my answer to Where Should Dough Rise? in my Baking With Yeast Guide.)
    3. Grease a 9×5-inch loaf pan.
    4. Shape the dough: When the dough is ready, punch it down to release the air. Lightly flour a work surface, your hands, and a rolling pin. Roll the dough out into a large rectangle, about 8×15 inches. It does not have to be perfect—in fact, it will probably be rounded on the edges. That’s ok! Roll it up into an 8-inch log and place in the prepared loaf pan.
    5. 2nd rise: Cover shaped loaf. Allow to rise until it’s about 1 inch above the top of the loaf pan, about 45–60 minutes.
  1. Adjust oven rack to a lower position and preheat oven to 350°F (177°C). It’s best to bake the bread towards the bottom of the oven so the top doesn’t burn.
  2. Optional oat topping: If you want to add the optional oat topping, add it right before baking the bread. With a pastry brush, brush the risen loaf with egg white, then sprinkle the oats on top.
  3. Bake the bread: Bake for 36–40 minutes, or until golden brown on top. If you notice the top browning too quickly, loosely tent the pan with aluminum foil. (I usually add it around the 20-minute mark.) To test for doneness, if you gently tap on the loaf, it should sound hollow. For a more accurate test, the bread is done when an instant-read thermometer reads the center of the loaf as 195–200°F (90–93°C). Remove from the oven and allow bread to cool for a few minutes in the pan on a cooling rack before removing the bread from the pan and slicing. Feel free to let it cool completely before slicing, too.
  4. Cover leftover bread tightly and store at room temperature for up to 1 week.

Notes

    1. Freezing Instructions: Prepare recipe through step 6. Place shaped loaf in a greased 9×5-inch loaf pan or disposable loaf pan, cover tightly, and freeze for up to 3 months. On the day you serve it, let the loaf thaw and rise for about 4–5 hours at room temperature. Bake as directed. You can also freeze the baked bread loaf. Allow the bread to cool completely, then freeze for up to 3 months. Thaw in the refrigerator or at room temperature, then reheat as desired.
    2. Overnight Instructions: Prepare the recipe through step 6. Cover the shaped loaf tightly and refrigerate for up to about 15 hours. At least 3 hours before you need the bread the next day, remove from the refrigerator, keep covered, and allow to rise on the counter for about 1–2 hours before baking. Alternatively, you can let the dough have its 1st rise in the refrigerator overnight. Prepare the dough through step 3, then cover the dough tightly and place in the refrigerator for up to 12 hours. Remove from the refrigerator and allow the dough to fully rise for 2 more hours. Continue with step 5.
    3. Special Tools (affiliate links): Stand Mixer or Large Glass Mixing Bowl with Wooden Spoon or Silicone Spatula | 9×5-inch Loaf Pan | Rolling Pin | Pastry Brush for optional topping | Instant-Read Thermometer | Wire Cooling Rack
    4. Milk: Low-fat or nondairy milk work here, but whole milk produces phenomenal texture and I highly recommend it.
  1. Yeast: I usually use instant yeast. You can use active dry yeast instead, with no changes to the preparation. Rise times will be slightly longer. Reference my Baking With Yeast Guide for answers to common yeast FAQs.
  2. Flour: Make sure your whole wheat flour is fresh. Check the date on the package, and don’t store it uncovered. Whole wheat flour can become rancid if stored for too long, and your bread will taste bitter. You can use all whole wheat flour in this recipe, or substitute 1 cup (130g) of bread flour for a slightly taller, fluffier loaf. You can use 1 cup of bread flour in the sponge in step 1 OR save it for the remaining dough in step 2. If using 1 cup (130g) of bread flour in step 2, you’ll also need the 1/3 cup (43g) of whole wheat flour.
  3. Honey: Honey produced the best tasting bread. In a pinch, you can use regular granulated sugar or brown sugar. But you will miss out on that honey flavor. I have not tested other sweeteners.
  4. Can I shape this into a round boule? No, this dough needs the structure of a loaf pan. Instead, you may like this no-knead seeded oat bread.
  5. Doubling this recipe: For best results, I recommend making two separate batches of dough. This is a big, heavy dough and the sponge will take a very long time to rise, and so will the kneading step. It’s best to make 2 separate doughs.
  6. Whole Wheat Rolls: I recommend my soft whole wheat dinner rolls recipe, or you can try my multigrain bread/rolls recipe instead.
  7. Adapted from Sandwich Bread and Whole Wheat Dinner Rolls

Hot Fudge Topping

Takes about 10 minutes from start to finish.

Ingredients

    • 6 oz baking chocolate – dark or semi-sweet
    • 1/2 C granulated sugar
    • 1/3 C Karo syrup
    • 1/4 C cocoa powder
    • 3/4 C heavy cream
    • 1/2 tsp salt – only if using unsalted butter
    • 1/4 C butter (softened)
    • 2 tsp vanilla extract
    1. Mix all except vanilla and buter
    2. Heat over medium heat until consistent
    3. Bring to 220º  (3-5 minutes)
    4. Remove from heat and stir in butter and vanilla.
    5. Store in fridge for no more than a month.

More Homemade Toppings for Desserts & Ice Cream from Sally’s Baking Addiction

Sally McKenney has a great site with many wonderful recipes.  Here are some links to her ice cream toppings.

HTML Snippets Powered By : XYZScripts.com