This is my favorite vanilla buttercream. It’s the perfect vanilla frosting that’s simple, creamy and smooth and tastes unbelievable on vanilla cupcakes!
4 – 5 cups (480-600g) confectioners’ sugar (see note)
1/4 cup (60ml) heavy cream, half-and-half, or whole milk, at room temperature
2 teaspoonspure vanilla extract
salt, to taste
Instructions
With a handheld or stand mixer fitted with a paddle attachment, beat the butter on medium speed until creamy, about 2 minutes. Add 4 and 1/2 cups confectioners’ sugar, the heavy cream, and vanilla extract. Beat on low speed for 30 seconds, then increase to medium-high speed and beat for 2 full minutes. Taste. Add a pinch of salt if frosting is too sweet. I always add 1/8 teaspoon.
Adjust if needed: You can control the consistency at this point—add up to 1/2 cup more confectioners’ sugar if frosting is too thin or more heavy cream if frosting is too thick (add only 1 Tablespoon at a time, beat together, then taste and add more if desired).
Use immediately or cover tightly and store for up to 1 week in the refrigerator or up to 3 months in the freezer. After freezing, thaw in the refrigerator then beat the frosting on medium speed for a few seconds so it’s creamy again. After thawing or refrigerating, beating in a splash of heavy cream or milk will help thin the frosting out again, if needed.
Notes
Freezing Instructions: Freeze in an airtight container for up to 3 months. Thaw in the refrigerator overnight, then beat the frosting on medium speed for a few seconds so it’s creamy again. After thawing or refrigerating, beating in a splash of room temperature heavy cream, half-and-half, or milk will help thin the frosting out again, if needed.
Quantity: This recipe is enough to frost 12-16 cupcakes or a thin layer on a 9×13 inch quarter sheet cake. Follow the ratios written in this white cake for a two layer cake, or for a three layer cake use the ratios in this confetti cake.
Confectioners’ Sugar: If your confectioners’ sugar is particularly lumpy, I recommend sifting it 1-2x before measuring and using.
Heavy Cream: I love using heavy cream for the creamiest consistency. You can use half-and-half or whole milk instead if needed. The lower the fat, the less creamy your buttercream will be. Whichever you use, make sure it’s at room temperature. Otherwise your frosting could separate or appear grainy.
These soft-baked oatmeal cream pies are a homemade take on the classic Little Debbie brand lunchbox treat we all loved growing up. Two chewy, soft-baked molasses- and cinnamon-kissed oatmeal cookies sandwich a fluffy, sweet cream filling. One bite and you’ll wonder why you ever settled for store-bought. And the best part: You don’t even need to chill the cookie dough.
I originally published this recipe in 2013.
One reader, Adrienne, commented: “I have made these cookies twice now. They are without a doubt the BEST cookies my husband and I have ever had… not just best I have made, but best we have ever eaten… Absolutely wonderful! ★★★★★”
And another reader, Kate, commented: “What a fantastic recipe!!! The oatmeal cookies on their own are easily the tastiest and best oatmeal cookies I have EVER MADE! I made my creme pies slightly smaller than the recipe called for so I had about 30 pies total. Highly recommend!★★★★★”
They’re not an exact copycat, though. My homemade version is softer and oat-ier than the original. And I know that packaged oatmeal creme pies use raisin paste (among other additional ingredients) in the cookie dough; these do not.
Ingredients You Need & Why
Butter: These cookies use plenty of it both in the cookie dough and in the filling. You need a lot of butter in the cookie dough to ensure spread. The cookies should be soft and flat, and using proper room-temperature butter will help achieve that. If the butter is too soft, they’ll over-spread and become hard and crispy. Read more: room-temperature butter in baking.
Dark Brown Sugar & Granulated Sugar: I recommend reaching for dark brown sugar, which has a slightly higher molasses content than light brown sugar. This means more flavor. You’ll use some granulated sugar, too, to ensure the cookies spread.
Egg: An egg helps bind the ingredients and provides structure.
Molasses: Just a Tablespoon, for even more flavor.
Flour: Flour gives the cookies structure and helps soak up the moisture in the cookie dough. Note that I slightly increased the flour from the original recipe. I now use 1 and 2/3 cups (209g) instead of 1 and 1/2 cups.
Baking Soda: Helps the cookies puff up, then fall a bit as they cool.
Salt: Flavor enhancer, and to balance the sweet.
Quick Oats: For the ideal texture, use quick oats. They incorporate smoothly into the dough, unlike whole oats, which can make the cookies overly coarse.
Confectioners’ Sugar: To sweeten and thicken the filling.
Heavy Cream: Smooths out the filling.
Let’s address the butter in the room one more time: yes, these cookies use plenty. You need 1 and 1/4 cups (20 Tablespoons) in the cookie dough. This is 2 and 1/2 sticks. You also need 3/4 cup (12 Tbsp) in the filling, which is 1 and 1/2 sticks. These aren’t lightened-up or healthified in any way—and that’s the whole point. They’re a true treat, one worth savoring… every single soft and sticky bite.
Oats Success Tip
Again, use quick oats for the best texture.
If you only have old-fashioned whole oats, which is what I usually use in most oatmeal cookie recipes, give them a few pulses in your food processor to break them down. That’s the secret to helping these cookies spread just right and still hold their soft, chewy center.
Homemade Cream Filling
As the cookies finish cooling, you can make the cream filling. This is just like making an American-style buttercream frosting. Beat butter until smooth, and then add confectioners’ sugar, cream, vanilla, and then add salt to taste. It’s smooth, fluffy, and thick—perfect consistency to stuff inside two cookies!
Homemade Oatmeal Cream Pies
5 Stars 4 Stars 3 Stars 2 Stars 1 Star 4.7 from 119 reviews
These soft-baked oatmeal cream pies are a homemade take on the classic lunchbox treat we all loved growing up. Made with buttery, cinnamon-kissed oatmeal cookies and a fluffy, sweet cream filling, they’re even better than the original. And the best part: You don’t even need to chill the cookie dough.
3 Tablespoons (45ml) heavy cream, at room temperature
1 and 1/2 teaspoons pure vanilla extract
salt, to taste
Instructions
Preheat oven to 375°F (191°C). Line baking sheets with parchment paper or silicone baking mats. Set aside.
In a large bowl using a hand mixer or a stand mixer fitted with a paddle attachment, beat the butter, brown sugar, and granulated sugar together on medium-high speed until light and creamy, about 3 minutes. Stop and scrape down the sides of the bowl as needed. (Here’s a helpful tutorial if you need guidance on how to cream butter and sugar.) Add the egg, vanilla, and molasses and beat on high speed until combined, about 1 minute. Scrape down the sides and bottom of the bowl and beat again as needed to combine.
In a medium bowl, whisk the flour, baking soda, salt, cinnamon, cloves, and oats.
With the mixer running on low speed, slowly add the dry ingredients to wet ingredients. The dough will be quite thick and very sticky, and you may have to mix it all by hand after a few seconds in the mixer.
Scoop the dough, about 2 heaping Tablespoons of dough per cookie (if using a scale, make them 45g each), and arrange 3 inches apart on the baking sheets (about 6 cookies per baking sheet). Cookies will spread a bit in the oven.
Bake for 10–13 minutes or until the cookies are very lightly golden around the edges. The centers will look very, very soft.
Remove from the oven and allow the cookies to cool on the baking sheet for 10 minutes before transferring to a cooling rack to cool completely.
For the filling: In a large bowl using a hand mixer or a stand mixer fitted with a paddle attachment, beat the butter on high speed until creamy, about 1 minute. Add the confectioners’ sugar and beat on medium speed for 1–2 minutes. Pour in heavy cream and vanilla extract. Beat on high speed for 2–3 minutes. Taste and add a pinch or two of salt, if needed. If filling is way too thick, beat in another Tablespoon of room-temperature heavy cream.
Spread about 1.5 Tablespoons of cream filling on the bottom side of half of the cookies; top with remaining cookies, right side up.
Cover and store leftover sandwich cookies at room temperature for up to 2 days, or in the refrigerator for up to 5 days.
Notes
Make Ahead & Freezing Instructions: You can make the cookie dough and store it, tightly covered, in the refrigerator for up to 3 days. Bring to room temperature before continuing with step 5. (Note that the cookies won’t spread as much since the oats have likely absorbed a lot of moisture.) Baked cookies, cooled but not filled/sandwiched, freeze well for up to 3 months. (For best taste and texture, filling should be fresh.) Thaw overnight in the refrigerator and bring to room temperature before continuing with step 8. Unbaked cookie dough balls freeze well for up to 3 months. Bake from frozen, adding a minute or two to the baking time. Read my tips and tricks on how to freeze cookie dough.
Brown Sugar: I use dark brown sugar for extra flavor. If you only have light brown sugar, you can use that with no other changes to the dough.
Oats: Do not use old-fashioned whole oats in this recipe; for the correct texture and to ensure enough moisture is soaked up in the cookie dough, use quick oats. If you only have whole oats, pulse them about 10 times in a food processor before using.
I’ve been a home-schooled chef for over 30 years, and I’ve got to say that Sally’s is one of the best sites I have come across. Her website says it all, only someone with a true addiction to the art of baking could be so comprehensive.
While I’ve copied many of the recipes here FOR MY OWN REFERENCE, you may use them. There is always a link at the top of each page, and I highly encourage you to visit her site. It is more comprehensive than mine, as mine is mainly for my own use.
Sally also has a cookbook that is filled with WONDERFUL recipes.
Sally’s Baking 101
A New York Times Best Seller, this is the ultimate baking book from the creator of the beloved website Sally’s Baking Addiction, written for home cooks of all skill levels and packed with 101 sweet and savory, foolproof recipes plus helpful tips for best results.
Homemade thin mint cookies come together using my chocolate sugar cookies recipe, a splash of peppermint extract, and a divine coating of chocolate. You’ll love these copycat thin mint cookies for when you have a craving and there’s no Girl Scout Cookie box to be found.
Divide the dough into 2 equal parts. Using a rolling pin, roll each to about 1/4-inch thickness on a piece of parchment. Refrigerate the dough for at least 1 hour—chilling is mandatory.
Cut the cookie dough into circles. Use a 2-inch round cookie cutter. Re-roll the remaining dough and continue cutting until all is used.
Bake.
Let the cookies cool completely.
Make the chocolate topping.
Dip each cooled cookie completely into the chocolate. Use a fork to lift out and let any excess chocolate drip off. Place each cookie onto a lined baking sheet and repeat the process for the remaining cookies. Refrigerate the baking sheet to help the chocolate set.
Here’s exactly how to make homemade thin mint cookies using a simple from-scratch cookie dough recipe with cocoa powder, real chocolate, and peppermint. Try them cold or out of the freezer—they’re incredible!
Make the cookies: In a large bowl using a handheld mixer or stand mixer fitted with a paddle attachment, beat the butter for 1 minute on medium speed until completely smooth and creamy. Add the granulated sugar and beat on medium high speed until fluffy and light in color. Beat in the egg, vanilla extract, and peppermint extract on high speed. Scrape down the sides and bottom of the bowl as needed.
Sift the flour and cocoa powder together in a medium bowl. Whisk in the baking powder and salt until combined. On low speed, slowly mix into the wet ingredients until combined.
Divide the dough into 2 equal parts. Roll each portion out onto a piece of parchment to about 1/4″ thickness. Stack the pieces (with parchment paper between) onto a baking sheet and refrigerate for at least 1 hour. Chilling is mandatory. If chilling for more than a couple hours, cover the top dough piece with a single piece of parchment paper. You can chill up to 2 days.
Once chilled, preheat oven to 350°F (177°C). Line 2-3 large baking sheets with parchment paper or silicone baking mats. Remove one of the dough pieces from the refrigerator and using a 2-inch round cookie cutter, cut in circles. Transfer the cut cookie dough to the prepared baking sheet. Re-roll the remaining dough and continue cutting until all is used.
Bake for 8-10 minutes or until the edges appear set. The cookies will seem very soft in the centers. Make sure you rotate the baking sheet halfway through bake time. Cool on baking sheet for 5 minutes, then transfer to a wire rack to cool completely before dipping in chocolate.
Once the cookies are cool, begin the topping: Melt the chopped chocolate and oil together in a double boiler or (carefully!) use the microwave. For the microwave, place the chocolate and oil in a medium heat-proof bowl. Melt in 15 second increments, stirring after each increment until completely melted and smooth. Once melted, stir in the peppermint extract. Dip each cooled cookie completely into the chocolate and use a fork to lift out. Tap the fork gently on the side of the bowl to allow excess chocolate to drip off. Place cookie onto a parchment or silicone baking mat-lined baking sheet. Place the baking sheet into the refrigerator to help the chocolate set. Once set, enjoy!
Cover and store leftover cookies at room temperature for up to 2-3 days or in the refrigerator for up to 1 week. The cookies taste delicious cold. I love eaten straight from the freezer!
Notes
Make Ahead & Freezing Instructions: Cookies freeze well up to 3 months. Thaw overnight in the refrigerator if desired. You can chill the cookie dough for up to 2 days (step 3). You can also freeze the cookie dough before rolling for up to 3 months. Then allow to thaw overnight in the refrigerator. Then allow to come to room temperature for about 1 hour. Then roll and continue with the recipe as directed.
Peppermint Extract: Avoid using mint extract; I find it more resembles the taste of spearmint toothpaste than anything else. Peppermint extract has that wonderful cool mint flavor which pairs wonderfully with chocolate.
Slice ‘n’ Bake Option: I’ve been getting questions about using this recipe as a slice ‘n’ bake cookie to avoid rolling out the dough. This is doable, just keep in mind the dough is a little sticky. Roll the cookie dough into two 2-3 inch diameter logs, then chill for at least 1 hour as directed above. Slice each into 16-18 cookies, then continue with step 5.
With only 8 ingredients in this recipe, each and every one has an important job to do:
All-Purpose Flour: Provides structure so the cookies hold their cut-out shapes.
Unsweetened Cocoa Powder: The star of the show! You can use natural or Dutch-process for slightly different flavor profiles. See the section below on this.
Baking Powder: Gives a slight lift without puffing too much (important for flat tops!).
Salt: For flavor balance.
Butter: Unparalleled for buttery sugar cookies. Make sure it’s properly softened to room temperature. And if you’re a baking beginner, check out my tutorial on how to cream butter and sugar.
Granulated Sugar: Sweetens and helps create those slightly crisp edges.
Egg: Binds everything together and adds richness.
Vanilla Extract: Enhances the chocolate flavor without overpowering it.
Success Tips for the Best Chocolate Sugar Cookies
There are a few tricks to making sure your chocolate sugar cookies hold their cookie-cutter shapes in the oven (rather than spreading into unrecognizable blobs):
Roll out the dough BEFORE chilling. It’s much more effective to chill the cookie dough *after* rolling it out, just as you do when making regular sugar cookies or brown sugar cut-out cookies. Trying to roll out hard, chilled sugar cookie dough is frustrating and difficult. So, once you’ve mixed together your dough, divide it into 2 halves, and roll out each portion before chilling the rolled-out dough in the refrigerator.
Another trick: Roll out the cookie dough directly on a silicone baking mat or parchment paper so you can easily transfer it to the refrigerator. If you don’t have enough room for 2 baking sheets in your refrigerator, stack the pieces of rolled-out dough on top of each other, with parchment in between.
Roll evenly: Aim for about 1/4-inch thickness so they bake evenly and stay soft.
My final trick: Instead of dusting your hands and work surface with flour like you usually do when handling/working with dough, use cocoa powder—an ingredient you need for the dough anyway! Flour is tasteless, so might as well use cocoa powder for extra chocolate flavor, right?
3 Cookie Icing Options
Once cooled, these cookies are your canvas! Because the cookies bake with a flat, smooth top, decorating is much easier and more professional-looking.
I have 3 cookie icing recipes, so you have several options to choose from, based on your skill level and decorating needs. Here are the basic differences:
1. Buttercream Frosting: I decorated the pictured chocolate sugar cookie hearts with cookie decorating buttercream, piped on with a Wilton 1A piping tip. Then I spread it around to flatten it out and added these sprinkles. This is a classic vanilla buttercream frosting that soft-sets on cookies after a few hours. In a nutshell:
Only 5 ingredients
Creamy + sweet
Great for beginners
Can decorate with piping tips or simply spread on cookies
2. Royal Icing: I have a separate post for royal icing where you can find many FAQs, make-ahead instructions, and a video tutorial. This icing is ideal for intermediate or advanced cookie decorators. In a nutshell:
Sturdy icing for piping sharp detail and fine designs
Sets on the cookie in just 1–2 hours
Dries firm but still soft, not a hard cement-like texture
3. Easy Glaze Icing: Another option is this easy cookie icing, which I typically use on these Christmas sugar cookies. This glaze-style icing is great for beginners and much easier to make than royal icing because you don’t need an electric mixer or the perfect icing consistency for success. It isn’t as sturdy as royal icing, though, so you won’t be able to pipe concise details. It also takes a good 24 hours to dry. In a nutshell:
Easy to make with just a fork/whisk and bowl
Just 5 basic ingredients
Can decorate with piping tips or a squeeze bottle (good for beginners and young bakers)
And if you’re not into piping tips, you can just dunk the tops of the chocolate sugar cookies into icing like when making mini animal cracker cookies. A fun option if you’re baking with kids!
Do chocolate sugar cookies spread?
Not much! This recipe is designed to hold its shape, especially when the dough is properly chilled.
Can I make this cookie dough ahead of time?
Yes! Chill it for up to 3 days in the refrigerator.
Can I freeze chocolate sugar cookie dough?
Absolutely. Freeze for up to 3 months, then thaw in the refrigerator before rolling. See How to Freeze Cookie Dough for more info.
Cut-Out Chocolate Sugar Cookies
5 Stars 4 Stars 3 Stars 2 Stars 1 Star 4.8 from 46 reviews
Total Time:3 hours, 30 minutes (plus icing setting time)
Yield:18 3-inch cookies
These are soft, thick chocolate sugar cookies with lightly crisp edges and rich cocoa flavor. This easy cut-out cookie dough rolls out smoothly, holds its shape, and bakes with a flat surface perfect for decorating with icing or buttercream. Chilling is the most important step, so don’t skip it. The number of cookies this recipe yields depends on the size of the cookie cutter you use. If you’d like to make dozens of cookies for a large crowd, double the recipe.
Make the cookies: Whisk the flour, cocoa powder, baking powder, and salt together in a medium bowl. Set aside.
In a large bowl using a handheld or a stand mixer fitted with a paddle attachment, beat the butter and sugar together on high speed until completely smooth and creamy, about 2 minutes. Add the egg and vanilla and beat on high speed until combined, about 1 minute. Scrape down the sides and up the bottom of the bowl and beat again as needed to combine.
Add the dry ingredients to the wet ingredients and mix on low until combined. Dough will be soft. If the dough seems too soft and sticky for rolling, add 1 more Tablespoon of flour.
Roll the dough: Divide the dough into 2 equal parts. Dust 2 large pieces of parchment paper or 2 silicone baking mats with cocoa powder or flour. Place a dough half on each. With a rolling pin lightly dusted with cocoa powder or flour, roll the dough out to about 1/4-inch thickness. Use more cocoa powder/flour if the dough seems too sticky. The rolled-out dough can be any shape, as long as it is evenly 1/4-inch thick.
Chill the dough: Lightly dust one of the rolled-out doughs with cocoa powder or flour. Place a piece of parchment on top. (This prevents sticking.) Place the 2nd rolled-out dough on top. Cover with plastic wrap or aluminum foil, then refrigerate for at least 1-2 hours and up to 2 days.
Preheat oven & shape cookies: Once chilled, preheat oven to 350°F (177°C). Line 2-3 large baking sheets with parchment paper or silicone baking mats. Carefully remove the top dough piece from the refrigerator. Using cookie cutters, cut the dough into shapes. Re-roll the remaining dough, using more cocoa powder or flour to lightly dust your work surface and rolling pin, and continue cutting the dough until all is used. Work quickly so the dough doesn’t become too warm or soft. If it does, stop what you’re doing and place any unused dough back in the refrigerator for 10 minutes to stiffen up again. Repeat cutting into shapes with 2nd half of dough. (Note: It doesn’t seem like a lot of dough, but you get a lot of cookies from the dough scraps you re-roll.)
Bake & cool: Arrange shaped cookies on baking sheets 3 inches apart. Bake for 11-12 minutes or until edges are set. If your oven has hot spots, rotate the baking sheet halfway through bake time. Allow cookies to cool on the baking sheet for 5 minutes and then transfer to a wire rack to cool completely before decorating.
Enjoy cookies right away or wait until the frosting/icing sets to serve them. Once the icing has set, these cookies are great for gifting or for sending. Plain or decorated cookies stay soft for about 5 days when covered tightly at room temperature. For longer storage, cover and refrigerate for up to 10 days.
Notes
Freezing Instructions: Plain or decorated sugar cookies freeze well up to 3 months. Wait for the icing/buttercream to set completely before layering between sheets of parchment paper in a freezer-friendly container. To thaw, thaw in the refrigerator or at room temperature. You can also freeze the cookie dough for up to 3 months before rolling it out. Prepare the dough through step 3, divide in half, flatten both halves into a disk as we do with pie crust, wrap each in plastic wrap, then freeze. To thaw, thaw the disks in the refrigerator, then bring to room temperature for about 1 hour. Roll out the dough as directed in step 4, then chill in the refrigerator for 1 hour before cutting into shapes and baking.
Room Temperature:Room temperature butter is essential. If the dough is too sticky, your butter may have been too soft. Room temperature butter is actually cool to the touch. Room temperature egg is preferred so it’s quickly and evenly mixed into the cookie dough.
Even if you’ve never made homemade bread or worked with yeast before, this homemade artisan bread is for you. Watch the video tutorial below and review the recipe instructions and recipe notes prior to beginning. If you’re new to working with yeast, reference my Baking with Yeast Guide for answers to common yeast FAQs.
Ingredients
3 and 1/4 cups (about 430g) bread flour (spooned & leveled), plus more for hands and pan
2 teaspoons (about 6g) instant yeast
2 teaspoons (about 9g) coarse salt (see note)
1 and 1/2 cups (360ml) water, close to room temperature at about 70°F (21°C)
optional: cornmeal for dusting pan
Instructions
In a large ungreased mixing bowl, whisk the flour, yeast, and salt together. Pour in the water and gently mix together with a silicone spatula or wooden spoon. The dough will seem dry and shaggy, but keep working it until all the flour is moistened. If needed, use your hands (as I do in the video tutorial below) to work the dough ingredients together. The dough will be sticky. Shape into a ball in the bowl as best you can.
Keeping the dough in the bowl, cover the dough tightly with plastic wrap or aluminum foil and set on the counter at room temperature (honestly any normal room temperature is fine!). Allow to rise for 2-3 hours. The dough will just about double in size, stick to the sides of the bowl, and have a lot of air bubbles.
You can continue with step 4 immediately, but for absolute best flavor and texture, I strongly recommend letting this risen dough rest in the refrigerator for at least 12 hours and up to 3 days. Place covered dough in the refrigerator for 12 hours – 3 days. I usually let it rest in the refrigerator for about 18 hours. The dough will puff up during this time, but may begin to deflate after 2 days. That’s fine and normal—nothing to worry about.
Lightly dust a large nonstick baking sheet (with or without rims and make sure it’s nonstick) with flour and/or cornmeal. Turn the cold dough out onto a floured work surface. Using a sharp knife or bench scraper, cut dough in half. Some air bubbles will deflate as you work with it. Place dough halves on prepared baking sheet. Using floured hands, shape into 2 long loaves about 9×3 inches each (doesn’t have to be exact) about 3 inches apart. Loosely cover and allow to rest for 45 minutes. You will bake the dough on this prepared baking sheet.
During this 45 minutes, preheat the oven to 475°F (246°C).
When ready to bake, using a very sharp knife or bread lame (some even use kitchen shears), score the bread loaves with 3 slashes, about 1/2 inch deep. (“Score” = shallow cut.) If the shaped loaves flattened out during the 45 minutes, use floured hands to narrow them out along the sides again.
Optional for a slightly crispier crust: After the oven is preheated and bread is scored, place a shallow metal or cast iron baking pan or skillet (I usually use a metal 9×13-inch baking pan) on the bottom oven rack. Carefully and quickly pour 3-4 cups of boiling water into it. Place the scored dough/baking pan on a higher rack and quickly shut the oven, trapping the steam inside. The steam helps create a crispier crust.
Place the shaped and scored dough (on the flour/cornmeal dusted pan) in the preheated oven on the center rack. Bake for 20-25 minutes or until the crust is golden brown. Gently tap the loaves—if they sound hollow, the bread is done. For a more accurate test of doneness, the bread is done when an instant read thermometer inserted in the center reads 195°F (90°C).
Remove the bread from the oven and allow to cool for at least 20 minutes before slicing and serving. Store leftovers loosely covered at room temperature for up to 5 days or in the refrigerator for up to 1 week.
Notes
Make Ahead & Freezing Instructions: The dough can sit in the refrigerator for up to 3 days, so this is a wonderful recipe to begin ahead of time. You can also bake the bread, allow it to cool, and freeze for up to 3 months. Thaw at room temperature before serving. You can also freeze the dough. Complete the recipe through step 3. Wrap in plastic wrap and place in a freezer-friendly container. To bake, allow dough to thaw overnight in the refrigerator, or for 2-3 hours at room temperature. Continue with step 4 and the rest of the recipe instructions.
Flour: For absolute best flavor and chewy texture, I strongly recommend using bread flour. You can use a 1:1 substitution of all-purpose flour in a pinch with no other changes to the recipe. I recommend avoiding whole wheat flour in this dough. If necessary, use half bread flour and half whole wheat flour. The bread will taste dense.
Yeast: You can use instant or active dry yeast, but I highly recommend an instant (aka “rapid rise” or “quick rise” yeast). The bread will rise faster. I usually use Platinum yeast by Red Star, which is an instant yeast. 2 teaspoons is a little less than 1 standard packet. If using active dry yeast, there are no changes needed to the recipe. The rise time in step 2 may take longer.
Salt: Use a coarse salt, such as coarse sea salt, in this bread. I find the flavor slightly lacking when using regular table fine salt. If you only have fine salt, reduce to 1 and 1/2 teaspoons.
Water: Use cool water. 70°F (21°C) is great, but the exact temperature doesn’t matter as long as it’s not hot or warm.
Round Loaf: If you want to shape the dough into a boule (round loaf) simply shape into a round ball instead of 2 loaves in step 4. Baking instructions are the same, but the loaf will take a few extra minutes in the oven. If you want to bake the boule in a dutch oven, see next note.
Using a Dutch Oven: Follow this dough recipe through step 3, then follow the simple shaping/baking instructions (steps 2-5) in my Cranberry Nut No Knead Bread recipe including using the parchment paper. If your parchment paper can’t withstand heat this high, you can either lower the oven temperature and bake the bread for longer or grease the Dutch oven instead.
Using a pizza stone: If you want to bake your bread loaves on a pizza stone, place pizza stone in the preheating oven. In step 8, place the shaped and scored dough on your preheated pizza stone. If the bottom of the shaped dough is pretty sticky, dust the hot pizza stone with some extra cornmeal. Bake as directed.
No Nonstick Pan: If you don’t have a nonstick baking sheet, line it with parchment paper instead. Coat with a dusting of flour and/or cornmeal before placing the dough on top. Parchment paper can burn, so it’s best to check the box to see how much heat yours can tolerate. Lower your oven heat if necessary and bake the bread for longer until golden brown and when gently tapped, sound hollow.
Flavor ideas: Before pouring in the water in step 1, add any of the following ingredients/combination of ingredients to the dry ingredients in the bowl: 4 cloves minced garlic + 3 Tablespoons chopped rosemary, 3 Tablespoons your favorite fresh herb (chopped), 1 cup your favorite shredded cheese, a diced jalapeño, 3/4 – 1 cup dried cranberries and/or chopped nuts, 2 teaspoons garlic powder, etc.
Give snack time an upgrade with flavorful homemade artisan crackers. Crispy, salty, savory, and endlessly customizable, the simple dough comes together quickly and easily in one bowl from basic pantry ingredients.
Ingredients
Crackers
2 cups (250g) all-purpose flour, plus more for kneading and rolling
1 teaspoongranulated sugar
1 teaspoonsalt
1/2 teaspoononion powder
1/4 tspgarlic powder
1 Tablespoon finely chopped fresh rosemary or other add-in (see Notes)*
2/3 cup (160g/ml) water
3 Tablespoons (41g/45ml) extra-virgin olive oil, plus more for brushing on top
In a large bowl, whisk together the flour, sugar, salt, onion powder, garlic powder, and rosemary (or other add-ins). Pour in the water and olive oil and stir with a wooden spoon or silicone spatula until the dough comes together in a clump.
Turn the dough out onto a lightly floured work surface. Lightly flour your hands and the dough and knead it, sprinkling on a little more flour as you go, until it’s no longer sticking to your hands and you can shape it into a rough ball, about 1 to 2 minutes. Return the dough to the bowl and cover the bowl with plastic wrap. Let the dough rest for at least 10 minutes, and up to 1 hour at room temperature.
Cut the dough in half. Keep one half of the dough covered while you work with the other half.
On a lightly floured work surface with a lightly floured rolling pin, roll one half of the dough out into a rectangle. Roll the dough very thin—about 1/16th of an inch (1.5mm). If the dough keeps shrinking back as you try to roll it out, lightly cover it and let it rest for 5 minutes, then try again. (Don’t worry if it shrinks, that’s completely normal and expected.)
Using a ruler and a pizza cutter, cut the dough into small rectangles about 3 x 1.5 inches in size. Carefully transfer the crackers to the prepared baking sheet(s).
Repeat steps 5 and 6 with the second half of dough.
Dock (poke holes in) the crackers several times with a fork. Brush with olive oil, then sprinkle with flaky sea salt (and everything bagel seasoning or sesame seeds, if making those varieties. Note that extra seasonings on top can sometimes fall off of the crackers when eating them).
Bake until golden brown and crispy, about 9–12 minutes. To ensure even browning, rotate the baking sheet(s) halfway through baking.
Let crackers cool completely on the baking sheet(s) set on a cooling rack. Crackers need several minutes of cooling before they taste crispy. They taste fantastic with hummus, crab dip or other dips, various cheeses, or serve with a cranberry pecan cheese ball.
Store in an airtight container at room temperature in a dry place for up to 2 days. To re-crisp crackers, spread them on a baking sheet and bake at 350°F for 10 minutes. Cool completely before serving.
Notes
Make Ahead & Instructions: These crackers taste best for up to 2 days after you make them. See step 11 for how to re-crisp them, if desired. You can freeze cooled crackers. Cover tightly and freeze up to 3 months. Thaw at room temperature. Re-crisp if needed (see step 11).
Other Flavors/Add-Ins: Do not leave the crackers plain. You need a flavor in the dough. Instead of rosemary, try another favorite herb, or any of these team favorites:
Black Pepper & Thyme: 2 teaspoons freshly cracked black pepper (do not use pre-ground fine pepper) + 1 Tbsp finely chopped fresh thyme
Everything & Chives: 1 Tbsp everything bagel seasoning (plus more for sprinkling on top) + 1 Tbsp dried chives
Sesame Seed: 1 and 1/2 Tbsp sesame seeds (plus more for sprinkling on top)
Gluten-Free Flour? We don’t recommend using gluten-free flour in this recipe. The test batches we tried with different brands of GF flour came out break-your-teeth hard. You’re better off looking for a cracker recipe that has been developed specifically to be gluten free.
Whole Wheat Flour? Crackers made with whole wheat flour were also quite hard. If you want to use whole wheat flour, try using half all-purpose and half whole wheat. Expect a slightly dense, less crisp cracker.
Let the dough rest. Trying to roll it out too soon is an exercise in frustration, trust me on this!
Roll the dough out suuuuuper thin. The crackers need to be very thin to bake up crispy. Too thick and they taste a little chewy.
If the dough keeps shrinking back as you roll it out, cover it lightly and let it rest for 5 minutes to allow the gluten to relax, then try again.
Use a light-colored (silver) baking sheet, not a dark baking sheet, and make sure your parchment paper is safe for high-temperature baking.
Rotate the pan(s) halfway through baking, for even browning. Ovens can have hot spots, and this recipe will show you where they are!
We don’t recommend using gluten-free flour in this recipe. The test batches we tried with different brands of GF flour came out chip-your-teeth hard. You’re better off looking for a cracker recipe that has been developed specifically to be gluten free.
Homemade crackers get stale a lot faster than store-bought crackers, because they don’t have added preservatives. Store them in an airtight container in a dry spot, and, if needed, re-crisp them in the oven at 350°F (177°C) for up to 10 minutes.
Make homemade cheese crackers with only 6 ingredients! Chilling the dough for 45 minutes is important– the crackers won’t hold their shape otherwise. You’ll appreciate the straightforward instructions and quick baking time!
3 Tablespoons (40g) unsalted butter, cold and cut into 3 pieces
1 TBLcold water
Sea salt for sprinkling
Instructions
Process cheddar cheese, flour, cornstarch, and salt together in a food processor until combined, about 30 seconds.
Add butter and process until mixture resembles wet sand, about 20 seconds.
Add water and pulse until dough forms large clumps, about 10 pulses.
Transfer dough to a lightly floured work surface, and pat each into a 6-inch square. (No need to use a rolling pin, just pat with hands.) If the dough feels dry, moisten your fingers with cold water.
Carefully wrap in plastic wrap and refrigerate until firm, about 45 minutes and up to 2 days.
Preheat oven to 350°F (177°C). Line large baking sheets with parchment paper or silicone baking mats.
Unwrap dough square and place on a lightly floured work surface.
Roll out into a 9-inch square. Doesn’t need to be perfect! Using a fluted pastry wheel, pizza cutter, crinkle cutter, or small sharp knife, trim dough into a neat 8 inch square. Slice square into 8 strips, each 1 inch wide, then make 8 perpendicular slices, each 1 inch wide. Each 8-inch square will have 64 squares (crackers).
Place squares on prepared baking sheet. Use a skewer or large toothpick to poke a hole through the center of each.
Lightly sprinkle with sea salt, if desired.
Bake until golden brown around the edges, about 16-18 minutes, rotating the baking sheets halfway through baking. For crunchier crackers, bake for 20 minutes.
Remove from the oven and cool completely on the baking sheet before serving.
Store leftover crackers at room temperature for up to 1 week. If tightly sealed, they’ll lose their crunch. Feel free to keep the lid slightly ajar to maintain some crunchiness.
Notes
Freezing Instructions: You can freeze the wrapped dough instead of refrigerating it in step 2. Freeze up to 3 months. Thaw in the refrigerator and bring to room temperature for 10 minutes before continuing with the recipe.
Instead of classic yellow cheddar, white cheddar is a wonderful substitute. In fact, any medium-hard cheese is great. Avoid soft cheeses.
6 Tablespoons (85g) unsalted butter, cold and cut into 6 pieces
2 Tablespoonscold water
optional: sea salt for sprinkling
Instructions
Process cheddar cheese, flour, cornstarch, and salt together in a food processor until combined, about 30 seconds. Add butter and process until mixture resembles wet sand, about 20 seconds. Add water and pulse until dough forms large clumps, about 10 pulses.
Transfer dough to a lightly floured work surface. Divide in half and pat each into a 6-inch square. (No need to use a rolling pin, just pat with hands.) If the dough feels dry, moisten your fingers with cold water. Carefully wrap each in plastic wrap and refrigerate until firm, about 45 minutes and up to 2 days.
Preheat oven to 350°F (177°C). Line 2 large baking sheets with parchment paper or silicone baking mats.
Unwrap each dough square. Place each on a lightly floured work surface and roll out into a 9-inch square. Doesn’t need to be perfect! Using a fluted pastry wheel, pizza cutter, or small sharp knife, trim dough into a neat 8 inch square. Slice square into 8 strips, each 1 inch wide, then make 8 perpendicular slices, each 1 inch wide. Each 8-inch square will have 64 squares (crackers).
Place squares on prepared baking sheet. Use a skewer or large toothpick to poke a hole through the center of each. Lightly sprinkle with sea salt, if desired. Bake until golden brown around the edges, about 16-18 minutes, rotating the baking sheets halfway through baking. For crunchier crackers, bake for 20 minutes.
Remove from the oven and cool completely on the baking sheet before serving.
You only need 7 ingredients to make these dinner rolls. Flaky, soft, and buttery, these fresh dinner rolls outshine any main dish. If you’re a bread beginner, read this blog post to learn more about the yeast rolls recipe, including how to prep the rolls ahead of time. You can also reference my Baking with Yeast Guide for answers to common yeast FAQs.
This recipe is brought to you in partnership with Red Star Yeast.
Overview: How to Make Homemade Dinner Rolls
Make the dough. Continue below to learn more about this dough recipe.
Knead the dough. Reference my How to Knead Dough video tutorial if you need extra help with this step.
Cover the dough and let it rise. The dough rises in about 1-2 hours in a relatively warm environment.
Punch down the dough to release the air and shape into rolls.
Let the rolls rise for about 1 hour.
Bake for 20-25 minutes until golden brown. If desired, brush the warm rolls with a little honey and melted butter for extra flavor.
Soft Dinner Rolls Require a Rich Dough
The crustier and chewier the bread, the less fat in the dough. This is known as a lean dough. The softer and richer the bread, the more fat in the dough. This is known as a rich dough. Unlike chewy homemade bagels, focaccia, ciabatta, and my artisan bread, soft dinner rolls require a rich dough. Unfortunately, this doesn’t mean that the dough is swimming in cash. Rather, “rich” correlates with the amount of fat. For example, this dough has milk, butter, and egg.
You need 7 ingredients total. They’re the same ingredients in my easy cinnamon rolls and homemade brioche, which are also rich doughs. (Though I use more sugar for sweeter cinnamon rolls, of course.)
Milk: Liquid activates the yeast. For the softest dinner rolls, use whole milk. Nondairy or low fat milks work too, but whole milk produces phenomenal flavor and texture.
Yeast: You can use active dry yeast or instant yeast. If using active dry yeast, the rise times will be a little longer. I recommend Platinum Yeast from Red Star, which is an instant yeast blended with natural dough improvers.
Sugar: Sugar feeds the yeast, increases its activity, and tenderizes the dough.
Egg: 1 egg provides structure and flavor.
Butter: Butter promises a flavorful and soft dinner roll. Make sure it’s room temperature.
Salt: You can’t make flavorful bread without salt!
Flour: You can use all-purpose flour or bread flour in this recipe. All-purpose flour is convenient for most, but bread flour produces chewier dinner rolls. There are no other changes to the recipe if you use bread flour.
Make sure your yeast isn’t expired. Expiration date is on the package.
Directly from the pros at Red StarYeast: Measuring flour correctly is key to avoiding a dense dough, which leads to heavy (not soft!) rolls. Spoon and level your flour, do not scoop it out of the package.
My final piece of advice? Don’t limit these rolls to suppertime. They’re welcome anywhere, with any meal, any time of day. Use for sliders, breakfast sandwiches, soaking up your favorite tomato sauce with slow cooker turkey meatballs, alongside salad, or dunking into a bowl of creamy chicken noodle soup. Above all, don’t doubt yourself because you, too, can become a bread baking pro.
Soft Dinner Rolls Recipe
5 Stars 4 Stars 3 Stars 2 Stars 1 Star 4.8 from 1046 reviews
You only need 7 ingredients to make these dinner rolls. Flaky, soft, and buttery, these fresh dinner rolls outshine any main dish. See recipe notes for freezing and overnight instructions. You can also reference my Baking with Yeast Guide for answers to common yeast FAQs. This recipe is also in my cookbook, Sally’s Baking 101.
Ingredients
1 cup (240ml) whole milk, warmed to about 110°F (43°C)
2 and 1/4 teaspoons Platinum Yeast from Red Star instant yeast(1 standard packet)
Prepare the dough: Whisk the warm milk, yeast, and 1 Tablespoon of sugar together in the bowl of your stand mixer. Cover and allow to sit for 5 minutes. *If you do not own a stand mixer, you can do this in a large mixing bowl and in the next step, mix the dough together with a large wooden spoon/silicone spatula. It will take a bit of arm muscle. A hand mixer works, but the sticky dough repeatedly gets stuck in the beaters. Mixing by hand with a wooden spoon or silicone spatula is a better choice.*
Add the remaining sugar, egg, butter, salt, and 1 cup flour. With a dough hook or paddle attachment, mix/beat on low speed for 30 seconds, scrape down the sides of the bowl with a silicone spatula, then add the remaining flour. Beat on medium speed until the dough comes together and pulls away from the sides of the bowl, about 2 minutes. If the dough seems too wet to a point where kneading (next step) would be impossible, beat in more flour 1 Tablespoon at a time until you have a workable dough, similar to the photos above. Dough should be soft and a little sticky, but still manageable to knead with lightly floured hands.
Knead the dough: Keep the dough in the mixer and beat for an additional 5 full minutes, or knead by hand on a lightly floured surface for 5 full minutes. (If you’re new to bread-baking, my How to Knead Dough video tutorial can help here.) If the dough becomes too sticky during the kneading process, sprinkle 1 teaspoon of flour at a time on the dough or on the work surface/in the bowl to make a soft, slightly tacky dough. Do not add more flour than you need because you do not want a dry dough. After kneading, the dough should still feel a little soft. Poke it with your finger—if it slowly bounces back, your dough is ready to rise. You can also do a “windowpane test” to see if your dough has been kneaded long enough: tear off a small (roughly golfball-size) piece of dough and gently stretch it out until it’s thin enough for light to pass through it. Hold it up to a window or light. Does light pass through the stretched dough without the dough tearing first? If so, your dough has been kneaded long enough and is ready to rise. If not, keep kneading until it passes the windowpane test.
1st Rise: Lightly grease a large bowl with oil or nonstick spray. Place the dough in the bowl, turning it to coat all sides in the oil. Cover the bowl with aluminum foil, plastic wrap, or a clean kitchen towel. Allow the dough to rise in a relatively warm environment for 1-2 hours or until double in size. (I always let it rise on the counter. Takes about 2 hours. For a tiny reduction in rise time, see my answer to Where Should Dough Rise? in my Baking with Yeast Guide.)
Grease a 9×13 inch baking pan or two 9-inch square or round baking pans. You can also bake the rolls in a cast iron skillet or on a lined baking sheet.*
Shape the rolls: When the dough is ready, punch it down to release the air. Divide the dough into 14-16 equal pieces. (Just eyeball it– doesn’t need to be perfect!) A bench scraper is always helpful for cutting dough. Shape each piece into a smooth ball. Arrange in prepared baking pan.
2nd Rise: Cover shaped rolls with aluminum foil, plastic wrap, or a clean kitchen towel. Allow to rise until puffy, about 1 hour.
Adjust oven rack to a lower position and preheat oven to 350°F (177°C). (It’s best to bake the rolls towards the bottom of the oven so the tops don’t burn.)
Bake the rolls: Bake for 20-25 minutes or until golden brown on top, rotating the pan halfway through. If you notice the tops browning too quickly, loosely tent the pan with aluminum foil. Remove from the oven, brush with optional honey butter topping, and allow rolls to cool for a few minutes before serving.
Cover leftover rolls tightly and store at room temperature for 2-3 days or in the refrigerator for up to 1 week.
Notes
Freezing Instructions: Prepare recipe through step 6. Place shaped rolls in a greased baking pan, cover tightly, and freeze for up to 3 months. Once frozen, the dough balls won’t stick together anymore and you can place them in a freezer bag if needed. On the day you serve them, arrange the dough balls in a greased baking pan, cover tightly, then let them thaw and rise at room temperature for about 4-5 hours. Bake as directed. You can also freeze the baked dinner rolls. Allow them to cool completely, then freeze for up to 3 months. Thaw in the refrigerator or at room temperature, then reheat as desired. If reheating the whole pan, lightly cover and reheat in a 300°F (149°C) oven for about 10 minutes or until warm.
Overnight Instructions: Prepare the recipe through step 6. Cover the shaped rolls tightly and refrigerate for up to about 15 hours. At least 3 hours before you need them the next day, remove the rolls from the refrigerator, keep covered, and allow to rise on the counter for about 1-2 hours before baking. Alternatively, you can let the dough have its 1st rise in the refrigerator overnight. Cover the dough tightly and place in the refrigerator for up to about 15 hours. Remove from the refrigerator and allow the dough to fully rise for 2 more hours. Continue with step 5.
Baking Pan: I prefer baking the rolls in a glass 9×13 inch baking pan because I find they brown a little too quickly in metal. As long as you bake the rolls on a lower oven rack and keep your eye on them, any pan is great.
Yeast: Platinum Yeast from Red Star is an instant yeast. You can use Red Star Yeast active dry yeast instead. Rise times will be slightly longer using active dry yeast. Reference my Baking with Yeast Guide for answers to common yeast FAQs.
Flour: You can use all-purpose flour or bread flour. All-purpose flour is convenient for most, but bread flour produces chewier dinner rolls. The rolls are still soft and fluffy no matter which you use. Either flour is fine and there are no other changes to the recipe if you use one or the other.
Even if you’ve never made homemade bread or worked with yeast before, this homemade artisan bread is for you. Watch the video tutorial below and review the recipe instructions and recipe notes prior to beginning. If you’re new to working with yeast, reference my Baking with Yeast Guide for answers to common yeast FAQs.
Ingredients
3 and 1/4 cups (about 430g) bread flour (spooned & leveled), plus more for hands and pan
2 teaspoons (about 6g) instant yeast
2 teaspoons (about 9g) coarse salt (see note)
1 and 1/2 cups (360ml) water, close to room temperature at about 70°F (21°C)
optional: cornmeal for dusting pan
Instructions
In a large ungreased mixing bowl, whisk the flour, yeast, and salt together. Pour in the water and gently mix together with a silicone spatula or wooden spoon. The dough will seem dry and shaggy, but keep working it until all the flour is moistened. If needed, use your hands (as I do in the video tutorial below) to work the dough ingredients together. The dough will be sticky. Shape into a ball in the bowl as best you can.
Keeping the dough in the bowl, cover the dough tightly with plastic wrap or aluminum foil and set on the counter at room temperature (honestly any normal room temperature is fine!). Allow to rise for 2-3 hours. The dough will just about double in size, stick to the sides of the bowl, and have a lot of air bubbles.
You can continue with step 4 immediately, but for absolute best flavor and texture, I strongly recommend letting this risen dough rest in the refrigerator for at least 12 hours and up to 3 days. Place covered dough in the refrigerator for 12 hours – 3 days. I usually let it rest in the refrigerator for about 18 hours. The dough will puff up during this time, but may begin to deflate after 2 days. That’s fine and normal—nothing to worry about.
Lightly dust a large nonstick baking sheet (with or without rims and make sure it’s nonstick) with flour and/or cornmeal. Turn the cold dough out onto a floured work surface. Using a sharp knife or bench scraper, cut dough in half. Some air bubbles will deflate as you work with it. Place dough halves on prepared baking sheet. Using floured hands, shape into 2 long loaves about 9×3 inches each (doesn’t have to be exact) about 3 inches apart. Loosely cover and allow to rest for 45 minutes. You will bake the dough on this prepared baking sheet.
During this 45 minutes, preheat the oven to 475°F (246°C).
When ready to bake, using a very sharp knife or bread lame (some even use kitchen shears), score the bread loaves with 3 slashes, about 1/2 inch deep. (“Score” = shallow cut.) If the shaped loaves flattened out during the 45 minutes, use floured hands to narrow them out along the sides again.
Optional for a slightly crispier crust: After the oven is preheated and bread is scored, place a shallow metal or cast iron baking pan or skillet (I usually use a metal 9×13-inch baking pan) on the bottom oven rack. Carefully and quickly pour 3-4 cups of boiling water into it. Place the scored dough/baking pan on a higher rack and quickly shut the oven, trapping the steam inside. The steam helps create a crispier crust.
Place the shaped and scored dough (on the flour/cornmeal dusted pan) in the preheated oven on the center rack. Bake for 20-25 minutes or until the crust is golden brown. Gently tap the loaves—if they sound hollow, the bread is done. For a more accurate test of doneness, the bread is done when an instant read thermometer inserted in the center reads 195°F (90°C).
Remove the bread from the oven and allow to cool for at least 20 minutes before slicing and serving. Store leftovers loosely covered at room temperature for up to 5 days or in the refrigerator for up to 1 week.
Notes
Make Ahead & Freezing Instructions: The dough can sit in the refrigerator for up to 3 days, so this is a wonderful recipe to begin ahead of time. You can also bake the bread, allow it to cool, and freeze for up to 3 months. Thaw at room temperature before serving. You can also freeze the dough. Complete the recipe through step 3. Wrap in plastic wrap and place in a freezer-friendly container. To bake, allow dough to thaw overnight in the refrigerator, or for 2-3 hours at room temperature. Continue with step 4 and the rest of the recipe instructions.
Flour: For absolute best flavor and chewy texture, I strongly recommend using bread flour. You can use a 1:1 substitution of all-purpose flour in a pinch with no other changes to the recipe. I recommend avoiding whole wheat flour in this dough. If necessary, use half bread flour and half whole wheat flour. The bread will taste dense.
Yeast: You can use instant or active dry yeast, but I highly recommend an instant (aka “rapid rise” or “quick rise” yeast). The bread will rise faster. I usually use Platinum yeast by Red Star, which is an instant yeast. 2 teaspoons is a little less than 1 standard packet. If using active dry yeast, there are no changes needed to the recipe. The rise time in step 2 may take longer.
Salt: Use a coarse salt, such as coarse sea salt, in this bread. I find the flavor slightly lacking when using regular table fine salt. If you only have fine salt, reduce to 1 and 1/2 teaspoons.
Water: Use cool water. 70°F (21°C) is great, but the exact temperature doesn’t matter as long as it’s not hot or warm.
Round Loaf: If you want to shape the dough into a boule (round loaf) simply shape into a round ball instead of 2 loaves in step 4. Baking instructions are the same, but the loaf will take a few extra minutes in the oven. If you want to bake the boule in a dutch oven, see next note.
Using a Dutch Oven: Follow this dough recipe through step 3, then follow the simple shaping/baking instructions (steps 2-5) in my Cranberry Nut No Knead Bread recipe including using the parchment paper. If your parchment paper can’t withstand heat this high, you can either lower the oven temperature and bake the bread for longer or grease the Dutch oven instead.
Using a pizza stone: If you want to bake your bread loaves on a pizza stone, place pizza stone in the preheating oven. In step 8, place the shaped and scored dough on your preheated pizza stone. If the bottom of the shaped dough is pretty sticky, dust the hot pizza stone with some extra cornmeal. Bake as directed.
No Nonstick Pan: If you don’t have a nonstick baking sheet, line it with parchment paper instead. Coat with a dusting of flour and/or cornmeal before placing the dough on top. Parchment paper can burn, so it’s best to check the box to see how much heat yours can tolerate. Lower your oven heat if necessary and bake the bread for longer until golden brown and when gently tapped, sound hollow.
Flavor ideas: Before pouring in the water in step 1, add any of the following ingredients/combination of ingredients to the dry ingredients in the bowl: 4 cloves minced garlic + 3 Tablespoons chopped rosemary, 3 Tablespoons your favorite fresh herb (chopped), 1 cup your favorite shredded cheese, a diced jalapeño, 3/4 – 1 cup dried cranberries and/or chopped nuts, 2 teaspoons garlic powder, etc.
Look no further for a creamy and ultra smooth classic cheesecake recipe! Paired with a buttery graham cracker crust, no one can deny its simple decadence. For the best results, bake in a water bath. This recipe is also in my cookbook, Sally’s Baking 101.
Ingredients
Graham Cracker Crust
1 and 1/2 cups (180g) graham cracker crumbs (about 12 full-sheet graham crackers)
1/4 cup (50g) granulated sugar
5 Tablespoons (71g) unsalted butter, melted
Cheesecake
32 ounces (904g) full-fat brick cream cheese, softened to room temperature
1 cup (200g) granulated sugar
1 cup (240g) full-fat sour cream, at room temperature
1 teaspoonpure vanilla extract
2 teaspoonsfresh lemon juice (optional, but recommended)
3 large eggs, at room temperature
Instructions
Adjust the oven rack to the lower-middle position and preheat oven to 350°F (177°C).
Make the crust: If you’re starting out with full graham crackers, use a food processor or blender to grind them into fine crumbs. Pour into a medium bowl and stir in the sugar until combined, and then stir in the melted butter. Mixture will be sandy. Try to smash/break up any large chunks. Pour into an ungreased 9-inch or 10-inch springform pan. With medium pressure using your hand, pat the crumbs down into the bottom and partly up the sides to make a compact crust. Do not pack down with heavy force because that makes the crust too hard. Simply pat down until the mixture is no longer crumby/crumbly (you can use the flat bottom of a small measuring cup to help smooth it out if needed). Bake for 10 minutes. Remove from the oven and set aside while you prepare the filling.
Make the filling: In a large bowl using a handheld or stand mixer fitted with a paddle attachment, beat the cream cheese and granulated sugar together on medium-high speed until the mixture is smooth and creamy, about 2 minutes. Add the sour cream, vanilla extract, and lemon juice and beat until fully combined. With the mixer on medium speed, add the eggs one at a time, beating after each addition until just combined. Stop the mixer as soon as the final egg is fully incorporated into the batter; over-mixing can cause the cheesecake to deflate. You will have nearly 6 cups of batter.
Prepare the simple water bath (see Note): (If needed for extra visuals, see How to Make a Cheesecake Water Bath; the visual guide and video will assist you in this step.) Boil a kettle/pot of water. You need 1 inch of water in your roasting pan for the water bath, so make sure you boil enough. I use an entire kettle of hot water. As the water is heating up, wrap 1 or 2 sheets of heavy-duty aluminum foil around the springform pan—be careful if it’s still warm from baking the crust! Place the wrapped springform pan inside of a large roasting pan. Pour the cheesecake batter on top of the crust. Use a spatula to smooth it into an even layer. Carefully pour the hot water inside of the pan and place in the oven. (Or you can place the roasting pan in the oven first, then pour the hot water in—whichever is easier for you.)
Bake the cheesecake for 55–70 minutes or until the center is almost set. If you notice the cheesecake browning too quickly on top, tent it with aluminum foil halfway through baking. When it’s done, the center of the cheesecake should still slightly wobble if you gently tap or shake the pan. Turn the oven off and open the oven door slightly. With the door ajar, let the cheesecake sit in the oven in the water bath as it cools down for 1 hour. After 1 hour, remove from the oven and water bath, discard the foil, and place the springform pan on a cooling rack to cool completely at room temperature. When it has cooled, cover and refrigerate the cheesecake for at least 4 hours or up to 2 days.
Run a knife around the edges of the springform pan to help loosen the cheesecake, then remove the outer rim. Using a sharp knife, cut into slices for serving. For neat slices, wipe the knife clean and dip it into warm water between each slice.
Serve cheesecake with desired toppings (see Note). Cover and store leftover cheesecake in the refrigerator for up to 4 days.
Notes
Make Ahead Instructions: This cheesecake can be made the day before. It has to chill for quite some time before serving. See step 5. Another way to make this cheesecake ahead of time is to freeze it. Cheesecake can be frozen up to 3 months. See instructions in blog post above.
Oreo Cookie Crust: Feel free to replace the graham cracker crust with this Oreo cookie crust. Spray bottom of springform pan with nonstick spray, as Oreo cookie crusts tend to stick. Pre-bake the crust, just as you do with the graham cracker crust in step 2 above.
Alternate Water Bath Method: This method works as well, and you don’t have to bake the cheesecake IN water. Boil a kettle or pot of water. You need 1 inch of hot water in your roasting pan for the water bath, so make sure you boil enough. Place the cheesecake on the center oven rack of the preheated oven. Place a large metal baking or roasting pan (do not use glass—I usually use a 9×13-inch baking pan or an extra-large cast iron skillet) on the bottom rack. Pour boiling water into the empty pan, about 1 inch deep. Immediately close oven to trap the steam inside. This unique water bath adds steam to the oven without having the cheesecake sit inside the water itself. No need to wrap the springform pan in foil. See How to Make a Cheesecake Water Bath for more information.
Room Temperature Ingredients: Bring all cold ingredients to room temperature before beginning. Room temperature ingredients combine quickly and evenly, so you won’t risk over-mixing. Also, beating cold ingredients together will result in a chunky cheesecake batter, hardly the way you want to begin!
Non-US Readers:Don’t have graham crackers where you live? Use 200g ground digestive biscuit crumbs (about 2 cups; 13–14 biscuits), 1/3 cup (67g) granulated sugar, and 6 Tablespoons (85g) melted butter. Pre-bake the crust for a bit longer, about 12–14 minutes. And from what I understand, spreadable cream cheese sold in a tub in countries outside of the US is a little different from the spreadable cream cheese in the US. It’s thicker, sturdier, and more solid and should be OK for this recipe. I have no experience with it, but this is what I’ve heard from other non-US readers. If you try it, let us know how it turns out!
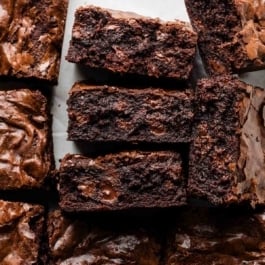
This recipe has been *slightly updated* since my team and I originally published it in 2016. These seriously fudgy homemade brownies are thick, dense, and intensely chocolatey thanks to cocoa powder, melted baking chocolate, and chocolate chips. With shiny crackly tops and melt-in-your-mouth centers, this is our go-to brownie recipe.
Ingredients
3/4 cup (12 Tbsp; 170g) unsalted butter, sliced into 12 Tbsp-size pieces
4-ounce (113g) semi-sweet chocolate bar, coarsely chopped and divided*
Preheat the oven to 350°F (177°C) and line a 9-inch square metal baking pan with parchment paper, leaving an overhang on two opposite sides to lift out the finished brownies (makes cutting easier!). Set aside.
In a small microwave-safe bowl or liquid measuring cup, combine the butter and half (2oz/56g) of the chopped chocolate. Melt in 30-second increments, stirring after each, until completely melted and smooth. Set aside to slightly cool while you continue.
In a large bowl with a handheld or stand mixer fitted with a whisk attachment, combine the sugar and eggs. Beat on medium-high speed until the sugar is dissolved and the mixture is pale and ribbon-y, about 3 minutes.
Pour the warm melted butter/chocolate into the bowl with the sugar/eggs, add the vanilla, and beat or whisk to combine.
With a fine-mesh sieve, sift the cocoa powder, flour, and salt into the batter, then whisk or beat on low speed to incorporate. Fold in the remaining 2 ounces/57g chopped chocolate and the chocolate chips. The batter will be very thick. Spread it evenly into the prepared pan. (A small offset spatula can help here.)
Bake for 28–30 minutes, then test the brownies with a toothpick. Insert the toothpick into the center of the pan. If it comes out coated with wet batter, the brownies are not done. If there are only a few moist crumbs, the brownies are done. Keep checking every 2 minutes until you have moist crumbs. Brownies typically take 30–32 minutes in my oven. Err on the side of under-baking, as the brownies will continue to set as they cool.
Remove from the oven and place on a cooling rack to cool completely in the pan. When cool, lift the brownies out by gripping the parchment overhangs and transfer to a cutting board. Use a sharp knife to cut into squares.
Cover and store leftover brownies at room temperature for up to 1 week.
Notes
Make-Ahead & Freezing Instructions: Brownies freeze well up to 3 months. Thaw overnight in the refrigerator then bring to room temperature before serving.
Chocolate: Baking chocolate is typically sold in 4-ounce (113g) bars. Half will be melted with the butter, and half will be chopped up and folded into the batter with the chocolate chips. I suggest Ghirardelli, Baker’s, or Lindt brands; in either semi-sweet (56% cacao) or bittersweet (60% cacao).
Cocoa Powder: You can use either natural or Dutch-process cocoa powder in this recipe. I prefer Dutch-process (such as this brand) for a smoother chocolate flavor.
Recipe Update in 2026: My team and I made a couple slight updates to this recipe based on reader feedback. To make it the way it was originally written, increase the sugar to 2 cups (400g) and increase the chocolate chips to 1.5 cups (270g). Proceed with steps 1 and 2 in the recipe above. Skip step 3. Then, whisk the 2 cups (400g) sugar into the melted butter and chocolate mixture. Whisk in the eggs and vanilla, followed by the remaining ingredients. Spread into a lined 9×13-inch pan and bake for 30-32 minutes.
5 Stars 4 Stars 3 Stars 2 Stars 1 Star 4.9 from 50 reviews
Author:Sally McKenney
Prep Time: 2 hours, 30 minutes (includes pie dough chilling)
Cook Time: 25 minutes
Total Time: 3 hours
Yield: 48-50 mini quiches
Category: Breakfast
Method: Baking
Cuisine: American
Description
This is a perfect base recipe for mini quiches where you can add your favorite add-ins and flavors. Bake in my super flaky homemade pie crust. Review video tutorial above and read recipe notes below before beginning.
1/2 cup shredded or crumbled cheese (see recipe note)
Instructions
Pie crust: I like to make sure my pie dough is prepared before I begin mini quiche. Make pie dough the night before because it needs to chill in the refrigerator for at least 2 hours before using.
Prep the egg filling: In a large bowl with a handheld or stand mixer fitted with a whisk attachment—or simply using a whisk and mixing bowl—beat/whisk the eggs, whole milk, heavy cream, salt, and pepper together (on high speed if using a mixer) until completely combined, about 1 minute. Cover and refrigerate egg filling until step 6.
Preheat oven to 375°F (191°C). Grease two 24-count mini muffin pans. (Nonstick spray is best.) If you only have 1 mini muffin pan, bake these in batches. Roll out first pie dough, fill, and bake then roll out the 2nd pie dough, fill, and bake.
Shape the mini crusts: Working with 1 chilled pie dough at a time, place the dough onto a floured work surface. Roll into a large 12-inch circle. Use your warm hands to mold any cracking edges back together as you see me doing in the video tutorial above. From the circle, cut rounds using a 2.5 inch cookie cutter. (Sometimes I use my 1/3 cup measuring cup, which is 2.5 inches in diameter.) You’ll have to re-roll the dough scraps a few times. Work quickly, as the dough becomes much more delicate the longer it’s at room temperature. You’ll get about 24 rounds per pie crust. Repeat with 2nd chilled pie dough for a total of about 48.
Place the dough rounds into greased 24-count mini muffin pan(s). Press the dough flat into the bottom of the crevice and up the sides.
Evenly pour cold egg filling into each unbaked crust. Top evenly with add-ins, then sprinkle each with cheese.
Bake mini quiches until the center is just about set and edges are lightly browned, about 25-28 minutes. Allow to cool for 5 minutes before removing from the pan. If greased well, the mini quiches pop right out using a spoon to scoop them up. Serve warm or at room temperature
Mini quiches make great leftovers! Cover tightly and store in the refrigerator for up to 4 days.
Notes
Make Ahead & Freezing Instructions: The pie dough can be prepared ahead of time and stored in the refrigerator for up to 5 days or in the freezer for up to 3 months. To freeze, cool baked mini quiches completely, then layer between sheets of parchment paper in a large freezer-friendly container. Freeze for up to 3 months. Thaw in the refrigerator or on the counter, then bake at 300°F (149°C) for 15 minutes or until warmed.
If using a 12-count standard muffin pan: Cut the pie dough into 3.5 inch circles. Other assembly instructions are the same for a 12-count muffin pan. Bake for about 27-30 minutes until the centers are set and edges are lightly browned. Yields about 16.
Pie Crust & Crustless Option: Both linked pie crust recipes make 2 crusts. You need 2 crusts for this recipe. You can use store-bought pie crust if desired. Make sure it is thawed. For crustless quiches, spray your mini muffin pan or regular size muffin pan with nonstick spray and pour the filling directly into the greased pan. Top with add-ins, then cheese. Bake mini quiches for 16-19 minutes and regular size (in a 12-count pan) for 20-23 minutes.
Whole Milk & Heavy Cream: Use this combination for best taste. If desired, use 1 cup of half-and-half instead. In a pinch, using all milk (whole milk, lower fat milk, or unflavored nondairy milk) works just fine.
Add-Ins: You need about 3/4 cup add-ins including vegetables and meat/seafood. Most quiche add-ins should be pre-cooked and can still be warm when adding on top of each quiche. See blog post for my favorite add-ins. No need to pre-cook or sauté add-ins like mushrooms or bell peppers unless you want to.
Cheese: Some favorites include feta cheese, goat cheese, white cheddar cheese, Swiss cheese, and gruyere.
With its super-moist and buttery texture, banana and brown sugar flavors, soft crumb, and 1,000+ reviews, this is a delicious AND undeniably popular banana bread recipe. You need 4 large ripe bananas. This recipe is also in my cookbook, Sally’s Baking 101.
optional: 3/4 cup (90g) chopped pecans or walnuts, or 1 cup (180g) semi-sweet chocolate chips
Instructions
Adjust the oven rack to the lower third position and preheat the oven to 350°F (177°C). Lowering the oven rack prevents the top of your bread from browning too much, too soon. Grease a 9×5-inch loaf pan with nonstick spray. Set aside.
In a medium bowl, whisk the flour, baking soda, salt, and cinnamon together. Set aside.
In a large bowl using a handheld or stand mixer fitted with a paddle attachment, beat the butter and brown sugar together on medium-high speed until light and creamy, about 3 minutes. (Here’s a helpful tutorial if you need guidance on how to cream butter and sugar.) With the mixer running on medium speed, add the eggs one at a time, beating well after each addition. Scrape down the sides of the bowl as needed. Beat in the yogurt, vanilla, and mashed bananas until combined.
Add the dry ingredients into the wet ingredients and beat on low speed just until combined. Do not over-mix. Fold in the nuts/chocolate chips, if using. The batter should be thick.
Pour and spread the batter into the prepared baking pan. Bake for 60–65 minutes, making sure to loosely cover the pan with aluminum foil halfway through, to prevent the top from getting too brown. The bread is done when a toothpick inserted in the center comes out clean with only a few small moist crumbs. Cool the bread in the pan set on a cooling rack for 1 hour. Remove the bread from the pan and cool it directly on the rack until ready to slice and serve.
Store wrapped tightly at room temperature for up to 3 days or in the refrigerator for up to 1 week.
Update in 2025: With enough reader feedback stating the bread can often be too moist and dense, and therefore not bake properly, my team and I retested the bread multiple times over the past 2 years; we slightly reduced the amount of mashed bananas from 2 cups to 1 and 1/2 cups.
Butter: If needed, you can use salted butter in this recipe with no other changes needed. I’ve also successfully reduced the butter down to 6 Tablespoons (85g) with no issue (just as tasty).
Brown Sugar: This is not an overly sweet quick bread. If you want a sweeter banana bread, increase to 1 cup (200g) brown sugar. Feel free to replace some or all of the brown sugar with regular white granulated sugar.
Cream Cheese Frosting: This banana bread also tastes fantastic with cream cheese frosting on top! To make it, beat 4 ounces (112g) of softened cream cheese and 1/4 cup (60g) of softened unsalted butter together on medium speed until smooth. Beat in 1 cup (120g) of confectioners sugar, 1/2 teaspoon of pure vanilla extract, and a pinch of salt until combined. Spread on cooled loaf.
Banana Bread Muffins: Use this banana bread recipe to make 15 banana bread muffins. Spoon the batter into a lined or greased muffin pan (fill each to the top with batter) and bake for 5 minutes at 425°F (218°C); then, keeping the muffins in the oven, reduce the oven temperature to 350°F (177°C). Bake for an additional 16–17 minutes or until a toothpick inserted in the center comes out clean. The total bake time for the banana bread muffins is about 21–23 minutes. The initial burst of hot air helps those muffins rise nice and tall! Or try my quick & easy banana muffins.
Brown Sugar: Feel free to substitute the same amount of regular white granulated sugar or coconut sugar. I do not recommend any liquid sweeteners.
No Sour Cream or Yogurt? Feel free to use 1/3 cup mashed banana (in addition to what is called for in the recipe), unsweetened applesauce, or even canned pumpkin puree.
Frozen Bananas: You can use frozen bananas here. Thaw the frozen bananas. Drain off any excess liquid, mash, then use as instructed in the recipe. See How to Freeze & Thaw Bananas for Baking. Try not to mash too much or else you’ll be left with banana-y liquid; some chunks are great.
Chocolate Chips: I love this bread with chocolate chips, too. Feel free to add 1 cup of your favorite chocolate chips. No need to leave out the nuts if you add the chocolate chips. Chocolate chips and nuts are both optional.
Can I Turn This Into Banana Bundt Cake? There isn’t enough batter. I recommend using my extremely similar, scaled-up recipe for chocolate marble banana Bundt cake instead. You can leave out the chocolate swirl in that recipe.
Follow these basic instructions for a thick, crisp, and chewy pizza crust at home. The recipe yields enough pizza dough for two 12-inch pizzas and you can freeze half of the dough for later. Close to 2 pounds of dough total. This recipe is also in my New York Times best-selling cookbook, Sally’s Baking 101.
Ingredients
Dough
1 and 1/3 cups (320ml) warm water (about 110°F/43°C)
1 Tablespoon (13g) granulated sugar
2 and 1/4 teaspoons (7g) Platinum Yeast from Red Star instant yeast (1 standard packet)*
3 and 1/2 to 4 cups (438–500g) unbleached all-purpose flour (spooned & leveled), plus more as needed
2 Tablespoons (30ml) extra-virgin olive oil, plus more for greasing
1 teaspoonsalt
sprinkle of cornmeal, for dusting the pan
Toppings (halve these amounts if making just 1 pizza)
extra-virgin olive oil, for brushing
2garlic cloves, minced (optional)
1 cup (250g) store-bought pizza sauce
4 cups (1lb/454g) shredded mozzarella cheese
Instructions
Whisk the warm water, granulated sugar, and yeast together in the bowl of your stand mixer fitted with a dough hook or paddle attachment. Cover and allow to rest for 5 minutes. *If you don’t have a stand mixer, simply use a large mixing bowl and mix the dough with a wooden spoon or silicone spatula in the next step.
Add the flour, olive oil, and salt. Beat on medium speed for 2 minutes, until the dough pulls away from the sides of the bowl.
Knead the dough: Keep the dough in the mixer and beat for an additional 5 full minutes, or knead by hand on a lightly floured surface for 5 full minutes. (If you’re new to bread-baking, my How to Knead Dough video tutorial can help here.) If the dough becomes too sticky during the kneading process, sprinkle 1 teaspoon of flour at a time on the dough or on the work surface/in the bowl to make a soft, slightly tacky dough. Do not add more flour than you need because you do not want a dry dough. After kneading, the dough should still feel a little soft. Poke it with your finger—if it slowly bounces back, your dough is ready to rise. You can also do a “windowpane test” to see if your dough has been kneaded long enough: tear off a small (roughly golfball-size) piece of dough and gently stretch it out until it’s thin enough for light to pass through it. Hold it up to a window or light. Does light pass through the stretched dough without the dough tearing first? If so, your dough has been kneaded long enough and is ready to rise. If not, keep kneading until it passes the windowpane test.
Rise: Lightly grease a large bowl with oil or nonstick spray—just use the same bowl you used for the dough. Place the dough in the bowl, turning it to coat all sides in the oil. Cover the bowl with aluminum foil, plastic wrap, or a clean kitchen towel. Allow the dough to rise at room temperature for 60–90 minutes or until double in size. (Tip: For the warm environment on a particularly cold day, heat your oven to 150°F (66°C). Turn the oven off, place the dough inside, and keep the door slightly ajar. This will be a warm environment for your dough to rise. After about 30 minutes, close the oven door to trap the air inside with the rising dough. When it’s doubled in size, remove from the oven.)
Preheat oven to 475°F (246°C). Allow it to heat for at least 15–20 minutes as you shape the pizza. (If using a pizza stone, place it in the oven to preheat as well.) Lightly grease baking sheet or pizza pan with nonstick spray or olive oil. Sprinkle lightly with cornmeal, which gives the crust extra crunch and flavor.
Shape the dough: When the dough is ready, punch it down to release any air bubbles. Divide the dough in half. (If not making 2 pizzas, freeze half of the dough for another time. See freezing instructions below.) On a lightly floured work surface using lightly floured hands or rolling pin, gently flatten the dough into a disc. Place on prepared pan and, using lightly floured hands, stretch and flatten the disc into a 12-inch circle, about 1/2-inch thick. If the dough keeps shrinking back as you try to stretch it, stop what you’re doing, cover it lightly for 5–10 minutes, then try again. Once shaped into a 12-inch circle, lift the edge of the dough up to create a lip around the edges. I simply pinch the edges up to create the rim. If using a pizza stone, place the dough directly on baker’s peels dusted with cornmeal.
Top & bake the pizza: Using your fingers, press dents into the surface of the dough to prevent bubbling. Lightly brush olive oil over the top of the crust. Sprinkle with minced garlic (if using), then spread on 1/2 cup (125g) pizza sauce, and top with 2 cups (227g) shredded mozzarella cheese. Top with any additional toppings of your choice and bake for 13–15 minutes or until the crust is golden brown.
Slice hot pizza and serve immediately. Cover leftover pizza tightly and store in the refrigerator.
Notes
Freezing Instructions: This recipe yields enough dough for two 12-inch pizzas, a little less than 2 pounds (900g) total. After the pizza dough rises and you divide the dough in half (step 5), you can freeze one of the balls of dough to make pizza at a later time. Or you can simply freeze both balls of dough separately. Lightly coat all sides of the dough ball(s) with nonstick spray or olive oil. Place the dough ball(s) into individual zipped-top bag(s) and seal tightly, squeezing out all the air. Freeze for up to 3 months. To thaw, place the frozen pizza dough in the refrigerator for about 8 hours or overnight. When ready to make pizza, remove the dough from the refrigerator and allow to rest for 1 hour on the counter. Preheat the oven and continue with step 5, punching down the dough to release air if needed.
Overnight/All Day Instructions: Prepare the dough through step 3, but allow the dough to rise for 8–12 hours in the refrigerator. (If it needs to be in the refrigerator for longer, use cooler water (about 70°F/21°C) in the dough, which will slow the dough’s rise and allow for more time.) The slow rise gives the pizza dough wonderful flavor! When ready, continue with step 4. If the dough didn’t quite double in size overnight, let it sit at room temperature for 30–45 minutes before punching down (step 5).
Yeast: Red Star Platinum yeast is an instant yeast. You can use active dry yeast instead. The rise time will be at least 90 minutes. Reference my Baking with Yeast Guide for answers to common yeast FAQs.
Pictured Pizza: This recipe yields 2 pizzas. For each, top with 1/2 cup pizza sauce, 2 cups shredded mozzarella cheese, pepperoni slices, thinly sliced green pepper or jalapeño, and a sprinkle of Italian seasoning blend or dried basil.
These easy cinnamon rolls are perfect for yeast beginners because they only require 1 rise. You have a few options for toppings. The recipe below includes a simple cream cheese icing, but we also love these with the coffee icing or vanilla icing that’s included in the recipe Notes below.
Ingredients
Dough
2 and 3/4 cups (344g) all-purpose flour (spooned & leveled), plus more as needed
1/4 cup (50g) granulated sugar
1/2 teaspoonsalt
3/4 cup (180ml) whole milk
3 Tablespoons (43g) unsalted butter
2 and 1/4 teaspoons Platinum Yeast from Red Star or any instant yeast (1 standard packet)
1 large egg, at room temperature
Filling
3 Tablespoons (43g) unsalted butter, extra softened
1/3 cup (67g) packed light or dark brown sugar
1 Tablespoonground cinnamon
Cream Cheese Icing
4 ounces (113g) full-fat block cream cheese, softened to room temperature
Make the dough: Whisk the flour, sugar, and salt together in a large bowl. Set aside.
Combine the milk and butter together in a heatproof bowl. Microwave or use the stove and heat until the butter has melted and the mixture is warm to the touch (about 110°F/43°C, no higher). Whisk in the yeast until it has dissolved. Pour mixture into the dry ingredients, add the egg, and stir with a sturdy rubber spatula or wooden spoon OR use a stand mixer with a paddle attachment on medium speed. Mix until a soft dough forms.
Transfer dough to a lightly floured surface. Using floured hands, knead the dough for 3-5 minutes. You should have a smooth ball of dough. If the dough is super soft or sticky, you can add a little more flour. Place in a lightly greased bowl (I use non-stick spray), cover loosely, and let the dough rest for about 10 minutes as you get the filling ingredients ready.
Fill the rolls: After 10 minutes, roll the dough out in a 14×8-inch (36×20-cm) rectangle. Spread the softened butter on top. Mix together the cinnamon and brown sugar. Sprinkle it all over the dough. Roll up the dough to make a 14-inch log. Cut into 10–12 even rolls and arrange in a lightly greased 9- or 10-inch round cake pan, pie dish, or square baking pan.
Rise: Cover the pan with aluminum foil, plastic wrap, or a clean kitchen towel. Allow the rolls to rise in a relatively warm environment for 60–90 minutes or until double in size. (For a tiny reduction in rise time, see my answer to Where Should Dough Rise? in my Baking with Yeast Guide.)
Bake the rolls: After the rolls have doubled in size, preheat the oven to 375°F (190°C). Bake for 24–27 minutes, or until lightly browned. If you notice the tops are getting too brown too quickly, loosely tent the pan with aluminum foil and continue baking. If you want to be precise about their doneness, their internal temperature taken with an instant read thermometer should be around 195–200°F (91–93°C) when done. Remove pan from the oven and place pan on a wire rack as you make the icing. (You can also make the icing as the rolls bake.)
Make the icing: In a medium bowl using a handheld or stand mixer fitted with a paddle or whisk attachment, beat the cream cheese on high speed until smooth and creamy. Add the butter and beat until smooth and combined, then beat in the confectioners’ sugar and vanilla until combined. Using a knife or icing spatula, spread the icing over the warm rolls and serve immediately.
Cover leftover frosted or unfrosted rolls tightly and store at room temperature for a day or in the refrigerator for up to 5 days.
Notes
Make Ahead Instructions: This dough can be made the night before through step 4. Cover with plastic wrap and let rest in the refrigerator overnight. The next morning, remove from the refrigerator and allow to rise in a warm environment, about 1 hour. Continue with step 6.
Make Ahead Instructions – Freezing: You can freeze the rolls for up to 3 months, and I recommend a few different methods. The first method is to freeze them after shaping, before they rise (before step 5). Thaw in the refrigerator overnight, then let rise for 1.5–2 hours at room temperature before baking. The second method is to par-bake the risen rolls for 10 minutes, let cool completely, then cover and freeze. Thaw in the refrigerator overnight, then let sit at room temperature for 30 minutes before baking. Finish baking at 375°F (190°C) for around 15 minutes. You can also freeze fully baked rolls. See How to Freeze Cinnamon Rolls for more details about all of these methods.
Yeast: I highly recommend instant yeast. If you only have active dry yeast, you can use that instead. Active dry and instant yeast can be used interchangeably in recipes (1:1). Active dry yeast has a moderate rate of rising and instant dry yeast has a faster rate of rising; active dry yeast will take longer to raise the dough.
Milk: This recipe used to call for 1/2 cup (120ml) milk and 1/4 cup (60ml) water. The rolls taste much richer using all milk, and that is what I recommend. Whole milk or even buttermilk are ideal for this dough. If needed, you can substitute 3/4 cup (180ml) lower-fat or nondairy milk.
Coffee Icing (or Vanilla Icing): Whisk 1 cup (120g) confectioners’ sugar, 1/2 teaspoon pure vanilla extract, and 2–3 Tablespoons (30–45ml) strong brewed coffee together until smooth. Or swap milk for coffee for regular vanilla icing. Drizzle over warm rolls.
These banana muffins are soft, buttery, and spiced with cinnamon. They’re wonderful plain, but taste fantastic with 1 cup chopped walnuts or chocolate chips. You need 3 ripe bananas and a handful of basic kitchen ingredients.
2/3 cup (135g) packed light or dark brown sugar (or coconut sugar)*
1 large egg, at room temperature
1 teaspoonpure vanilla extract
2 Tablespoons (30ml) milk*
optional: 1 cup chopped walnuts, pecans, or chocolate chips
Instructions
Preheat oven to 425°F (218°C). Spray a 12-count muffin pan with nonstick spray or use cupcake liners.
Whisk the flour, baking powder, baking soda, salt, cinnamon, and nutmeg together in a medium bowl. Set aside. In a large bowl or in the bowl of your stand mixer, mash the bananas. On medium speed, beat or whisk in the melted butter, brown sugar, egg, vanilla extract, and milk. Pour the dry ingredients into the wet ingredients, then beat or whisk until combined. If adding nuts or chocolate chips, fold them in now. Batter will be thick.
Spoon the batter into liners, filling them all the way to the top. Bake for 5 minutes at 425°F, then, keeping the muffins in the oven, reduce the oven temperature to 350°F (177°C). Bake for an additional 16–18 minutes or until a toothpick inserted in the center comes out clean. The total time these muffins take in the oven is about 21–23 minutes, give or take. (For mini muffins, bake 12–14 total minutes at 350°F (177°C).) Allow the muffins to cool for 5 minutes in the muffin pan, then transfer to a wire cooling rack to continue cooling.
Muffins stay fresh covered at room temperature for a few days or in the refrigerator for up to 1 week.
Notes
Make Ahead Instructions: For longer storage, freeze muffins for up to 3 months. Thaw overnight in the refrigerator, then bring to room temperature or warm up in the microwave if desired.
Why the initial high temperature? The hot burst of air will spring up the top of the muffin quickly, then the inside of the muffin can bake for the remainder of the time. This helps the muffins rise nice and tall.
Whole Wheat Flour: Feel free to substitute whole wheat flour for all-purpose flour or use a mix of both as long as you use 1 and 1/2 cups total. If using all whole wheat flour, add another Tablespoon (15ml) of milk.
Frozen Bananas: You can use frozen bananas here. Thaw the frozen bananas. Drain off any excess liquid, mash, then use as instructed in the recipe. See How to Freeze & Thaw Bananas for Baking.
Sugar: You can use 2/3 cup of packed brown sugar or coconut sugar. Or a mixture of these to yield 2/3 cup. If using 2/3 cup coconut sugar, the muffins won’t be as sweet. I find they taste best with 2/3 cup brown sugar or 1/3 cup of each. 2/3 cup of honey or pure maple syrup works too, though the muffins will taste a little more moist in the centers. I’m unsure about sugar substitutes, but let me know if you try any.
Milk: Use your favorite variety of dairy or nondairy milk.