- Bring a pot of water to a boil. Have ready a large bowl of iced water. Plunge whole tomatoes in boiling water until skin starts to peel, 1 minute. …
- In a large pot or Dutch oven over medium heat, cook onion, bell pepper, carrot and garlic in oil and butter until onion starts to soften, 5 minutes. Pour in pureed tomatoes.
How To Make Basic Tomato Sauce with Fresh Tomatoes
Makes about 8 pints
What You Need
Ingredients
15 pounds ripe tomatoes
1/4 to 1/2 cup lemon juice or red wine vinegar
2 teaspoons salt (optional)
Optional ingredients: grated carrot, chopped onion, minced garlic
Equipment
6 1/2-quart or larger Dutch oven or stockpot
Mixing bowls
Slotted spoon
Knife and cutting board
Food processor or blender
Jars for canning or containers for freezing
Instructions
- Boil a pot of water and prep the ice bath: Bring a large Dutch oven or stockpot of water to a boil over high heat. Fill a mixing bowl with ice and water and set this next to the stove.
- Prepare the tomatoes for blanching: Core out the stems from the tomatoes and slice a shallow “X” in the bottom of each fruit.
- Blanch the tomatoes to peel them: Working in batches, drop several tomatoes into the boiling water. Cook until you see the skin starting to wrinkle and split, 45 to 60 seconds, then lift the tomatoes out with the slotted spoon and plunge them into the ice water. Continue with the rest of the tomatoes, transferring the cooled tomatoes from the ice water to another mixing bowl as they cool.
- Strip the peels from the tomatoes: When finished blanching, use your hands or a paring knife to strip the skins from the tomatoes. Discard the water used to boil the tomatoes.
- Roughly chop the tomatoes: Working in batches, pulse the tomatoes in the food processor. Pulse a few times for chunkier sauce, or process until smooth for a pureed sauce. Transfer each batch into the Dutch oven or stockpot. Alternatively, chop the tomatoes by hand. Process through a food mill for a smoother sauce. For a very chunky sauce, skip this step entirely and let the tomatoes break down into large pieces as they cook.
- Simmer the tomatoes: Bring the tomato sauce to a simmer over medium heat. Continue simmering for 30 to 90 minutes, stirring occasionally, until the sauce reaches the taste and consistency you like.
- Stir in the lemon juice and salt: When finished cooking, stir in the lemon juice or vinegar and salt. A quarter-cup is necessary to ensure a safe level of acidity for canning. Add more lemon juice or vinegar to taste.
- Preserving option 1 — freeze your sauce: Let the sauce cool, then transfer it into freezer containers or freezer bags. Sauce can be kept frozen for at least 3 months before starting to develop freezer burn or off-flavors.
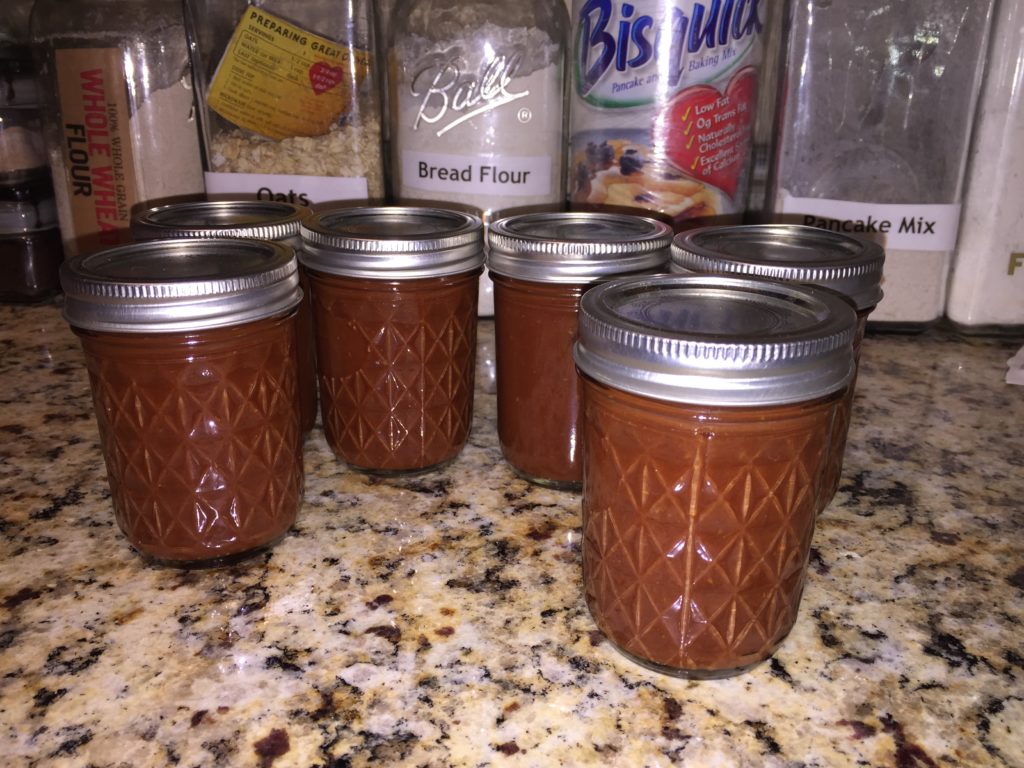
- Preserving option 2 — can your sauce: Transfer the hot sauce into sterilized canning jars. Top with new, sterilized lids, and screw on the rings until finger tight. Process in a pot of boiling water for 30 minutes. Let cool completely on the counter — if any lids do not seal completely (the lids will invert and form a vacuum seal), refrigerate that sauce and use it within a week or freeze it for up to 3 months. Canned tomato sauce can be stored in the pantry for at least a year.→ For a more detailed description of the canning process, read this tutorial: A Visual Tour of Hot Water Bath Canning
First, I want to admit something: Making sauce from fresh summer tomatoes has long been an insecurity of mine, despite years of cooking experience, including working as a sous chef in a Tuscan restaurant in New York and living and working on farms in Italy for extended periods, elbows deep in fresh-picked tomatoes and the sauce we made from them.
The reason why: there are two primary goals when making fresh tomato sauce, and they’re at odds with each other:
- First, the sauce should taste like it was made from fresh tomatoes, which means it should have the bright, fruity aroma and flavor of uncooked (or barely cooked) fruit. If we don’t have this, we might as well throw in the towel and stick with canned tomatoes 365 days of the year.
- Second, the sauce should have a good sauce-like consistency and have deep, sweet notes, which means cooking off much of the tomatoes’ natural water content and caramelizing the fruit’s natural sugars. Otherwise it’s going to be too thin and tart.
The trouble is that retaining the tomatoes’ fresh flavor means minimal cooking, while getting rid of the excess water content and caramelizing sugars means extended cooking. Everyone has a different solution to this dilemma. Some discard the watery seed-jelly and cook only the tomato pulp, which I refuse to do because the seed jelly has way too much flavor to waste. Others settle for a minimally cooked sauce that just heats for about 25-30 minutes, but I find this to be a compromise that fails to deliver the deep, sweet flavors we want. Another approach is to divide the sauce into two parts, one long-cooked, one quick-cooked, and then blend them back together.
Of those approaches, the divide-and-conquer concept has always made the most sense to me, but I’d never settled on exactly how to do it. To figure it out, I started with the first obvious question: What kind of tomato should we use?
You Say Tomato, I Say, Which One?
The first rule of making tomato sauce from fresh tomatoes is to do it in the peak of summer, when tomatoes are not only at their absolute best, but also their absolute cheapest. In the winter, when the only tomatoes available are ghostly versions of their in-season selves, it often makes more sense to use canned: canned tomatoes tend to be made with fruit that’s more ripe than anything we can hope to get out of season, and they’re generally cheaper, especially when you account for the amount of water weight that fresh ones have to shed before they become sauce.
But there’s still the question of which fresh tomatoes to use when they’re at their peak. The general wisdom is to use pulpy “paste” tomatoes (i.e. plums), which are less watery. Those guys yield more sauce per pound of fruit and require a shorter cooking time to get rid of the liquid, which helps retain some of that fresh tomato flavor.
But are plum tomatoes really the best way to go? And does it matter which kind of plum tomato you use? I bought four different types of tomato at the farmers market: three different varieties of plum tomato and then common beefsteaks, which are basically never recommended for sauce due to their juiciness. There are far more varieties of tomato than this, but it isn’t practical to test them all, and, frankly, most other varieties, such as most heirlooms, cost a premium—making them a prohibitively expensive option for sauce.
And these are the beefsteaks. Tanta acqua! Clearly, after all this water cooks off, there’s not going to be much sauce left, which is why it doesn’t make a lot of sense to make sauce from these kinds of tomatoes, unless you like paying hard-earned cash to humidify the air in your home with tomato vapor.
But, since I’d already started, I took the beefsteaks to their completion, straining out the skins and seeds and cooking the purée down. I did the same for all four types of the tomatoes, and was surprised at how drastic their flavor differences were.
- The San Marzanos made a purée that was bright and tart and not too sweet.
- The Amish Pastes produced a purée that was sweet, mild, slightly tart, and fruity.
- The Romas were sweet and floral, but not very tart.
- The beefsteaks had a great balance between sweetness and tartness.
Alone, each had its strengths, one more tart, one more sweet, one fruitier, another more fragrant. But as I tasted them all, what I realized was I didn’t want any one of these tomatoes in my sauce: I wanted all of them. Tasting then one by one, each was good, but combining them into a single spoonful made the whole thing pop.
To be clear, the flavors of my tomatoes are particular to the ones I bought: You may buy San Marzanos that are sweeter and less tart, and Romas that are tart but not sweet. It depends not only on the variety, but also where they were grown and other specific environmental conditions. It’s hard to predict with certainty the exact flavor profile and balance of sweetness and tartness any given tomato will deliver, so the best way to arrive at a balanced sauce is to combine multiple types.
The majority of the tomatoes should be pasty plums—ideally a variety of types if you can find them—because they’re more cost-effective. But I’m willing to add a little extra water from a small portion of beefsteaks or other juicy tomatoes if it means I can get a little bit of their flavor in the mix.
http://www.seriouseats.com/2014/08/how-to-make-the-best-fresh-tomato-sauce-summer-spaghetti-sauce-which-tomatoes-to-use.html
Prepping the Tomatoes
Once I’d settled on using a mix of tomatoes, the next step was deciding on how to prep them. Most folks agree that an abundance of skin or seeds in a tomato sauce is not a good thing, but there’s more than one way to remove that stuff from a sauce.
Some recipes call for discarding the seeds altogether, but as I’ve already mentioned, I like the flavor of the jelly the seeds are suspended in too much to do that—in fact, it has a tartness that I think is essential to creating what will ultimately be a sauce that has a good balance of sweet and tart flavors.
As for the skins, one option is to score the tomatoes, quickly blanch them and then peel off their skins. This is fine for small quantities of sauce, but I felt strongly that I wanted to select a method that would work for large batches—we are doing this in peak tomato season so we might as well make a lot, and peeling each tomato individually isn’t practical.
The method I know best is one I used when working on farms in Italy where we would make vats of sauce each week in the peak of summer: The tomatoes are cut into chunks, cores, skins, stems, seeds, and all (absolutely no need to exclude anything except the odd bad spots you may find), dumped into a pot, and set over high heat until they dump their juices and come to a boil.*
*Yet another method involves baking the tomatoes first at low heat to drive off some of their water, and only then to quickly cook them into a sauce; the reason for this has to do with how temperature affects enzyme activity and flavor, but for large quantities of sauce I also find this method impractical.
Then they’re boiled for about 10 minutes, just long enough to soften the pulp. It’s a quick enough cooking time that the fresh tomato flavor isn’t lost, but long enough that the pulp will pass* through a food mill or vegetable strainer.
In fact, in Italian this watery, fresh tomato purée is called a passata (“passed”).
According to Harold McGee in On Food and Cooking, this quick-boil method allows pectins to thicken the sauce much more effectively, requiring less overall sauce reduction (and therefore a fresher-tasting sauce!).
This does require having either a food mill or some other type of mechanical strainer, but for large quantities of sauce, it’s a minimal investment that will save a lot of time. Plus, it’s one of the easiest ways to remove seeds and skins while keeping all the good stuff in the sauce.
Once we have our tomato purée, the next question is what to do with it.
Cooking the Sauce: The Quick and the Red
One of the goals I outlined above for fresh-tomato sauce is that it should retain some of that fresh-tomato flavor. So I knew I wanted some of my tomato purée to be cooked minimally. But one of the things my initial test batches made me think about is how damned delicious long-cooked tomatoes are. You see, when I was cooking down my beefsteak tomato purée, I had to cook it a long, long time to get rid of all of its excess water, and by the time it was done, it was sooooo delicious: dark red, intensely sweet, and oh-so rich. I just kept going back to it with a spoon.
To get that flavor into my sauce, I consulted several cookbooks, and settled on the idea of turning a portion of the purée into a tomato-paste like extract in the oven, called estratto in Italian. It’s a technique described well by Paul Bertolli in his fantastic Cooking By Hand, and Rosetta Costantino in My Calabria, and while it’s traditionally done in the Southern Italian sun, a low oven is the easy alternative.
Because so much evaporation is required to reach the concentrated stage I was going for here, I used only paste tomatoes for this portion of the recipe—I’d rather let the small portion of beefsteaks in the batch contribute their water elsewhere than have to cook it all off here. Overall, a little less than half of my tomatoes went towards this component (10 pounds out of 25).
The method is simple: pour the purée into rimmed baking sheets or baking dishes (basically anything wide that will maximize surface area and therefore evaporation) and set them in a low oven, stirring from time to time, especially as it begins to thicken, until a rich, sweet extract is formed. Don’t even think of taking a shortcut with store-bought tomato paste here: This stuff is way more flavorful than any canned tomato paste I’ve ever tried.
The low-and-slow reduction allows the tomato sugars to caramelize, creating an intensely sweet, concentrated flavor base for the sauce.
Just one tip: Keep an eye on these and stir them frequently. I learned the hard way that the thin layer of tomato paste can burn quickly, even at low oven temperatures, if it’s left unattended for too long.
With most of my remaining tomato purée, about 15 pounds of mixed tomatoes, I used a more classic stovetop method, cooking it down for about 45 minutes to a sauce-like consistency. But before I did that, I set about a quart of the fresh tomato purée aside, thinking I would add it back in at the end for a blast of fresh-tomato flavor. I had gotten the idea while thinking about the common practice of adding a splash of high-quality uncooked olive oil at the end of cooking to get its great taste into the dish. I figured, if it works for olive oil, why shouldn’t it work for tomatoes?
What that meant was I ended up with three sauce components: my rich, delicious tomato paste; my basic cooked sauce; and then my very fresh-tasting tomato purée.
Here they are side-by-side, and the color alone speaks volumes about how each is different. In terms of absolute quantities, I had only about a quart’s worth of both the concentrated paste and the fresh purée; the regular sauce seen in the middle here produced about a gallon, and is the backbone of the sauce. The idea is to enrich the bulk of the sauce with the deep, sweet, caramelized notes of the paste, and then finish it with the bright, fresh flavor of the barely-cooked purée, to create layers and layers of flavor that hit every note.
Correcting the Bulk Sauce
So, now that I’ve explained my three-pronged approach to the sauce, we’re basically done, right? Nope!
Just because I have my amazing tomato paste and my fresh-and-fruity purée doesn’t mean I’m just going to accept that the bulk of the sauce is going to taste merely good, especially if there’s anything I can do about it.
The first trick is one we’ve all seen a million times: toss in some basil. It’s no accident that basil is usually included in canned tomatoes: Canning require intense heat and cooking, which kills any trace of fresh tomato flavor. A few sprigs of basil help add a little freshness back in. I added some basil to a portion of my bulk sauce while it was still warm and let it steep.
It worked, adding a fragrant, floral, anise-y scent to the sauce that is totally wonderful. At the very least, it’s worth steeping the basil in the sauce.
Some folks, though, also add some tomato leaves to their sauce. Writes McGee, “tomato leaves have a fresh-tomato aroma thanks to their leaf enzymes and prominent aromatic oil glands.”
I tried it out, and, aside from putting way too much in my sauce, found that it does indeed add a grassy green flavor that can help offset whatever fresh notes are lost from cooking the tomato. The only hard part for most of us is getting our hands on tomato-plant cuttings. If you can’t, rest assured the basil does more than enough on its own—honestly, if I had to choose between the two, I’d take the basil. But if you can do both, each will help in its own way.
The Question of Aromatics
One other major concern for the bulk sauce is whether to add aromatics like onion and garlic, and if so, how to do it. Some recipes call for cooking the aromatics first until soft and sweet (but not browned), while others have the aromatics dumped in raw and simmered in the sauce as it cooks.
I tried it three ways*: with raw aromatics, sautéed aromatics, and none at all. In my tests I just used onion and garlic, which are the most common, though you can opt to also include others like carrot and celery—each will alter the flavor of the sauce somewhat, and whether or not you include them is a matter of personal preference.
*Actually four ways, I also did a batch with crushed red pepper, and loved the subtle warm heat it adds to the sauce.
Raw onion and garlic produced a cleaner-tasting sauce with fresh vegetable notes, but the overall flavor and texture was less integrated. To avoid the texture issue, you can use Marcella Hazan’s method of submerging raw onion halves in the simmering sauce and then fishing them out whole.
When blind-tasting these two sauces on spaghetti, more of my colleagues preferred the sautéed aromatics to the raw ones, but opinion wasn’t unanimous.
My third batch, without any aromatics, was also delicious, and in some ways I preferred its pure tomato flavor, which goes to show that if the sauce is good enough, you really don’t need to enhance it much. On that note, I also preferred my sauce without cheese, which shocked me, because I always put cheese on my pasta with tomato sauce, but this sauce really is that good—too much other stuff just gets in the way.
There are many, many ways to make very good tomato sauce, but if you’re going to take the time to prepare it using fresh tomatoes, the key to creating a balanced, rich, and layered sauce that tastes both fresh yet also deep and complex is to think of it as a blender’s art: make tomato purée and divide it into parts, then slow-cook one portion of it into a thick, sweet, caramelized paste; cook another portion into the bulk of the sauce, flavored with basil, possibly tomato leaves, and aromatics; and save a small portion of the barely-cooked purée to add at the end for a bright, fresh note, similar to how we often finish dishes with a drizzle of uncooked olive oil.
Exactly how you use the sauce will determine final steps: On pasta, for instance, you can finish the pasta in a pan with the sauce and some of the pasta-cooking water, adding a little raw olive oil, pat of butter, or splash of cream at the end, depending on the final flavor you want.
It may be a little fussy, but it’s also the first tomato sauce I’ve made that I haven’t wanted to top with cheese. And really, I don’t even really need the pasta. Just give me a spoon.
 Step by Step