Unless you’re a professional cook, you may be confused as to why most pots and pans have a hole at the end of the handle You may not have even noticed that the hole is there. There are actually two good reasons why pots and pans have this hole. First, it makes it easy to hang them up on hooks when they’re drying or not in use. This is often seen in professional kitchens or house that have a lot of space.
Another trick that experienced chefs like to use is using that hole to hold a utensil. For example, if you have a stirring spoon, you don’t just want to leave it in the pot or set it on the counter. But with the hole at the end of the handle, you can slide the utensil in there so it just sits up and drips back into the pot. Try it out next time you want to impress people with your cooking skills.
Salt is one of the most commonly found minerals on earth. And while most people associate it with cooking, it actually has tons of uses all around the house. One of the more helpful alternatives uses for salt is to help fix clogged drains.
Here’s what you need to do. First, clear as much of the blockage as you can by hand. Then take 1/2 a cup of salt and 1/2 a cup of baking soda and pour it into the drain. Then take vinegar and pour it down the hole. It will bubble up fast, then by the time the bubbles stop, the clog should be gone.
Salt can also be used for things like putting out a dangerous grease fire. You can also use it as an abrasive to help clean a very dirty pot or pan. There are literally ended uses for salt around the house, that’s why it pays to always keep extra in your pantry.
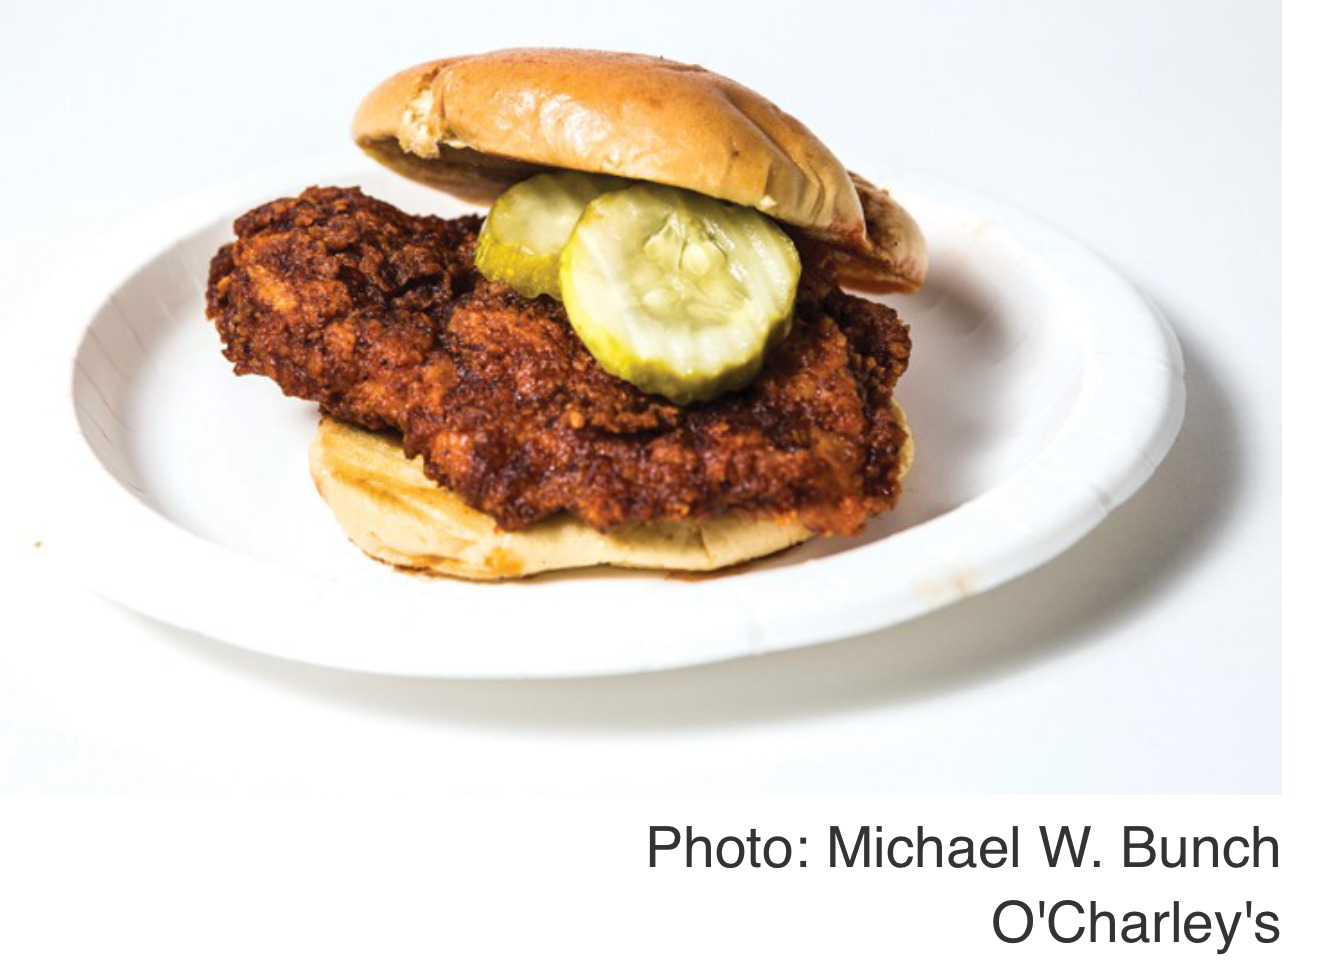
This is a nice sandwich if you are looking for a bit of heat and a crispy mouth feel. Here is my recipe, adapted from a recipe shown on YourLife A – Z.
Prepare wet marinade: 1/2 C buttermilk, 1 egg yolk, 2 TBL Frank’s Red Hot Cayenne, 2 tsp Grandpa’s Thunder Powder. For less heat, use a bit of cumin and a bit of garlic powder.
Pound 2 chicken thighs between two sheets of plastic, lightly sprayed with Pam. Make evenly flat, but not too thin.
Put into plastic bag, and let rest in refrigerator overnight.
– – NEXT DAY
Next day (for lunch or dinner) remove liquid from plastic bag, and put into a large bowl for later use.
Pat dry (DON’T WIPE) and dredge in dry ingredients:
2 TBL brown sugar, 1 tsp salt, 1 tsp garlic powder, 1 TBL Thunder Powder, 1/4 C AP flour, 1 tsp corn starch
Set on wire rack and let rest an hour
– – AN HOUR LATER
Dredge again in the dredge flour and place in hot oil – Canola or Peanut
Fry about 10-12 minutes each piece at 320 – 330º
Drain on a wire rack.
Put thighs in an oven at 350º for about 30 minutes
Serve on a brioche bun with desired sandwich toppings
16 ounces (454g) Philadelphia cream cheese 2 large eggs ½ cup (120g) sour cream 3 – 4 tablespoons (42g – 56g) unsalted butter
Place cream cheese, eggs, sour cream on counter-top to reach room temperature.
Then, melt the unsalted butter.
*Critical Tip: this is critical for your cheesecake’s success, so please please make sure all the above ingredients are at room temperature before you start. If not, you may end up with lumpy fluff top cheesecake. So don’t skip this step! 🙂
PART A
MAKE THE CRUST
1
Ground Graham Crackers
10 (120g) graham crackers Food processor or Ziploc bag + Rolling pin
Finely ground the graham crackers in a food processor.
Or place the graham crackers in a Ziploc bag and roll them with a rolling pin.
Mix Crust Mixture
Finely ground graham crackers A pinch sea salt 2 tsp – 1½ tbsp (8.3g – 19g) brown sugar
Small mixing bowl Fork
In a small mixing bowl, mix finely ground graham crackers, sea salt, brown sugar together with a fork.
*Pro Tip: Why add sea salt?A small pinch of sea salt heightens the flavor of other ingredients. A secret ingredient in many restaurant-quality desserts. shh… 😉
3
Optional – Add Flour
¼ cup (32g) all-purpose flour
If you want a firmer & crisper crust, we recommend blind-baking the crust. We’ll discuss this in Step 7 below.
If you’re blind-baking your crust, mix in the flour at this step.
4
Mix in Melted Unsalted Butter
3 – 4 tbsp (42g – 56g) unsalted butter, melted
Mix in unsalted butter until the mixture sticks together.
Line the side & bottom of the cheesecake pan with parchment paper for smoother sides & easier release.
*Note: We did not use any butter to line the parchment paper.
Form Crust
Graham cracker crumbs mixture, from above
Measuring cup/Spoon
Pour in the graham cracker crumbs mixture.
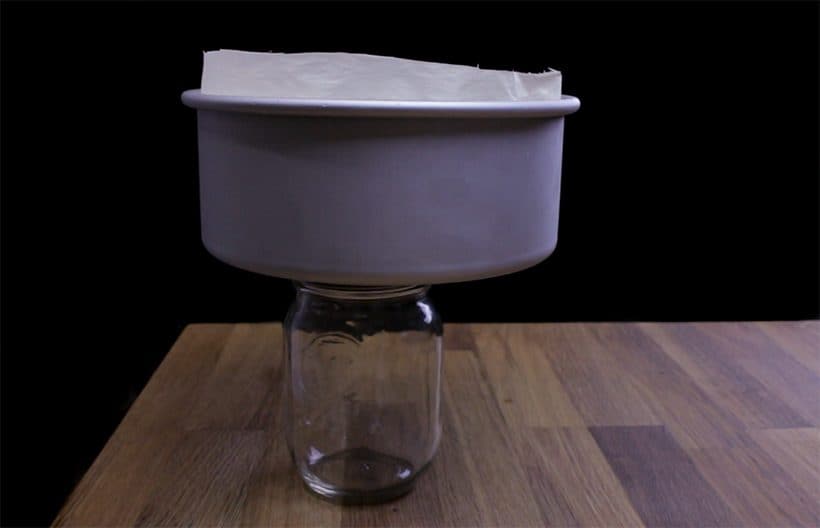
Gently press down the crumbs with a flat measuring cup, ramekin or Mason jar to form an even layer. You can also use a spoon for the edges.
In our blind taste test, the Method #2: Blind-Baked Crust was noticeably firmer and crisper compared to Method #1’s freezer version.
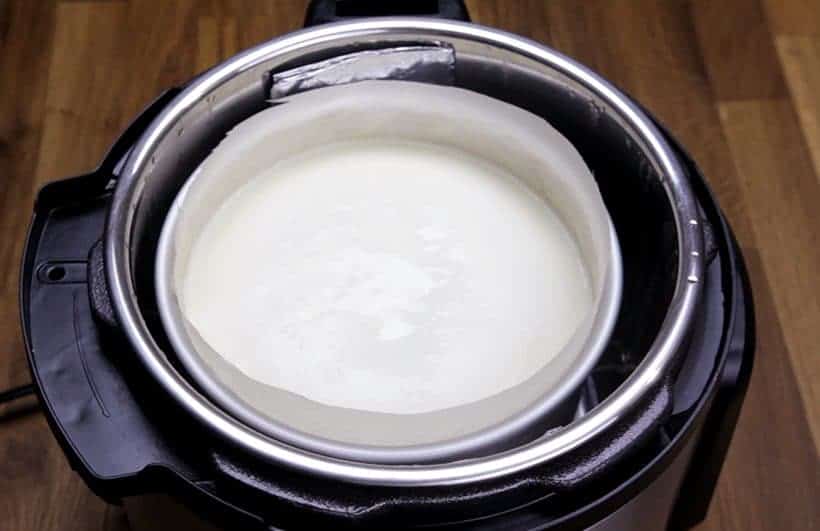
Method #1 – Freeze the Crust: Place the cheesecake pan in the freezer while you make the cheesecake batter.
Method #2 – Blind-Bake the Crust (for firmer & crisper crust): Place the crust in a 325°F oven for 15 minutes.
PART B
MAKE CHEESECAKE BATTER
*Critical Tip: We highly recommend using a Hand Mixer instead of a Stand Mixer. Stand Mixer is usually more powerful, thus you can easily overmix and introduce too much air into the cheesecake batter. This may result in a puffy souffle-style cheesecake.
*Note: Click on the Tabs to choose Method #1: Dense or Method #2: Creamy.
2 tbsp (16g) cornstarch2 pinches of sea salt⅔ cup (133g) white sugar Small mixing bowl
Mix cornstarch, sea salt, and white sugar together in a small mixing bowl.
9
Briefly Beat Cream Cheese
16 ounces (454g) Philadelphia cream cheese Medium mixing bowl Hand mixer
In a medium mixing bowl, briefly break up the cream cheese by beating it for 10 seconds with a hand mixer using low speed.
10
Mix in Sugar Mixture
Sugar mixture, from aboveHand mixerSilicone spatula
Add in half the sugar mixture and beat until just incorporated using low speed (roughly 20-30 seconds). Scrape down the sides and the hand mixer with a silicone spatula every time a new ingredient is added. Add remaining sugar mixture and beat until just incorporated using low speed (roughly 20-30 seconds).
11
Add Sour Cream & Vanilla Extract
½ cup (120g) sour cream2 tsp (10 ml) vanilla extract Hand mixer
Add sour cream and vanilla extract to the cream cheese mixture. Beat until just incorporated using low speed (20-30 seconds).
Blend in Eggs
2 large eggs Hand Mixer Silicone spatula
Blend in the two eggs using low speed, one at a time. Mix until just incorporated (about 15 – 20 seconds with a hand mixer). Try not to overmix on this step.
Scrape down the sides and the hand mixer with a silicone spatula and fold a few times to make sure everything is fully incorporated.
13
Pour Batter in Pan
Cream cheese batter Cheesecake pan
Pour cream cheese batter into the cheesecake pan.
14
Remove Air Bubbles for Smooth Surface
Tap cheesecake pan against the counter to let the air bubbles rise to the surface.
Burst the air bubbles with a toothpick or fork.
The longer you tap, the more air bubbles you’ll be able to burst.
Removing air bubbles is an art that requires patience!
Tap until you are satisfied. Ensure the surface is clear of air bubbles or fork marks.
Side note: what we learned from our 16 17 experiments, it’s almost impossible to remove all air bubbles.
PART C
PRESSURE COOK CHEESECAKE
To make it easier to take out the cheesecake pan from Instant Pot: make a foil sling by folding a piece of aluminum foil (as shown below).
*Note: Be sure to tuck in the foil sling down the sides (don’t let it fold over the cake when you close the lid).
Click on the Tabs to choose between: Regular Method #1 or Perfectionist Method #2.
This Perfectionist Method takes an extra step to further prevent surface dents on the cheesecake. Cause of Surface Dents: Dents on cheesecake’s surface is mostly caused by the condensation build-up during the “going up to pressure” stage. Why Use This Method? By starting with boiling water, we can shorten the “going up to pressure” time in order to minimize condensation.
15
Pressure Cook Cheesecake
1 cup (250 ml) of waterSteamer rackFoil slingInstant Pot Pressure Cooker
Place a steamer rack and pour water in pressure cooker. Bring water to a boil (Instant Pot users: Press manual/pressure cook and set the time to 28 minutes).
When the water begins to boil, place cheesecake pan on the steamer rack with a foil sling right away.
*Caution: Don’t wait too long to place the cheesecake in pressure cooker, as it’ll affect the cooking time. Place it immediately once the water begins to boil. This prevents too much water from evaporating.
Immediately close the lid with the Venting Knob at Venting Position.
Turn Venting Knob to Sealing Position and let it pressure cook. It should go up to pressure in ~1 minute.
Pressure Cooking Time: High Pressure for 28 minutes, then Full Natural Release (takes roughly 7 – 9 minutes)
Open the lid gradually.
*Pro Tip 1 – For 6 x 3 inches Cheesecake Pan: add 5 mins High Pressure Pressure Cooking Time. *Pro Tip 2: As you open the lid, try your best to avoid dripping the condensation from the lid onto the cheesecake.
Absorb any condensation on the surface by lightly tapping it with a soft paper towel.
Allow cheesecake to cool to room temperature with the lid open in the Instant Pot Pressure Cooker.
Or place it on a wire rack to cool to room temperature.
17
Release Cheesecake From Sidewall
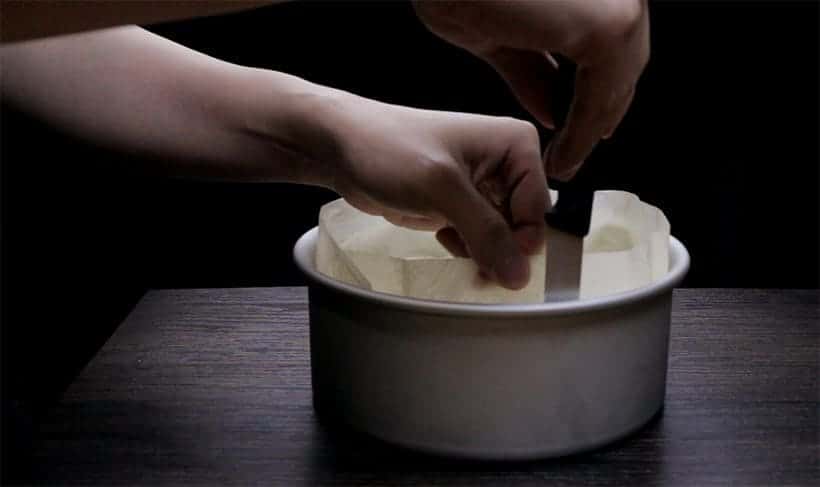
After cooling for 10 – 15 minutes, carefully run a thin paring knife between the sidewall and the cheesecake (or parchment paper) to release the cheesecake from the pan.
The parchment paper will wrinkle after pressure cooking. Pull it lightly to straighten it out for a smooth side.
18
Chill Cheesecake in Fridge
Once the cheesecake has completely cooled, place it in the refrigerator for at least 4 – 8 hours (preferably overnight).
19
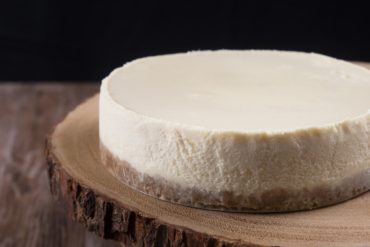
Serve Instant Pot Cheesecake #17
Remove the cheesecake from the refrigerator!
The best way to release the cheesecake from the bottom pan is warm bottom of the pan to melt the butter. You can use a torch or heating pad for this step.
Carefully peel off the parchment paper.
You’ve done it!! Your very own Instant Pot Cheesecake #17.
Give yourself a pat on the back & EAT!! 😀
Cooking Tips for Instant Pot Cheesecake
1. Ensure Cream Cheese, Eggs, Sour Cream at Room Temperature
Placing the above ingredients on the counter ahead of time until it reaches room temperature is critical to your cheesecake’s success! Please ensure they’re not cold before you begin making your stunning New York Cheesecake #17!
2. Smooth & Creamy Cheesecake Option:
Adjust the beating time to 1 minute for Part B – Step 9 (cream cheese), Step 10 (sugar mixture), and Step 11 (sour cream & vanilla extract).
3. Add Lemon Juice to Cheesecake Batter?
We tried using fresh Sour Cream and old Sour Cream. Old sour cream has lost some of the tangy flavors, so adding 1 tablespoon of lemon juice will help balance the flavors. Add it in Part B – Step 11 with the sour cream.
But if your sour cream is fresh, no lemon juice is needed unless you like extra tangy flavor. 🙂
4. Modifications For Other Sizes of Cheesecake Pan?
You can use the same recipe with adjusted pressure cooking time.
6 x 3 inches Cheesecake Pan (Uncovered): Due to the increase in thickness, add 5 – 8 mins High Pressure Pressure Cooking Time
4.5 – 5 x 2 inches Cheesecake Pan (Uncovered): High Pressure 18 minutes + Natural Release
Standard silicone cup (2.7″ x 1.25″) cheesecake bites (uncovered): High Pressure 7 minutes + Natural Release
5. Can I Wrap My Cheesecake with Aluminum Foil?
Some users like to wrap their cheesecake with aluminum foil for pressure cooking, but it’s not necessary. If you do decide to wrap the pan with aluminum foil, add additional 5 – 7 mins to our stated pressure cooking time in this recipe.
6. Use Hand Mixer Rather than Stand Mixer
We highly recommend using a Hand Mixer over a Stand Mixer to mix the cheesecake batter. Since Stand Mixers are usually more powerful, you can easily overmix and introduce too much air into the cheesecake batter. This may result in a puffy souffle-style cheesecake.
Easy New York Style Instant Pot Cheesecake Recipe: Pamper yourself & impress guests with your choice of smooth/creamy or rich/dense pressure cooker cheesecake with crisp crust.
We highly recommend using a Hand Mixer to mix the cheesecake batter instead of a Stand Mixer. Stand Mixers are often more powerful, thus you can easily overmix and introduce too much air into the cheesecake batter. This may result in a puffy souffle-style cheesecake.
Place 16 ounces (454g) cream cheese, 2 large eggs, ½ cup (120g) sour cream on counter-top to reach room temperature. Then, melt the 3 – 4 tablespoons (42g – 56g) unsalted butter.*Pro Tip: this is critical for your cheesecake’s success, so please make sure all the above ingredients are at room temperature before you start. If not, you may end up with lumpy fluff top cheesecake. So don’t skip this step! 🙂
PART A. MAKE THE CRUST
Ground Graham Crackers: Finely ground 120g graham crackers in a food processor. Or place the graham crackers in a Ziploc bag and roll them with a rolling pin.
Mix Crust Mixture: In a small mixing bowl, mix finely ground graham crackers, a pinch of sea salt, 2 tsp – 1 1/2 tbsp (8.3g – 19g) brown sugar together with a fork.
Perfectionist’s Step – Add Flour (if blind-baking for firmer & crisper crust): mix in ¼ cup (32g) all-purpose flour.
Add Melted Unsalted Butter: Mix in roughly 3 – 4 tbsp (42g – 56g) unsalted butter until the mixture sticks together.
Line Pan: Line the side & bottom of cheesecake pan with parchment paper.
*Note: We did not use any butter to line the parchment paper.
Form Crust: Pour in the graham cracker crumbs mixture. Gently press down the crumbs with a ramekin or Mason jar to form an even layer. You can also use a spoon for the edges.
Firm Crust
Method #1 – Freeze: Place cheesecake pan in freezer while you make the cheesecake batter.
Method #2 – Blind-Bake (for firmer & crisper crust): Place crust in a 325°F oven for 15 minutes.
PART B. MAKE DENSE CHEESECAKE BATTER
Mix Sugar Mixture: Mix 2 tbsp (16g) cornstarch, 2 pinches of sea salt, and 2/3 cup (133g) white sugar together in a small mixing bowl.
Briefly Beat Cream Cheese: In a medium mixing bowl, briefly break up the 454g cream cheese by beating it for 10 seconds with a hand mixer using low speed.
Mix in Sugar Mixture: Add in half the sugar mixture and beat until just incorporated using low speed (roughly 20 – 30 seconds). Scrape down the sides and hand mixer with a silicone spatula every time a new ingredient is added. Add remaining sugar mixture and beat until just incorporated using low speed (roughly 20 – 30 seconds).
Add Sour Cream & Vanilla Extract: Add 1/2 cup (120g) sour cream and 2 tsp (10 ml) vanilla extract to the cream cheese mixture. Beat until just incorporated using low speed (20 – 30 seconds).
Blend in Eggs: Blend in the two eggs using low speed, one at a time.
Mix until just incorporated (about 15 – 20 seconds with a hand mixer & less time if you are using a powerful stand mixer). Try not to overmix on this step.
Scrape down the sides and hand mixer with a silicone spatula and fold a few times to make sure everything is fully incorporated.
Pour Batter in Pan: Pour cream cheese batter in cheesecake pan.
Remove Air Bubbles for Smooth Surface: Tap cheesecake pan against the counter to let air bubbles rise to the surface. Burst the air bubbles with a toothpick or fork. Tap until you are satisfied. Ensure the surface is clear of air bubbles or fork marks.
Method #1: Pour 1 cup (250 ml) of cold water in pressure cooker. Place cheesecake pan on top of a steamer rack (so, it’s not touching the water). Close lid and pressure cook at High Pressure for 26 minutes and Full Natural Release. Natural release will take roughly 7 minutes. Open lid gradually. Absorb any condensation on surface by lightly tapping it with a soft paper towel.
Perfectionist’s Method #2 – Prevent Surface Dents: Place a steamer rack and pour 1 cup (250ml) of water in pressure cooker. Bring water to a boil (Instant Pot users: Press manual/Pressure Cook and set the time to 28 minutes). When the water begins to boil, place cheesecake pan on the steamer rack with a foil sling right away.
*Caution: Don’t wait too long to place the cheesecake in pressure cooker, as it’ll affect the cooking time. Place it immediately once the water begins to boil. This prevents too much water from evaporating. Immediately close the lid with Venting Knob at Venting Position. Turn Venting Knob to Sealing Position and let it pressure cook at High Pressure for 28 minutes and Full Natural Release. It should go up to pressure in roughly 1 minute. Natural release will take roughly 7 – 9 minutes. Open the lid gradually. Absorb any condensation on the surface by lightly tapping it with a soft paper towel.
PART D. COOL, CHILL, SERVE CHEESECAKE
Cool Cheesecake: Allow cheesecake to cool to room temperature with the lid open in the pressure cooker. Or place it on a wire rack to cool to room temperature.
Release Cheesecake from Sidewall to Avoid Cracking: After cooling for 10 – 15 minutes, carefully run a thin paring knife between the sidewall and parchment paper to release the cheesecake from the pan. Pull the slightly wrinkled parchment paper lightly to straighten it out for a smooth side.
Chill Cheesecake in Fridge: Once the cheesecake has completely cooled, place it in the refrigerator for at least 4 – 8 hours (preferably overnight).
Serve: Remove cheesecake from the refrigerator. The best way to release the cheesecake from the bottom pan is warm the bottom of the pan to melt the butter. You can use a torch or heating pad for this step. Carefully peel off the parchment paper. Enjoy~
Video
Notes
Smooth & Creamy Cheesecake Option: Remember to adjust the beating time to 1 minute for Part B – Step 2 (cream cheese), Step 3 (sugar mixture), and Step 4 (sour cream & vanilla extract).
For 6 x 3 inches Cheesecake Pan: add 5 mins High Pressure Pressure Cooking Time.
*Rate Amy + Jacky’s Recipe: If you’ve tried our recipe, don’t forget to Rate the Recipe in the Comments Section. Thank you!
*Disclosure: We are an Amazon Influencer/Amazon Associate. This means that if you decide to purchase items or services on Amazon through our links on Pressure Cook Recipes to Amazon, Amazon will send a small commission to us at no additional costs to you. Thank you!
Please read before leaving a comment 🙂
1) If you have a question, it’ll be great if you can try to search for the answer first by checking the comments below. Thank you so much. 🙂
2) We’re super thankful for all the reviews. We may not be able to reply to all of you, but we read and enjoy every single one of them.
1.8K Comments
newest
Chris @ FB
5 hours ago
#17 recipe Instant Pot cheesecake I made last night
Pressure Cooker
Instant Pot DUO 60
0
Diane
16 days ago
I have made this several times, and it is wonderful.
Pressure Cooker
Instant Pot DUO EVO PLUS 60
0
Matthew @ FB
17 days ago
After weeks of planning and preparation, I finally managed to make the famous cheesecake #17!
Pressure Cooker
Instant Pot DUO 60
0
Nancy @ FB
18 days ago
I have been playing with and making LOTS of Cheesecake #17 my latest creation is an Espresso Cheesecake with a Chocolate Glaze. I have been giving at LEAST half of every cake away. This time I gave the whole cake away in trade for two beautiful lobsters!
Pressure Cooker
Instant Pot DUO 60
0
Sarah
20 days ago
What is the serving size used to determine the nutritional value? Serving size with the recipe says 7 inches.
I used cinnamon-oat-cookies bought at a Swedish Furniture Company. On top of the prebaked bottom I added dulce du leches and fresh apples coated with brown sugar and cinnamon. Then the cheesecake batter. On top I added another thin layer of dulce du leches and some caramelized Walnuts (The nuts were tossed in a pan with sugar and maple syrup to caramelize them) right before serving. I will use more caramel and apples inside next time, but the consistency and taste was perfect. The nutty crunch on top was a great addition.
I made an oreo cookies n creme cheesecake in my IP today for my boyfriends birthday tomorrow! It has an oreo crust, oreos mixed into the cheesecake, hersheys cookies n creme topping, oreos mixed into the homemade whipped cream, and mini oreos on top!!! I follow the cheesecake #17 recipe by Amy & Jacky. Here are the things I do different on my cheesecakes: I use a 7″ springform pan I tap bubbles out while the cheesecake batter is still in the mixing bowl I cover the cheesecake with papertowel and tin foil while pressure cooking. Here are my twists… Read more »
It was a total hit! Super amazing! Here’s a picture of it cut. 😊 even beautiful from the inside.
1
Melissa @ FB
1 month ago
I decided to try another cheesecake in the instant pot. This time I did a strawberry cheesecake and I even hand dipped the strawberries and chocolate. Let me tell you I do not do dessert so those strawberries were challenging but they look okay. And if there wasn’t enough chocolate, I had to get Ghirardelli chocolate hearts 😂I used this recipe and followed it to the t and it came out even better this time. I hope this is a huge hit at the super bowl party. I am going to tomorrow with my chocolate chip cookie that I made… Read more »
Pressure Cooker
Instant Pot DUO 60
1
Susan @ FB
1 month ago
Cheesecake #17 did not disappoint! I’ve made a lot of IP cheesecakes, but this was definitely the best by far! I followed all of the pro tips. It made a perfect birthday cheesecake for my husband! Thanks Amy + Jack.
P.S.: I can’t believe how much better it sliced being denser than the previous ones I’ve made!
This recipe was adapted from the Easy Eggwich by Ontel. I bought this on Amazon and it works just as promised. I’ve moved into a smaller apartment, where space is at a premium, so this recipe uses a small round ramekin instead of the Original Eggwich. Still… if you have room, buy the Easy Eggwich.
Basic Recipe
Wipe a round ramekin with Crisco, butter, or spray with Pam
Beat an egg in a separate container and place into the ramekin
Add toppings (two max) bacon, sausage, cheese, olive, ham, etc
Put into microwave and cover with a tea plate
Microwave 60 seconds on high
The glass will heat up. BE CAREFUL. The Easy Eggwich container does not heat up.
Turn out on a prepared English muffin or other container – add toppings as desired
Options from Easy Eggwich
CONTAINER: English muffin, biscuit, bagel, croissant, waffle, pancake, Texas toast, corn muffin, ciaatta bun, flatbread, wraps, potato buns, street taco tortillas, pitas, and more
MEAT FILLING: Bacon, sausage, sausage links, ham, pork roll, Canadian bacon, maple bacon, turkey sausage, chorizo, corned beef, prosciutto, soppressata, and more.
SPECIALTY TOPPINGS to use BEFORE cooking: (mix in with egg) Onions, salsa,diced tomatoes, mushrooms, and more.
SPECIALTY TOPPINGS to use AFTER cooking: Avocado, salsa, sliced tomatoes, lettuce, spinach, sprouts, tater tots, hashed browns, and more.
CHEESE TOPPING: Cheddar, Swiss, Provolone, pepper jack, Muenster, goat cheese, feta, cream cheese, Manchego, Cotija, and others (Grandpa’s suggestion: put cheese on AFTER cooking)
Eggwich Variations
PLEASE NOTE: I’ve intentionally omitted amounts to use. Please use your judgement to use whatever amounts best suits your personal taste. DO NOT, however, use too much tomato or cheese, as it will prevent the egg from congealing.
Sausage and Waffle Eggwich
Prepare Eggwich from basic recipe as shown above
Cook sausage patty and place on one waffle
Top with the egg.
Add maple syrup
Option: Add second waffle to top of the stack
Option: Use a pancake rather than a waffle
Croissant Eggwich with Apple Bacon & Cheddar
Prepare Eggwich from basic recipe as shown above
Cook bacon and place on toasted croissant
Layer thin apple slices on top of the bacon (tart apples are best)
Use melted butter because recipe tests made with softened butter weren’t as flavorful.
Embrace a sticky dough made with *some* whole wheat flour and *some* all-purpose or bread flour.
You will be tempted to add more flour, but don’t. The high hydration level is key to obtaining that shaggy & airy texture inside.
Let the dough rise on the counter until doubled, about 2 hours. Then let it rest in the refrigerator for at least 6 hours. This time gives the muffins extra flavor, plus cold dough is MUCH EASIER to work with. (We do the same when making artisan bread, cranberry nut no-knead bread, no-knead pizza bread and olive bread.)
Start the muffins on the stove in a skillet or on a griddle and finish them in the oven. Cook until an instant read thermometer reads the center as 200°F (93°C). If you don’t have an instant read thermometer, cut a muffin open and if it’s still extra doughy in the center, return to the oven.
Here’s What Doesn’t Work:
A firm, dry dough will not produce an airy center.
Avoid using ALL whole wheat flour because you may end up with bread hockey pucks.
Do not punch down the dough after it rises.
Do not skip the cornmeal or semolina flour because it’s needed to coat the dough and your hands.
Do not flatten the shaped muffins with force because they will deflate.
These honey wheat English muffins are completely homemade from a simple no-knead 8 ingredient dough. Though the dough rises and is ready in about 2 hours, I strongly recommend refrigerating it for at least 6 hours so your English muffins have better flavor. For best success, review recipe notes, video tutorial, and step-by-step photos (below) before starting.
Ingredients
1 and 1/4 cups (300ml) milk, warmed to about 100°F (38°C)*
cornmeal or semolina flour for handling dough (at least 1/2 cup (60g))
Instructions
Prepare the dough: In a large un-greased mixing bowl, whisk the warm milk, yeast, and honey together in the bowl of your stand mixer fitted with a dough hook attachment. Cover and allow mixture to sit for about 5 minutes or until foamy on top. *If you do not own a mixer, you can do this in a large mixing bowl and in the next step, mix the dough together with a large wooden spoon/silicone spatula. A hand mixer works, but the sticky dough repeatedly gets stuck in the beaters. Mixing by hand with a wooden spoon or rubber spatula is a better choice.*
Add the butter, egg, salt, whole wheat flour, and 1 cup (about 130g) of the bread flour. Whisk to combine. Add 1 more cup (130g) bread flour and beat on low speed for 2 minutes. Dough will be extremely sticky and like a loose batter. Add remaining flour, scrape down the sides of the bowl with a silicone spatula, and then beat on low speed for 1 minute to combine. Scrape down the sides of the bowl again and then fold the dough together a few times with your silicone spatula. Do not be tempted to add more flour. It’s supposed to be very sticky.
Cover the dough tightly with plastic wrap or aluminum foil and set on the counter at room temperature. Allow to rise until double in size, about 2 hours. The dough will be sticking to the sides of the bowl and have a lot of air bubbles. You can continue with step 4 immediately, but for absolute best flavor and texture, I strongly recommend letting this risen dough rest in the refrigerator for at least 6 hours and up to 24 hours. Place covered dough in the refrigerator for 6-24 hours. The dough will very slightly puff up during this time, but may begin to deflate after 24 hours.
Line two large baking sheets with parchment paper or silicone baking mats. One is for the shaped uncooked muffins and the 2nd is for baking the muffins.
Shape the muffins: Remove cold dough from the refrigerator—no need to bring it to room temperature. Sprinkle a little cornmeal/semolina on the surface of the dough and all over your hands. Have more nearby and use whenever things begin getting super sticky. Grab a small handful of dough, about 1/3 cup of dough or 2.5-3 ounces if you have a kitchen scale, and gently form into a 1-inch thick disc that’s about 3.5 inches in diameter—doesn’t need to be perfect—and place onto lined baking sheet. You’re basically shaping them as you’d shape hamburger patties. Repeat with remaining dough for a total of about 12. Sprinkle the tops of the shaped discs lightly with more cornmeal and cover to rest for 20 minutes. (Do not extend this time or the muffins will puff too much.)
Meanwhile, as the shaped muffins rest, get your stove ready. Heat a griddle to medium heat or about 325°F (163°C) or use a large skillet or cast iron skillet over medium-low heat. If your griddle/skillet/cast iron is nonstick or seasoned, there’s no need to grease it. If not nonstick, grease with a little butter. Once greased pan/griddle is heated, sprinkle lightly with cornmeal/semolina flour and begin to cook the muffins in the next step.
Read this entire step before starting to cook the muffins. Using a flat spatula, carefully transfer however many muffins can fit on your pan/griddle with at least 2 inches between each because muffins will puff up as they cook. Gently flatten them around the edges with the back of your spatula, being careful to not flatten too hard which would deflate them. Cook for 7-8 minutes and then flip over, gently flatten again, and cook for another 7-8 minutes. (No need to grease or sprinkle more cornmeal/semolina when flipping.) This cook time is a general guideline because griddles/stoves/pans can heat differently and/or unevenly. You want to cook until golden brown on each side and edges seem set. If muffins seem to be over-browning quickly, slightly turn down the stove’s heat. And, as the muffins cook, you can start preheating the oven (next step). Transfer cooked muffins to the unused prepared baking sheet.
Preheat oven to 350°F (177°C).
Bake for 8-11 minutes or until an instant read thermometer reads the center as 200°F (93°C). If you don’t have an instant read thermometer, cut a muffin open after 8 minutes and if it’s still extra doughy in the center, return to the oven until baked through. I usually bake them for at least 10 minutes.
Remove from the oven and cool for 10 minutes on the baking sheet before slicing and handling. To preserve the craggy texture, slice the honey wheat English muffins in half using a serrated knife. Or you can slice around the edges with a regular sharp knife and then pry the two halves apart with a fork. Toast halves in the toaster if desired (taste best that way!) and serve warm with desired toppings such as butter, honey butter, jam, apple butter, or other topping of choice. Muffins can also be used for breakfast sandwiches or eggs Benedict.
Store leftovers covered at room temperature for up to 2 days and then transfer to the refrigerator for up to 3 days. After that, it’s best to freeze them. Freezing instructions in notes.
Notes
Make Ahead Instructions: Prepare the dough through step 3 and let the dough rest in the refrigerator for up to 24 hours before continuing with step 4. No need to bring dough to room temperature before you begin to shape the muffins—cold dough is easier to work with!
Make Ahead Instructions – Freezing: Baked English muffins freeze well up to 3 months. You can freeze in a large container or freezer bag or wrap individually in plastic wrap. Thaw by defrosting in the microwave or setting out on the counter to come to room temperature. For best taste and texture, slice and toast them after thawing. You can also freeze the English muffins after they come off the stove (after step 7). Cool completely and then freeze in a large container or freezer bag or wrap individually in plastic wrap for up to 3 months. Thaw and then continue with step 8.
Special Tools: Stand Mixer or Large Mixing Bowl with Silicone Spatula or Wooden Spoon | Griddle or Skillet | Baking Sheets | Silicone Baking Mat or Parchment Paper | Flat Spatula | Instant Read Thermometer
Milk: Whole milk is great, but you can use any milk—non dairy or dairy + any milk fat.
Yeast: You can use active-dry or instant yeast. The instructions are the same no matter which you use. Note that 2 teaspoons (6g) is less than 1 standard packet.
Honey: You can substitute the honey with granulated sugar, but reduce it down to 2 Tablespoons (25g).
Flour: This ratio of whole wheat to white flour is best. I do not recommend using more whole wheat flour because the texture of the English muffins will change. For the white flour, you can use bread flour or all-purpose flour. I recommend bread flour for the best texture.
Adapted from King Arthur Baking. I reduced the flour, reduced the butter and switched to melted, used some whole wheat flour, swapped sugar for honey, and reduced the milk.
While not EXACTLY like Thomas’s English Muffins, these are close enough that I bought ten rings from Amazon and will not go back to the more expensive commercial product. This recipe produces a slightly better muffin than the recipe above, but is a bit more work.
INGREDIENTS
FIRST MIX
1/2 cup non-fat powdered milk
1 tablespoon sugar
3/4 teaspoon salt, divided
1 tablespoon butter or shortening
1 cup hot water – nearly boiling
SECOND MIX
2 TBL dry yeast
1 TBL sugar
1/3 cup warm water
THIRD MIX
1 C all-purpose flour – sifted
1/2 C spelt flour – sifted
1/2 C whole wheat flour – sifted
Non-stick vegetable spray and oil for brushing
1 egg – beaten
STEP BY STEP
FIRST MIX: In a glass bowl combine the powdered milk, 1 tsp sugar, salt, shortening, and (nearly) boiling hot water; stir until the milk, sugar and salt are dissolved. Set aside to cool to 100 degrees or less
SECOND MIX: In a separate glass bowl combine the yeast and tablespoon of sugar in 1/3 cup of warm water and rest until yeast has dissolved. Let proof for 5 minutes.
THIRD MIX: After the milk mixture has cooled to 100 degrees or less, put it into your food processor or Kitchen Aid. Add your beaten egg, and start adding your sifted flours about 1/2 cup at a time. Beat until incorporated, then add more flour. Your target is a soft wet dough. Thicker than pancake batter, but not as thick as bread dough.
Cover the bowl and let it rise in the fridge overnight.
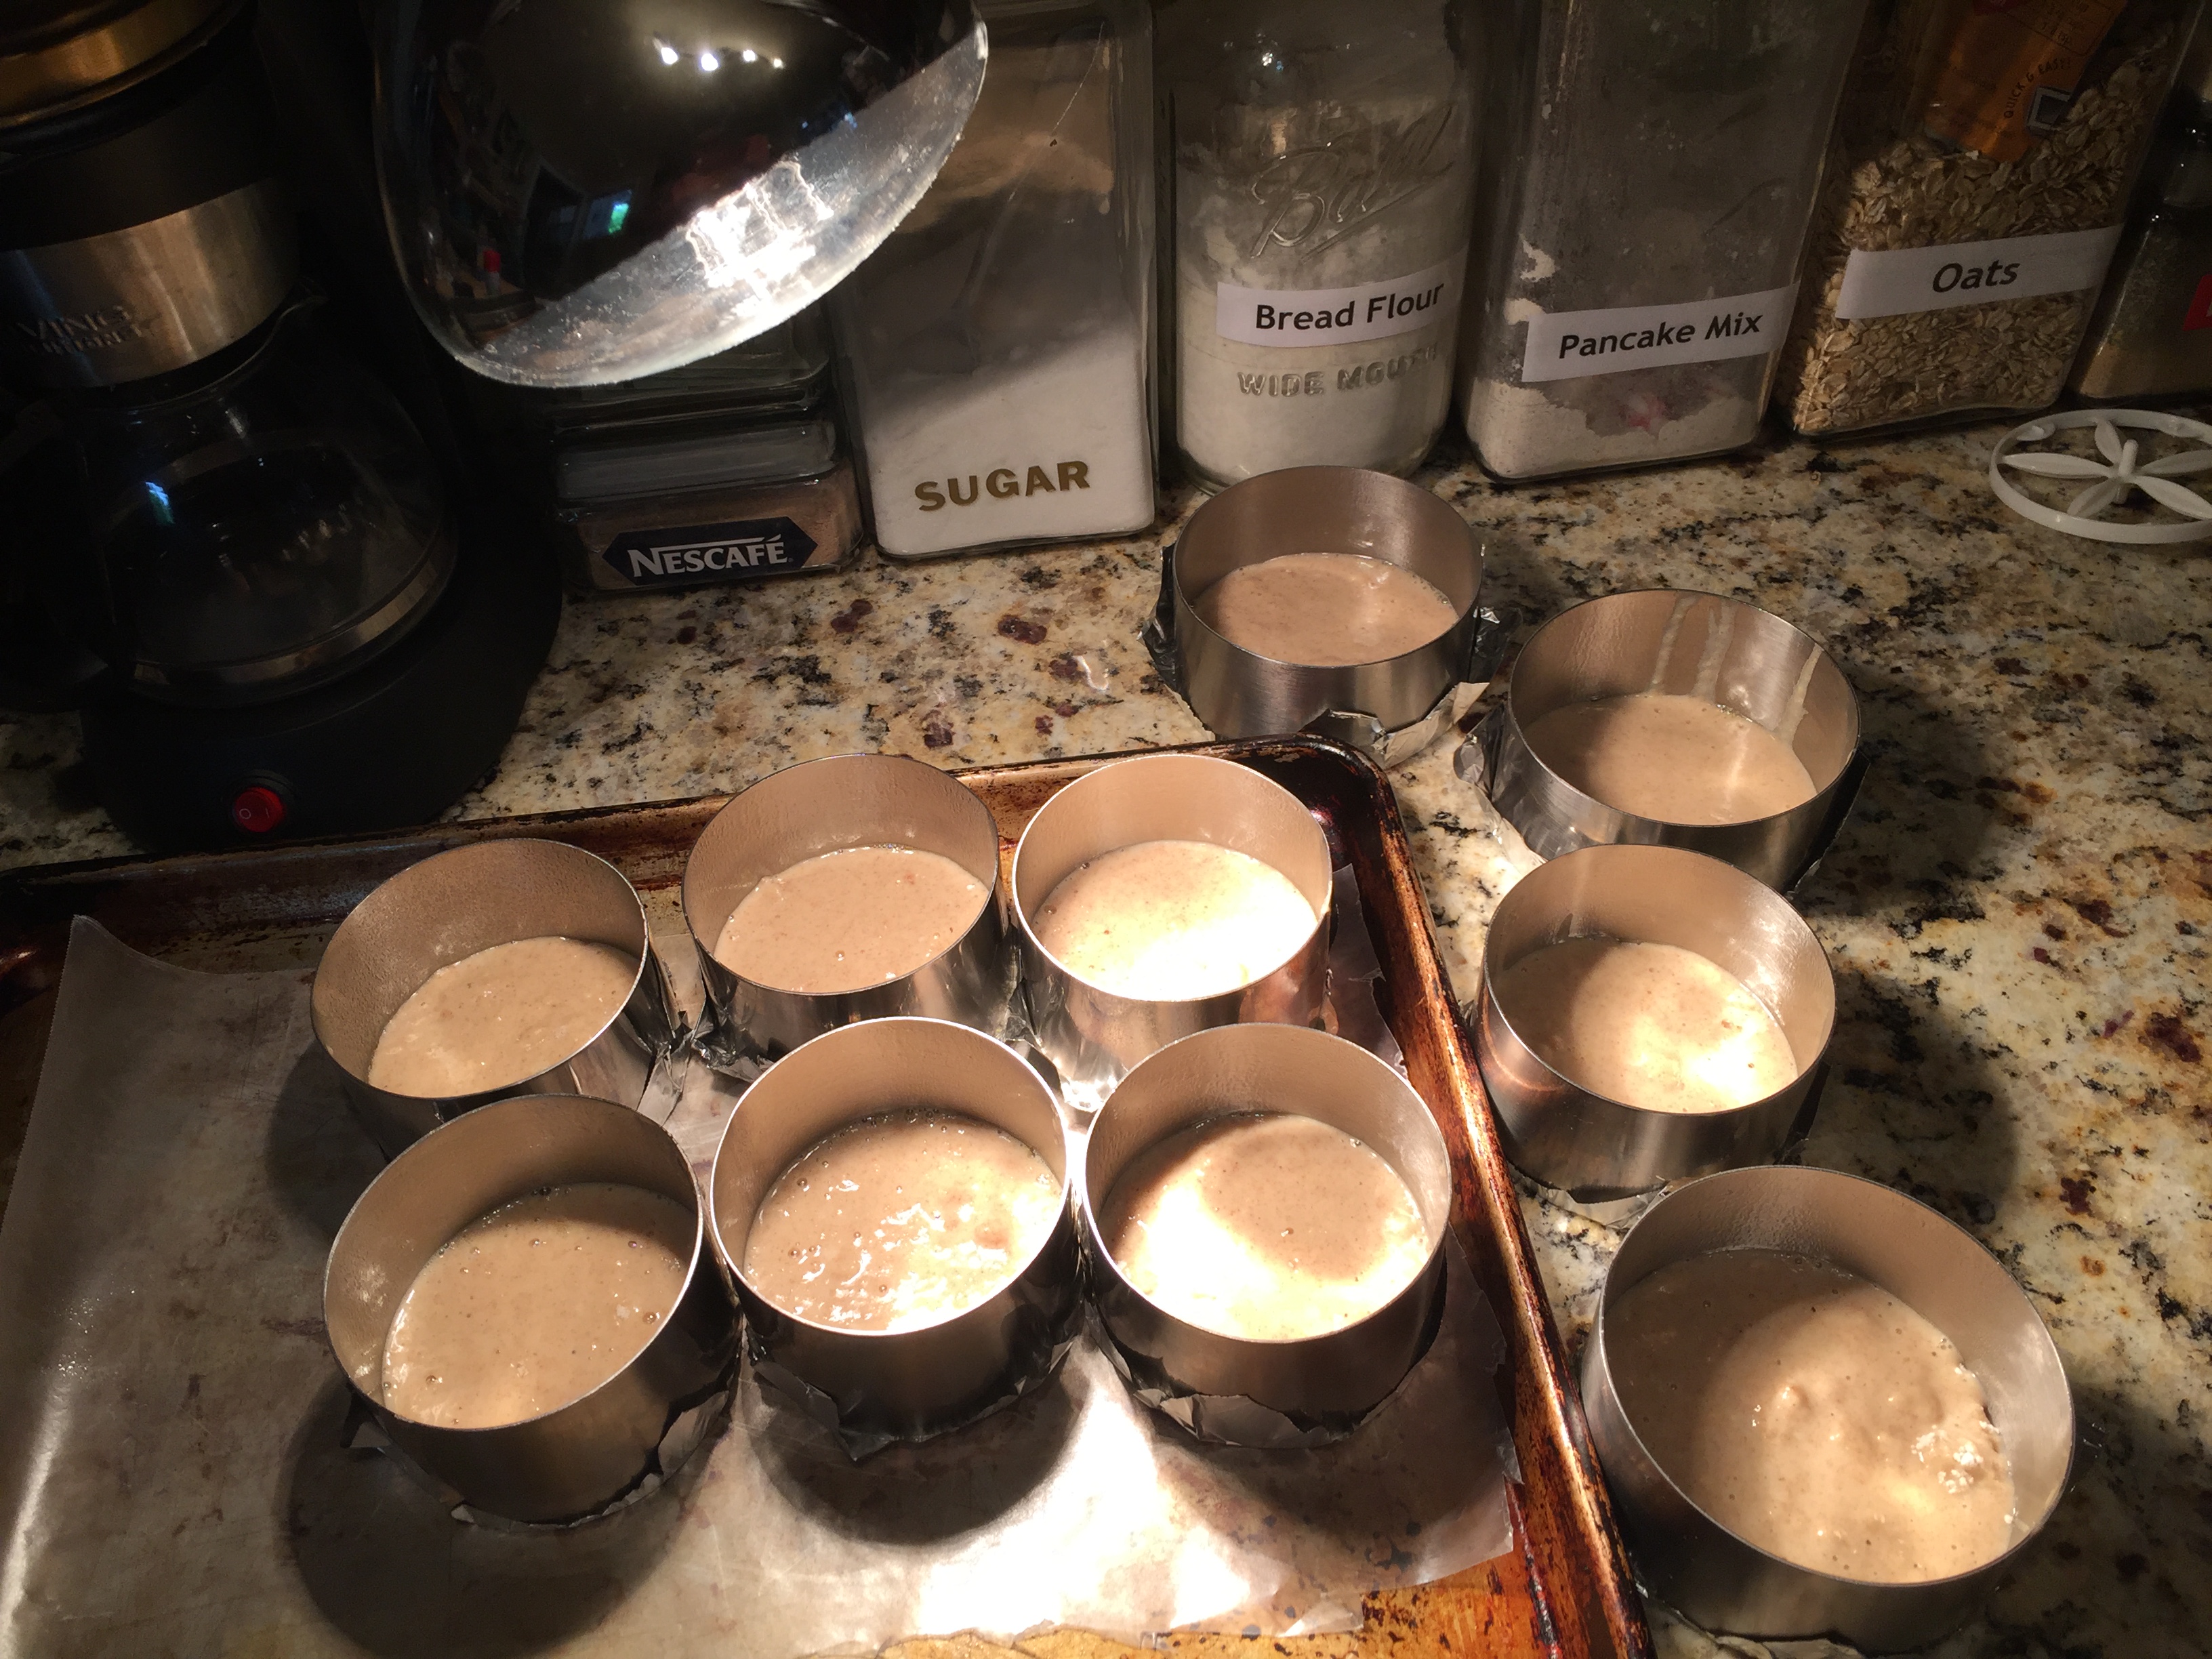
The following morning, use a 2 ounce ice cream scoop to put into your greased rings. Let rise in a warm spot for 90 minutes (longer = more holes!).
We will be baking our muffins on a baking sheet in the oven. If you don’t have muffin rings, try wide-mouth canning lids or mini-tart rings. And if you don’t have those, try using tuna cans with the top and bottom removed!
A small square of foil underneath each ring makes it easier to transfer to the hot skillet.
Preheat the griddle to exactly 300 degrees. If you do not have an electric skillet, either get one or get an infrared thermometer at Thermoworks.com – This is where I got mine and I use it every single day. I cannot stress how critical temperature is in this recipe.
Flip them onto an oiled skillet, and cook them with the foil on top until you are ready to turn them – then gently remove the foil
COVER the skillet with its lid, and then cook for EXACTLY 5 minutes – they are easy to burn so set the timer.
Use a tongs and remove the ring and the foil, then flip the muffin and cook for 5 more minutes.
ALTERNATELY BAKE IN THE OVEN AT 400º FOR 20-30 MINUTES. Cover with parchment paper for the first 15 minutes.
As far as English Muffin recipes go, this one is pretty easy, and a good entry into the world of English Muffin making. While not exactly quick (because of an overnight rise) this recipe is very easy. As a bonus, it makes above average muffins with a long refrigerator life.
IN THE EVENING or LATE AFTERNOON
In a four cup glass measuring cup, mix
1 C whole milk and 1 C water
Alternately, you can use 2 C lowfat milk.
1 TBL sugar
4 TBL butter
1/2 tsp salt
Heat in the microwave for three minutes.
Pour into a large pot, and stir in
1 C AP sifted flour (5 oz)
1 C bread flour (5 oz)
This will be like a thick slurry. Heat until you start to see just a bit of steam rising from the surface of the milk mixture; then remove from heat and set aside to cool.
When the slurry is still very warm, but not hot, combine and add
Put both risen sponges into your Kitchen Aid with the beater attachment and start on (setting 2) medium-slow speed
Mix to combine, then add in 1 C of your new flour mixture
Continue to add the flours in about 1/2 C at a time until you get kind of a wet gooey cookie batter – much thicker than pancake batter though, but not firm like a bread dough
If it gets too dry, add a splash of milk
Final ball should be moist to the touch, but not gooey or runny, and it should spring back if you press a finger into it.
Cover, and let rise for about 1 1/2 hour
Grease muffin rings
Grease baking sheet
Sprinkle rings and sheet with cornmeal
Using an ice cream scoop, add the batter about half-way up each ring – 3/4 to 1 inch
Sprinkle top lightly with cornmeal as well
Meanwhile, bring a cast iron skillet up to about 325º
Cook 1 side about 3-5 minutes, flip, remove ring, then 2-3 minutes.
Alt: Bake at 350º for 15 minutes, then remove ring and flip, then cook for an additional 8 minutes
Cook – Internal temp should be between 185-200º NEVER above 200º
Note: For crumpets, follow the above recipe, except increase milk from 1/2 C to 2/3 C, and cook only on one side, allowing bubbles to pop out the top. At Step 13 (above) dough will actually be like a very thick pancake batter.
When we lived in Spain, it was a full day to go to the local bar/coffee shop and have several Cafe con Leches with friends . . . amigos. Here is my Americanized version.