Dahl Restaurant Gazpacho

From Arizona A to Z

  • 64 oz Campbells Tomato Juice (cold)
  • In food processor place
    • 1 C chopped celery
    • 1 C English cucumber
    • 1 C green pepper
    • 1 C red bell pepper
    • 1 C yellow bell
    • 2 jalapeno peppers – seeds and veins removed
    • 1/2 C red onion
  • Put in bowl with tomato juice
  • Add
    • 2 TBL tomato paste
    • 2 TBL lime juice
    • 2 TBL sherry vinegar
    • 2 TBL freshly minced garlic
    • 1/2 tsp Thunder Powder
  • Minced cilantro
  1. Put into bowl
  2. Put in pieces of avocado
  3. Drizzle with EVOO
  4. Top with cilantro

BBQ Chicken Thigh

Recipe from ThermoWorks.com

Bam Bam has years of experience in competition as well as BBQ restaurants, so he knows a lot about when chicken is done. For that reason, he relies solely on his Thermapen. Most home cooks and beginning BBQ-ers should monitor the internal temperature of the chicken throughout the cook. In this recipe, we’ve included instructions to use a leave-in probe thermometer to keep track of the chicken temps as they rise.

Ingredients

  • 8 Chicken thighs, bone-in, skin on
  • ~6 Tbsp of your favorite chicken BBQ rub
  • 1–2 C your favorite BBQ sauce for chicken
  • 1 lb butter, plus a tablespoon for the sauce

Instructions

  • Preheat smoker to 300°F (149°C)
  • If you want competition-style thighs, trim them by removing the skin, cutting off any high-spots of fat from the inside of the skin, squaring up the meat and trimming off excess fat, and removing the ball joint of the bone.
  • Sprinkle the meat lightly but evenly with the rub.
  • Re-wrap the meat in the skin and sprinkle with more rub.
  • Even if you don’t do all the trimming, it’s a good idea to peel the skin back and sprinkle some rub underneath it. Skin is designed to keep things out. Put some rub under it to flavor the meat better.
  • Cut the butter up into small cubes and put it all in the bottom of an aluminum pan that is large enough to fit all the chicken in one layer.
  • Layer the chicken, seam-side up, on the butter. Cover it with foil and put it in the smoker for 45 minutes.
  • After 45 minutes has elapsed, remove the chicken pan from the smoker and let it sit for 15 minutes.
  • Remove the chicken from the pan and place it back in the smoker, inserting a Pro-Series® Probe attached to a leave-in thermometer such as BlueDOT®, ChefAlarm® or Smoke™. Set the high alarm for 175°F (79°C) and smoke the chicken.
  • Warm your barbecue sauce on the stove or in the smoker for a few minutes. Stir in the tablespoon of butter and remove the sauce from heat.
  • When the alarm sounds, verify the temperature with your Thermapen, then baste the chicken with the BBQ sauce. Alternatively, you can lift each piece and dunk it in the sauce before returning it to the smoker.
  • Cook the chicken for a final 10 minutes to set the sauce.
  • Remove the chicken from heat, allow to rest for 10 minutes and serve.

Healthy Ketchup

In a medium sized stock pan add

    • 2 TBL peanut oil
    • 2 TBL butter
    • 1 whole onion
      • Caramelize onion low and slow (about 45 minutes)
    • 2 cloves garlic added @ the 40 minute point
    • 8 – 10 tomatoes – blanched and peeled
    • 1 C white vinegar
    • 1/2 tsp salt
    • Simmer for 90 minutes – chop and stir along the way
    • Put into blender and puree
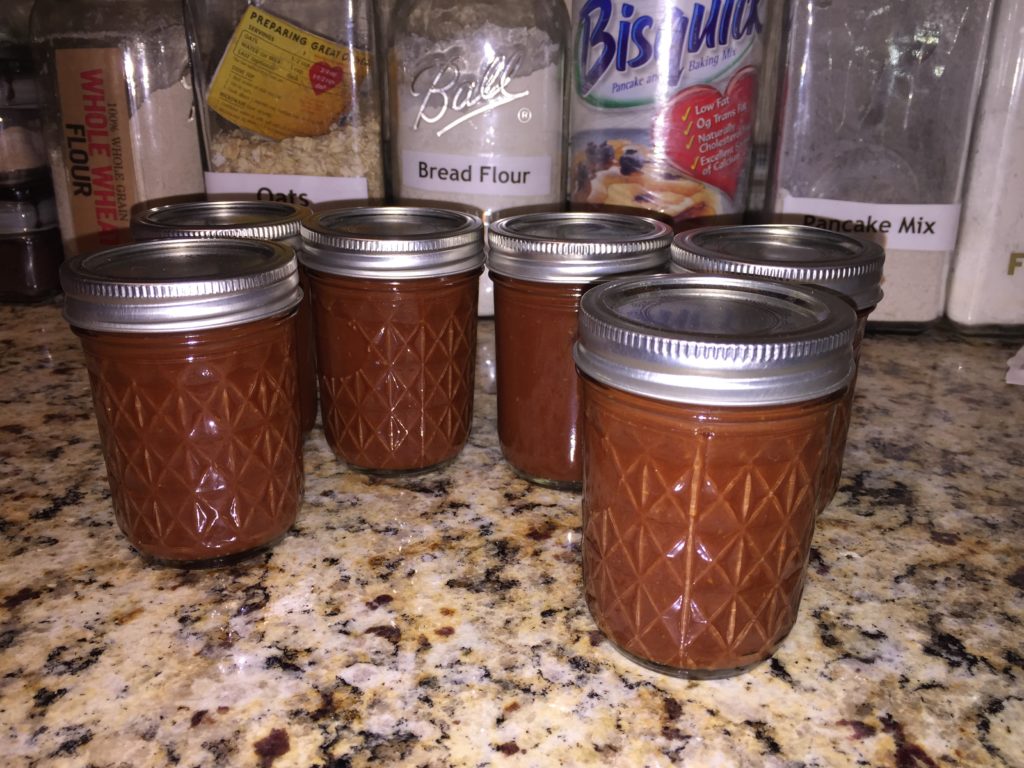
    • Pour into small clean canning jars
      • Keep in fridge for a few months
      • Freeze the rest


Green Tomato Ketchup

For food safety, it’s very important that you add citric acid to this Green Tomato Ketchup recipe to give it enough acidity to avoid any issues with Colostrum botulinum bacteria, which is a deadly neurotoxin.

Canned, this will last until next season.

Ingredients

  • 3 LB green tomatoes(200 mg)
  • 2 LB onions
  • 1 tsp ground black pepper
  • 1/2 tsp ground dry mustard
  • 1 tsp Worcestershire sauce
  • 1 C apple cider vinegar
  • 1 C granulated sugar
  • 12-16 oz tomato paste
    CHEESECLOTH BAG
  • 6 cloves
  • 4 bay leaves
  • 1 sprig rosemary
    AT THE VERY END
  • 1 tablespoons bottled lemon juice (do not used fresh juice as it’s not acidic enough) or 1/2 tsp pure powdered citric acid

Step by Step

  1. Slice or chop green tomatoes and onions.
  2. Place in a large crockpot with pepper, mustard, and Worcestershire sauce.
  3. Put the removable flavoring spices in a small cheesecloth bag and add to the pot.
  4. Pour cider over mixture.
  5. Cook for 6 to 8 hours over very low heat, stirring occasionally.
  6. Remove cheesecloth bag and discard.
  7. Puree mixture with a wand blender or in a food processor or blender.
  8. Strain tomato mixture through a mesh strainer, or if you have it a food mill using the smallest disk available
  9. Return to pot and bring to boil.
  10. Add 12-16 oz tomato paste and whisk until smooth.
  11. If necessary, let simmer on low until thickened. I usually go about 3-4 hours.
  12. Add citric acid and stir until dissolved. Using a clean spoon, take a taste. If you feel the ketchup is sweet enough, stop. If not, add another 1/4 cup of sugar.
    CANNING
  13. Immediately fill six sterilized half pint jelly jars with green tomato ketchup, leaving 1/4-inch head space.
  14. Wipe the jar tops and threads clean with a clean paper towel. Place hot sealing lids on the jars, as you fill each one, and apply the screw on rings loosely.
  15. Process in boiling water bath in a deep canning pot for 10 minutes.
  16. Remove the jars and cool completely. Tighten the jar screw rings to complete the sealing process.
  17. After the jars of green tomato ketchup cool (don’t do this while they are still hot) check seals by pressing middle of lid with finger. If lid springs back, your green tomato ketchup didn’t seal and must be refrigerated and used within the month.
  18. Let jars of green tomato ketchup stand at room temperature 24 hours.
  19. Store unopened product in a cool dry place up to one year. Refrigerate green tomato ketchup after opening and keep for up to a month.

Grandpa’s Ketchup

The Whitehouse Recipe is a fun part of history, and makes pretty good ketchup (or should I say catsup) but this variation has a few twists added by Grandpa.

  • 1 8 oz can tomato paste
  • 3-5 tomatoes – cut into pieces
  • 1 small onion (minced)
  • ½ tsp EACH dry hot mustard, nutmeg, coriander, black pepper, cayenne pepper, cinnamon, ground clove, salt, garlic powder, paprika
  • 2 bay leaves
  • 1 TBL lime juice
  • 1 TBL soft brown sugar (packed) HOLD FOR LATER
  • 2 TBL apple cider vinegar – HOLD FOR LATER

Step by Step

  1. Combine all ingredients (except sugar and vinegar) in a large heavy pan
  2. Rinse can/jar of tomato paste into pan with 2 TBL water, TWICE
  3. Bring the mixture to the boil, then reduce to a slow simmer.
  4. Cook over a medium heat for 20 minutes stirring often and carefully.
  5. Add brown sugar and vinegar and cook until it starts to thicken (10-40 minutes) stirring frequently
  6. Leave to cool a full half hour
  7. Run through a food mill’s finest settings for the ketchup
  8. Run through the next larger food mill screen for a nice spread for crostini
  9. Pour the ketchup mixture through a funnel into suitable bottles
  10. Use it as you would any commercial tomato ketchup
  11. Stored in the fridge this ketchup will keep for a month.

Note: Before Step 6 if you put it (while hot) into sterilized canning jars (and sterilized canning lids) you can store it for up to a year.

Whitehouse Tomato Catsup #1

This recipe was adapted from “The Whitehouse Cookbook” published in 1887 by Fanny Lemira Gillette & Hugo Ziemann.  Grover Cleveland was President of the United States at the time.

  • 16 oz tomato pieces (drained)
  • 1/4 onion (minced) and collected juices
  • 2 tsp TBL salt
  • 2 TBL brown sugar
  • 2 tsp mustard
  • 1 tsp alspice
  • 1 tsp black pepper
  • 1 tsp cinnamon
  • 1/4 tsp ground clove
  • 1/4 tsp cayenne pepper
  • 1/4 tsp grated nutmeg
  • 1/2 C white balsamic vinegar

Step by Step

  1. Blend tomato pieces, then run through a food mill or sieve to remove seeds.
  2. Mince onion, salt and brown sugar.
  3. Boil until quite thick
  4. Mix together mustard, allspice, black pepper, cinnamon, ground cloves, cayenne pepper, and grated nutmeg
  5. Blend with balsamic vinegar
  6. Mix vinegar mixture with tomato mixture.
  7. Bring to a boil, then simmer for five minutes, stirring continually.
  8. Pour into sterilized canning jars with sterilized lids.
  9. I should keep for about a year

Easy Ketchup

  • Large can of ripe tomatoes OR 10 tomatoes – halved, salted and broiled until edges just start to blacken
  • 1 can tomato paste
  • 1 large onion – minced
  • 1/2 red pepper – minced (seeds and vein removed)
  • 4 cloves garlic – minced
  • 1/2 C red wine vinegar (alt: cider vinegar)
  • 2 TBL brown sugar
  • 1/4 C EVOO
  • 1/2 tsp each:  Mustard, paprika
  • scant: Nutmeg, allspice, ground clove, mace, cinnamon, chili powder, salt and pepper
  • 1 bay leaf
  • Simmer until reduced and thickened
  • Run through a food mill
  • Store in the fridge for up to two months

Pretzel Cheese Dipping Sauce

INGREDIENTS

  • 2 tbsp Unsalted Butter
  • 2½ tbsp All-purpose flour
  • ½ cup Milk
  • ¾ cup Beer
  • 1½ tsp Worcestershire sauce
  • 1 tsp Mustard powder (½ tsp if you’re not a mustard fan)
  • ½ tsp Garlic powder
  • 2 cups (8 oz) Shredded Sharp Cheddar Cheese
  • Pinch of Salt and pepper to taste

STEP BY STEP

  1. Melt the butter in a sauce pan over medium heat.
  2. Add flour and whisk until you’ve got a paste like substance.
  3. Add a splash of milk, and while continuously stirring,
  4. Add a splash of beer, and while continuously stirring,
  5. Add the  Worcestershire sauce while continuously stirring.
  6. Add the remaining milk and beer, while continuously stirring.
  7. Stir until smooth, then add mustard powder and garlic powder.
  8. Continue to heat and whisk until the mixture thickens, about 5 minutes.
  9. Turn heat to low and add shredded cheese, one ½ cup at a time, stirring continuously until cheese has completely melted and the sauce is smooth.
  10. Add salt and pepper to taste, serve immediately.
  11. To prevent congealing, serve in a small crock pot or fondue dish over heat.

Tips and Tricks – COLLECTION

  1. 100 Great Tips
  2. A Very Basic Pickle Overview
  3. All About Eggplants
  4. Baked Potato Secret
  5. Bread Wrapper Color Tag Codes
  6. Breadsticks – Several Recipes and Tips
  7. Chicken Tips and Tricks
  8. Chicken with Sour Cream
  9. Decorative Chocolate Garnish
  10. Grandpa’s Pizzas and Calzones
  11. Life Hacks – 2013
  12. Life Hacks – 2016
  13. Life Hacks – 2017
  14. Life Hacks – 2023
  15. Life Hacks – 2025
  16. No Refrigeration Needed
  17. Non-Perishable Emergency Food
  18. Onion Tips
  19. Photos for Guys Grocery Games
  20. Pineapple Tips
  21. Product Review: GOTHAM STEEL 9.5 inche Non-stick Titanium Skillet
  22. Quick Sauces
  23. Shredding Chicken Hack
  24. Steam Juicer
  25. Store-quality burger sauce
  26. Tip: Weight Loss
  27. Tips and Tricks – July 2023
  28. Tips from America’s Test Kitchen
  29. Tips: _MISC – MOVE AROUND
  30. Tips: Airline Tickets
  31. Tips: Around the Kitchen
  32. Tips: Avocado
  33. Tips: BBQ
  34. Tips: Butter
  35. Tips: Buying Good Meat
  36. Tips: Cast Iron Skillets
  37. Tips: Caul Fat
  38. Tips: Cheese
  39. Tips: Chicken
  40. Tips: Clogged Drains
  41. Tips: Coconut
  42. Tips: Cooking on an Electric Range
  43. Tips: Cow Parts – Dissection
  44. Tips: Dietary Water
  45. Tips: Edible Colors
  46. Tips: Equipment
  47. Tips: Equivalents – COLLECTION
  48. Tips: Fish from Alton Brown
  49. Tips: Freezing Things
  50. Tips: Freezing Things
  51. Tips: Fresh Fish
  52. Tips: Frozen or Canned Food
  53. Tips: Frying Food
  54. TIps: Gadgets
  55. Tips: Gardening
  56. Tips: Garlic and Ginger
  57. Tips: Garlic Paste
  58. Tips: Grinding your own Meat
  59. Tips: Grinding, Grating, Peeling
  60. Tips: Grocery Shopping
  61. Tips: Guacamole – COLLECTION
  62. Tips: Holes in Pot Handles
  63. Tips: Hot Wings
  64. TIPS: IP Address of your Computer
  65. TIps: Knives
  66. Tips: Meatloaf
  67. Tips: MISC Notes
  68. Tips: Non-Stick Skillets
  69. Tips: Noodles
  70. Tips: Oils Demystified
  71. Tips: Omelets
  72. Tips: Oranges
  73. Tips: Pasta
  74. Tips: Peppers Demystified
  75. Tips: Pickling and Canning
  76. Tips: Pig Parts – Dissection
  77. Tips: Piping Bag
  78. Tips: Pizza
  79. Tips: Pork
  80. Tips: Potatoes
  81. Tips: Preserving Food
  82. Tips: Recipe Rehab
  83. Tips: Safety
  84. Tips: Salads
  85. Tips: Salsa
  86. Tips: Sauces
  87. Tips: Spring Rolls
  88. Tips: Squid
  89. Tips: Starch Thickeners
  90. Tips: Steak
  91. Tips: Storing Fruits and Veggies
  92. Tips: Tires – What you need to know
  93. Tips: Tomatoes
  94. Tips: Tuna
  95. Tips: USDA Safe Food Handling
  96. Tips: Vegetables
  97. Tips: Yeast
  98. Tips: Animals – Cows, Pigs, Chickens…
  99. Tips: BBQ and Grilling
  100. Tips: Butter and Oil
  101. Tips: Cheese Info
  102. Tips: Corn Bread
  103. TIPS: Cut down on Salt
  104. Tips: Eggs
  105. TIPS: Everyday Eating
  106. Tips: Grilling Burgers (Beef)
  107. Tips: Healthy Eating
  108. Tips: Just what is a pinch?!?
  109. Tips: Kitchen
  110. Tips: Peppers
  111. Tips: Pizzas
  112. Tips: Potluck Safety
  113. Tips: Salads
  114. Tips: Skills and Kitchen Safety
  115. Tips: Steaks (Beef)
  116. Tips: Substitutions
  117. Tips: Terminology
  118. Tips: Working with Turkey
121 Total Number of Tips

Juicy Lucy

A Jucy Lucy is a stuffed cheeseburger with the cheese inside of the meat instead of on top, resulting in a melted core of cheese. Two bars in Minneapolis, Minnesota claim to be the inventor of the burger, while other bars and restaurants have created their own interpretations of the style.

A debate rages on.  Google has chimed in.  A Google Search for “Jucy Lucy” resulted in 116,000 results.  A search for “Juicy Lucy” resulted in 1.8 million results.  O.E.D. spelling rules here.

Regardless of how it is spelled, this is a great treat for your next BBQ.

Per Person Ingredients

    • For 1 sandwich
      • 1 hamburger bun
      • 2 ground beef patties- thin
        • about 3 ounces each
      • Sliced mild Cheddar cheese
        • Traditionally 1-2 slices of American Cheese are used.  We prefer Cheddar.
        • I prefer sliced because you get more cheese.  Shredded cheese melts better, but is less dense.  That is also why I use medium heat, rather than high.  It gives the cheese time to become molten.
      • Other ingredients used along the way
        • Onion, Pickle, Relish

Preparation

    1. OPT:  Saute thinly sliced onions in 1 TBL butter. Go for as much caramelization as you like.  Set aside
    2. OPT:  Cook two slices of bacon per burger.  Set aside
    3. Brush melted butter on the inside surfaces of the hamburger bun and place on a pan or griddle on low heat.
    4. While the bun is toasting, flatten each beef patty so that it’s no more than ¼ inch thick.
    5. Place shredded cheese in the middle of one of the patties, leaving just a bit of a border.
    6. Then cover it with the other patty.
    7. Push the patties and pinch the edges, so that they merge into a single patty – assuring there are no holes for the cheese to seep through.
    8. Place meat on a griddle or pan over medium heat. Cook no more than 5 minutes per side or until cheesy juices start spilling out.
      • I usually cook the first side 4 minutes, then the other 2-3 minutes.
      • I used a cast iron grill pan.  It works great.
    9. Add pickles to the bottom bun, If desired, place onion thinly sliced or sauteed,  and bacon, then add the cooked burger and top bun.
    10. Be very careful.  The cheese is hot.

Cavatapi and Cheese

    • 1 LB cooked Cavatapi pasta (screws)
      • set aside
    • 1 stick butter in hot skillet
    • 1/2 C AP flour
      • Cook together until it starts to brown
        • This is called a Roux
    • Put 6 C milk into a measuring cup
      • Add 1/2 C to the flour
      • Add another 1/2 C to the flour
      • Add the remainder of the milk and whisk together
        • This is called Bechemel Sauce
      • Add 4 oz Mozzarella, 4 oz Swiss and 4 oz Colby
        • This is called Mourney Sauce
      • Add 1/2 C Parmesan and 1 tsp Colorante
      • Cook together until it starts to thicken
        • Pour into slightly greased casserole
      • Top with a mixture of 1 C Panko, 1/4 Parmesan,
        1/2 tsp granulated garlic, and 1 TBL EVOO
    • Bake 25 minutes at 325º


Bobby Flay Apple Butter

This is for my reference only.  I’ve made a few changes and substitutions, indicated by (GR) for Grandpa’s Revision

INGREDIENTS

  • 6-8 medium to large apples
    Fuji, Gala and Granny Smith
    About TWO POUNDS by weight AFTER peeling and coring
  • 1/2 C of apple cider (no preservatives if possible)
  • 1 C  granulated white sugar
  • 1/2 C brown sugar
  • 1 teaspoon cinnamon
  • 1/2 tsp nutmeg – freshly grated
  • scant teaspoon cloves
  • 1 tsp lime juice (GR)
  • 1 tsp lemon juice
  • 1 tsp vanilla extract
  • scant salt

This recipe makes about 2-4 jars, so if you plan on using it over the next few months, you don’t have to can it.  If you are planning to can some, double the recipe and follow standard canning procedures (which will not be repeated here)

STEP BY STEP

  1. Wash your jars in the dishwasher so they are as sterile as possible
  2. Put a small pot of boiling water in the far corner of your stove top and let it simmer for now (GR)
  3. Peel and core your apples, and then chop, mince or grate (GR)
  4. Bring all other ingredients up to a boil on your stove top
  5. Add your apple pieces to the boiling mixture
  6. Let simmer about 60 minutes
  7. IMPORTANT NOTE: During the cooking process, the liquid may expand to about TWICE the original size, so make sure you have a large pot.
  8. If you don’t have an immersible thermometer, GET ONE.  Here is the one that I use, and I LOVE IT.  It is by Thermoworks, and is not all that expensive for the use you will get out of it.  This is also good for cooking meat, potatoes, etc.  I also got an infrared thermometer that I used for grill and pan temperatures.
    –
    THE CANNING PROCESS
  9. Heat until it reaches 220-222º
  10. Put a lid (one by one) into the small pan of boiling water to soften the seal.
  11. Pour into prepared canning jars, screw lid on finger tight, and set on the counter.
    Even without hot water bath canning, the “counter canned” apple butter should last a few months in the refrigerator.


Triple Citrus Tart

You can use the below recipe from Johanne Killeen & George Germon, owners of Al Forno, in Providence, Rhode Island, or you can use my recipe for Pastry Dough.  Here is another recipe.   If you want REALLY easy, just use Puff Pastry.

    • 1 tsp orange zest – minced
    • 1 TBL orange juice – cold
    • 1 TBL ice water
      • It is better to have your dough too moist, rather than too dry
        You can always add a bit more flour, but not liquid
    • Approx 1 C AP flour
    • 2 TBL confectioner sugar
    • 1/4 tsp salt
    • 1 sticks cold butter in pieces
      • Pulse in food processor about six times
    • With motor running, add liquid all at once
    • Stop only to scrape down sides
      • You want dough to just hold together
      • Pour onto aluminum foil
      • Press together into a disk
      • Refrigerate immediately for about 2 hours
    • Keeping your hands and your dough floured start rolling it out
    • Flatten it to just under 1/8 inch
    • Replenish floured surface as necessary
    • Transfer onto a baking sheet
      • Add first layer to the tart
    • If using lemons, blanch them about 10 seconds in boiling water, then rinse them and dry them to remove the waxy coat and any pesticides
    • Slice on mandolin as thinly as you can possibly slice them
    • Layer over entire tart surface, slightly overlapping
    • Sprinkle with super-fine sugar – You can also create your own with your food processory
    • Fold over the crust sides
    • Refrigerate for about 90 minutes
      • Preheat oven to 450 before putting into the oven
      • Bake 15 minutes

Prepare your lime curd

    • Two whole eggs plus two egg yolks
    • 1/2 C sugar
    • 3/4 C fresh lime juice
    • 1/2 C heavy cream
    • Heat over a double boiler until it thickens – Keep no hotter than 190º

Whip your egg whites

    • 4 egg whites
      • Start to whip to froth on high
    • 1/2 C super-fine sugar – 1 spoonful at a time
    • Scrape down sides, then continue to soft peaks

Combine

    • After your tart has cooled, add a layer of curd
    • Put on your meringue over top of curd
      • Use a fork to pull out the peaks
    • Put into preheated oven until meringue darkens
    • Let cool just a bit, and then plate
    • Sprinkle with confectioner sugar


Italian Rustic Bread

This is good for garlic bread.  SEE THIS RECIPE

      • PREPARE YOUR STARTER (aka BIGA)
    • Dissolve 1/2 tsp of yeast in 3 TBL warm water
    • Add just a pinch of sugar
    • Add 1 1/3 C room temp water
    • Add 1 C flour
      • Put on Kitchen Aid with paddle attachment
      • Mix to combine
      • Let rest 6-24 hours on counter – covered

The next day, you are ready to make your bread

    • Add 1 tsp yeast to your Kitchen Aid
    • Add 3 TBL warm water
    • Add just a pinch of sugar
      • Let rest for 5 minutes
    • Add 1 1/3 C room temperature water
      • Using WET HANDS pull out 6 oz (about 2/3 C) of your BIGA
    • Add that into your water
      • Whisk, squeeze or cut your BIGA into the water
    • Put paddle attachment onto your Kitchen Aid – While mixing . . .
      • Add 1 C AP flour and combine
      • Add 1 1/2 more C AP flour and combine
      • Add 1 C whole wheat flour
      • Add 2 tsp salt
    • Bring together using your Paddle attachment
      • It will be really sticky
    • Put dough hook onto the machine and run on high for 5-6 minutes
      • It will still be really sticky, but will start to show gluten development
    • Put onto a well-floured board and knead using a bench knife and your hands
    • Knead until it starts to get less sticky
    • Add flour to the board as necessary
    • Put into an oiled bowl allowing room for it to TRIPLE in size
      • Let rise 3-5 hours – the longer and cooler the rise, the better the results
    • On a lightly floured surface, pour dough out and form your loaves
    • Divide into two loaves
    • Gently roll toward you forming a roll, turn, the roll again, turn, then roll again
    • Form a round loaf on your board
    • Put parchment paper on your peel, and flour the surface
    • Put the dough on the peel, then spray very lightly with water
    • Cover and let rise again for about an hour
    • If it develops a skin, spritz it with water before going into the oven
    • Trim parchment to the edge of the loaf
    • Preheat baking stone to 450º
    • Sprinkle baking stone lightly with cornmeal
    • FLIP OVER, and put on baking stone – LEAVE parchment paper on loaf, for about 15 minutes
    • Carefully remove parchment, let it bake uncovered another 20 minutes or so
    • Do not cut until it has cooled.


Spiralized Cucumber Salad

THIS RECIPE HAS NOT YET BEEN TESTED

    • Shred two chicken thighs or one breast.
    • Make your Drunken Sauce
      • 2 TBL soy
      • 1/2 tsp corn starch
      • 2 TBL Hoisin
      • 1 TBL fish sauce
      • 1 TBL sweet chili sauce
      • 1-2 tsp sesame oil
    • Spiralize an English Cucumber using a Benriner spiralizer
    • Cut a Vadalia onion thinly and put into medium-hot skillet
    • Meanwhile, chop yellow or red bell pepper
      • Add to skillet
    • Meanwhile, smash and mince a clove of garlic
      • Add to skillet
      • Add chicken to the skillet
    • Meanwhile, halve a dozen cherry tomatoes
      • Add to skillet
    • Meanwhile, cut 3-6 scallions in 3/4 inch pieces
      • Add to the cucumber noodles
    • Toss noodles with the warm (not hot) chicken mixture
    • Top with fresh basil chiffonade

Bitty Bite-sized Donuts

THIS RECIPE HAS NOT YET BEEN TESTED

    • 3 TBL butter melted
    • 1/4 C AP flour
    • 3 TBL milk
      • Heat in skillet until it thickens into a blob
    • 2 C more of cake flour
    • 1/3 C sugar
    • 1 TBL instant coffee
    • 2 tsp baking powder
    • 1/4 tsp salt
      • Mix dry ingredients to combine
    • 1/2 whole milk – room temperature
    • 1 egg
    • add melted butter
    • 1 tsp vanilla
      • Whisk to combine
    • Put Kitchen Aid on low, and drizzle in wet ingredients
    • Add starter and mix on high until combined
      • The dough will still be sticky
    • Dump onto a heavily floured surface
    • Work dough with hands – kneading until it is not too sticky
    • Roll out dough to about 1/2 inch in thickness
    • Using a pastry ring cut circles from the dough, and place on parchment paper in groups of three – making a triangle
    • You can roll out remaining edges to get a few more circles
    • Put into refrigerator to cool at least 45 minutes
    • Prepare hot oil (365º)
      • PREPARE ICING
    • Meanwhile mix up 2 C confectioner sugar with 1/2 tsp vanilla
      and 2 TBL milk

      • NOTE:  It is easier to add a few drops of liquid rather than to try to recover from an icing that is too thin.  Err on less liquid.
    • OPTIONAL:  Omit coffee, and add 1 tsp citric acid to the icing
      • COOK THE DONUTS
    • Drop into hot oil (365º) and fry until browned
    • Dip into the icing, or drizzle over top

Tips: Holes in Pot Handles

Unless you’re a professional cook, you may be confused as to why most pots and pans have a hole at the end of the handle You may not have even noticed that the hole is there. There are actually two good reasons why pots and pans have this hole. First, it makes it easy to hang them up on hooks when they’re drying or not in use. This is often seen in professional kitchens or house that have a lot of space.

Another trick that experienced chefs like to use is using that hole to hold a utensil. For example, if you have a stirring spoon, you don’t just want to leave it in the pot or set it on the counter. But with the hole at the end of the handle, you can slide the utensil in there so it just sits up and drips back into the pot. Try it out next time you want to impress people with your cooking skills.

Tips: Clogged Drains

Salt is one of the most commonly found minerals on earth. And while most people associate it with cooking, it actually has tons of uses all around the house. One of the more helpful alternatives uses for salt is to help fix clogged drains.

Here’s what you need to do. First, clear as much of the blockage as you can by hand. Then take 1/2 a cup of salt and 1/2 a cup of baking soda and pour it into the drain. Then take vinegar and pour it down the hole. It will bubble up fast, then by the time the bubbles stop, the clog should be gone.

Salt can also be used for things like putting out a dangerous grease fire. You can also use it as an abrasive to help clean a very dirty pot or pan. There are literally ended uses for salt around the house, that’s why it pays to always keep extra in your pantry.

HTML Snippets Powered By : XYZScripts.com