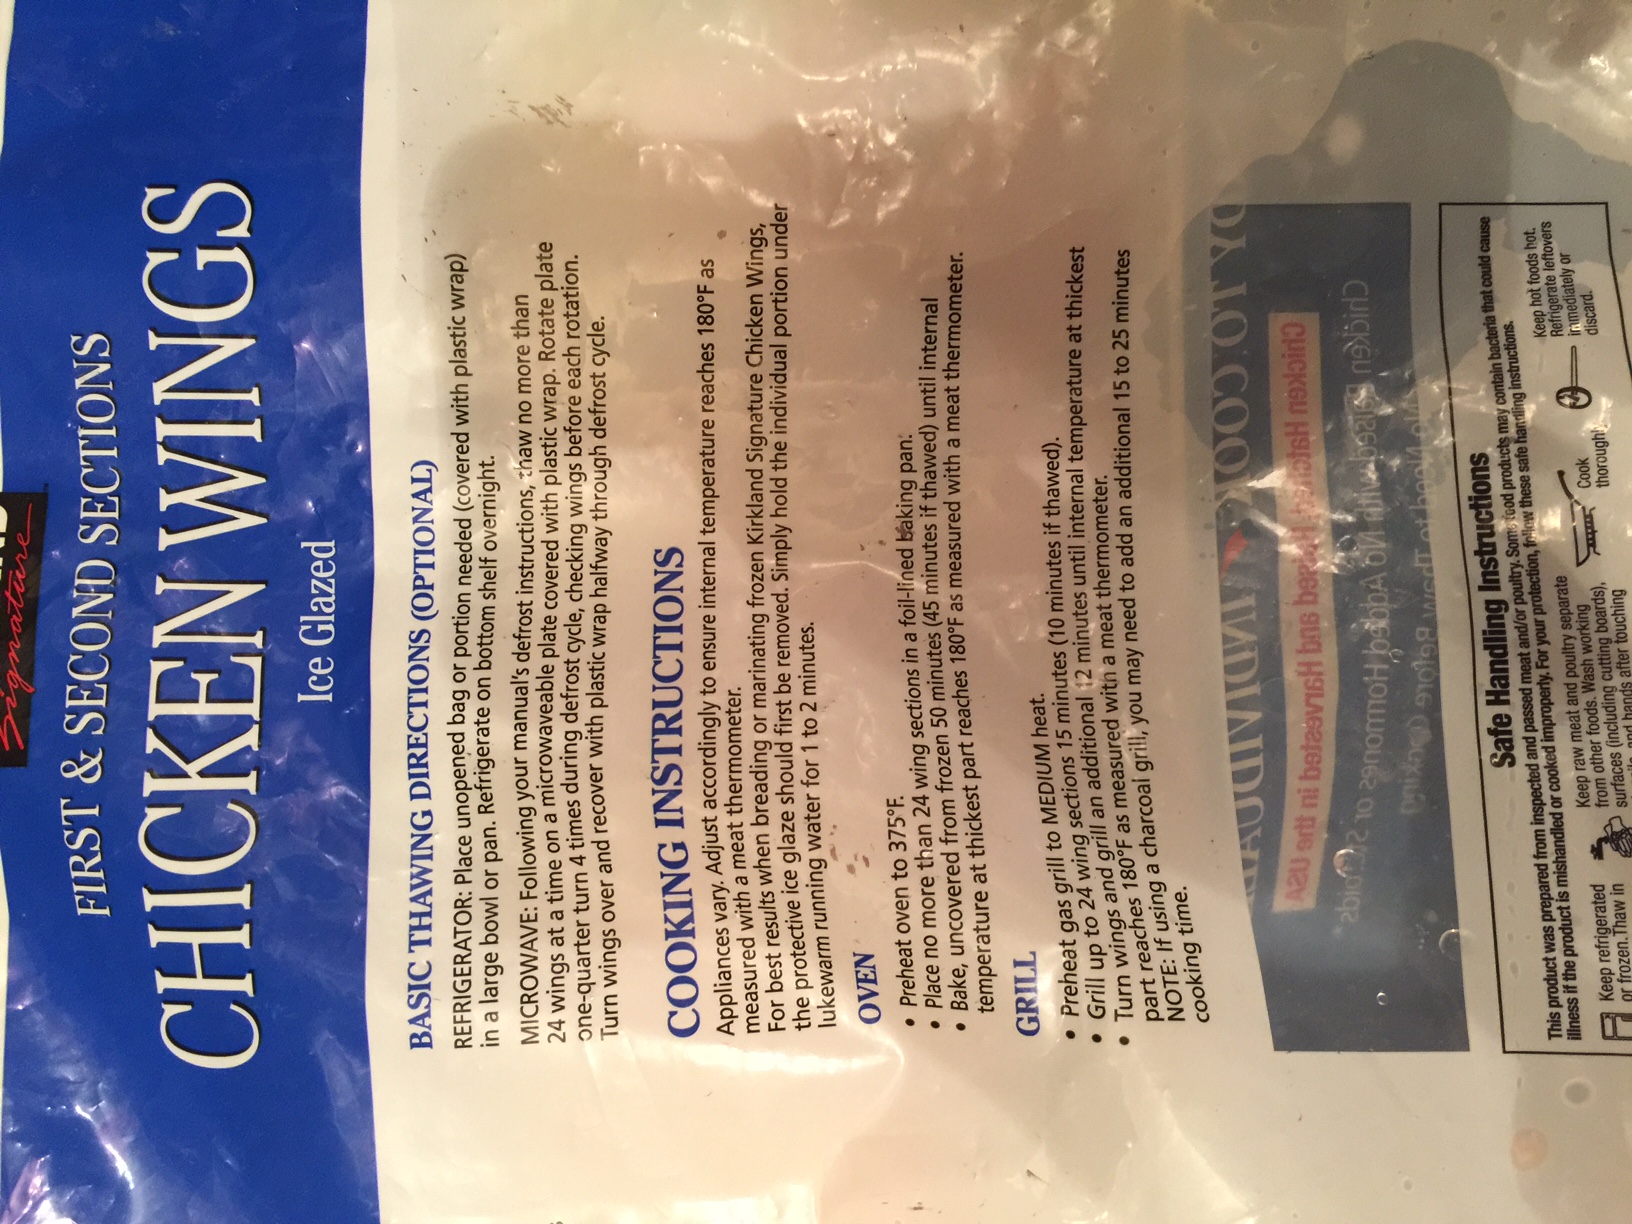
This is the basic recipe for cooking pretty much any frozen chicken wings.
CLICK THE IMAGE ABOVE TO DISPLAY THE RECIPE.
It is actually better to get a “Party Wing Pack” from the grocery store. Cut the wing tip off and safe for stock. Cut the remaining two pieces right at the joint.
Thaw wings overnight in the fridge (recipe for 12)
Cleaning mushrooms: The common wisdom is don't wash mushrooms, just use a dry paper towel. Also, don't wash them until you are ready to use them. That being said: Do not wash them if they are being used in a dry application, such as a salad. You can, however, give them a quick rinse underwater if you are immediately baking with them or using them immediately in some sort of soup or other wet application. The towel cleaning should be a suggestion rather than a rule, but when in doubt, just use a dry paper towel.
Brine your mushrooms
Put 2 QT of water in a large bowl
Add 2 TBL salt
Cut mushrooms all the same size
Put shrooms in the water
Top with a plate to hold them down
After 10 minutes drain and pat dry
Let completely dry for another 10 minute
Toss in 2 TBL EVOO
Roast at 450º for about 30 minutes on the bottom rack
Take out and toss them, then cook 10 more minutes
Take out and toss with 2 TBL butter and 1 tsp lemon juice
They are ready to use or serve
A mushroom acts like a vegetable, in that vegetables get soft when cooked.
Mushrooms also have Chitin in them, which acts more like meat – and toughens up
The brine will allow it to hold onto the moisture during cooking
Spoon Greek yogurt into a fire-ready ramekin
Sprinkle Turbinado sugar over the top
Use your torch to caramelize the sugar
Top with a bit of fresh fruit
Serve quickly, cause it will not stay as crispy for as long as custard will.
1 milligram = 0.015 grain = A teeny tiny ant, or a mosquito that has not yet eaten
1 grain = 64.8 milligrams = 1/7,000 pound = 1/437.5 ounce = 1 single grain of barley or long grained rice
1 CC = about 5 drops = ABOUT 1 gram (just barely under)
1 CC = 1 milliliter
1 CC = 1 gram = use just the tip of your measuring spoon 1 tsp = 5 cc = ABOUT 5 gm = the weight of a single nickle
1 TBL = 3 tsp = 1/2 oz = 15 cc
1 ounce = 2 TBL = 1/128 U.S. gallon = 1/16 U.S. pint 1/4 C = 2 oz = 4 TBL
1 deciliter = 1/10 liter = 100 milliliters 1/2 C = 4 oz = 1 gill = 119 cc 1 C = 16 TBL = 8 oz = 238 gm 1 PT = 2 C = 16 oz = 1/2 quart = 1/8 gallon 1 QT = 2 PT = 32 oz = .946 liter = 1/4 gallon
1 liter = 1,000 CC = 1 qt + 3 TBL = 1.06 U.S. quarts 1 gallon = 4 qts = 128 oz = 3.78 liter
1 U.S. gallon (basic unit of liquid capacity in the United States) = 231 cubic inches of water
1 imperial gallon = 1.2 US gallons = 277.4 cubic inches
Dry Measures: From smallest to largest
1 cubic centimeter = 0.06 cubic inch
1 cubic inch = 16.4 cubic centimeters
1 dry pint = 1/64 bushel = 1/2 dry quart
1 dry quart = 1/32 bushel = 1/8 peck
1 peck = 1/4 bushel
1 U.S. bushel (basic unit of dry capacity in the United States) = 2,150.4 cubic inches
1 imperial bushel (basic unit of dry capacity in some Commonwealth nations) = 2,219.4 cubic inches
1 cubic yard = 0.765 cubic meter
1 cubic meter = 1.3 cubic yards
1 U.S. bushel = 0.97 imperial bushel = 3.5 dekaliters
Weight: From lightest to heaviest
1 milligram = 0.015 grain = A teeny tiny ant, or a mosquito that has not yet eaten
1 grain = 64.8 milligrams = 0.0648 gm
1 gram = 0.035 avoirdupois ounce
1 pennyweight = 24 grains = 1/20 troy ounce
1 dram = 1/256 pound = 1/16 ounce = .0625 ounces = 1.77 gram
5 gm = the exact weight of one nickle
1 oz = 1/16 pound = 12 dimes = 28.5 gm
1 pound = 0.454 kilogram = Typical 16 oz canned goods
1 kilogram (basic unit of weight or mass) = 2.205 pounds
1 metric ton = 1,000 kilograms = 1.1 short tons
1 short ton = 2,000 pounds = 0.9 metric ton
1 long ton = 2,240 pounds
Length: From shortest to longest
1 millimeter = 1/1,000 meter = The diameter across this zero º
1 centimeter = 1/100 meter = 0.39 inch
1 inch = 2.54 centimeters = 1/36 yard = 1/12 foot
1 foot = 1/3 yard = 0.305 meter
1 yard (basic unit of length) = 0.914 meter
1 meter (basic unit of length) = just more than a yardstick = 39.37 inches = 3.28 feet = 1.094 yards
1 fathom = 6 feet
1 rod = 5 1/2 yards
1 furlong = 220 yards = 40 rods
1 kilometer = 1,000 meters = 0.62 mile
1 mile = 1,760 yards = 5,280 feet = 1.609 kilometers
1 nautical mile = 6,076.1 feet
Area
Liquid: From smallest to largest
1 square centimeter = 1/10,000 square meter = 0.155 square inch
1 square inch = 1/1,296 square yard = 1/144 square foot = 6.45 square centimeters
1 square decimeter = 1/100 square meter
1 square foot = 1/9 square yard
1 square yard (basic unit of area)
1 square meter (basic unit of area)
1 square rod = 30 1/4 square yards
1 are = 100 square meters
1 acre = 4,840 square yards = 160 square rods = 0.405 hectare
1 hectare = 10,000 square meters = 100 ares = 2.47 acres
1 square kilometer = 1,000,000 square meters = 0.386 square mile
1 square mile = 3,097,600 square yards = 640 acres = 2.59 square kilometers
Volume
Length, Width, Height: From smallest to largest
1 cc = 1 cubic centimeter = 0.06 cubic inch = 1/1,000,000 cubic meter
1 cc = 1 milliliter = 1/1,000 liter
1 cubic inch = 1/46,656 cubic yard = 1/1,728 cubic foot = 16.4 cubic centimeters
1 cubic foot = 1/27 cubic yard
1 cubic yard (basic unit of volume) = 0.765 cubic meter
1 cubic meter = 1 stere (basic unit of volume) = 1.3 cubic yards
1 centiliter = 1/100 liter
1 deciliter = 1/10 liter
1 liter = 1 cubic decimeter (basic unit of capacity)
1 dekaliter = 10 liters
1 hectoliter = 100 liters = 1/10 cubic meter
DO NOT USE FRESH EGGS. Eggs should be at least near (or past) their last day of sale. This is not an expiry date. They plan on eggs being in your fridge for a couple of weeks after his date.
The time allows the shell to separate from the membrane making them much easier to peel.
Put a dozen eggs (room temperature) into a deep pot, and add cold tap water until covering the eggs with an extra 2-3 inches of water
Add 2 TBL salt and 1/4 cup white vinegar to water and stir until salt is dissolved.
Turn burner on highest heat possible. Watch closely to make sure it does not come up to a rolling (or roiling) boil. If you have an immersible thermometer, you are looking for about 205º
Meanwhile, prepare bowl of water containing about four cups of ice cubes, for when eggs are done. Set aside.
When water starts to steam or lightly boil, turn heat to low and start timing
Cover and let cook for 10 minutes
(optional) Every 2 minutes or so, use a tongs to gently stir and rotate egg (to center yolk)
At the eight minute mark, put water into your bowl of ice
At 10 minute mark, use a slotted spoon to carefully transfer eggs from the hot water into the ice water.
Let cool for 15 minutes.
Eggs are done.
Drain, dry and refrigerate.
Peeling Tips
Start peeling from the fat end – the air sac usually makes this end float
If you peel within 24 hours, they will peel more easily. Any longer than that and the moisture evaporates through the shell, and makes them harder to peel.
Use eggs that are several days past their “Sell by” date. These are older eggs, and the membrane has begun to let go. They will peel more easily.
THE STEAM METHOD
Another method that produces consistent results because the temperature is highly regulated is to put 1-2 inches of water in a steamer. Put the eggs into the basket, but don’t put the basket on the steamer yet. Bring the water up to a boil, and THEN put the basket back on the steamer and cover.
Eggs should be room temperature.
For large eggs, time 13 minutes exactly, then remove the eggs to a bowl of iced tap water to cool – about 30 seconds. 12 minutes will give you a softer white and creamy yolk. 15 minutes will give you a drier yolk and very firm white. Peel underwater.
Add eggs, one at a time, incorporating each egg as you go
Blend thoroughly
Peel and grate the carrots, or use a food processor
Pulse almonds to break them apart
Add carrots and almonds
Pour into well greased ten inch cake pan
– or use four inch rings to make individual cakes – Drop baking time to 1 hour
– or use two pans to create thin layers – Drop baking time to 1 hour
Bake at 325º for 1-1/2 hours
Cool and frost
Traditional Frosting
Mix 1 8 oz package of cream cheese (room temperature) with 1/2 C melted butter
Add 1 LB confectioner sugar, 2 TBL vanilla and mix well
Spread while still room temperature
Glaze Frosting
Mix 1 C confectioner sugar with 4 TBL lemon juice
Decoration
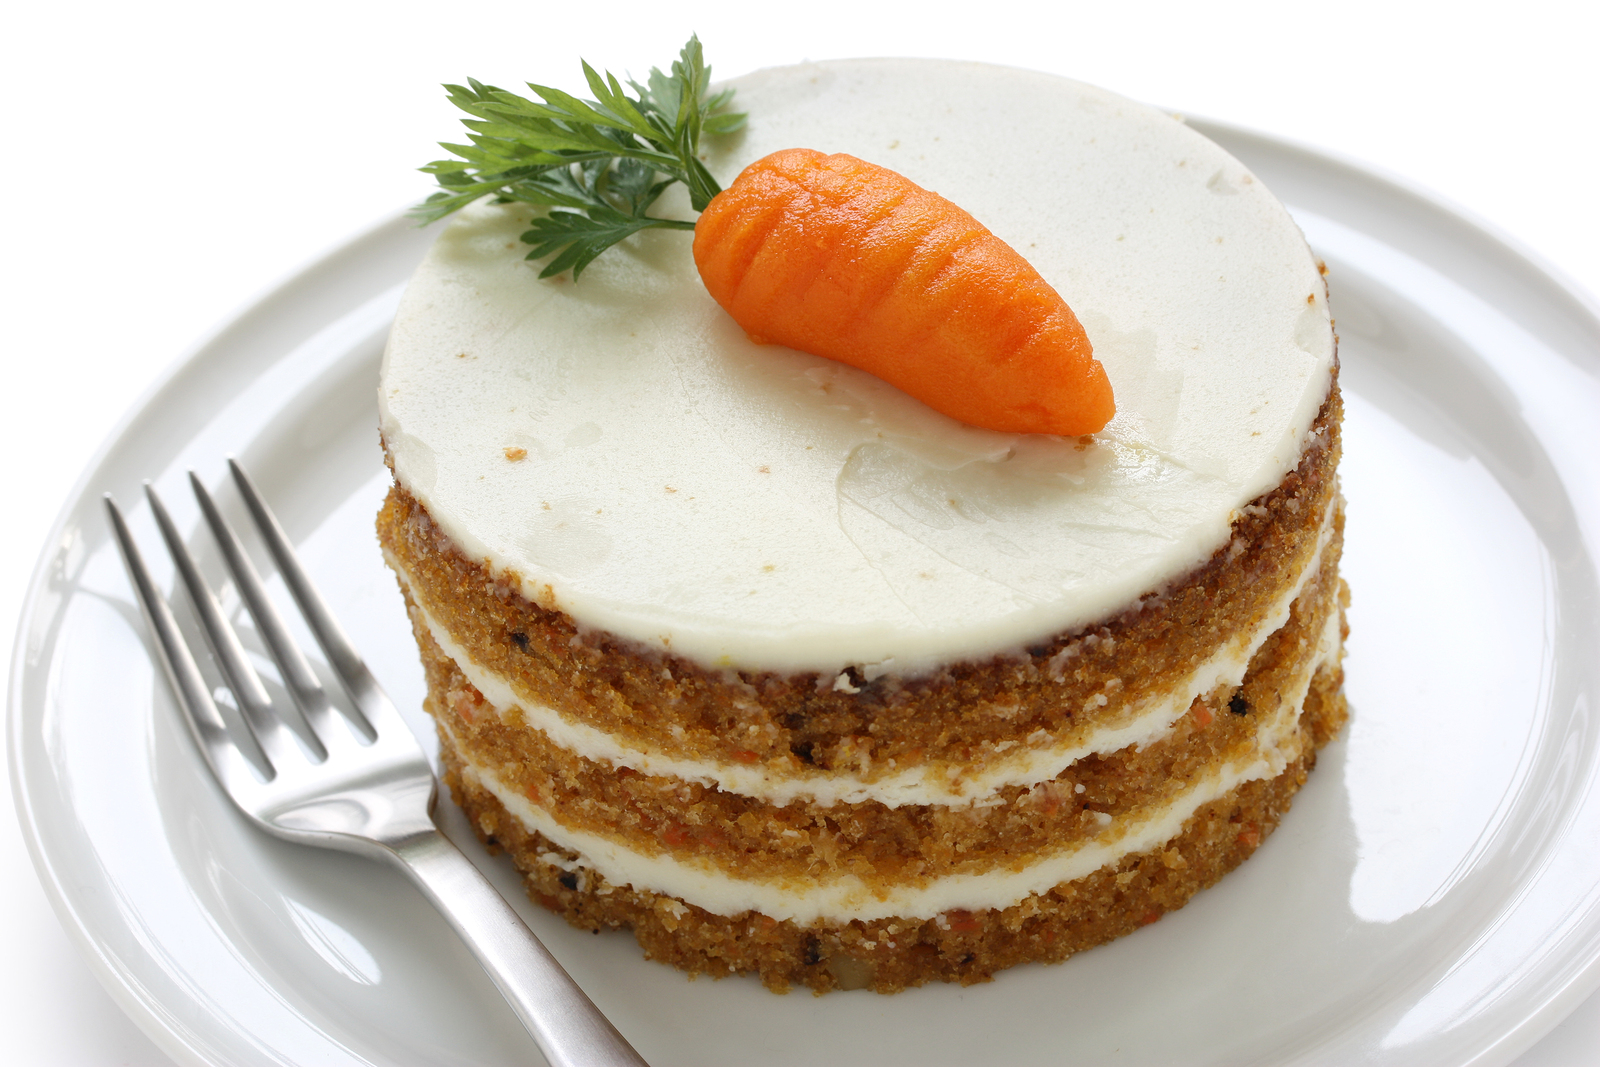
For carrot use confectioner sugar and food coloring. Use parsley sprig for the carrot top
RECIPE TWO
Preheat oven to 350º
Butter cake pan
Sprinkle and spread flour
Grate 12 oz carrots
Batter
Mix dry, then wet, then combine
DRY INGREDIENTS
12 oz ap flour
1 tsp baking powder
baking soda
1/4 each alspice, cinnamon, and nutmeg
scant salt
Toss with grated carrots to coat
WET INGREDIENTS
10 oz granulated white sugar
2 oz dark brown sugar
3 eggs
6 oz yogurt
DRIZZLE in 6 oz vegetable oil while mixing
Pour wet over dry and mix barely to combine
Bake at 350º for 45 minutes
Reduce heat to 325º and bake for another 20 minutes
OR 1 package Spinach Souffle (Skip steps 2 through 14)
Clean mushrooms by rubbing with dry paper towel (See note at bottom)
Thaw spinach completely
Squeeze as much water from the spinach as you are able and set aside
Separate yolks from eggs, and set both yolks and whites aside
Shred 1/4 C Parmesan cheese
Add 1/2 tsp paprika to cheese and 1/2 tsp salt and set aside
In a hot skillet, melt the butter and stir in the flour, cooking until it starts to brown – this creates a roux
Add milk whisking continually – this creates a bechemel sauce
Temper half your bechemel into your egg yolks, then mix back into the pan
Remove from heat and set aside
Add 1/2 tsp cream of tartar to egg whites
Beat egg whites until stiff peaks form
Break apart dried spinach, then gently mix in with the cheese and bechemel
Gently fold spinach mixture into the beaten egg whites
ALTERNATE TO STEPS 2 – 14: Buy a premade Spinach Souffle, and defrost
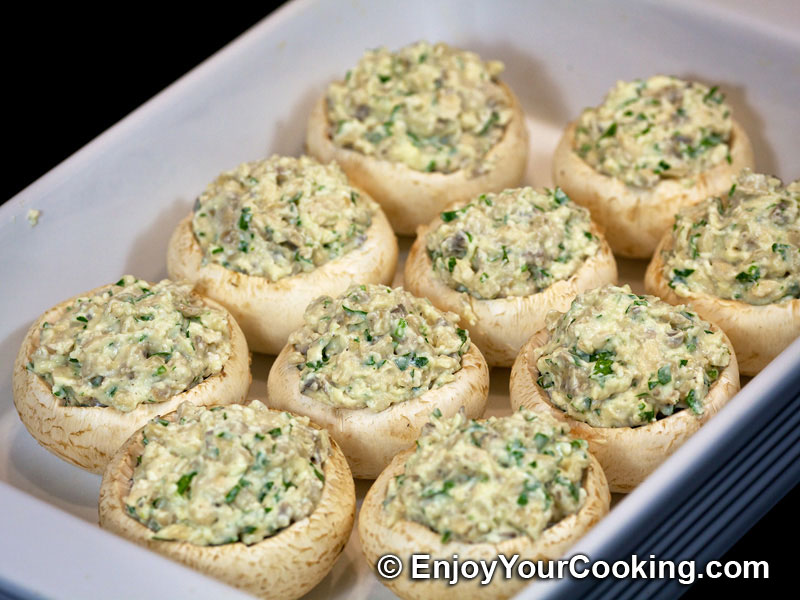
Fill mushroom caps with spinach souffle
Bake at 350º for 15 minutes or until souffle is puffy
Serve immediately
Cleaning mushrooms: The common wisdom is don't wash mushrooms, just use a dry paper towel. Also, don't wash them until you are ready to use them. That being said: Do not wash them if they are being used in a dry application, such as a salad. You can, however, give them a quick rinse underwater if you are immediately baking with them or using them immediately in some sort of soup or other wet application. The towel cleaning should be a suggestion rather than a rule, but when in doubt, just use a dry paper towel.
2 TBL butter, 2 TBL flour, 1 C chicken stock or milk
Create a lid with puff pastry – Dock the crust – Alternate, cut moons or shapes
Bake before filling at 350º for 5 minutes
Basic Chicken Pot Pie
This recipe is much like the one shown below. You may use my ingredients, but be sure to watch the video for some important tips. Ingredients – Filling
4 TBL butter
1/4 C AP flour
1-1/2 C chicken broth (or 1 can CampbellsCream of Potato Soup instead of above three ingredients) IN A SEPARATE MIXING BOWL, COMBINE
1 small carrot – diced small
1/2 C baby peas
1 small stalk celery – diced small (or 1 C mixed veggies instead of above three ingredients – Skip to Step 7)
1 C shredded chicken
1/2 C shredded cheese
4-6 black olives – diced – Optional
Ingredients – Crust
1 C AP flour
1/2 tsp salt
1 tsp baking powder
1/4 C shortening
3 TBL cold butter
2 TBL granulated sugar
1/4 C ice water (or prepared pie crust from the grocery store)
You will also need one egg yolk and one egg white (separated) in two separate bowls.
A pastry brush will be helpful, but you can use your fingers at the pastry brush step. Step by Step
Bring sauce pan up to medium heat
FILLING – – – –
Add butter to hot pan
As soon as butter is melted, add flour
As soon as flour starts to ball, add half your broth
Stir until it starts to turn smooth
Add the rest of your broth
Stir until it starts to thicken
When it has thickened (per video below) add it to the mixing bowl with your chopped veggies
CRUST
Pulse flour, salt, baking powder, shortening and butter in a food processor till combined
Add 1/4 C ice water all at once and pulse until a ball forms
Dump onto the counter to finish kneading
Separate into 4 pieces and let rest five minutes
Meanwhile, spoon your filling into ramekins for cooking
Roll out your crust to a near circle. If necessary, cut slightly bigger than diameter across top of ramekin.
NOTE: My cutter was the exact size of my ramekin top, so I cut it, then rolled it more to make it slightly larger
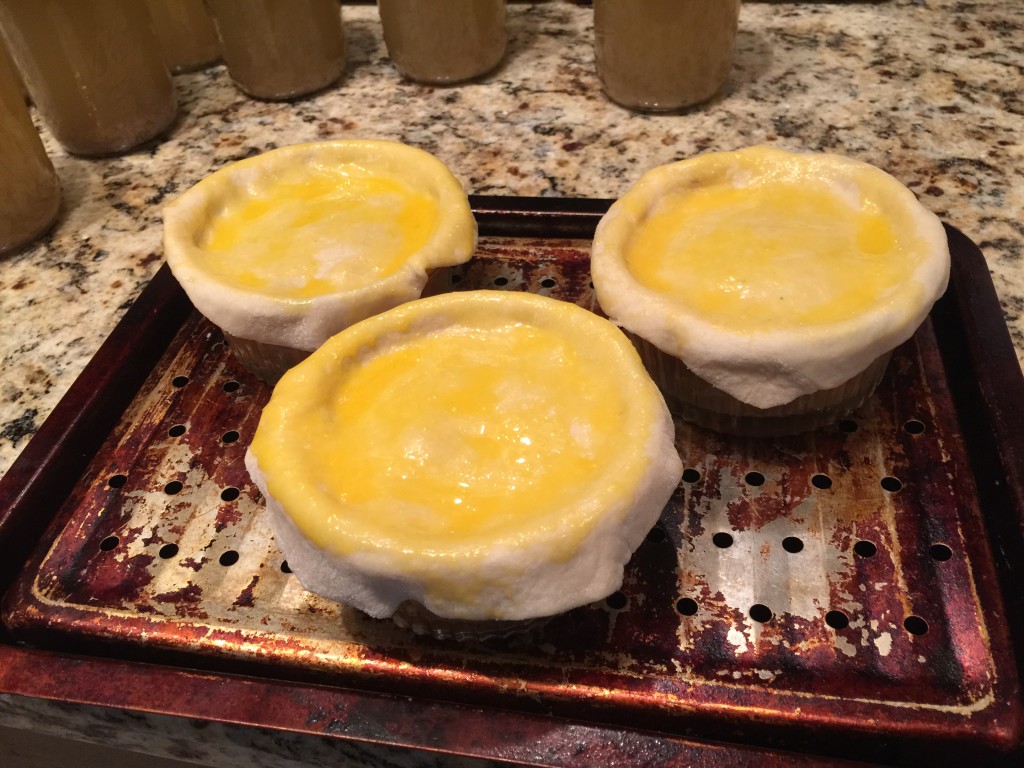
Brush the bottom with egg white and press into your pot pie filling, pressing around the edge
Brush the top with egg yolk
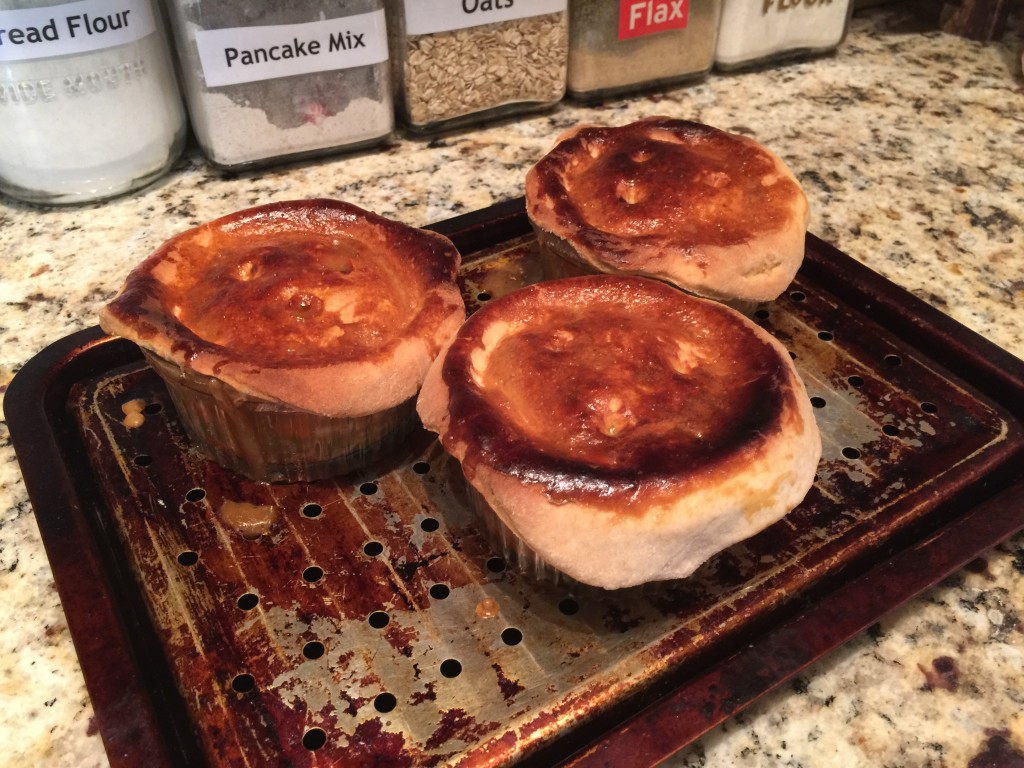
Poke holes in the top so that steam can escape, otherwise your pie crust will fail.
Bake at 350º for 35 minutes until browned
Let rest five minutes before serving, or cool on counter and refrigerate for reheating later.
Scratch Chicken Pot Pie
1 C chopped onion (1/4 inch pieces)
1 C chopped celery (1/4 inch pieces)
1 C chopped carrot (1/4 inch pieces)
1/2 C melted butter
1 C frozen tiny English peas (canned peas, in a pinch)
1/4 C AP flour
2 C chicken broth
1 C whole milk
1 tsp salt
1/4 tsp pepper
4 C diced cooked chicken
2 pkg. frozen puff pastry, thawed
1 egg yolk
1 TBL whole milk
1. Saute onion, celery and carrot in butter for 10 minutes.
2. Stir in peas and flour, cook 1 minute, stirring constantly.
3. Gradually add broth and 1 cup whole milk; cook over medium heat, stirring constantly, until thick and bubbly.
4. Stir in salt and pepper.
5. Add chicken, stirring well.
6. Ladle chicken mixture into cooking ramikins – just to the top
7. Set aside.
8. Roll pastry sheets to 1/8 inch thickness.
9. Cut pastry 1/2 inch larger than bowl(s).
10. Combine egg yolk and 1 tablespoon milk.
11. Brush one side of pastry. Place brushed side down over bowl(s), folding edges under and pressing firmly to sides of bowl.
12. Brush top with remaining egg mixture.
13. Bake at 350 degrees for 35 minutes until top is puffed and browned.
Chicken Pot Pie – From a whole chicken
Piece an entire chicken.
Use dark meat (legs and thighs) or light meat (breast and back)
Place into stock pot with cut up carrots, celery, onion and garlic
Pour one can of chicken stock into pot, then add water until it covers the chicken
Bring up to simmer over medium high heat
When it starts to simmer, reduce heat to medium low and simmer for 30 minutes
Strain out solids, retaining liquid
Set both aside to cool
To prepare dough:
(Bisquick or Puff Pastry is also acceptable)
Add to a food processor:
– 1 1/2 C flour
– pinch of salt
– 1 stick of cold butter – cubed
– 8 ounces of cold cream cheese – pieces
Pulse together until it forms crumbs
– Add 1 egg yolk
– Drizzle in water until it STARTS to come together
Remove from food processor and finish on a floured surface (the counter)
Wrap in plastic wrap and refrigerate for an hour to 24 hours
To prepare vegetables:
Cut butternut or acorn squash into 1/2 inch cubes
Cut 1/4 onion into pieces
Cut 1/2 stalk celery into 1/4 inch pieces
Cut carrots into 1/4 inch pieces
Toss in EVOO and salt and bake on baking sheet for 30 minutes at 350 degrees
Cut string beans into 1/2 inch pieces
Add a small can of peas (or fresh if you desire)
To finish up:
Set dough on counter to start to come up to room temperature
Shred or cube chicken
Make a roux (see recipe here) with the leftover strained chicken stock – be sure to stir constantly
Mix chicken, fresh veggies and cooked veggies together
Roux should be thickened, but not pasty or lumpy
– If necessary, thin by whisking in 1/2 C chicken stock
Flatten dough to about 1/4 inch
Fill ramekin with veggie mixture
Label roux over top of veggies about 1/2 to 3/4 of the way up
Top with dough, brush with melted butter and trim edges
Poke holes (or a smiley face) into top of crust to let steam vent
Bake at 350 degrees for about 35 minutes
Third Party Recipes
The information below this section is from a third party. It is part of Grandpa's Personal Recipe box. Feel free to browse, but know that this information is from someone else.
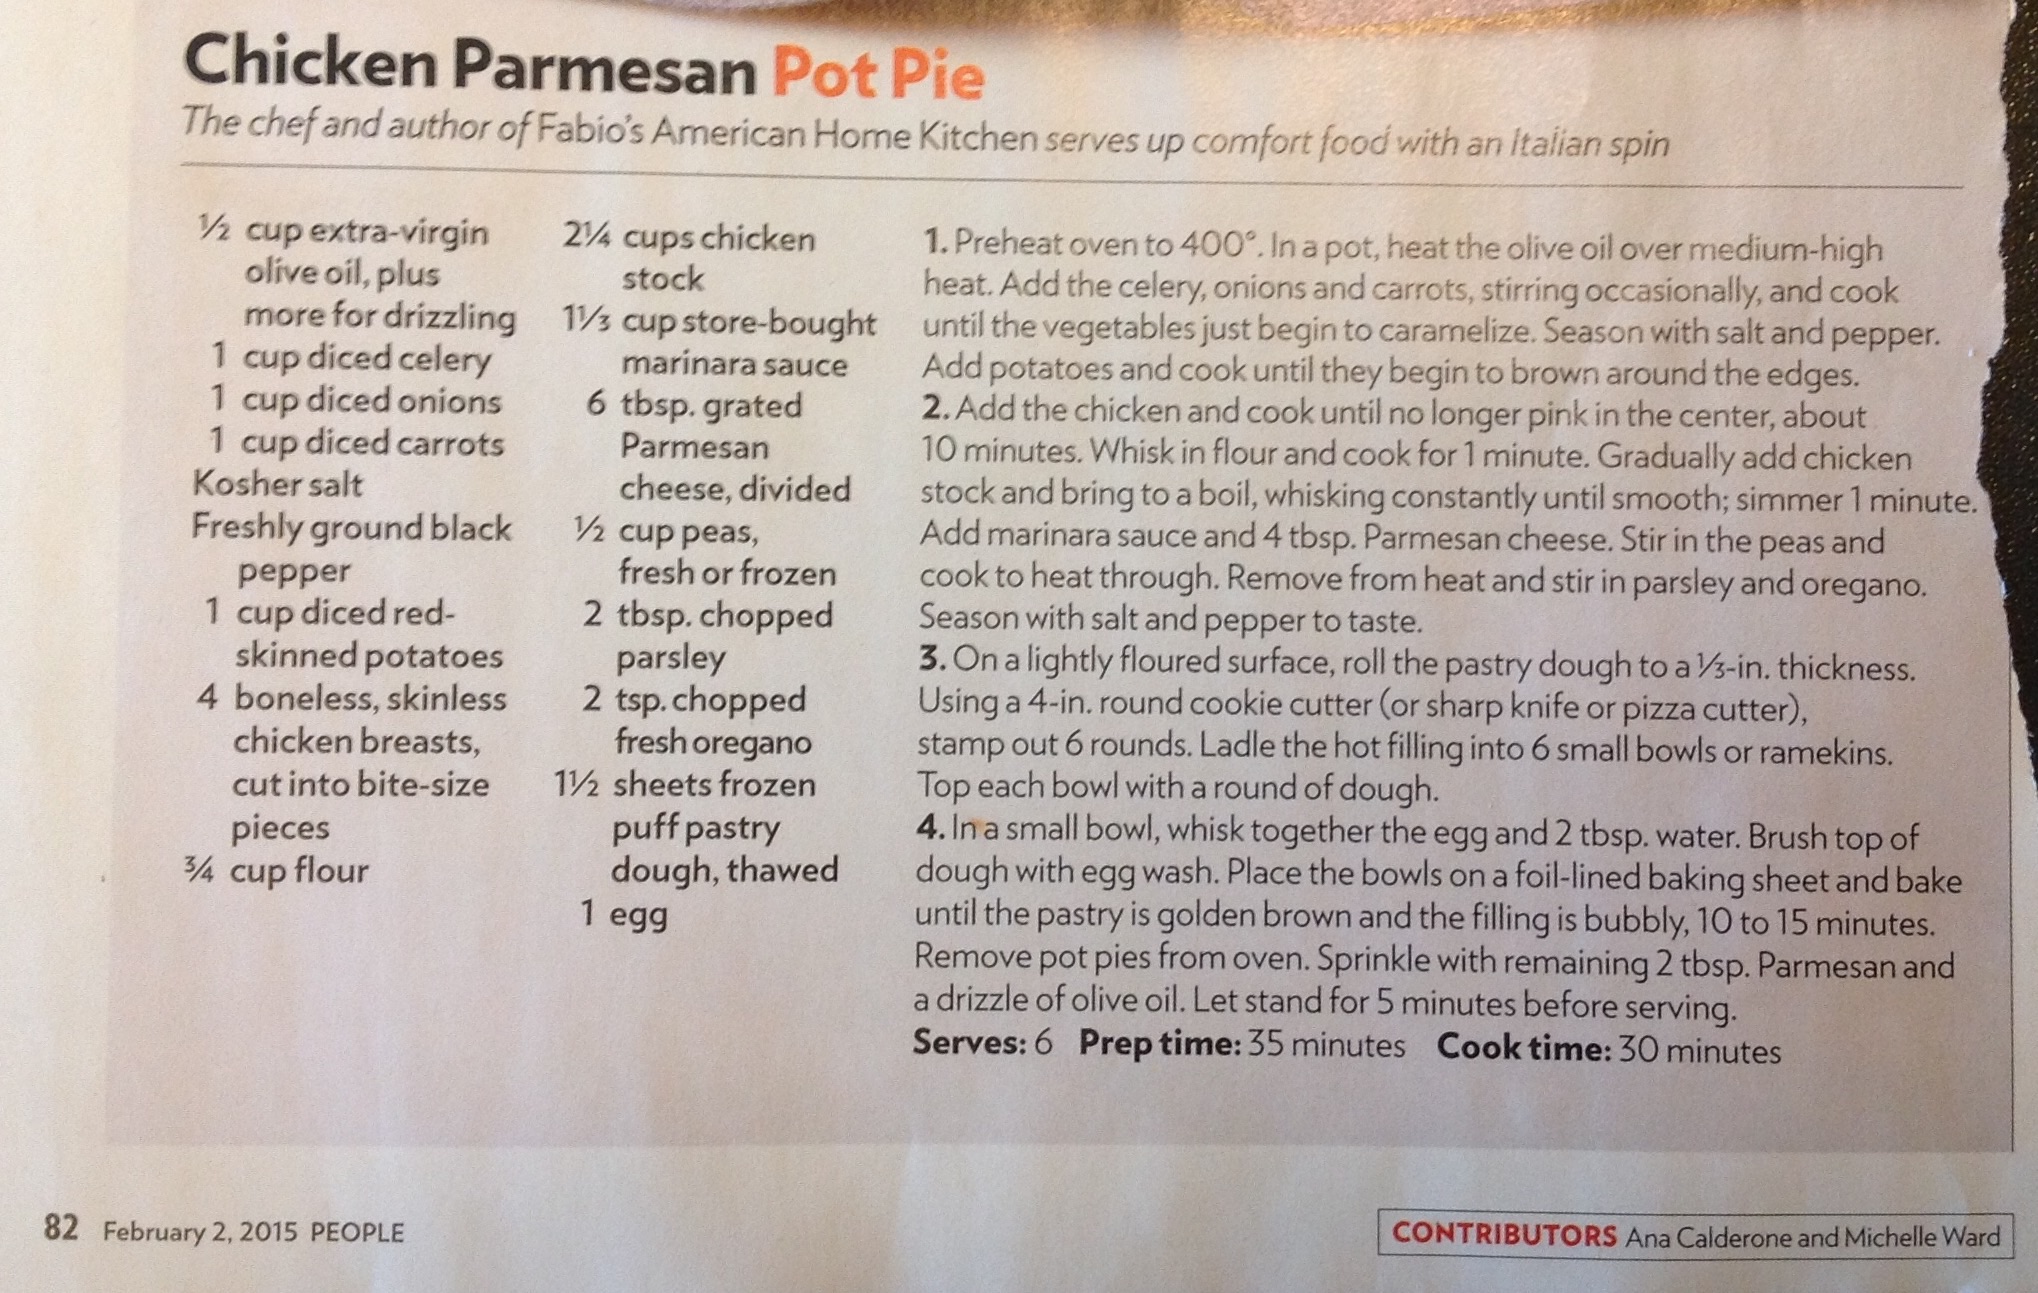
Clipped from People Magazine
Easy Chicken Pot Pie
1 can cream of chicken soup
1 PKG (about 8 OZ) frozen vegetables
1 CU cubed or shredded cooked chicken or turkey
1/2 CU milk (or less)
1 egg
1 CU Bisquick
1 prepared pie plate
Instructions
1. Mix soup, vegetables and chicken in bowl, then pour into 9″ pie plate
2. Mix milk, egg and Bisquick (very thick) and spread over chicken mixture
3. Bake @ 400 degrees for 30 minutes or until golden
Special Steps
Variations If you are feeling energetic, cut your own vegetables: onion, broccoli, bell pepper, carrot, green beans, Anaheim chilies
This really works. A dozen egg whites with four egg yolks will store in a half liter water bottle, and freeze. They are a little rubbery when they thaw, but after they cook (like for scrambled eggs) you can’t even tell a difference.
Corn on the cob should be cooked and eaten as soon as possible. Definitely within 48 hours of being picked, or the sugars will turn to starch, and the corn will become tough as time passes.
When buying corn ASK when it was picked. If it has been anything other than “this morning” don’t get it – or at least know that you are buying inferior tasting corn.
When not using the tip above, use a steamer (10 minutes) or a pot of boiling salted water (5 minutes) Actually, the microwave idea is pretty cool, but does not cook the corn as nicely as steam or boiling water.
Yellow kernel corn has a more fully developed flavor, but white kernel corn tends to be sweeter.
MEXICAN CORN ON THE COB
Grill the corn off the husk and on sticks
Coat the cooked corn with sour cream or mayo
Sprinkle with Tajin and salt – If you can’t find Tajin, use ground cayenne