Dutch Baby

INGREDIENTS

  • 1/2 C  plain flour
  • 2 eggs
  • 1/2 CU (4 FL OZ) milk
  • 3 TBL butter (melted)
  • 2 TBL sugar
  • 1/2 tsp vanilla
  • 1/2 tsp lemon zest or juice
  • scant nutmeg
  • salt and pepper for taste

STEP BY STEP

  1. Cover the bottom of a cast iron skillet liberally with butter
  2. Place skillet in a COLD oven and turn heat to 425 degrees F or 220 C.
  3. Use a sieve to sift the flour and other dry ingredients into a bowl.
  4. Mix HALF the dry ingredients with all of the wet ingredients and mix well
  5. Add in the remaining dry ingredients and mix, but do not over-mix
  6. Wait until the oven comes up to heat. CAUTION: Oil will be very hot.
  7. Add the batter to the pan. It should sizzle as you pour it.
  8. Bake for about 20 to 40 minutes minutes.
  9. Let the pudding rise and get golden brown in color
  10. Remove from oven
  11. It will start to deflate as soon as it has been removed from the oven.   Cut and serve immediately with sugar and lemon

See also “Yorkshire Pudding”

Going the Extra Step

Caramel Apple Baby

While your Baby cooks, prepare the following filling.  After removing from the oven (ABOVE) the center will collapse.  Let it; then pour your filling into the cavity and serve.

  1. In a hot skillet, add 2 TBL butter, 1/4 C water and 1/4 C brown sugar
  2. Let caramelize a bit then put in apple slices or pieces
  3. Stir to coat, then simmer covered for five minutes
  4. Uncover and sprinkle with cinnamon, salt and some white sugar
  5. Cook uncovered for an additional 5-7 minutes
  6. Pour into your Dutch Baby and serve hot

Tips: Fish from Alton Brown

1. Lube your fish up then rub with salt and pepper inside and out
2. Wrap VERY tightly in foil and cook at 500 degrees for 30 minutes or (better yet) internal temperature of 120 degrees, but DON’T OVERCOOK
3. Plate on top of bed of fresh parsley and dill, and garnish with lemon slices

Try to hide your fish, layering the ingredients like this:

Parsley
Dill
Onion
Lemon
Fish
Lemon
Onion
Dill
Parsley


Grandpas Frappuccino

Why spend $4 for a small bottle of Frappuccino, when you can make a good Copy Cat Frappuccino for under a buck?

Grandpa’s Copy Cat Frap

There is a lot of internet chatter about canning your own coffee, while (in theory) it can be done, flavor will suffer. I’ve tried it.  It seems a bit more cardboardy and bitter.  I prefer to make my coffee fresh, in a large batch, on the stove, and have found that this recipe gives me nearly an entire weeks worth of coffee, with decent flavor.

Purists would tell me that as soon as I started adding sugar, milk, etc I had lost the entire coffee experience anyway, so I figure that this makes me happy, so it might make you happy.  This is the recipe that I use.

For storage I use

  • ONE – 64 ounce bottle (from apple juice or similar) for storing the entire recipe after it has been filtered, but not flavored: BLACK
  • TWO – 32 ounce PowerAde bottles for storing flavored Frap Concentrate: DARK BROWN (Chocolate brown)
  • FIVE – 16 ounce bottles (Gatorade or Body Armor, emptied) for ready to drink Frapp:  TAN (Light brown)

SEE BOTTOM OF THIS PAGE FOR SINGLE SERVING RECIPE

Grandpa’s Frappuccino

Ten Servings – Coffee Concentrate

This makes a total of ten 16 ounce bottles, but I split the 64 ounces of brewed coffee into two 32 ounce bottles, which allows me to prepare only five bottles of Frap at a time.

SUMMARY:  Prepare 8 C (64 ounces) of strong coffee.

  • 8 CU (64 ounces) water in a large pot
  • 2 C ground coffee or two hotel coffee bags (caf or decaf)

STEP BY STEP

  1. Put ground coffee into 9 C cold water and cover
  2. Heat cold water on high for about 6-8 minutes
  3. DO NOT BRING TO A BOIL
  4. Reduce to lowest hot setting and cook 3-4 hours
    (too hot to touch, but not hot enough to bring water to a full boil)
  5. Stir once half-way through
  6. Turn off stove, leave covered
  7. Let steep (cool) for an additional 60 minutes
  8. Lift carefully off stove and pour into two large 4 C measuring cups leaving as many of the grounds behind as possible.  I use a strainer purchased from AMAZON.   Discard or compost the grounds.
  9. Let cool completely (just warm to the touch is OK) before pouring the coffee into your plastic bottle.  Then, pour the coffee into your large 64 ounce bottle and refrigerate overnight to let the grounds completely settle

Grandpa’s Frap Concentrate

TWO BATCHES – Frap Concentrate

SUMMARY:  Here you will flavor half the coffee from the previous night, and store the other half for later use.

  • You will need TWO 32 ounce bottles – such as a Powerade bottle
  • 1/4 C sugar
  • 1 TBL Stevia (buy it in bulk)
  • 1-2 TBL Toriani coffee syrup (I like French Vanilla or Hazelnut)
  • 1 tsp of vanilla
  • 2 TBL whole milk (to color the Concentrate)
  1. Fill one 32 ounce bottle and store it in the fridge for use another day
  2. Pour 8 ounces of your coffee into a measuring cup and the remainder into your 32 ounce bottle
  3. At this point you have 8 ounces in a measuring cup, and 24 ounces remaining in your bottle.
  4. Heat the 8 ounces for about 90 seconds
  5. Add the sugar and Stevia and stir until completely dissolved
  6. Add all other ingredients
  7. Pour the mixture into your 32 ounce bottle
  8. You will notice the color difference between the two bottles.  The dark brown bottle contains the flavoring, the black coffee is unflavored.
  9. We will use the dark brown bottle as the source for the next recipe.  When you are ready to prepare the second bottle, just start with step three of this recipe.

Grandpa’s Frappuccino

FIVE BOTTLES – Ready-to-drink Frappuccino

SUMMARY:  We will now finish our Frap and pour into bottles.

  1. The most complex step was making the Frap Concentrate.  Now it is an easy job of just combining ingredients.
  2. Pour 3/4 C of concentrate into each of your five bottles
  3. Now, I know you were not THAT precise, so spread the rest of the concentrate across the other bottles to even things up
  4. Add 1/4 C milk to each bottle
  5. Top off each bottle with water (or milk) and refrigerate.

Single Servings of Grandpa’s Frap

  1. Pour 3/4 C of concentrate or 1 C strong coffee into a single 16 ounce bottle
  2. Add 1/2 C milk onto the bottle
  3. Top off the bottle with water (or milk) and enjoy

Flavor Variations – for one serving

  • Add 1/8 tsp cocoa for a type of Mocha
  • Add 1 tbs hot fudge for a different flavor of Mocha
  • Try a few drops only of almond extract

What does it all mean? – Start out with 4 oz of espresso, then add…

  • Cappuccino – 6 oz of milk
  • Latte – 8-12 oz milk
  • Mocha – 2 oz chocolate, 8 oz milk
  • Macchiato – 1 oz foamed milk
  • Doppio – just add another 4 oz espresso (double espresso or double Dutch)
  • Venti Macchiato – steamed almond milk with mocha topping

Enchilada Sauce – COLLECTION

Grandpa’s Easiest Ever Enchilada Sauce

Grandpa’s Red Enchilada Sauce

Grandpa’s Green Enchilada Sauce Recipes


The information below this section is from a third party. It is part of Grandpa's Personal Recipe box. Feel free to browse, but know that this information is from someone else.

Pretty Darned Easy Enchilada Sauce

Mild Green Enchilada Sauce

You can easily double any of these recipes and can the extra.  Put canning jars (not lids) through the dishwasher and time the cycle so that it finishes just when you finish your enchilada sauce.  When sauce is finished, put the lids into a bowl of nearly boiling hot water for 30 seconds.  Pour hot sauce into “sterile” jars, and put the lid on.  For those jars that “PING” the sauce will stay on the shelf for up to a month.  PLEASE NOTE:  YOU MUST ELIMINATE THE MEAT if you are planning to can your sauce in this manner, otherwise leave one inch head space and freeze the sauce.

Gnocci with Tomato Sauce

Serves 6

* 1 tablespoon extra-virgin olive oil
* 1 small onion, finely chopped
* 3 cloves garlic, minced
* 1/4 cup dry white wine
* 1 can (28 ounces) whole plum tomatoes with juice, crushed by hand
* 1 can (14 1/2 ounces) tomato sauce
* 2 sprigs basil
* 1/4 teaspoon crushed red pepper flakes
* Coarse salt and freshly ground pepper
* Gnocchi
* Thinly shaved parmesan cheese, for serving

1. Heat oil in a large saucepan over medium heat until hot but not smoking. Add onion and garlic; cook, stirring occasionally, until onion is translucent, 5 to 7 minutes. Add wine; cook until most liquid has evaporated. Add tomatoes and juice, tomato sauce, basil, and red pepper flakes. Reduce heat to medium-low; simmer until slightly thick, about 30 minutes. Season with salt and pepper. Remove from heat; cover to keep warm.

2. Bring a large pot water to a boil; add 1 tablespoon salt. Add half of the gnocchi; when they rise to the top (after about 2 minutes), continue to cook until tender, about 15 seconds more. Transfer gnocchi with a slotted spoon to pan with sauce. Repeat process with remaining gnocchi.

3. Reheat gnocchi over low heat; gently toss. Serve with cheese shavings.

These are from Martha Stewart Web Site

Crispy but Soft Garlic Bread

INGREDIENTS

  • 6 TBL butter
  • 2 TBL olive oil
  • 2 TBL grated garlic
  • 1 tsp garlic powder mixed in 1 tsp water
  • 1 tsp Oregano
  • Cayenne, Salt and Pepper to taste
  • 1 loaf of SOFT crusted Italian bread

STEP BY STEP

  1. Heat 3 TBL butter and the garlic in the microwave for 60 seconds (tames the garlic)
  2. Mix heated butter with garlic powder mixture
  3. Mix in remaining ingredients
  4. Cut Italian loaf lengthwise
  5. Spread both halves with garlic butter mixture
  6. Sprinkle lightly with freshly grated Reggiano cheese
  7. Bake face up on a heavy baking sheet at 450º for 3-4 minutes
  8. Turn face down on the hot baking sheet
  9. Cover with another baking sheet and press lightly
  10. Cook for 8-10 more minutes

Garden Skillet Supper

Ingredients

½ c butter
1 c onion (thinly sliced)
2 zucchini (1/2” slilces)
1 med eggplant (peeled and cut ½” slices)
½ c flour
2 green pepper (cut in strips)
2 tomatoes (wedges)
1 tsp salt
¼ tsp oregano
1/8 tsp pepper
garlic

Instructions

  1. In covered elect skillet melt butter, sauté onions, garlic until onions tender.
  2. Dip zucchini and eggplant in flour to coat lightly. Add to onions along w/green pepper, cover and simmer 30 min.
  3. Add tomatoes, salt, oregano and pepper.
  4. Cook an additional 15 min.
  5. Serve over rice.

Tips: Frying Food

Before we begin…

  1. Very little oil gets absorbed if done properly.
  2. Frying in cast iron increases potential to go rancid.
  3. Dutch oven is good fry vessel because it is heavy and holds the heat
  4. Unless you plan to do a LOT of frying, don’t invest in a dedicated fryer
  5. Have an ABC fire extinguisher on hand (and a lid)
  6. Spider strainer is good for removing fried foods
  7. You will also need a good pair of metal long-reach tongs – no plastic
  8. Try to get pieces to uniform size
  9. Since temperature is critical, a candy thermometer is important – about 315-365º depending on what you are frying.  DO NOT DEVIATE from fry recipe temperatures.  Do not go above 365 or your oil will go rancid.
  10. You need a wire rack so that things won’t get soggy after being removed from the fryer
  11. Canola oil and Peanut oil both have a high smoke point
  12. Fry in small batches because the temperature will change when you put things into it.
  13. Season when your fried food is still hot
  14. When you are done, let it cool before you do anything. Don’t save oil when you fry strong flavors such as fish. Then strain it into a glass jar. Use for up to three times, but then discard. Do not mix new oil with reused oil.
  15. Food to be fried should be patted dry with a towel, or spun in a salad spinner.  Any amount of water will create spatter risks.
  16. Fry in small batches to maintain temperature of oil
  17. Initial sizzle is steam being forced out.   When steam is going out, oil can’t go in.  When steam stops, oil is absorbed, so remove as soon as sizzle stops.

Ingredients to feed 4 people

BASIC FRY MARINATE (4-24 hours)

  • 1 Pieced chicken
  • 1 C Buttermilk
  • 1/4 C cayenne sauce
  • 3 eggs

BASIC FRY DREDGE

  • 1 tsp Salt
  • 1 tsp Garlic powder
  • 1/2 tsp Black pepper
  • 2 CU AP flour
  • 1 TBL baking powder
  • 1 tsp salt
  • 1/4 tsp cayenne pepper
BASIC FRY BATTER

  • 1 C Buttermilk
  • 1/4 C cayenne sauce
  • 3 eggs
  • 1 tsp Salt
  • 1 tsp Garlic powder
  • 1/2 tsp Black pepper
  • 2 CU AP flour
  • 1 TBL baking powder
  • 1 tsp salt
  • 1/4 tsp cayenne pepper
  • enough cold beer to thin your batter

Oh, one more thing…

  • Saturated Fats are BAD.  Althought they have a long shelf life, they are bad for your health.
    (eg) Butter, beef tallow, lard, palm oil. Saturated fats are solid at room temperature
  • Mono Unsaturated Fats are : BETTER for you.  They have a shorter shelf life
    (eg)  Olive oil, nut oils like almond, walnut and hazlenul – Low smoke point.
  • Poly Unsaturated Fats are actually GOOD for you.  They have a short shelf life, so keep refrigerated
    (eg) Canola, peanut, safflower and grapeseed oil. Mild flavor. High smoke point.
  • FRENCH FRY TIP FOR CHICKEN:   Fry twice…
    First for 2-3 minutes to cook, then drain on rack and cool then another 2-3 minutes for final fry to crispen
    Put on drain rack and season, then pop in oven at 200 degrees for 10 minutes

This is a recipe that has been created or modified by Robert (Grandpa) Andrews.
CLICK HERE for a free sample copies of Grandpa's Cookbooks. © 2016, 2017, 2018.

Grilled Cheese Sandwich

Recipe Ingredients

  • Your favorite bread – Rye or pumpernickel is a good choice
  • Slice of sharp yellow or white Cheddar or Swiss
    You can use processed cheese.  It keeps well because it is shelf-stable.
  • 2 TBL Miracle Whip or Mayo plus 1 TBL Dijon mustard – mixed
  • 2 TBL Butter – softened
  • 1/2 C Apple Cider or White vinegar
  • Optional
    • Thin slice of ham
    • Fresh Poblano pepper – blackened and skinned
    • Beefsteak or other slicing tomato
    • Red onion – paper thin slices

Step by Step

  1. Cut onion into paper-thin slices
  2. Marinate the onion in 1/2 C hot vinegar – set aside to cool
  3. Toast poblano over an open flame, with a blow torch, or under the electric oven broiler until it is blackened
  4. Put the pepper into a plastic bag to sweat for 10 minutes
  5. Use a paper towel to remove the skin – DO NOT RINSE
  6. Cut off top of pepper, slit open and remove seeds and vein
  7. Cut bread into thin slices.
  8. Apply desired mayo or mustard to the cooking side.
  9. Apply chipotle mayo to the inside.
  10. Put optional ham or onion or tomato on the bread.
  11. Put cheese onto the bread and place the other slice on top.
  12. Melt 2 TBL butter in a medium heat (not hot) skillet.
  13. Put sandwich into the skillet, spreading around so that butter coats the bottom slice.
  14. Get another tab of butter ready.
  15. Slip a spatula under the sandwich and hold it while the other tab of butter melts, flip it and place it on the pool of  butter.
  16. Spread it around on the butter.
  17. Put a lid, large mixing bowl or baking sheet over top to help the cheese melt.
  18. Cook about two more minutes
  19. Serve with sides of bread butter pickles, sweet gerkins, capers, etc.
  20. Cut the crust off, as sparingly as possible, then quarter the sandwiches and serve.

Alternatives

Chipotle Spread

  • 1/2 C miracle whip
  • 2 chipotle peppers
  • zest and juice from one lime
  • salt and pepper


Gravlox (“Grav Lox” = buried salmon)

From Cindy’s Recipe Card

Title of Recipe: Gravlox (“Grav Lox” = buried salmon)

Ingredients:
Salmon
2 tbl salt
3 tbl sugar
1 tbl white pepper
2 tbl honey
1 tbl whole-grain mustard
1 tbl reg. Mustard
1 tbp red wine vinegar

Instructions:
Sprinkle salt, sugar & white pepper mixture in bottom of pan, put salmon in pan, top w/ lots of mixture (be very liberal). Cover with dill sprigs. Baste/drizzle w/ cognac. Put weight on top. Let set 2 hours, then put in refrigerator. Flip & repeat daily for 5 days. Scrape off almost all topping, slice and discard, cut at extreme angle as thin as possible (cut off brown edges).

Sauce; 3 tbl of juice/liquid from Gravlox pan, 2 tbl honey, 1 tbl whole grain mustard, 1 tbl reg. Mustard, 1 tbl red wine vinegar. Slowly pour in 4 tbl veg. Oil, while whisking, will emulsify. Refrigerate, add 1 tbl chopped dill.

Special Steps:
Top w/lemon dill, radish sauce and serve with pumpernickel and chardonnay /or schnapps.

Basic Gravlox

Ingredients

  • Salmon – fresh – skin on
  • 2 TBL salt
  • 3 TBL sugar
  • 1 TBL white pepper
  • 1 TBL black peppercorns
  • 1 TBL corriander seed
  • 2 TBL honey
  • 1 TBL chopped fresh dill
  • 2 TBL ground mustard

Note:  You can tell if it is fresh because the pin bones WILL NOT pull out easily.  There will be just a bit of tug.  If they slide right out, the salmon is not quite fresh.

Step by Step

  1. Mix all dry ingredients
  2. Put salmon in pan, skin side down
  3. Top w/ lots of mixture (be very liberal)
  4. Flip skin side up, and top with more mixture
  5. Flip again, skin side down and top with more mixture – reserve about 2 TBL of the mixture
  6. Layer thickly with slices of lemon and orange
  7. Add last 2 TBL of dry ingredients over top of lemon and orange
  8. Cover and refrigerate for 24-36 hours
  9. Unbury salmon and place on sheet of plastic wrap
  10. Wrap tightly with plastic wrap
  11. Refrigerate about 3 more days
  12. Unwrap and rinse under running water
  13. Pat dry and wipe liberally with olive oil
  14. Wrap in plastic and refrigerate for another 2-3 days
  15. Unwrap and cut at extreme angle as thin as possible (cut off brown edges)
  16. Serve with sauce and crackers, or see other preparations below

Sauce

  1. 2 TBL each – honey, sour cream, minced onion
  2. 1 TBL each – whole grain mustard, regular mustard, red wine vinegar, capers
  3. Slowly pour in 1/4 C olive oil, while whisking, will emulsify.
  4. Add 1 TBL each – chopped dill, cives
  5. Refrigerate
  6. Serve with sauce and pumpernickel

Norwegian Gravlox

Ingredients

  • Raw salmon
  • Olive oil
  • Rock salt – fleurdesel
  • Lemon
  • pepper

Step by Step / Serving

  • Slice paper thin, lay out.
  • Eat with salt, pepper, oil, lemon , chervil

American Gravlox

Ingredients

  • 1 tablespoon cumin seeds
  • 2 tablespoons whole white peppercorns
  • 1/2 cup kosher salt
  • 1/2 cup granulated sugar
  • 1/4 cup brown sugar
  • 2 cups chopped dill
  • 2 cups chopped parsley
  • 1 teaspoon crushed red pepper
  • 1 tablespoon finely grated lemon zest
  • 3 tablespoons gin, Hendrick’s preferred
  • One 2-pound, center-cut, skin-on wild salmon fillet, pin bones removed
  • Bagels and cream cheese, blini or scrambled eggs, for serving

Step by Step

  1. In a spice grinder, combine the cumin seeds and white peppercorns and pulse until finely ground.
  2. Transfer to a medium bowl and add the salt, both sugars, dill, parsley, crushed red pepper, lemon zest and aquavit.
  3. Mix well.
  4. Place the salmon in a glass or ceramic dish, skin-side down.
  5. Spread the herb paste evenly over the fillet.
  6. Cover the dish tightly with plastic wrap and refrigerate until the fish feels firm and looks cured in the center, 2 to 3 days.
  7. The sides of the fillet will have the strongest flavor and driest texture.

Serving

  • Sliced gravlox
  • Sliced avocado
  • Toasted Noble Bread
  • Scallion cream cheese spread
  • Grainy mustard honey sauce
  • Boiled egg slices
  • Dill sprigs


Mexican Gravlox

Ingredients

  • Fresh Salmon
  • 1 TBL tequila over top
  • Mix handful of chopped cilantro
  • 2 TBL dark brown sugar
  • 2 TBL salt
  • 1 TBL black pepper
  • 1tsp chipotle or cayenne powder
  • 1tsp cumin
  • Grated lime zest

Step by Step

  1. Cover, flip and cover
  2. Cover in plastic and cover with heavy weight
  3. Ready in 3-6 days
  4. Serve on crackers or toast
  5. Top with Crema

Puff Pastry Gravlox

  1. Egg wash (yolk, water, salt) a sheet of room temperature puff pastry
  2. Cut into circles and place on baking tray
  3. Put a 1/4 lattice tray over top of circles, using a spacer so that all of puffs will be the same height
  4. Bake 325º for about 15 minutes
  5. Poke a hole in the center for filling
  6. Pipe mixture of sour cream, dill, salt and pepper onto baked circles
  7. Top with thinly sliced gravlox or roll into a rose
  8. Bake 400º for no more than 2 minutes
  9. Add a dab of sour cream onto the rose and garnish with salmon caviar or sturgeon caviar
  10. Top with the merest bit of dill
  11. Serve on a piece of slate (just to be pretty)

Hash Browns (Hashed Browns)

hash-brownsAccording to Google Hash Browns is correct.  I’ve heard it both ways.  People will also refer to Latkes (which is the Jewish term) and Rostis (which is the German term).  They are cooked SLIGHTLY differently, so I will include a recipe for both of them at this site.  This recipe is for the kind of Hash Browns that you would get if you were to go out to some Mom and Pop diner here in the United States.

INGREDIENTS

  • 3 small Yukon Gold potatoes (or two large Russets)
  • 1 small onion
  • Corned beef
  • 1 egg
  • 1 TBL Olive oil
  • 1 TBL salted butter
  • 1 tsp salt

STEP BY STEP

NOTE: For Home Fries, dice the potatoes into cubes the desired size and prepare pretty much the same way.  Toss every 5 minutes or so, and increase cooking time so that they are well browned on most sides.

  1. Wash potatoes well, and pat dry
  2. If you prefer peeled potato hash browns, cut nice big chunks of the skin for cooking on another day as potato skins.  Store them in the fridge in a jar of salted water.
  3. Cut potato meat into thin slices, then cut slices into short strips. 
    Alternately you can grate them.
  4. Mix with grated or diced onion
  5. Mix with shredded corned beef
  6. Add 1 beaten egg
  7. Use salad spinner or a tea towel to dry them as much as possible
  8. Toss in 1 TBL Olive oil and place in large cast iron skillet over medium heat
    – These will cook for about 5-8 minutes.
    Flip when potatoes start to brown at the edges of the pan.
    You can slide onto a plate, then invert the plate for safe flipping
  9. Set the burner to low, then cook for another 5 minutes
  10. They are ready to serve when the second side has browned.
    HERE IS AN OPTION YOU MAY TRY.
  11. Peel onion and chop into small slivers
  12. In small pan, saute onion in 1 TBL olive oil
  13. When translucent, remove from heat and set aside
  14. After potatoes have browned, combine all into a large mixing bowl and toss together with sauteed onion and salt
    READY FOR ANOTHER OPTION?
  15. Put loosely into a preheated (oiled) waffle iron for 10-12 minutes.  DO NOT add too much cheese, or you will have a gooey mess.  Top the cheese with more potatoes to minimize cheese contact.

NOTES

    • If you toss them too frequently the gluten develops and the hashed browns become tough and chewy, rather than crisp.
    • Don’t overcrowd skillet of they will be soggy, rather than crisp. You need space for the steam to escape.

VARIATIONS

  • When hashed browns are almost done, create a hollow, and carefully crack two
    eggs into the hollows. Reduce heat to simmer, cover and allow eggs to soft
    boil for 5-10 minutes.
  • Add one diced sour apple at Step 7. You can also add bell peppers or diced
    chives at Step 7. Another option is to add finely diced corned beef or sausage
    to make hash.
  • I prefer to dump the partially cooked potatoes into a large mixing bowl and toss there, rather than in the skillet. After tossing, return them to the hot skillet.

Harvard Beets

INGREDIENTS – For a full can, just double ingredients

  • 1-2 CU beets (cooked, cubed or sliced) or 1/2 of a16 oz can
  • 1/4 C of the beet water (usually salt, sugar and vinegar)
  • 1/4 CU sugar
  • 1/4 CU red wine or white vinegar
  • 1 TBL cornstarch
  • 1-2 tsp butter
  • salt to taste

STEP BY STEP

  1. Drain 1/4 C beet liquid into a medium saucepan
    Set the beets aside in a bowl until the end
  2. Add all other ingredients to the saucepan
  3. Bring to a boil over medium-high heat
  4. Reduce heat and simmer 2 min or until thickened
  5. Add beets to saucepan and gently fold in until heated


Breadsticks – Several Recipes and Tips

{Olive Garden Breadsticks}


From:   http://readableeatables.blogspot.com/

Oh man, I loved these! These would just complete any meal really. Pasta, soup, salad…you name it. Make these when you get a chance. Make sure you serve them hot out of the oven.

*These are a little more dense than Olive Garden’s. But the flavor is incredible and pretty right on with the garlic butter. I also updated the picture, because the other one was too dark. Enjoy 🙂

Dough:
1 1/2 cups warm water
2 Tbs sugar
1 Tbs yeast
1 Tbs salt (yes, the recipe calls for 1 Tablespoon, which I use every time and they turn out great.)
2 Tbs butter, softened
4-5 Cups flour

Topping:
3 Tbs butter melted
sea salt
1 tsp garlic powder

For the dough, pour the water into a stand mixer with the sugar and yeast, let that sit and froth for about 10 minutes. Add salt, butter, and 2 cups of flour. Mix the dough on low. Add the rest of the flour a half cup at a time, until dough scrapes the sides of the bowl clean. Mix the dough about 5 minutes on medium speed, until its soft and easy to work with.
Let the dough rest in the bowl until doubled in size, about 1 hour and then roll it out. Roll the dough out into a long log, spray a knife with cooking spray and cut the dough into 12-14 pieces. Roll those pieces into about 6 inch long snakes. Spray 2 large cookie sheets with cooking spray, ( I usually only use one) and lay the breadsticks out leaving about 2 inches between each one.
Place them in the oven with the temperature turned to 170 degrees. Let them rise for about 15 minutes, or until doubled in size.( I have also let them sit at room temp until they are doubled in size and then bake them in the oven)
Once risen, brush them with the 1 1/2 T of melted butter and sprinkle them with salt. Now preheat the oven to 400 degrees and bake them for 12-14 minutes or until golden brown. While they are baking combine the rest of the melted butter with 1 tsp garlic powder. When the breadsticks are golden brown, remove them from the oven and brush them with the butter/garlic mixture.


Other Breadstick Notes

Basic ingredients:
Flour, EVOO, Water, Yeast, Milk, Butter

Grissini Bread sticks are thin crisp bread sticks, rather than the chewy ones shown above.
Good flavor enhancers and combinations for this type of bread stick (from Greatest British Cooking Show) follow:

  • Nigella seed and Parmesan cheese
  • Poppy seed, caraway seed and Kalamata olives
  • Lemon and rosemary
  • Ras el hanout is a flavor from Africa
  • Garlic, Parmesan cheese and Bleu cheese
  • You can also entwine two different colors

Knead your dough until you achieve the Window Pane Stage, where it can stretch so thin that light goes through it.
A slow bake will drive out the moisture, making it crispier.

Grissini

    • 1 1/3 C water (warm)
    • 2 tsp yeast
      • Let rest 5 minutes
    • 1/4 C EVOO
    • 1 C AP flour – whisk to combine – this removes lumps
    • 2 C more flour
    • 1.5 tsp sea salt
      • Put on Kitchen Aid with paddle attachment
    • Change to dough hook
      • Add 3/4 C more flour
    • Mix 3-5 minutes with dough hook on medium-slow speed
    • Finish on counter, kneading by hand
    • Stretch dough into a rough rectangle
    • Put dough on surface oiled with EVOO
    • Continue to stretch until it is relatively flat
    • Roll using rolling pin to about 1/2 inch thickness
    • Brush the top with sesame oil
    • Cover with plastic wrap while still on counter
    • Cover plastic with a towel for about 90 minutes
      • You will have only one rise
      • OPTIONAL:  Sprinkle with sesame seeds or caraway seeds
    • As time nears, oil a large baking sheet with sesame oil
    • Cut into half (lengthwise) with a pizza cutter
    • Cut dough about the width of your fingers and move fingers to the baking sheet, stretching to width of baking sheet
    • OPTIONAL:  Stretch far, then twist into a spiral breadstick
    • Bake at 400º for 18-20 minutes
      • Cook until golden/tanned

Juevos Rancheros – COLLECTION

2016-02-24 08.51.092016-02-24 08.50.57
HIS AND HERS

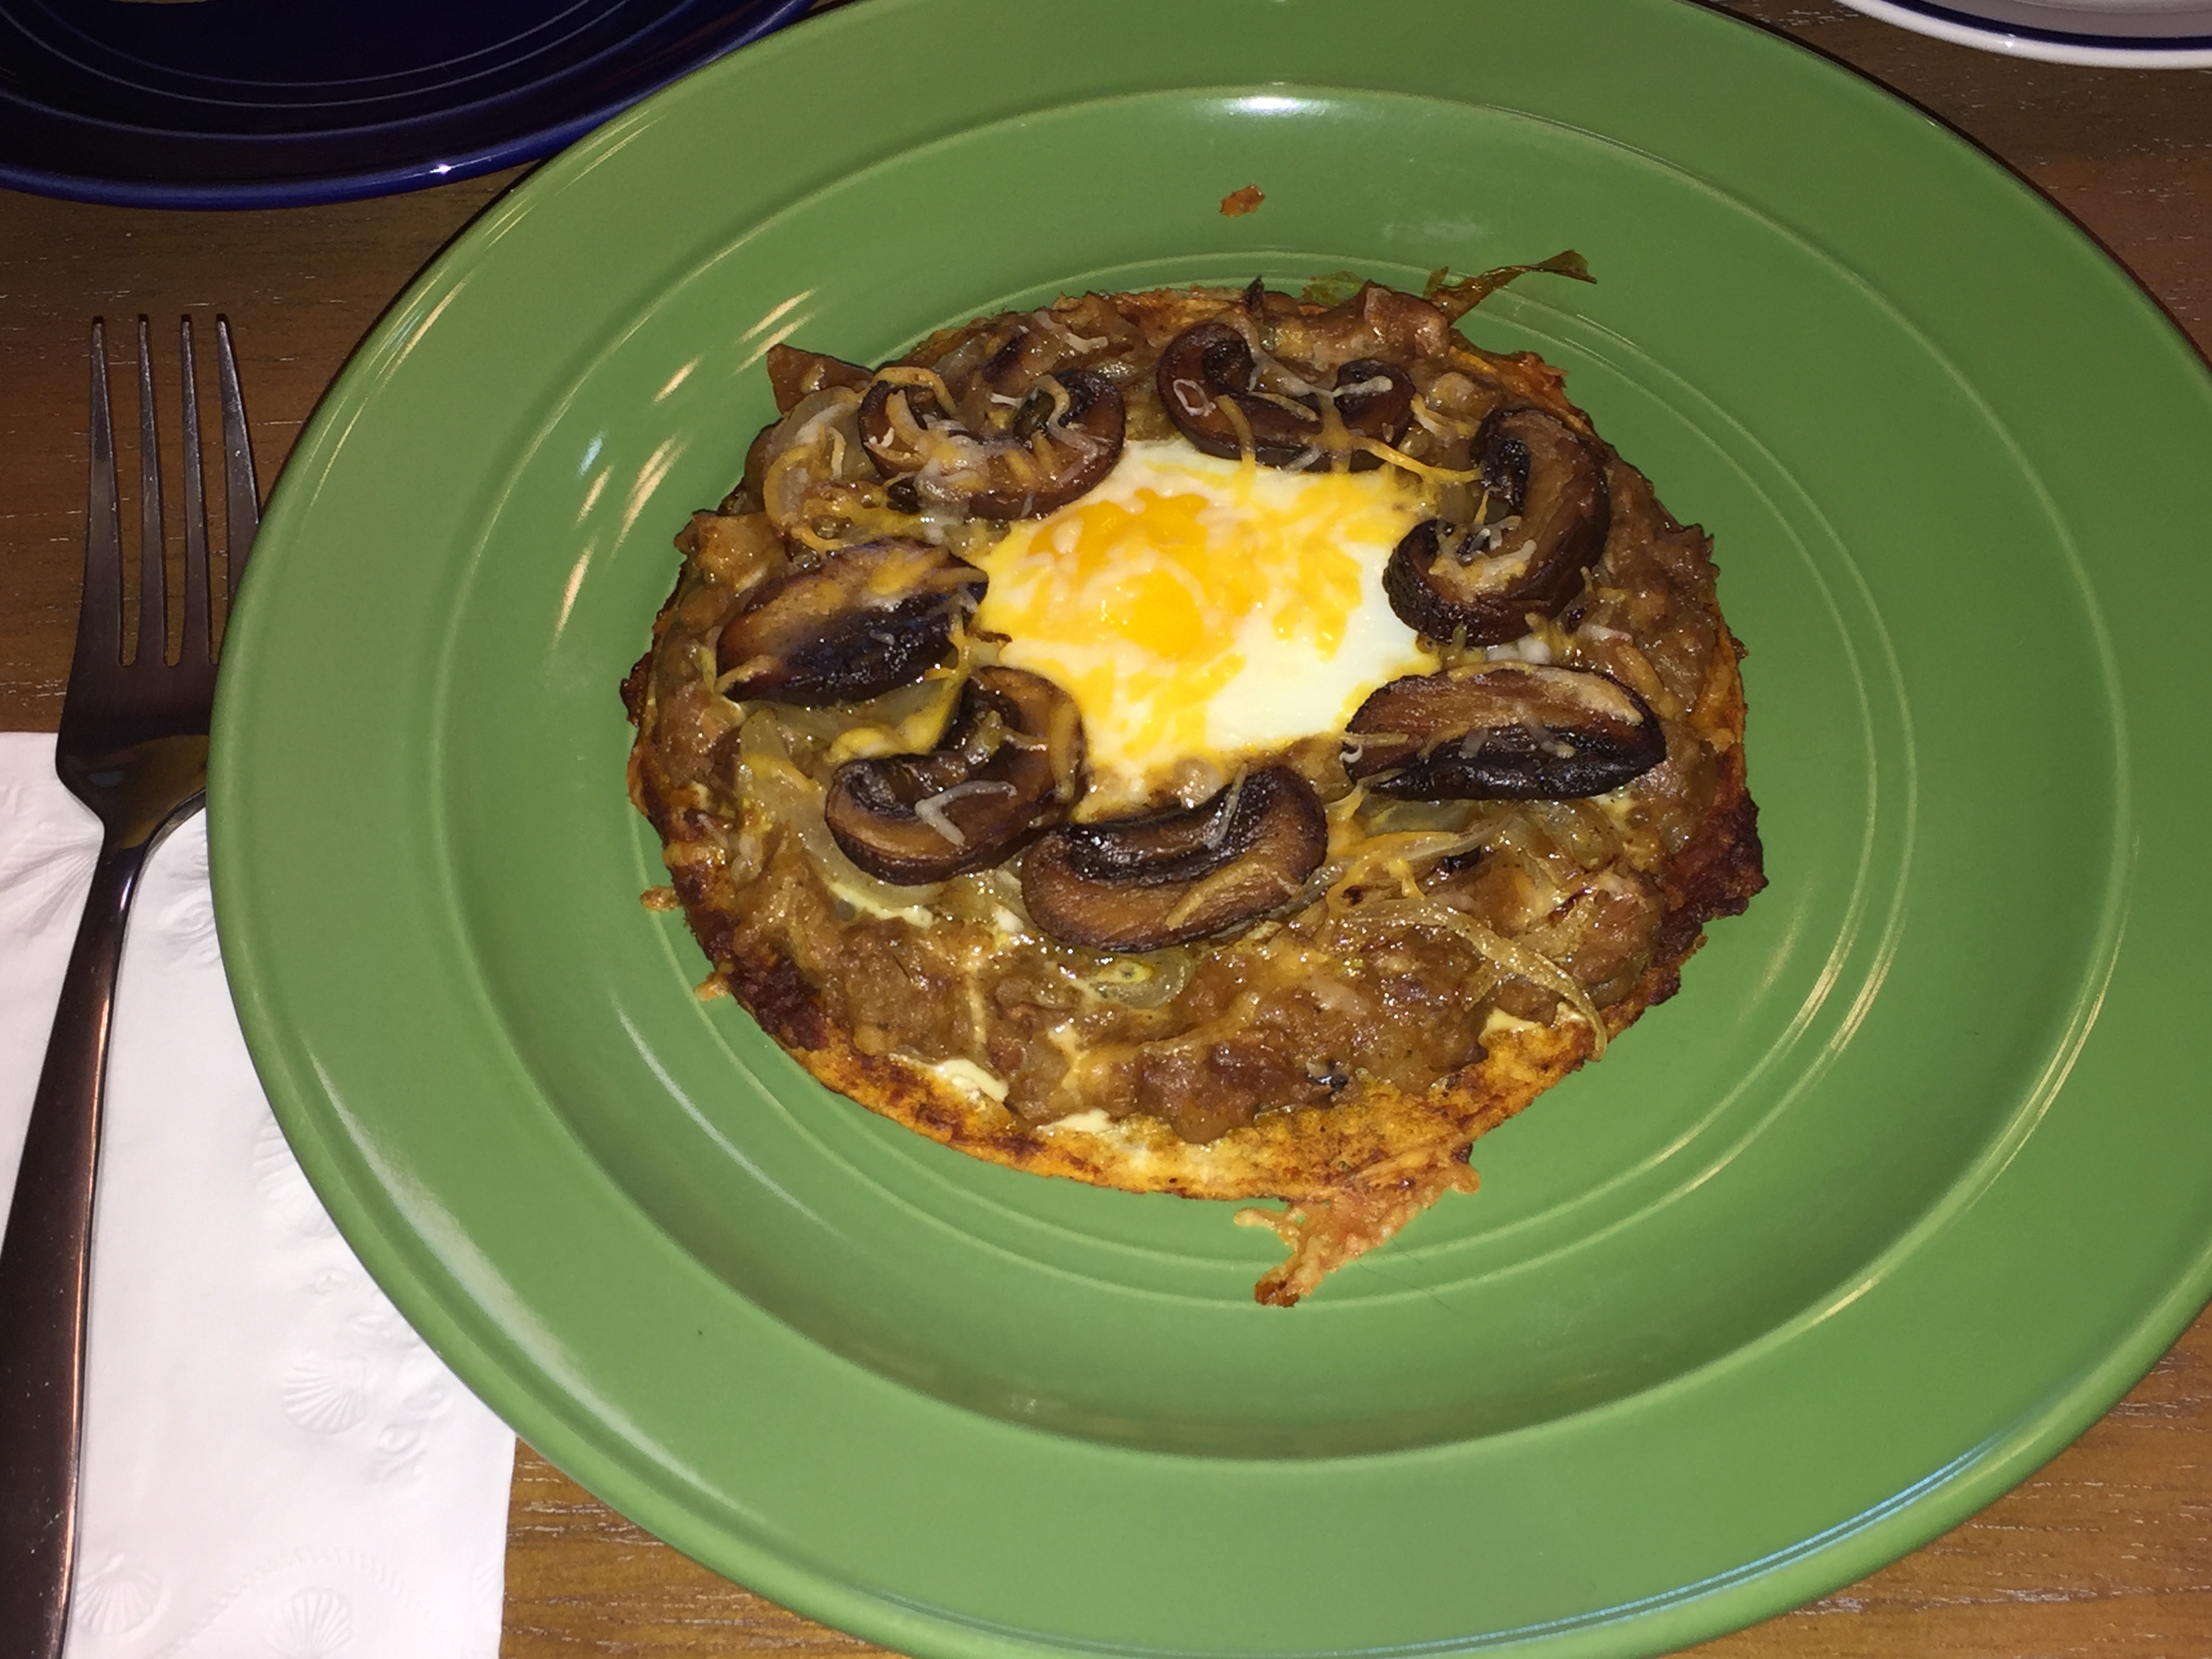
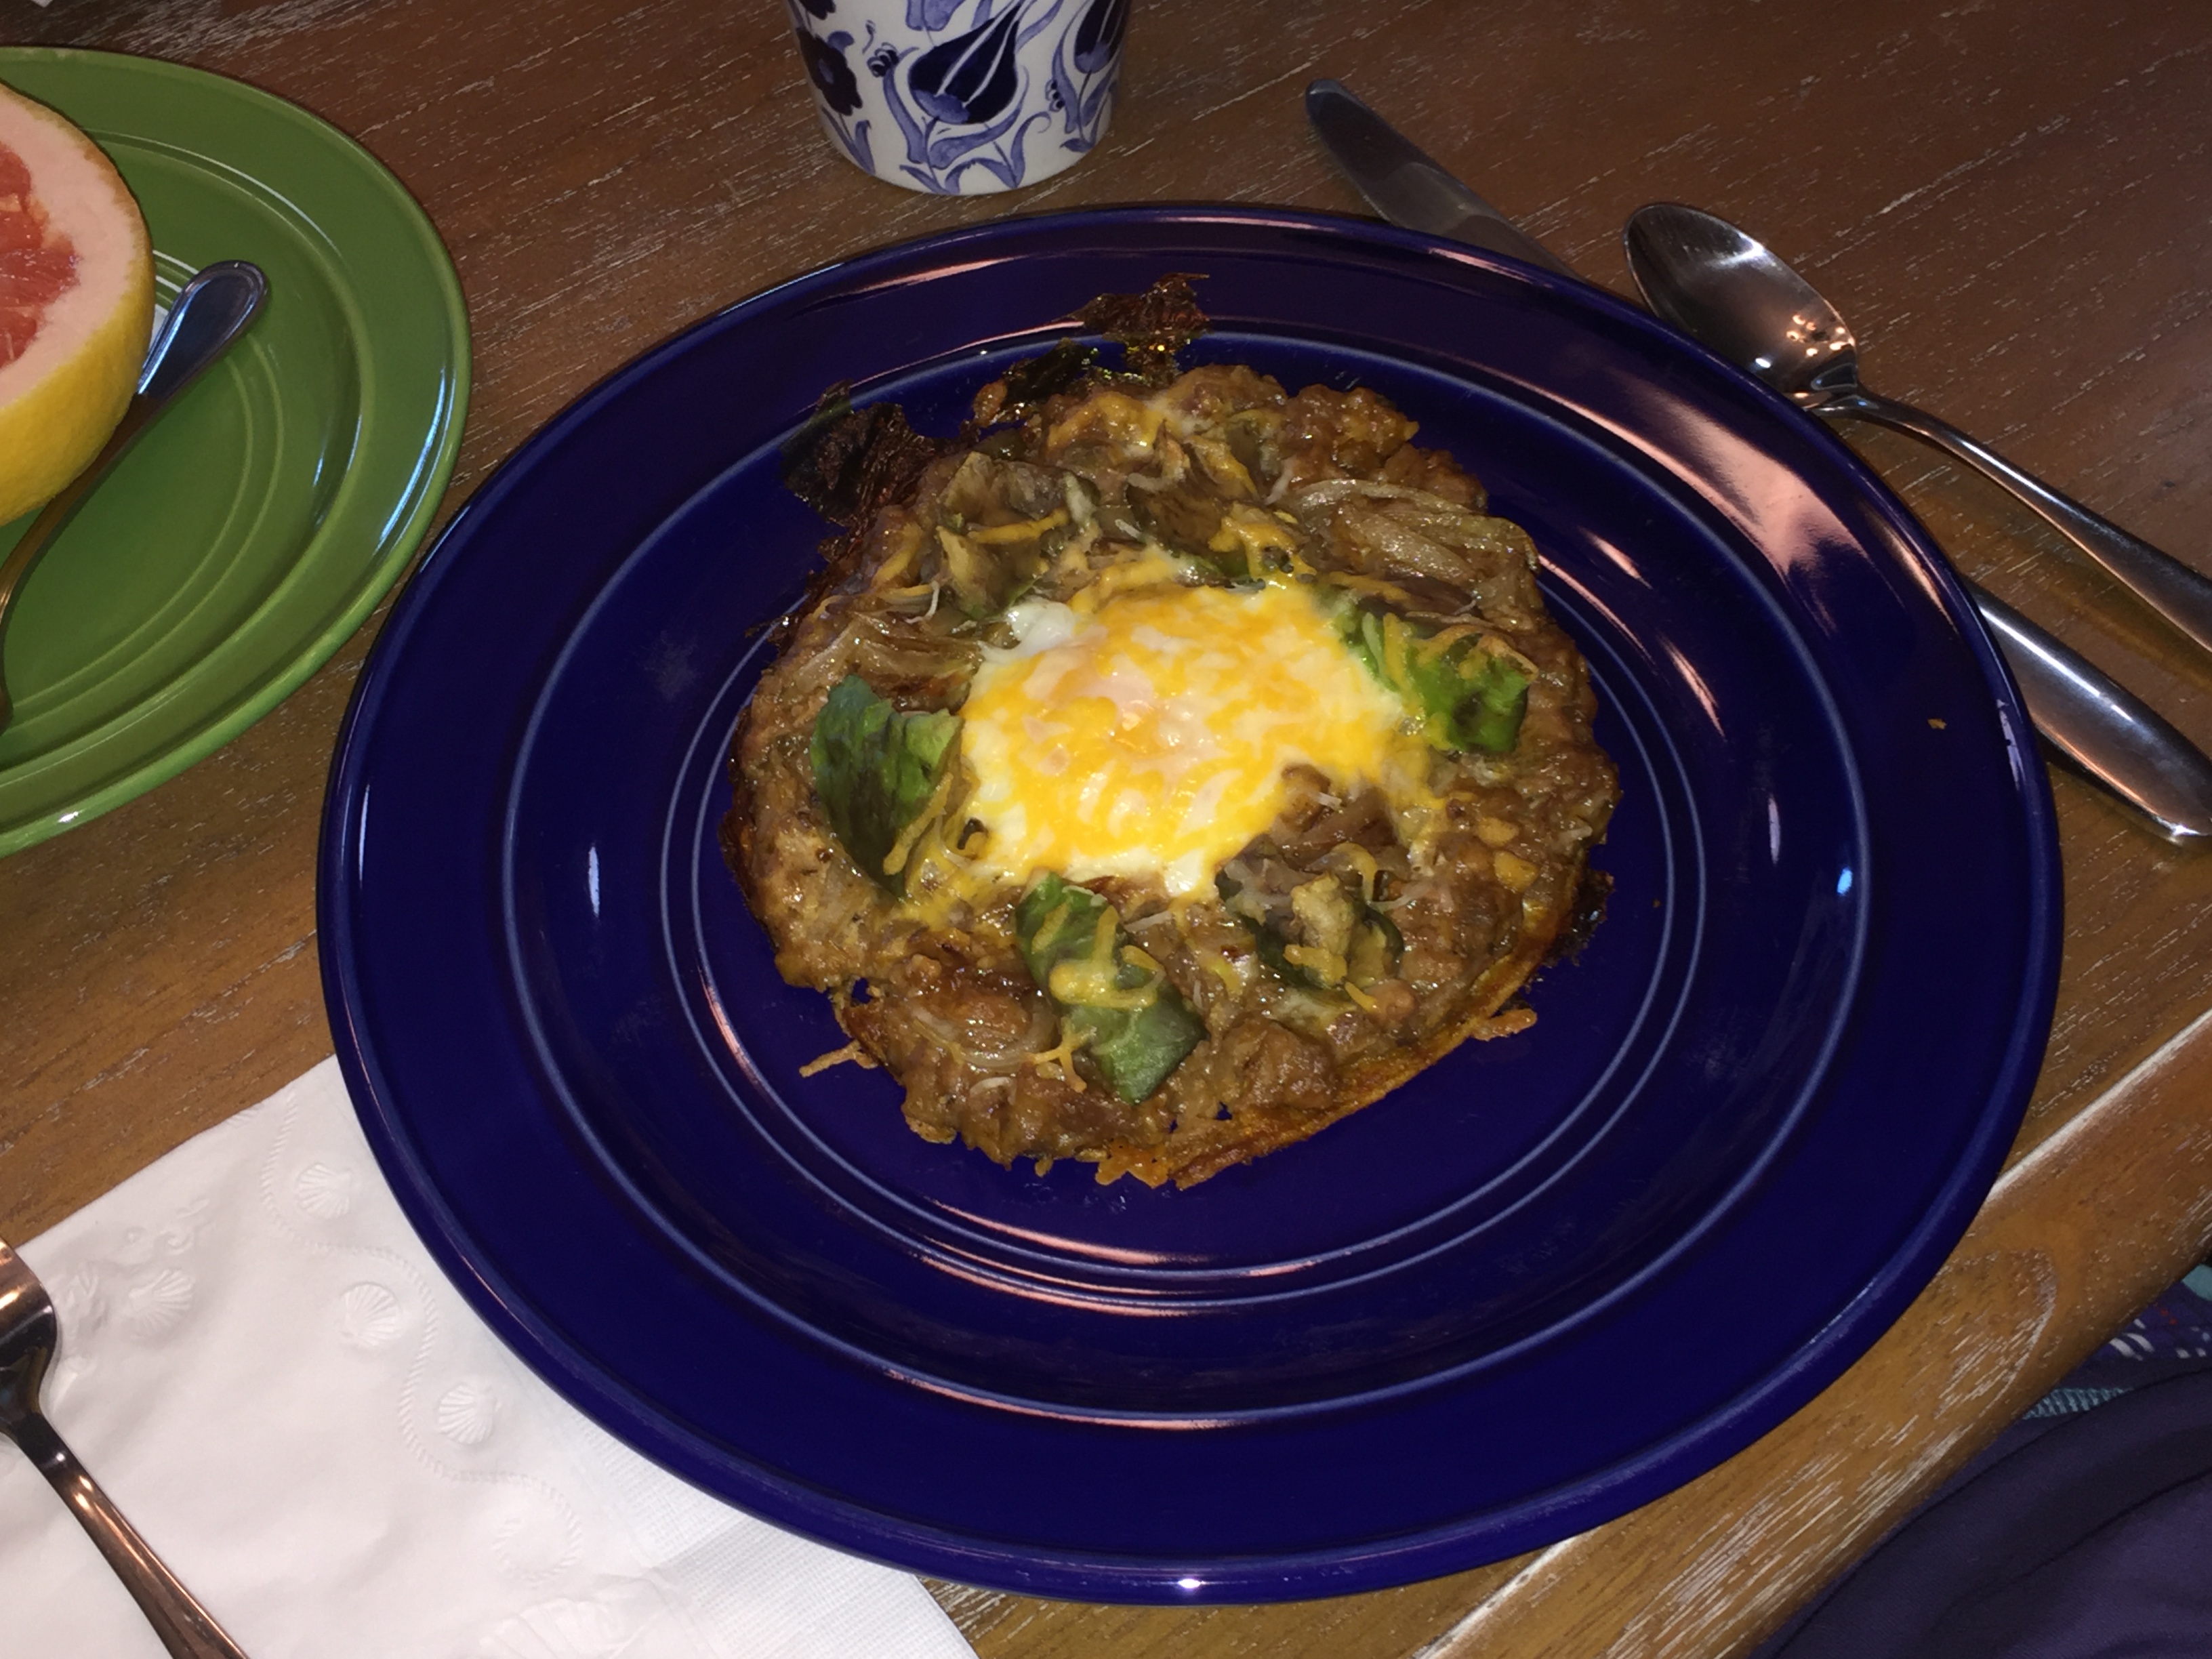
Grandpa’s Huevos Rancheros

Top with avocado (blue plate) or mushrooms (green plate)

  1. Slice mushrooms and cook in butter, then set aside
  2. Sautee slivered onions, the set aside
  3. Add 1 C enchilada sauce to the pan and bring to simmer
  4. Dip corn tortillas in sauce and put on a small square of aluminum foil placed on a baking tray
  5. Mix refried beans in with remaining sauce and heat
  6. Place on tortillas
  7. Add sliced onion
  8. Create a recess in the center and add a whole egg
  9. Top with avocado (blue plate) or mushrooms (green plate)
  10. Sprinkle with grated cheese
  11. Bake at 350º for 13 minutes
  12. Use foil to move to plates (remove foil or just keep it there) The tortillas will be soft and may fall apart

See also: CAZUELA DE HUEVOS RANCHEROS for a casserole recipe, if you are cooking for more than two people.


When I make Huevos Ranchers it is never the same. Of course, it is served on a corn tortilla, and then spread with refried beans, but sometimes has a fried egg on top, sometimes ham, sometimes green chilis… and then topped with cheese. The concept is a corn tortilla with tasty goodness. Here are several recipes if you want some guidance your first time through.

Juevos rancheros

QUICK AND SIMPLE
PHOTO SHOWN AT RIGHT

Corn tortilla heated and browned on both sides
Smear with refried beans
Sprinkle with diced peppers
Top with scrambled egg disc
Top with shredded beef and salsa mixed together
Top with poached egg
Sprinkle with cheese
Broil about five minutes


Grandma’s Huevos Rancheros

2 fried or poached eggs
½ tsp vegetable oil
1/8 small onion
1/8 sliced bell pepper
¼ clove garlic, chopped
¼ CU Salsa
1 TBL diced green chiles
2 corn tortillas
2 TBS shredded cheese

1. Heat vegetable oil in large skillet
2. Saute onion, bell pepper and garlic
3. Add salsa and chiles – bring to boil, remove from heat
4. Top corn tortilla with 1/3 CU sauce and one egg
5. Sprinkle with cheese


Huevos Rancheros Casserole with Ranchero Sauce

  • Place the canned and fresh tomatoes, the onion, jalapeño, garlic, water, chilies powder, salt, cumin, oregano, sugar and vinegar in a 2-quart saucepan. Simmer for 15 to 20 minutes.
  • Preheat the oven to 350 degrees.
  • While the sauce is simmering, prepare the tortillas and the eggs.
  • Heat the oil in a skillet.
  • Place a tortilla in the hot oil and fry just until softened.
  • As each tortilla is done, place it on a plate.
  • Repeat this procedure until all the tortillas are cooked.
  • Oil a long baking dish (about 9 x 13 inches).
  • Spoon half of the sauce over the bottom, then arrange the tortillas over the sauce.
  • Top the tortillas with more sauce.
  • Sprinkle with half of the grated cheddar cheese.
  • Crack the eggs onto the cheese layer at intervals so that there will be a few inches between each egg.
  • Spoon the remaining sauce over the length of the eggs and sprinkle with the remaining cheddar cheese.
  • Bake for about 13 minutes at 350º
  • Pierce one of the eggs with a sharp paring knife to check that the eggs are done as you like.
  • After 20 minutes of baking, the eggs are hard- cooked.
  • When the eggs are cooked to your liking, remove the pan from the oven and let cool for 10 minutes.
  • To serve, cut the casserole into squares. Sprinkle with freshly grated cotija or feta cheese.

Serves 6 to 8.

Note: Cotija cheese is sold in small rounds, and is available in the dairy case of many supermarkets. It is easily crumbled. You can substitute feta cheese.


Black Olive Huevos

Options
Add Black olives
Use a tomatillo rather than tomatoes
Add Artichokes
Top with cilantro
Include diced green chilies
Use tortilla chips or corn chips rather than corn tortilla
Use poached egg rather than Fried Egg

Special Steps Break your egg into separate bowls. This will assure that you have an unbroken yolk. If you break the yolk, save this for scrambled eggs the following morning.

Huevos Rancheros – SAUCE

The Ranchero Sauce
— 1 large can (28 ounces) diced tomatoes with juice
— 2 fresh tomatoes, diced
— 1 cup diced onion
— 1 jalapeno chile, seeded and minced
— 2 minced cloves garlic
— 1 cup water
— 2 tablespoons red chile powder
— 1/2 teaspoon salt
— 1/2 teaspoon ground cumin
— 1 teaspoon oregano
— 1 teaspoon sugar
— 1 tablespoon vinegar
Adapted from Jacqueline Higuera McMahan, who grew up on a Bay Area rancho, and is the author of “California Rancho Cooking,” “The Salsa Book” and “The Chipotle Chile Cook Book.”

America’s Test Kitchen

  • 1 Can diced tomatoes – strained – reserve liquid
  • 1 C strained reserved tomato juice
  • 2 tsp brown sugar
  • 1 tsp  lime
  • 1/2 Onion – diced
  • 4 tsp Chili powder
  • 1/2 C canned green chilies
  • 2 garlic cloves – sliced thin
  • 2 TBL EVOO
  • Salt and pepper to taste
  • 1/4 C pepper jack cheese
  • 4 eggs

STEP BY STEP

  1. Strain diced tomatoes, reserving liquid
  2. Add brown sugar and lime to strained tomato juice
  3. To tomatoes, add onion. green chilies, garlic, EVOO, chili powder and salt/pepper to taste
  4. Stir to combine
  5. Transfer to baking sheet lined with parchment paper or waxed paper
  6. Spread into an even layer
    Alternately you can use a comal or a large cast iron skillet
  7. Bake at 500º for about 40 minutes
  8. Turn oven down to 400º
  9. Put cooked mixture into a glass baking dish, and add the strained/reserved juice back into it, and stir to combine
  10. Sprinkle with pepper jack
  11. Nestle 1 egg at a time into an impression you will make in the sauce
  12. Season with salt and pepper
  13. Bake at 400º for 15 minutes
  14. Tent with aluminum for about 5 minutes
  15. Top with avocado, scallions and cilantro

GZ’s Huevos Rancheros

Geofry Zakarian cooked with his two daughters Anna and Madeline

  • 1 can of Refried beans or chili beans
  • Pico de gallo – Chop, dice and mix:  red chili pepper, roma tomato, lime juice, red onion – add a little bit of chopped cilantro
    Optionally, use a jar of store-bought salsa
  • Crisp corn tortilla taco or tostada
    Optionally, you can use a bag of corn chips
  • Two sunny side up eggs
  1. Heat beans in a skillet
  2. Cook two eggs sunny side up
  3. Put heated beans in the bottom of a bowl
  4. Put corn chips on top of beans
  5. Top with an egg
  6. Garnish with cilantro, avocado, tomato, lime, chili, onion, salt, pepper
  7. Top with fresh salt and pepper

Grandpa’s Old Fashioned Lemonade

This creates a lemonade CONCENTRATE that will store efficiently and is really easy to mix when you are ready.

INGREDIENTS

  • 16 lemons – or enough juice to fill an empty water bottle
  • TWO empty water bottles
  • 1 CU sugar
  • 8 mint leaves
  • water

STEP BY STEP

  1. Fill one water bottle with water and empty into sauce pan
  2. Add sugar to water in the sauce pan and heat until sugar dissolves
  3. Meanwhile, cut lemons in half, and squeeze juice from lemons into measuring cup.  Discard the seeds.
  4. Pour sugar water into the measuring cup with the lemon juice
  5. Make sure that mixture is only warm to the touch, NOT HOT.
  6. Pour lemon/sugar mixture equally into two empty water bottles
  7. Top bottles off with a bit more water and refrigerate
  8. Will keep in the refrigerator for up to two weeks.
    WHEN YOU ARE READY TO SERVE…
  9. Fill glass with ice cubes
  10. Add water only to half-way
  11. Top glass off with lemon concentrate from your bottles


Krab Salad

INGREDIENTS

  • 1/2 LB Krab or lobster
  • 1/2 C Miracle Whip
  • 1/2 pkg cream cheese
  • 1 C Baby spinach – stems removed
  • 2 TBL Dried cranberries
  • 2 TBL Blueberries
  • 2 TBL Walnuts
  • 4 leaves Romaine lettuce (alt – Radiccio)
  • 1/4 Sweet red onion – very thinly sliced
  • Juice and zest from one lemon ( for garnish )

STEP BY STEP

  1. Shred Krab into large pieces – set aside
  2. Mix Miracle Whip and cream cheese
  3. Chiffonade spinach leaves
  4. Roughly chop cranberries, blueberries and walnuts
  5. Mix all of the above together without over-mixing or breaking the Krab apart
  6. Place Romaine lettuce leaves in a bowl creating a lettuce border
  7. Put mixture onto the lettuce leaves
  8. Top with onion slices
  9. Top with lemon juice and zest
  10. Serve with nice rustic crackers


Grandpa’s Mashed Potatoes

These are not your traditional potato skins, but instead gives you a yummy use for the left-over skins.

INGREDIENTS

  • 4 “regular” russett potatoes – Use starchy, not waxy
  • 1 carrot – julienne strips
  • 1-2 C raw cauliflower – cut into one inch pieces
  • 1/2 onion – slivers
  • 3 TBL olive oil OR 6 TBL butter
  • 2 TBL “chives” or cut green onion tops
  • 1 tsp oregano
  • 1/4 CU half and half (at the very end) or low-fat buttermilk
    Use whole milk if you must, but not low fat regular milk

STEP BY STEPpotato

  1. Cut the skins off the potatoes into nice large flat hunks. This can be stored in a bowl of salted water and used later for potato skins.
    When ready, bake peels at 400º for 20 minutes.
  2. Rinse remaining potatoes and cut into one inch (or less) sized pieces.
  3. Cut 1/2 onion into slices into mixing bowl
  4. Using a potato peeler, peel the carrot into the mixing bowl.
  5. Toss potatoes, onion and carrot in the mixing bowl
  6. Put the pieces into a steamer basket with one inch of water in the bottom of the pan.
    Alternately you can use a pot of water, but this rinses a lot of the sugars and starches away.
  7. Cook or steam potatoes for about 20 minutes
  8. Drain water from pan and put veggies back into the empty pan.
  9. Add 6 TBL of butter
  10. Using a potato masher, crush the pieces into a mush. If you like “lumpy” potatoes, don’t pot-skinscrush them too much.
  11. Add splashes of milk product, stirring continually, ONLY to the point of giving them a creamy texture
  12. Add chives and oregano and mix with a fork.
  13. Optional:  At this point, you can add a bit of shredded cheddar cheese
  14. For really fancy potatoes, pipe them into mounds using a fluted piping tip, then broil them for about three minutes.  Otherwise, just plate and serve with a side of gravy.
  • Special Steps A “quick release” ice-cream scoop can give you those pretty restaurant mounds of potatoes.
  • Variations For less starch in the potatoes, and less stringent onions, run tap water gently through them after  Step 3.

Healthy Alternative

Use half russet potato and half cauliflower.  Add a bit of extra salt and butter.

HTML Snippets Powered By : XYZScripts.com