Grandpa’s Mashed Potatoes

These are not your traditional potato skins, but instead gives you a yummy use for the left-over skins.

INGREDIENTS

  • 4 “regular” russett potatoes – Use starchy, not waxy
  • 1 carrot – julienne strips
  • 1-2 C raw cauliflower – cut into one inch pieces
  • 1/2 onion – slivers
  • 3 TBL olive oil OR 6 TBL butter
  • 2 TBL “chives” or cut green onion tops
  • 1 tsp oregano
  • 1/4 CU half and half (at the very end) or low-fat buttermilk
    Use whole milk if you must, but not low fat regular milk

STEP BY STEPpotato

  1. Cut the skins off the potatoes into nice large flat hunks. This can be stored in a bowl of salted water and used later for potato skins.
    When ready, bake peels at 400º for 20 minutes.
  2. Rinse remaining potatoes and cut into one inch (or less) sized pieces.
  3. Cut 1/2 onion into slices into mixing bowl
  4. Using a potato peeler, peel the carrot into the mixing bowl.
  5. Toss potatoes, onion and carrot in the mixing bowl
  6. Put the pieces into a steamer basket with one inch of water in the bottom of the pan.
    Alternately you can use a pot of water, but this rinses a lot of the sugars and starches away.
  7. Cook or steam potatoes for about 20 minutes
  8. Drain water from pan and put veggies back into the empty pan.
  9. Add 6 TBL of butter
  10. Using a potato masher, crush the pieces into a mush. If you like “lumpy” potatoes, don’t pot-skinscrush them too much.
  11. Add splashes of milk product, stirring continually, ONLY to the point of giving them a creamy texture
  12. Add chives and oregano and mix with a fork.
  13. Optional:  At this point, you can add a bit of shredded cheddar cheese
  14. For really fancy potatoes, pipe them into mounds using a fluted piping tip, then broil them for about three minutes.  Otherwise, just plate and serve with a side of gravy.
  • Special Steps A “quick release” ice-cream scoop can give you those pretty restaurant mounds of potatoes.
  • Variations For less starch in the potatoes, and less stringent onions, run tap water gently through them after  Step 3.

Healthy Alternative

Use half russet potato and half cauliflower.  Add a bit of extra salt and butter.

Hot Dog Buns / Hamburger Buns

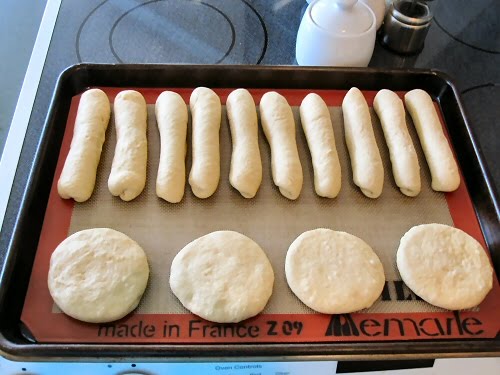
This was originally a recipe for bread sticks. If that is what you want, just roll them a little skinnier and shorten the cooking time by 2-3 minutes.  For hamburger buns, roll them into small baseballs and press them flat to about 1/2 inch thickness – they will rise and thicken.  I frequently roll them into a sheet about 3/4 inch thick, and use a 3 inch biscuit cutter to make the buns.  They end up being about 3.5 inches in diameter.

bunsINGREDIENTS

  • 1 package (or 1 TBL) active dry yeast
  • 2 TBL sugar (split in half for use at two different times)
  • 1/4 C warm water – very warm to the touch, but not hot
  • Three-quarter C milk
  • 1/4 C dried (instant) milk powder
  • 1 tsp Xanthan gum
  • 2 tsp salt
  • 1/4 C soft shortening or lard (bacon grease)
  • 3 C sifted all-purpose flour
  • 1 C spelt or whole wheat flour
  • 1 egg, beaten
  • (optional) 1/4 C sour dough starter

STEP BY STEP

  1. ACTIVATE YOUR YEAST
    Mix your yeast, water, and half your sugar in a small glass bowl
    Stir to mix
    Set aside
  2. SCALD YOUR MILK
    Put into microwave for a minute
    Set aside to let it cool
    Put your lard, salt and the rest of your sugar into the milk
  3. PREPARE HALF OF YOUR FLOUR
    In a large mixing bowl…
    Add your sourdough starter if you are using it
    Add the milk mixture and 1/2 cup flour.
    Add the yeast mixture, dried milk, xanthan gum and everything else
    Mix in bread maker at medium speed until smooth, scraping the bowl occasionally. 100 strokes if by hand.
  4. FINISH YOUR DOUGH
    Add more flour, a little at a time, until dough leaves the sides of the bowl, and surface of dough springs back when pressed.  Dough should not be sticky.
    You may not use all of your flour (or you may need more)
    Turn dough onto lightly floured board.
    Knead until smooth and elastic: 4-8 minutes.
    Place in lightly oiled bowl.
    Turn dough over to oil the top also.
    Cover and refrigerate overnight for a more complex flavor
    When ready to make the buns, cover and let rise in warm place for about 30 minutes.
  5. SHAPE YOUR BUNS
    Form your buns on a greased baking sheet, keeping in mind that they will increase in size by about 125%
    Let them rise for about an hour in the (not turned on) oven
  6. BAKE YOUR BUNS
    Pull the trays of buns out of the cold oven and turn oven to 350º
    Brush the tops of your buns with melted butter
    Sprinkle with sesame seeds or lightly with coarse sea salt if you wish
    Bake at 350º for about 10-12 minutes or until browned
    Let cool 10 minutes before removing from tray

Pastry Dough

You can use a pastry cutter, but it is easier to use your food processor.  Just make sure you do not overprocess your dough, or it will be tough.

INGREDIENTS

  • 4 CU flour
  • 1/4 CU granulated sugar
  • 1/4 CU dark brown sugar
  • Juice and zest from one lemon
  • 1 stick butter (cold) pieces
  • 1 tsp salt
  • 1 egg plus 1 yolk
  • Pulse above together, then add ice cold water
    Pulse only long enough to bring dough ball together

STEP BY STEP

  1. Cut all ingredients together or pulse in food processor
  2. Add water with food processor running only to incorporate – DO NOT OVERPROCESS
  3. Wrap dough in plastic, and refrigerate for 30-60 minutes
    Freezes well too.
  4. Roll dough flat, but not too thin, then transfer to pie pan or parchment paper.  Roll onto your rolling pin to transfer to keep it from breaking apart.
  5. Dock crust so that dough doesn’t puff up
  6. Sprinkle lightly with a bit more brown sugar
  7. Cover with foil, and bake at 375° for 20 minutes
  8. Remove foil and bake 5 more minutes

NOTES

  • Fill with savory or sweet filling.
  • If you are making a rustic free-form tart, put fruit in just after step four

Rigatoni Bolognaise ala Grandpa

INGREDIENTS

  • Rigatoni pasta
  • 1/3 LB Ground pork
  • 1/3 LB Ground sausage
  • 1/3 LB Ground beef
  • 2 strips of bacon
  • 2 TBL Olive oil
  • 6 cloves garlic – crushed
  • 1 small carrot – minced
  • 1 yellow bell pepper – chopped
  • 1 small celery – chopped
  • 1 medium onion – minced
  • 1 tsp paprika
  • 1 TBL Worcestershire sauce
  • 1 C Red wine
  • 1 tsp Parsley
  • 3 Bay leaves
  • 1 large can crushed tomatoes
  • 1 can tomato paste
  • Salt/pepper to taste
  • Parmesan cheese
  • Grated Gruyere and 1 poached egg per person

STEP BY STEP

  1. Brown meat, save drippings.
  2. Sweat in pan: EVOO, carrot, celery, onion, garlic, bell pepper
  3. Add red wine, bay leaf, crush tom, parsley (reduce parsley)
  4. Bring to a boil, then reduce to a low simmer and cook 2 hours
  5. Boil pasta
  6. Toss w/ sauce and grated Parmesan
  7. Top with grated Gruyere and a lightly poached egg


Sourdough – COLLECTION INDEX

Care and Feeding of your Sourdough (Printable Summary)

Questions? Always start out at GRANDPA'S SOURDOUGH COLLECTION INDEX

Thinking about venturing into the world of Sourdough?  Read Grandpa’s Sourdough BEGINNERS OVERVIEW as one of your first steps.

It’s started to get too confusing with so many recipes and notes on my web page, so this is the ONLY page that will link to the other pages.

More accurately called Sourdough, the entire process has taken on a nearly cult following. Click here to read what Wiki has to say about Sourdough.

Much of this page is based on (or was taken from) CarlsFriends.NET which offers Carl Griffith’s 1847 Oregon Trail Sourdough Starter. This page is not intended to take away from Carl’s Friends, but rather be a continuing legacy of Carl T Griffith. (Reciprocal information here.)

BACKGROUND INFORMATION

About Carl T. Griffith :: Carl is an actual descendent of those who came west on the Oregon Trail. He has inspired hundreds, if not thousands, of bakers to explore sourdough bread. He got me started!!!!

Carls Brochure :: This gives a bit of background information about this starter that has been alive since 1811. (Backup page) :: (Grandpa’s note: check recipes from above link)

About Carl and the 1847 Oregon Trail Starter :: A legacy that spans over 170 years

Musings from Carl :: The inspiration behind Carl’s Friends

BEGINNERS

Print out this page :: This is a VERY brief overview that will be handy to have on hand until you are familiar with the sourdough process.

Obtaining Dried Starter

Getting Starter from Carl T Griffith :: SASE required

Getting Starter from Grandpa :: SASE OR $1 required

Making Your own Starter from Scratch

Basic Sourdough Starter :: This is a very basic recipe to make your own sourdough starter

Susan’s Easy Sourdough Starter :: by Susan Payne

Honey Sourdough Starter :: A recipe from one of our church ladies

Rita’s Sourdough Starter :: From Rita Davenport

Son of Norway Sourdough Starter :: From Fedrelaudet Lodge 23 – Petersburg, Alaska

Maintaining your starter

How to Revive your Sourdough Starter :: Unless you are given a live sponge, you will need to bring it back to life. Click here to get a live sponge.

Regular Care and Feeding of your Starter :: Feed your starter at least every 7-10 days

OK… My Starter is alive – Now what? :: You must feed your starter weekly or it will die

OK… My Starter is alive – Now what? :: Here is a brief printable sheet that all beginner and intermediate sourdough bakers should have handy.

INTERMEDIATE BAKERS

Making your own dried starter :: Grandpa’s way and Carl’s way.  You ‘ve learned… now you want to share.

ADVANCED BAKERS

External Links :: There is soooooo much to learn about sourdough. Here are some links that will help you expand your knowledge.

NOTHING BUT RECIPES

Grandpa’s Sourdough Bread :: This is the recipe that I make most of the time.

Sour Dough Cinnamon Rolls :: By our of the Church Ladies at Phoenix First UCC.

Sourdough Braided Wheat Rolls :: Unknown source

Sourdough Parker House Rolls :: by Trysha Mapley – Mapley’s Morsels

Irish Soudough Soda Bread :: Traditional soda bread with the tang of sourdough.

Royal Caribbean Cruise – Sourdough Rolls :: provided through the courtesy of Royal Caribbean Cruise Lines

Four Sourdough Recipes :: Two Breads, Pizza Dough and Sweet Rolls

Basic Bread :: Basic recipe from a TV show


xxxxxxxxxxxxx :: zzzzzzzzzzzzz

Tortilla Española

AKA Spanish Tortilla

In Spain, the tortillas are not the thin things that we are used to in Phoenix, but rather thick potato quiches.
In Spain, tortillas are not the thin things that we use here in Phoenix, but rather thick potato quiches.

INGREDIENTS

  • 1/4 cup extra-virgin olive oil
  • 1-1/4 pounds waxy potatoes, peeled and thinly sliced
  • 1 medium onion, thinly sliced
  • 8 extra-large eggs
  • Kosher salt and freshly ground black pepper
  • Optional:  Cheese mix: See notes at bottom of this page.

STEP BY STEP

  1. Heat half of your oil in a large skillet till hot, but not smoking.
  2. Add the onion and stir occasionally.  Onion should sweat and soften, but not caramelize.
  3. Gently toss the potatoes in with the onion, seasoning with salt and pepper along the way.
  4. Reduce the heat to medium, and cover.
  5. Simmer – stirring occasionally and adjusting the heat if necessary so that the vegetables do not brown, until the potatoes are tender when pierced with the tip of a parking knife, 15 to 20 minutes.
  6. Meanwhile, beat the eggs with salt and pepper to taste in a large bowl.
  7. Heat the oil in a large cast-iron or nonstick skillet over medium-high until very hot but not smoking.
  8. Gently temper the potatoes and onion into the eggs
  9. Pour the entire thing into the skillet, spreading the potatoes evenly in the pan.
  10. Cook for about 1 minute, just to set the bottom of the egg mixture.
  11. Reduce the heat to medium-low and cook for 20 minutes, or until almost set through.
  12. Carefully flip the tortilla over (invert it onto a plate if you must, then slide it back into the pan, bottom side up) and cook for 5 minutes longer, until set.
  13. Flip out onto a clean plate and allow to rest for 5 minutes.
  14. Serve warm or at room temperature.

NOTE

  • After reducing the heat to medium-low in Step 11, start checking for doneness after about 15 minutes. It may not take the 20 minutes mentioned depending on the pan you use. You don’t want to overcook the eggs or they’ll toughen and become dry.
  • You could, of course, Americanize this just a bit with cheese.  Option 1 is to use a Monterey Jack and cheddar mix.  Option 2 is to grate a nutty Gruyere, Manchego or Parmigiano-Reggiano and toss into the egg and potato mixture. It isn’t traditional but it adds another layer of flavor.
  • Use organic eggs if possible. There is a difference, especially in dishes like this one where eggs are the focal point.
  • Tortilla Española is essentially the national dish of Spain. You can eat it as a tapa, for breakfast, in a bocadillo (sandwich), or for dinner with salad and a bit of jamon. Basically anytime, anywhere. We had a great one at Valdubon and I think it’s because they weren’t afraid to use a lot of olive oil. No fear!

Reprinted from Spain: A Culinary Road Trip by Mario Batali with Gwyneth Paltrow, published by Ecco, an Imprint of HarperCollins Publishers, 2008 with adaptations by Robert (Grandpa) Andrews


Yorkshire Pudding

In America, these are called simply POPOVERS.

INGREDIENTS – By Measure

  • 2 CU (120 g) of plain flour
  • 2 C (200 ± g) lowfat or whole milk – do not use skim
  • 4 egg yolks (200 ± g)
  • About 1/2 tsp salt, 1/2 tsp pepper
  • 3 TBL beef or chicken roast drippings
    (or 1 chopped piece of bacon in the bottom of the pan)
  • Optional:  1-2 TBL chopped thyme, tarragon or chives

STEP BY STEP

  1. Use a sieve to sift the flour and salt into a bowl.
  2. Create a “well” or a hole in the middle of the flour.
  3. Break the eggs and place them in the hole.
  4. Mix the eggs and flour thoroughly, but do not overmix
  5. Add the milk. Try to make a smooth mixture with everything
  6. Let mixture rest for 60 minutes in the fridge
  7. About 25 minutes before serving, place skillet in a COLD oven
  8. Preheat oven and large cast iron skillet to 450 degrees F or 220 C.
    If using chopped bacon, keep an eye on it so it does not burn, but does completely render
  9. If not using bacon, cover the bottom of a HOT cast iron skillet with 3-4 TBL roast drippings.  Add butter if necessary.
  10. Wait until the oven comes up to heat. CAUTION: Oil will be very hot.
  11. Add the batter to the pan, filling to 3/4 from top.
    It should sizzle as you pour it.
  12. Close door and turn heat down to 425.
  13. Bake for about 25 to 40 minutes minutes – until raised and browned
  14. Let the pudding rise and get golden brown in color, but not black
  15. Remove from oven and serve immediately.
  16. If the pudding sits for a while or if you wait, the pudding may get soggy, and fall in the middle

VARIATIONS

  • see also POPOVERS and “Dutch Baby”
  • Yorkshire pudding is a tradition staple food in British Sunday dinners. It’s mainly served as a side dish, usually served with beef roast or chicken.

Whole Wheat Spaghetti with Kale

INGREDIENTS

  • 1 lb Kale (chopped)
  • 4 strips of bacon (1/2” pieces)
  • 1/2 C fontina cheese
  • 3 cloves garlic (sliced into chips)
  • 2 C Chicken stock
  • Pasta

STEP BY STEP

  1. To prepare Kale, remove thick stem, roll up & slice into ½” ribbons, Float leaves in water basin to wash.
  2. Cut bacon into 1/2” pieces
  3. Cook bacon @ med hi till brown & crispy, put onto paper towel and set aside.
  4. Into rendered fat add, garlic chips, cook till transparent (done).
  5. Add kale, bit by bit, adding a bit of salt w/ each handful to draw out moisture.
  6. After kale has wilted, add chicken stock (1 can plus a splash of water), bring up to simmer & cook 10 minutes covered.
  7. Cook your pasta
  8. Reserve 1 cup pasta water for sauce thinning.
  9. Drain pasta, add fontina cheese or other cheese, add salt & pepper.
  10. Serve w/ sprinkles of bacon & cheese.
  11. Add cut tomatoes or cherry tomatoes for texture.


Whole Wheat Bread

INGREDIENTS

  • 2 C lukewarm water
  • 1 pkg (1 TBL) yeast (w/1 tsp sugar)
  • 1/2 C honey (or ½ cup sugar)
  • 3 TBL oil
  • 1 TBL salt
  • 2 cup wheat flour
  • 2 cup white flour (more for kneading)
  • 2 TBL raw rolled oats

STEP BY STEP

  1. Mix everything together and dump out onto a floured surface
  2. Knead thoroughly on floured surface until smooth, keeping dough as soft as possible.
  3. Keep kneading, and adding more flour until you get a ball that is moist, but not sticky
  4. Place in greased bowls, cover and let rise until double – about 90 minutes.
  5. Shape into loaves, place in greased tin. Let rise until almost double – about 60 minutes.
  6. Bake 400° for 10 min then lower to 325° for 25-30 min.

Makes 2 loaves

Bread Pudding – COLLECTION

Bread Pudding
A great cold-morning breakfast.

Optional Additions:

  • Brioche
  • browned sausage
  • cheddar or Monterey jack cheese
  • Make ahead, refrigerate overnight, bring to room temp before cooking

Grandpa’s Bread Pudding

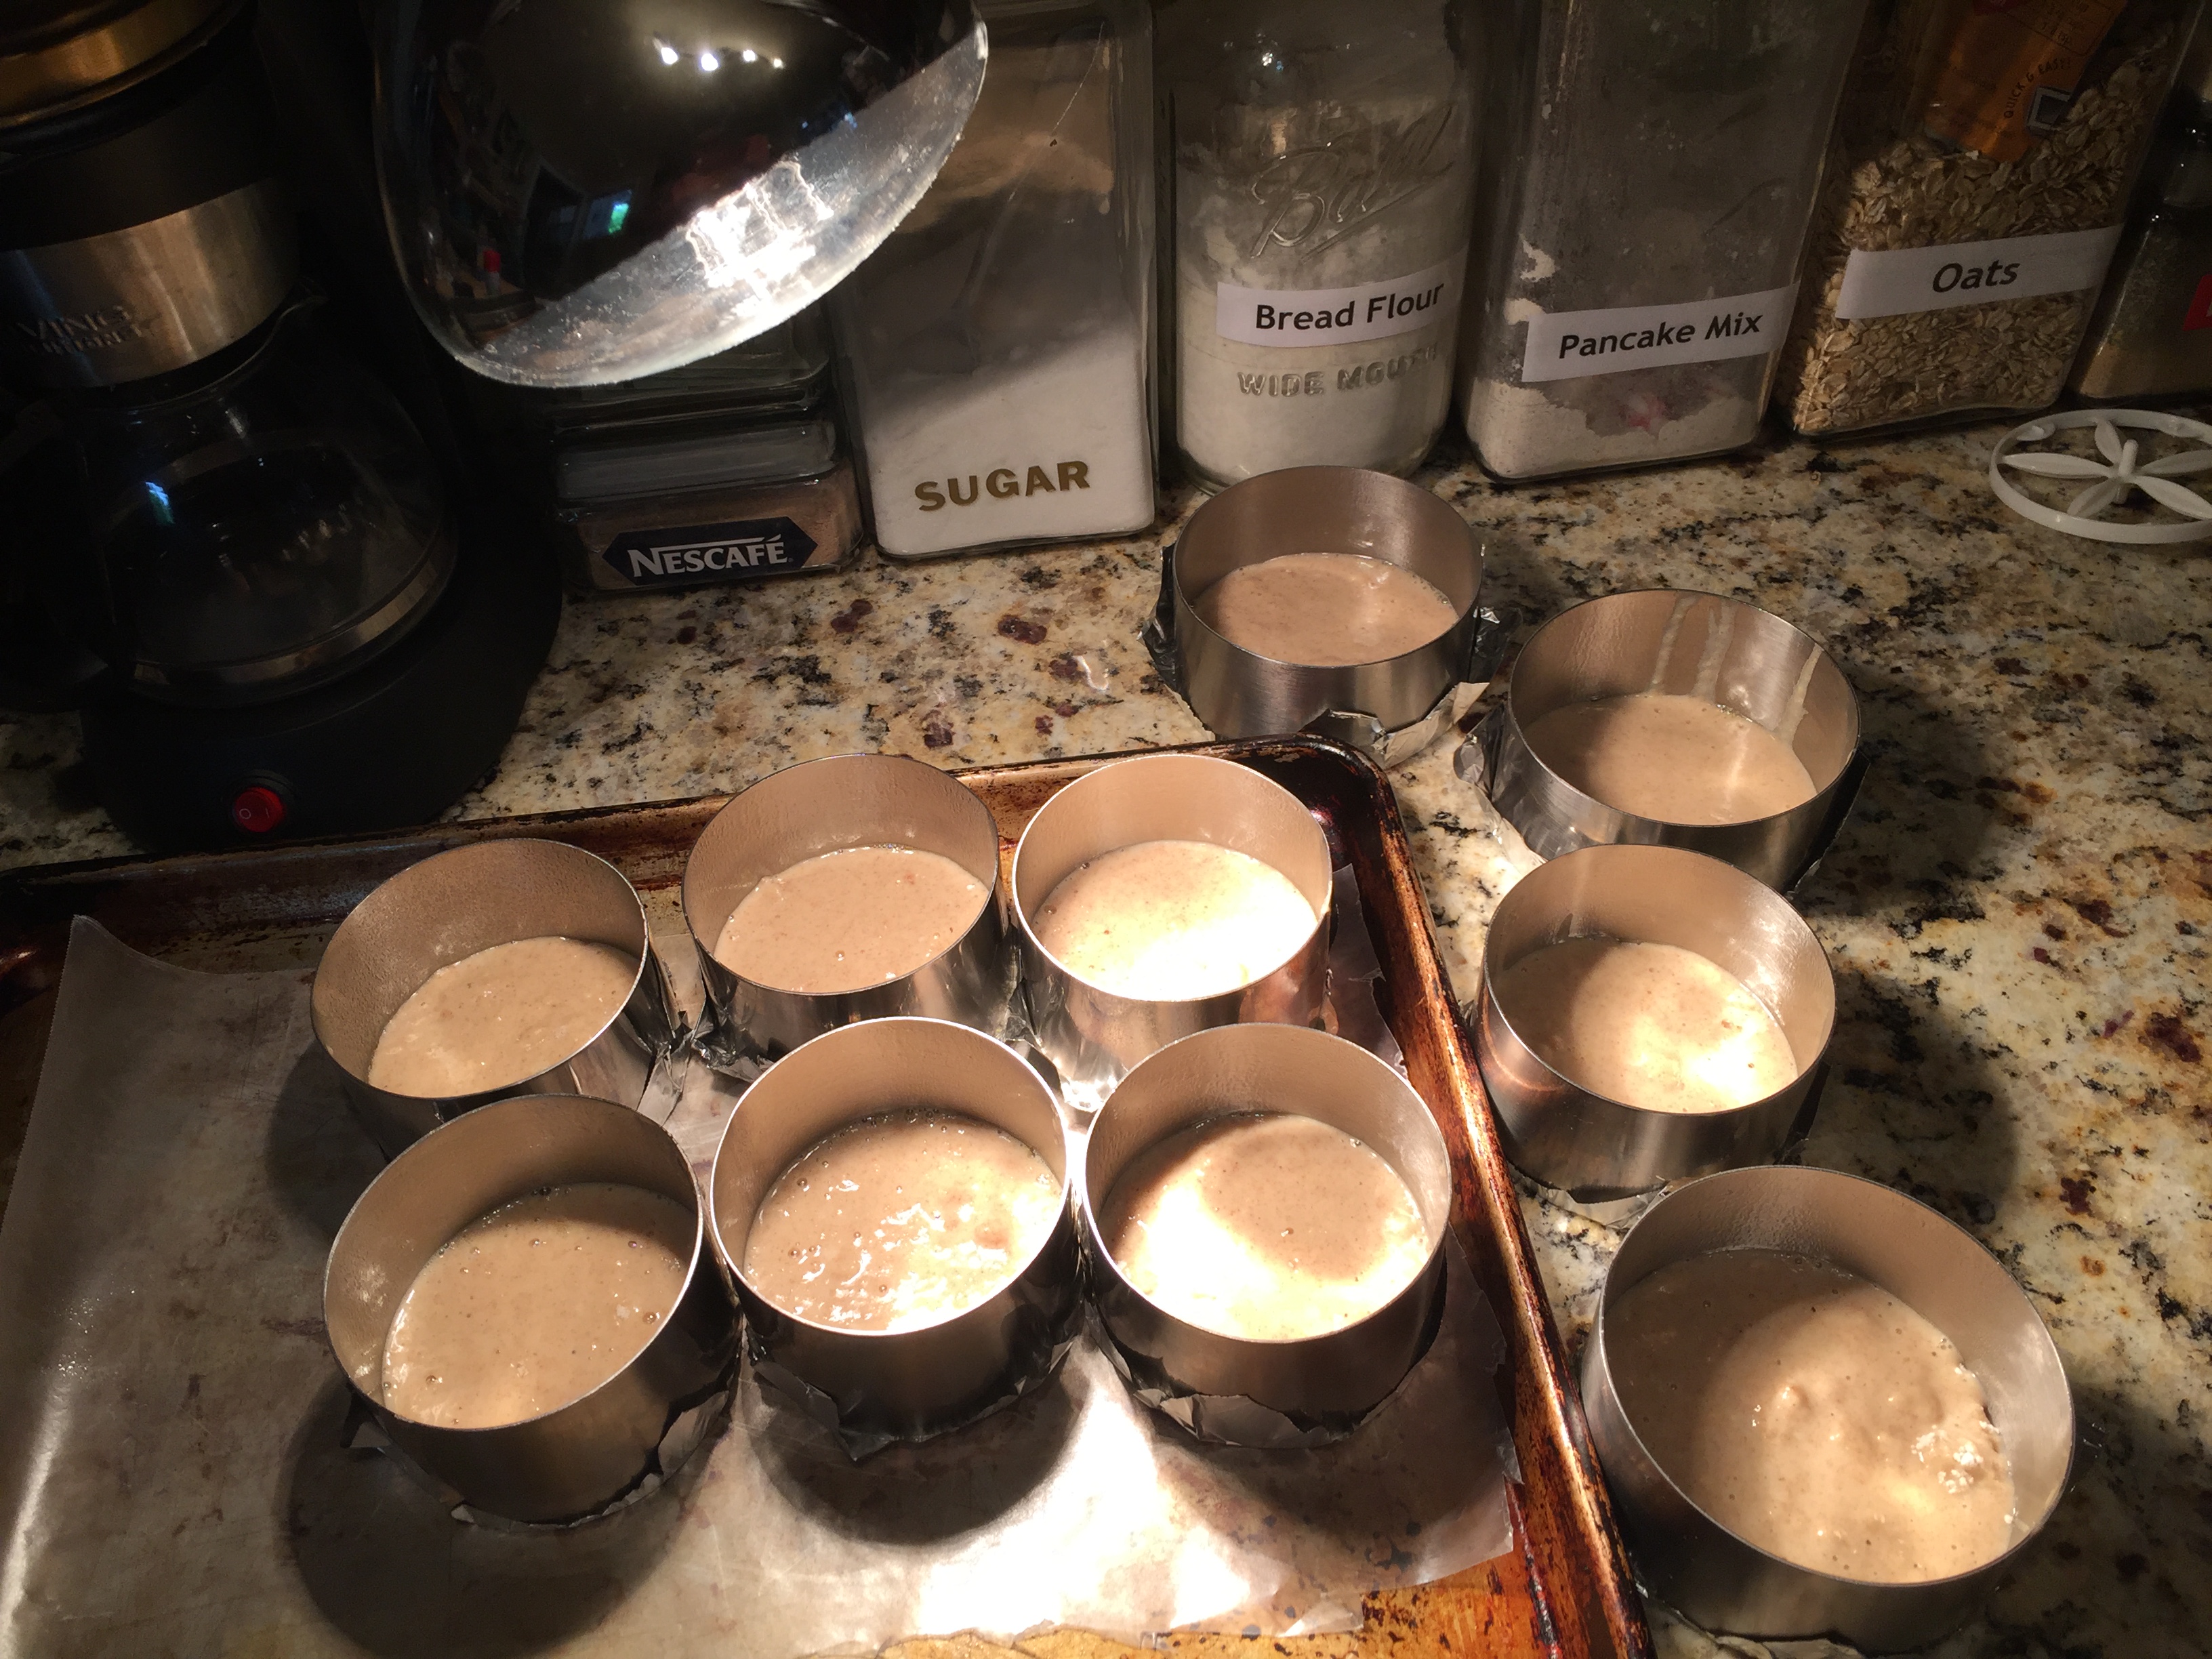
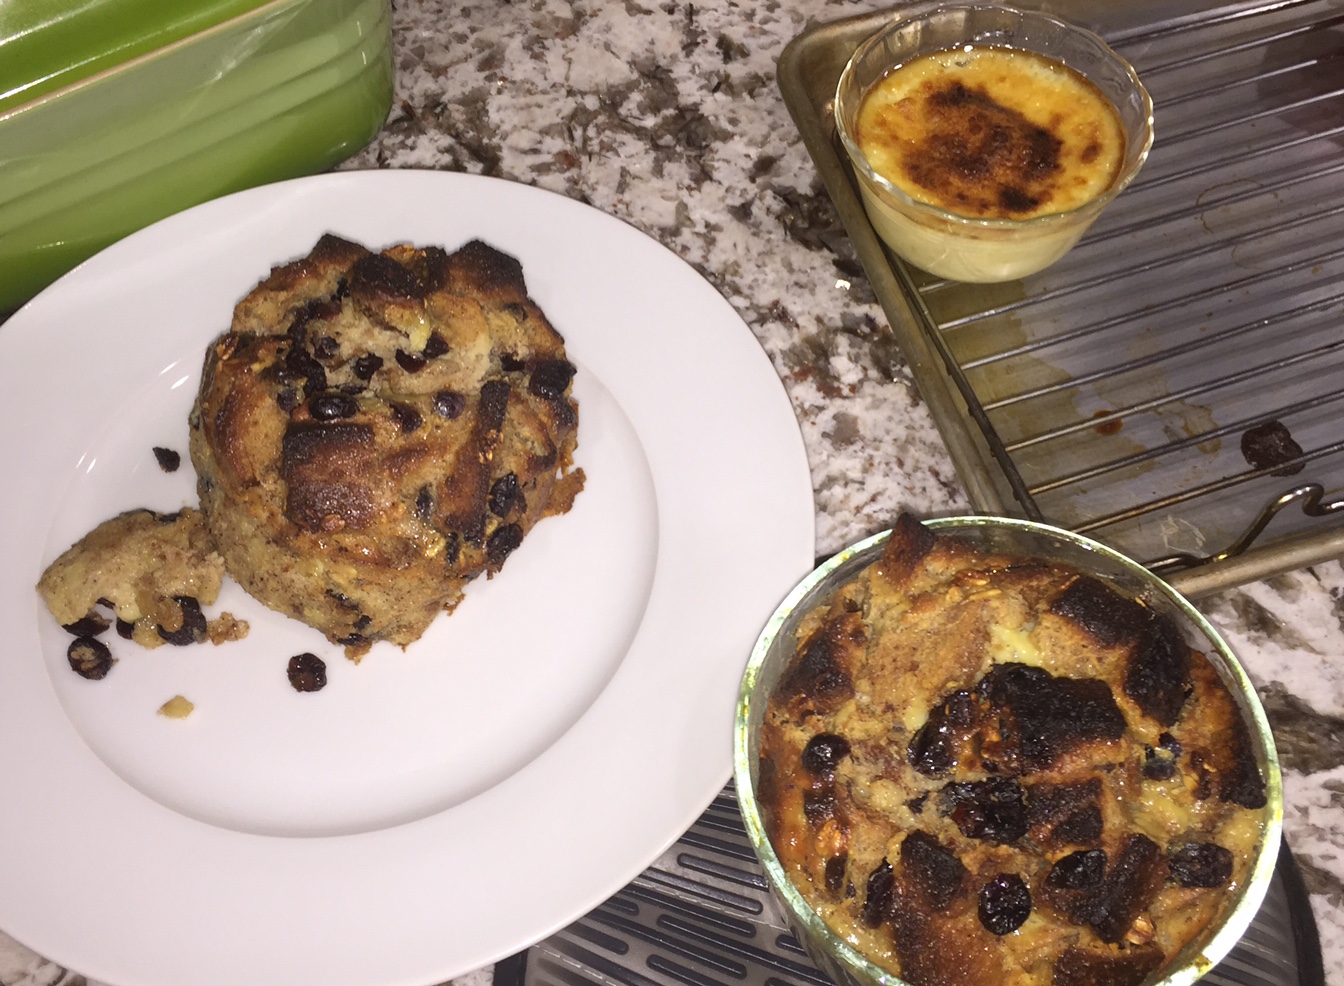
Start with Grandpa’s recipe for BASIC CUSTARD, but use brown sugar, not white.

Bread Mixture:  2-3 C challah or brioche, mixed with 1/2 cup raisins, 1 chopped banana, and 1/2 C cottage cheese.

Once you have the custard liquid made, pour it over top of your bread mixture and let rest for 2-8 hours.

OPTIONS:
1 TBL oat bran
1 TBL wheat germ
1-2 oz dark rum or cognac
After Crisco, additionally coat ramekins with fine corn meal

Variations FILLING OPTION: Try combining with sausage, cheese, bell pepper, onion, ham, etc.

BREAD: Don’t use stale bread crumbs, but instead use Fresh hard bread like a baguette torn into rustic small pieces.
Use a firm bread. French Bread, Sourdough, etc.  – DO NOT USE SPONGE BREAD – You can, however use Hawaiian Bread, Brioche or Hallah for a nicely textured bread.

Bake bread crumbs at 350° for about 10 minutes
Cover and soak golden raisins in bourbon over low heat
After 5 minutes at a simmer, drain bourbon into custard

{CAPTION}Immerse bread crumbs gently into custard
Soak cubed bread crumbs in custard mixture for 20-30 minutes
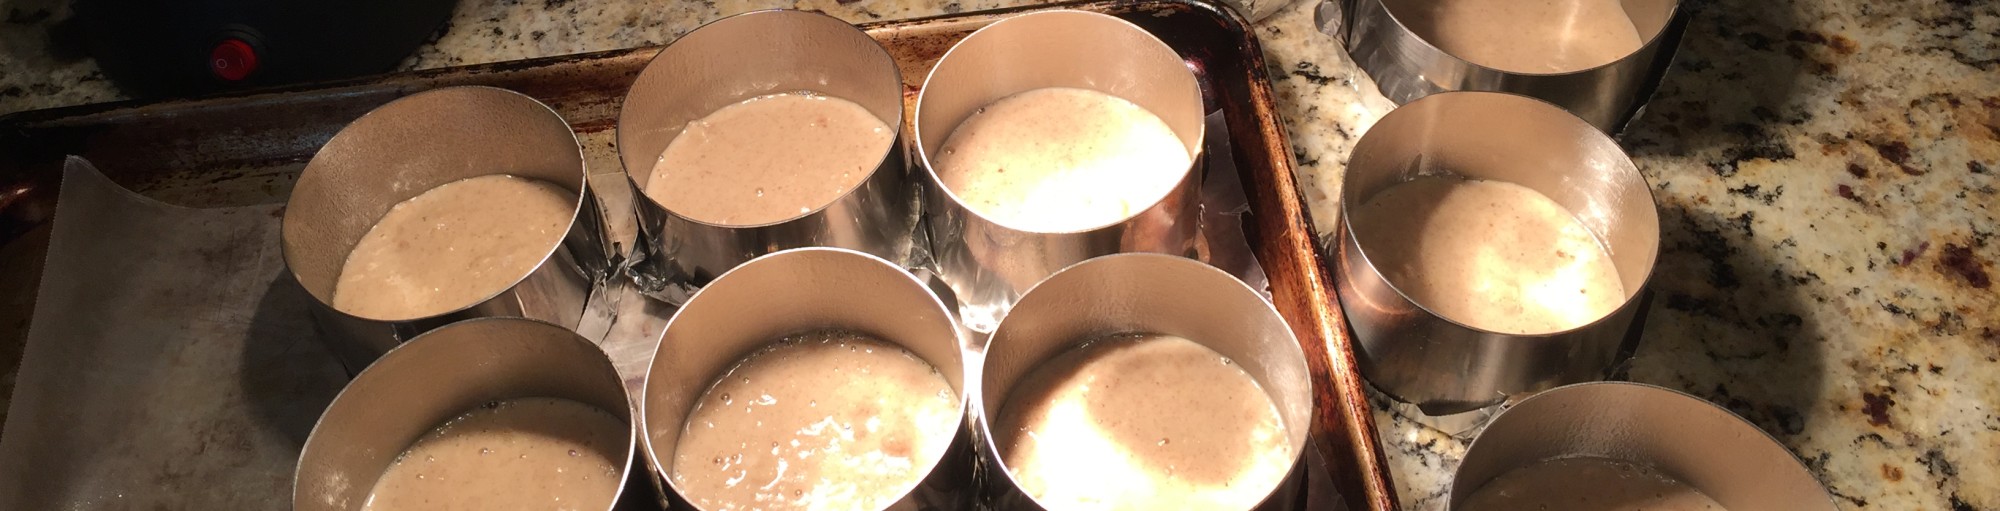
Using slotted spoon, put bread crumbs evenly into lightly greased individual ramekins or baking dish

TOPPING OPTION: Toss bread crumbs with Parmesan cheese and butter.
Top bread pudding with this topping, then cook 5 minutes more.

Fill up with bread, then add remaining liquid
Bake 45 minutes at 350
– For large baking dish, increase this time to 50 minutes
. Cover with foil for first half hour
Meanwhile prepare topping. After removing foil, sprinkle toping and then continue cooking.

Remove and let set on counter for about five minutes
Run spatula around the edges

Topping
Pieces of butter
Add sugar and cinnamon
Cut together with pastry cutter

Basic Custard

IRC Bread Pudding

Apple Bread Pudding

Bread Pudding – another idea

Savory Corn Bread Pudding


Drop Biscuits

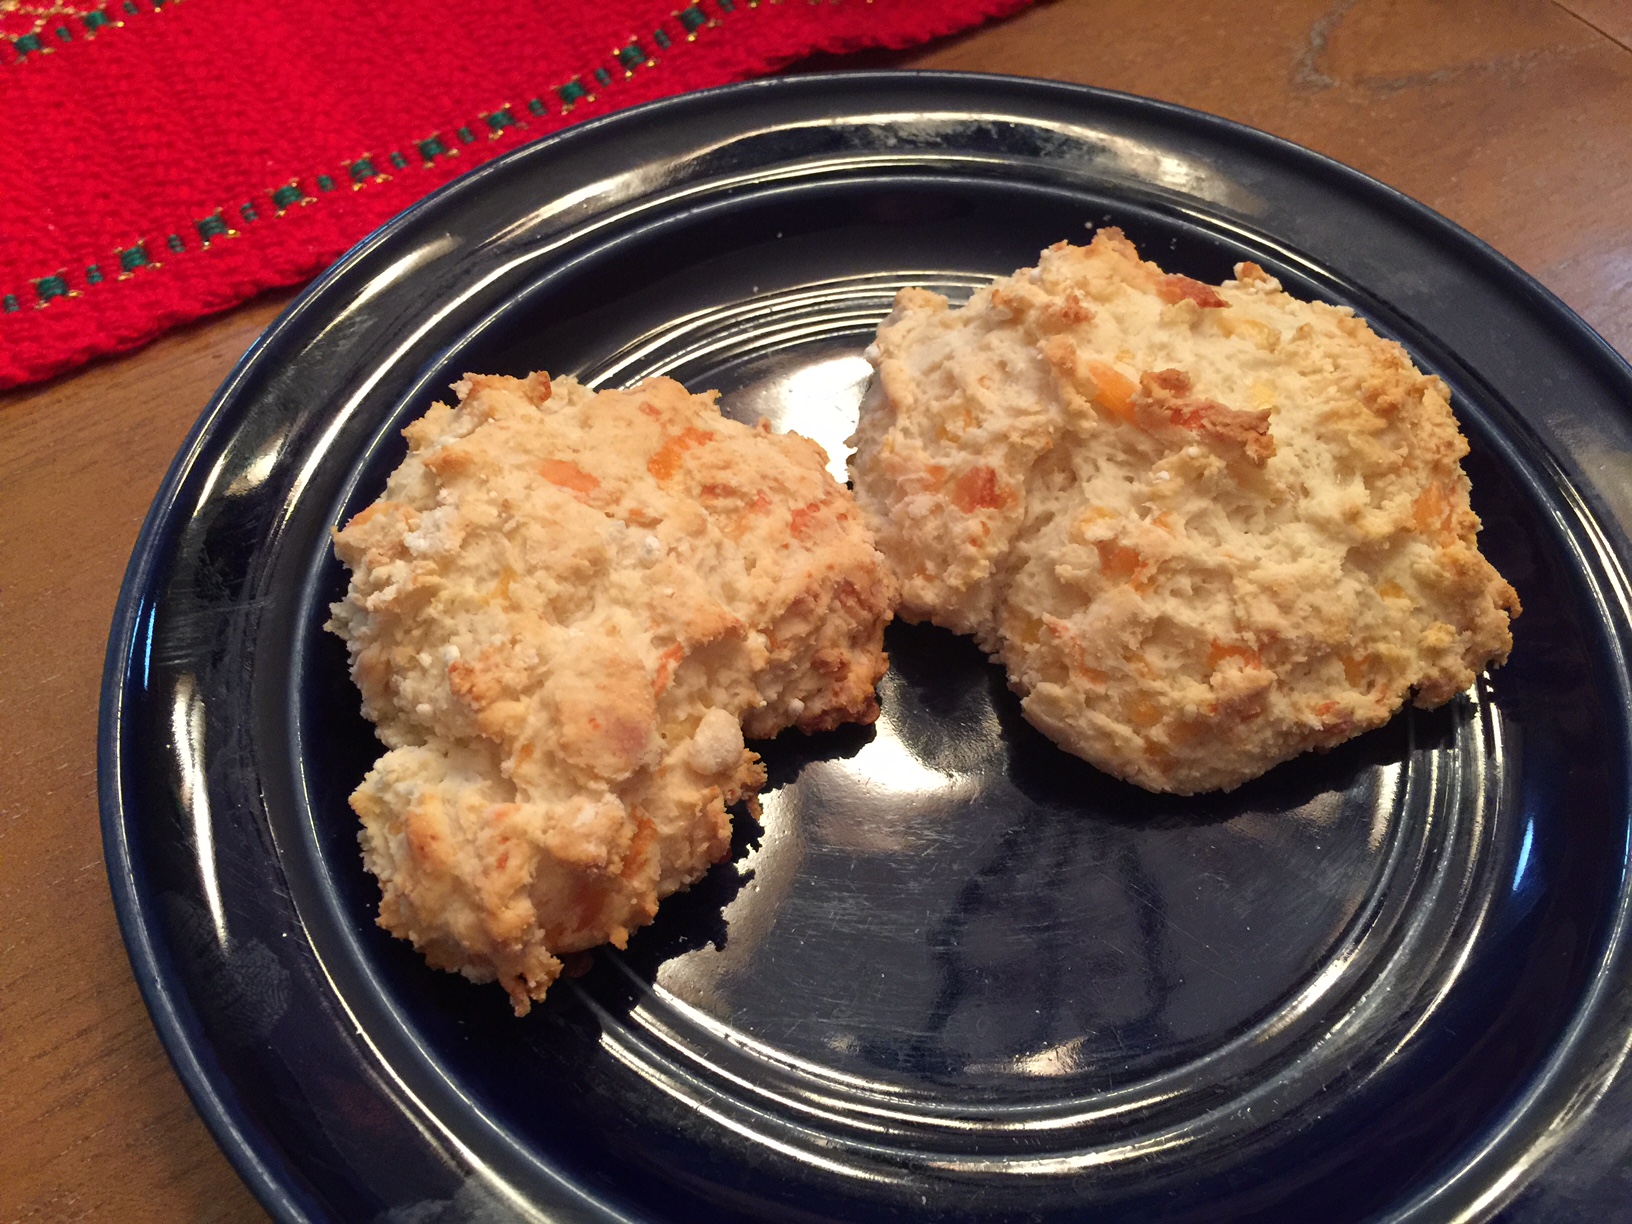
Drop biscuits are just about the easiest and best thing that you can serve with breakfast.

Here is the recipe from the Bisquick box, which is just about perfect. I do like, however, to sometimes add shredded cheddar cheese or chives.

Easy for Yesica to make for Eliseo.

Biscuits and Gravy Recipe

Basic Drop Biscuits

INGREDIENTS & STEP BY STEP

  1. 1 CU Bisquick
  2. 1/3 CU milk
  3. Mix and drop onto ungreased baking pan
  4. Bake at 400 for about 12-15 minutes

For Corn Dogs add 2 TBL corn meal to the above recipe. Roll dough flat, cut into wedges, wrap around hot dogs.  Bake as directed above.

Garlic Cheese Drop Biscuits

INGREDIENTS

  • 2 cups Original Bisquick® mix
  • 2/3 cup milk
  • 1/2 cup shredded Cheddar cheese (2 ounces)
  • 2 tablespoons butter or margarine
  • 1/8 teaspoon garlic powder

STEP BY STEP

  1. Heat oven to 450ºF.
  2. Stir Bisquick mix, milk and cheese until soft dough forms.
  3. Drop dough by 9 spoonfuls onto ungreased cookie sheet.
  4. Bake 12-15 minutes or until golden brown.
  5. Stir together butter and garlic powder; brush over warm biscuits.

Grandpa’s Biscuits

INGREDIENTS

  • 1 CU Bisquick
  • 2 stalks of chives – diced
  • 1/4 CU softened butter
  • (mix above lightly together)
  • 1/4 CU Sour Cream
  • 1/2 CU Buttermilk

STEP BY STEP

  1. Preheat oven to 450 degrees F
  2. Combine (fold) all gently until soft and sticky – DO NOT OVER MIX
    – If too sticky or wet, add more Bisquick
    – If too dry, add ONE tablespoon of milk
  3. Lightly flower your baking surface (preferably a baking stone)
  4. For drop biscuits
    – Pull off golf-ball sized chunks and let drop on baking surfaceBiscuit
    – You can moush into shape, but do not roll.  They should be rustic.
  5. For more traditional biscuits
    Pull off smaller than golf-ball sized chunks and roll lightly into balls
    – Flatten slightly, then place onto baking surface
  6. Brush top of bottom later lightly with butter
  7. Roll another and place it on top of the first layer
  8. Press them together
  9. Bake at 400º for 12-15 minutes or until golden brown

Drop Biscuits from Scratch

INGREDIENTS

  • 2 CU All Purpose Flour
  • 1 TBL Baking Powder
  • 1 TBL Sugar
  • 1 tsp Salt
  • 1 tsp cream of tartar
    (sift above five together)
  • 1/4 CU cold butter
  • 1/2 C cold shortening
    (cut above into dry ingredients)
  • 1/2 CU Sour Cream
  • 1/2 CU Buttermilk

STEP BY STEP

  1. Sift together dry ingredients
  2. In separate bowl, mix wet ingredients
  3. Cut in shortening and butter into dry ingredients
  4. Combine (fold) all together gently – DO NOT OVER MIX
  5. Drop small chunks onto baking stone
  6. Bake @ 350-400º degrees for about 12-15 minutes


Kale and Mustard Greens Pasta Noodles

INGREDIENTS

  • Large handful of Kale or minzuna.
  • Large handful of mustard greens, collard greens, or spinach
  • 2 C White AP Flour
  • 1/2 C flax or whole wheat flour
  • 3 yolks plus 1 whole egg
  • 1/2 tsp salt

STEP BY STEP

Noodles can be cut to any width
  1. Steam greens
  2. Chop the steamed greens small
  3. Squeeze all moisture from greens – Press between paper towels and newspaper
  4. Chop again to make sure they are very fine
  5. Sift together All-Purpose Flour, flax or whole wheat flour and salt
  6. Create a “well” in the flours
  7. Crack and beat the eggs into the well and start to mix
  8. Add water 1 tsp at a time (if necessary) to allow dough ball to come together
  9. Wrap in plastic and let contents meld for 30 minutes
  10. Using a rolling pin on a floured surface, roll, flip, roll, flip, etc
    Ideally, if you have a pasta roller, start on setting 5 and go down to setting 2.
  11. Once desired thickness is obtained use pasta cutter or pizza cutter and a ruler to cut strips
  12. Hang out to dry for 30 minutes before cooking
  13. Cook only until noodles are softened. Takes HALF the time as dried pasta.
  14. Toss with olive oil and cheese

This recipe was published in Grandpa’s Corner – IRC Volume 1, Issue 5

International Rescue Committee – Gila Farms Cooperative Project

Parker House Rolls

parker
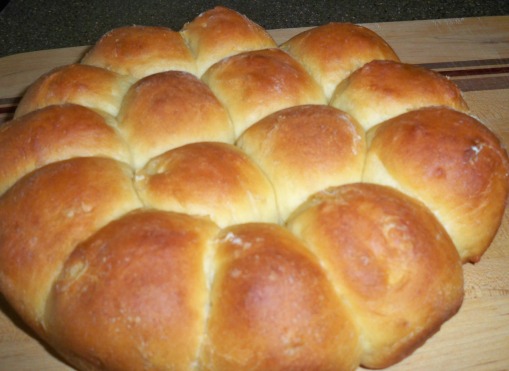
INGREDIENTS TO MAKE ABOUT 24 ROLLS

HALF RECIPES ARE SHOWN IN PARENTHESIS

    • STEP ONE – Mix and proof
  • 1/2 C warm water
  • 1 pkg yeast ( or 1 TBL )
  • 2 TBL honey
    (HALF: 1/4 C, 2 tsp, 1 TBL)

    • STEP TWO – Heat to scalding
  • 1/2 C milk
  • 5 TBL butter
  • 2 tsp salt
  • 3 TBL sugar
    (HALF:  1/4 C, 3 TBL, 1 tsp, 2 TBL)

    • STEP THREE – Mix in glass bowl
  • 3 eggs, beaten
  • 1/4 milk powder (ideally buttermilk powder)
  • 1/4 C shortening
  • OPT: 1/2 C sourdough starter
    (HALF:  2 eggs, 2 TBL powder, 2 TBL shortening,1/4 C starter)

    • STEP FOUR – Create dough-
  • 2 C AP flour (or half AP / half wheat flour)
  • More flour if needed to make the dough not too sticky
  • Reserve 2 C more AP flour
    (HALF:  1 C flour, and add more as necessary)

STEP BY STEP

    1. Mix Step One ingredients
      • Let rise for about ten minutes
    2. Meanwhile, put Step Two ingredients into sauce pan, and bring to a high simmer
      • Set pan aside to cool to just “warm”
    3. Mix Step Three ingredients in a glass bowl
    4. Add warm milk mixture
    5. Next mix the yeast mixture into the milk mixture
    6. Put into stand mixer, or use your bowl
    7. Mix, and add flour until it starts to form a dough ball
    8. Then knead on a floured surface
    9. Add more flour to your floured surface  if necessary until the dough ball becomes only a little bit sticky
    10. Transfer to a greased bowl and lightly oil the top of the ball
    11. Let rise to twice the bulk  – about 30 minutes
      • IDEALLY:  Move to the fridge and let rise at least 8 hours.  Even overnight is OK
    12. Flatten with your fingers on a floured surface.  Kind of flat, but still about 3/4 inch thick.
    13. Cut into disks
    14. Place on baking sheet or pie pan with sides not quite touching
    15. Brush the top with butter
    16. Cover and let rise again for 1/2 to 1 hour in warm place.
    17. Bake 12-15 minutes in 400 degree oven.
      . . . Another source says 350° for 30 minutes
      . . . Just watch closely and remove when browned
    18. Brush top with more melted butter
    19. OPT:  Sprinkle with a bit of coarse sea salt

Very Thin Tortillas – Mu Shu

Authentic Mu Shu Pancakes

I don’t like the thicker tortillas that you find in the grocery store.  Here is a fairly simple way to make thin ones.  These also work well for Mu Shu pancakes.

INGREDIENTS

  • 1 cup sifted flour
  • 1/2 cup  very hot water
  • Scant salt

STEP BY STEP

  1. Mix flour and salt, then add extremely hot water
    What I do is put flour and salt in a food processor, and then drizzle in hot water until it starts to come together.
    The hot water breaks down the gluten so that they roll easier and flatter
  2. After adding the boiled water, drizzle in cold water until dough comes together.
  3. Mix adjusting water until dough is like playdough
  4. Wrap in plastic and let set for 30 minutes
  5. Prepare a medium-hot skillet – Cast iron is my preference – NO OIL
  6. Roll a log, and then cut in half, then in half again, then in thirds – You will have 12 pieces
  7. Roll into balls, and then flatten into thick disks – hockey pucks
  8. Brush sesame oil onto the top of HALF of them
  9. Stack two disks (oil in between) and roll out until about 7 or 8 inches in diameter
  10. Put a pair into a non-greased skillet on 350-400º for 30 seconds
  11. When the edges start to become translucent (about 30 seconds) flip the pancakes as a pair
  12. Cook the second side for about 30 more seconds
  13. Flip the two together and cook the first side again for only 10-20 seconds more
  14. Remove the pancakes to cool just a little bit, then separate
  15. See tips below on keeping them from drying out

To keep Mu Shu Pancakes from Drying Out

  1. Place finished pancakes in shallow covered bowl – like a glass pie pan
  2. Put microwave-heated wet cloth at the bottom of the bowl
  3. Put a plate on top of the cloth so the pancakes do not become soggy
  4. Cooked side always goes up.
  5. Put a pan lid on top of the bowl to keep the moisture in.


Mu Shu Pancakes – Video

Here is a video that shows how to roll the pancakes together. It is kind of hard to visualize above.  They fold the pancakes into quarters.  Although that is very common, I don’t like that because they tend to stick together that way.

Mu Shu Crepe Pancakes

INGREDIENTS

  • 3 TBL melted butter
  • 1 C whole milk
  • 1/2 C flour
  • 1/2 tsp salt
  • 2 eggs

STEP BY STEP

  1. Pulse together flour, salt, eggs and butter
  2. Add milk, and pulse just to mix
  3. Strain using a fairly coarse strainer
  4. Let batter rest for 30 minutes to let the glutens relax
  5. Cook in buttered crepe pan until cooked, but not browned
  6. Stack on plate to store and serve

Finish on a floured surface. If you have a scale, 120 – 130 mg ball of dough is perfect for pancakes. Roll balls, then cover and set them aside for 30 minutes

Po’ Boy Sandwich Roll

This creates a nice soft bollito that is great for making a po’ boy.

INGREDIENTS

  • 1 TBL dry yeast
  • 1 TBL Nonfat Dry Milk
  • 1/2 TBL Sugar
  • 1 tsp Salt
  • 2 C AP flour (I plan to try swapping 1 Cup of cake flour next time)
  • 1 C Hot Water (120-130 F)
  • 1/2 TBL Butter
  • 1/2 TBL cold water

STEP BY STEP

  1. Mix together 1 Cups flour, yeast, dry milk, sugar and salt
  2. Pour in the hot water and butter, mix well
  3. Add remaining flour 1/2 cup at a time. Switch to hook near the end of flour
  4. Add additional flour 1 TBL at a time to get to an elastic ball that is not TOO sticky, but better sticky than too dry.
  5. Knead on medium speed 2 for 10 minutes
  6. Turn dough out onto floured surface and knead with your hands, folding over and over until it is NOT sticky, and dough springs back when you push a finger into it.
  7. Shape into a ball, oil lightly, and place in large glass bowl at least 3x the size of the ball.
  8. Let rise until doubled in size – about 1 hour
  9. Turn out onto a lightly floured surface. Knead briefly to allow large bubbles to escape.
  10. Place pan of water in the oven
  11. Start oven preheating to 350º
  12. Divide into 2 pieces, shape into two torpedoes, and cover loosely with saran and let rise for another 60 minutes on top of the stove
    The dough should double easily in 45 min
  13. Brush dough with cold water, slash across the top and bake for 40 Minutes
  14. Rotate half way through for even color – do not over-bake
  15. Cool on a rack


Grandma’s Spinach Pasta

Grandma LOVES spinach pasta. This recipe was designed to make quick, but good, spinach pasta using a Kitchen Aid, and will make a total of about eight servings. We’ve also substituted Collard Greens and Kale with excellent results. Since I created this recipe though, I found a great source of spinach pasta at Amazon.com. CLICK HERE to see what I buy these days. Even Grandpa takes a quality shortcut now and then.

pasta

INGREDIENTS

  • 4 C AP Flour
  • 1 block froezen spinach (drained, chopped and squeezed)
  • 3 eggs
  • 1 tsp salt
  • 1/2 C Flax
  • 1/2 C Whole Wheat Flour
  • 1/2 C water
  • 1/4 C EVOO

STEP BY STEP

  1. Mix until like Playdough
    Add a spoonful of water or a spoonful of flour to adjust if necessary
  2. Cut into four pieces
  3. Roll into skinny long rope – about 12 inches long
  4. Roll to about 1/4 inch with rolling pin
  5. Put into pasta roller at 1 for one pass
  6. Fond and repeat on 1 about four more times
  7. Return into pasta roller at 3 for three more passes
    NOTE: The continued rolls will improve the consistency of the resulting pasta
  8. Put through pasta cutter, controlling the strands as they come out
  9. Hang over board or broom handle for 20-30 minutes in four separate groups
  10. Take each group and divide again into 4-8 groups and wind VERY LOOSELY into nests
  11. Set aside to dry for 24 hours before bagging and storing
    Make sure they dry out before storing or they will mold
  12. Will keep about two weeks.  Four in the refrigerator.

Lasagna Rolls

INGREDIENTS

  • 12 whole-wheat lasagna noodles
  • 1 TBL extra-virgin olive oil
  • 3 cloves garlic, minced
  • 1 TBL tomato paste
  • 1/2 LB ground hamburger and 1/2 LB ground pork
  • 3 C chopped spinach
  • 1/2 C shredded Parmesan cheese
  • 2 tsp finely chopped Kalamata olives
  • 1/2 tsp cayenne pepper powder
  • 1/2 tsp salt
  • 3 C Grandpa’s Marinara Sauce
  • 1/2 cup shredded mozzarella cheese

STEP BY STEP

  1. Bring a large pot of salted water to a boil.
  2. Cook lasagna noodles according to package directions.
  3. Drain and return to the pot
  4. Cover with cold water until ready to use.
  5. Brown meat in skillet and set aside.
  6. Heat oil in a large nonstick skillet over medium heat.
  7. Add garlic and cook, stirring, until fragrant, about 20 seconds.
  8. Add tomato paste and cook 60 seconds
  9. Add meat and spinach and cook, stirring often, until the spinach wilts and the mixture is heated through, 3 to 4 minutes.
  10. Transfer to a bowl
  11. Stir in Parmesan, olives, cayenne pepper, salt and 2/3 cup marinara sauce.
  12. Spread 1 cup of the remaining marinara sauce in the bottom of the pan.
  13. To make lasagna rolls, place a noodle on a work surface and spread 1/4 cup of the spinach filling along it.
  14. Roll up and place the roll, seam-side down, in the pan.
  15. Repeat with the remaining noodles and filling.
    The spinach rolls will be tightly packed in the pan.
  16. Spoon the remaining marinara sauce over the rolls.
  17. Place the pan over high heat, cover and bring to a simmer.
  18. Reduce heat to medium; let simmer for 3 minutes.
  19. Sprinkle the rolls with mozzarella and cook, covered, until the cheese is melted and the rolls are heated through, 1 to 2 minutes.
  20. Serve hot.

Here is a video by PDX Traveler that game me the idea for this recipe.

Fettuccine Alfredo

If you want to make it just a bit healthier, check out our HEALTHY ALFREDO SAUCE.

INGREDIENTS

  • 10 ounces fettuccini pasta – boiled 8-10 minutes
  • 1/2 cup butter
  • 5 cloves garlic, chopped
  • 1 cup heavy cream
  • 1 egg yolk
  • 2 cups freshly grated Parmesan cheese
  • 2 tablespoons dried parsley

STEP BY STEP

  1. Bring a large pot of lightly salted water to a boil.
  2. Add fettuccine pasta and cook for 8 to 10 minutes or until al dente
  3. Drain.
  4. In a large skillet melt the butter and add the chopped garlic.
  5. Cook on low for about 5 minutes, stirring often, making sure not to burn the garlic.
  6. Pour about a 1/4 cup of the heavy cream into a small bowl.
  7. Add the egg yolk and beat together; put aside.
  8. Pour the remaining cream into the frying pan.
  9. Increase the heat to medium-high.
  10. As the cream starts to boil, mix rapidly using a whisk.
  11. Slowly add the cream/egg mixture.
  12. You do not want the egg to curdle.
  13. Continue whisking until well blended.
  14. Add 1 cup of the Parmesan cheese and continue to mix the cream.
  15. Pour in the remaining Parmesan and the parsley, mix until smooth.
  16. Immediately remove from stove.
  17. Serve over cooked pasta.

Chili Tomato Sauce

Chili Tomato Sauce is good on sandwiches and pizza. On pasta, it can be a bit overwhelming, but if you are looking for that rush of endorphins; OK, yes… even pasta.

INGREDIENTS

  • 1 large red bell pepper
  • 1-3 fresh habañero peppers, depending on how hot you like it.
  • 1 small onion
  • 4 garlic cloves
  • 1 cup water
  • 1/3 cup of red wine vinegar
  • 1 tablespoon paprika
  • 1 teaspoon cumin
  • 1 teaspoon salt
  • 6 oz. tomato sauce

STEP BY STEP

  1. Roughly chop the bell and habanero peppers, onion and garlic.  Remove seeds.
  2. Combine all of the ingredients except the tomato sauce in a pan, bring to a boil, and simmer, covered, for 8 minutes.
  3. Puree the mixture in a blender. DO NOT put lid on blender, or it will literally explode.  Use a paper towel over the top
  4. Add the tomato sauce to complete.
  5. If you don’t want any heat, just eliminate the habaneros, and you will have a good flavorful chili sauce.
  6. Or if you prefer it just a little spicy, use jalapeños instead.  Seeds removed.

Lots about Sushi: with VIDEO

Sushi Toolbox

  • Dark soy sauce
  • Rice wine vinegar
  • Short grain rice
  • Nori – small sealed packages
  • Rice Spatula
  • Rolling Mats
  • Wasabi paste or powder
  • Pickled Ginger (Gari) – white (homemade) or pink

Sushi Rice

      • 2 C short grain rice (meshi)
        • AKA Sushi Rice, Glutinous Rice or Pearl Rice
          Very starchy and sticky OR if you can’t find any, add 1 TBL cornstarch to your rice
        • Rinse three times
      • 2 C water
        MIX BELOW – Use this after the rice has finished cooking
      • 3 T rice vinegar or Sushi seasoning vinegar (heated in microwave)
      • 1 TBL mirin
      • 2 TBL sugar
      • 2 tsp salt

STEP BY STEP

      1. Measure your amount of rice while it is dry
      2. Wash rice in a bowl of cold water
      3. Strain
      4. Repeat Steps 2 and 3 until water runs clear (total three times is usually OK)
      5. Mix pre-measured amounts of rice and water and let set for 30 minutes
      6. Cook rice according to directions
        OR Put rice into boiling water, simmer 15 minutes
      7. Remove from heat, cover and let rest 10 minutes
      8. Meanwhile, mix vinegar, mirin, sugar and salt
      9. Poke holes/wells into your rice with a spoon
      10. Pour over a wooden paddle onto rice … drizzle
      11. GENTLY fold cooked rice into vinegar mixture
        Stir around, don’t beat (fan with paper plate to help it cool more quickly)
      12. Keep your hands wetted
      13. Cover with plastic and let cool about 30 minutes on the counter.  Do not refrigerate

Rolling Tips and Tricks

      • Nori (海苔) is the Japanese name for edible seaweed and is frequently used for sushi across the world.  It is usually just referred to as seaweed.
      • Seaweed . Smooth and shiny goes toward the outside.  Rough side goes to the inside against the rice.
      • Use plastic wrap as a covering for your sushi mat
      • Press rice flat onto plastic
      • Dress with slices of cucumber, avocado, shredded imitation krab meat
      • Do not overfill
      • Tuck and roll
      • Dip knife and hands in water
      • Cut in half three times for 8 pieces or half, then thirds for six pieces.

Sushi Filling Options

  • Salmon
  • Shrimp
  • Tuna (mahi mahi)
  • Red snapper
  • Spanish mackerel
  • Scallop
  • Mushrooms
  • Avocado
  • Scallion
  • Sesame Seed
  • Caviar
  • Un
  • Fennel Leaves
  • … and actually whatever you want to wrap into it

Types of Sushi

      • Chirashizushi: “scattered sushi” – Sushi plus other things over rice
      • Oshizushi: “pressed sushi”. Also known as hako-sushi which means “box sushi”
      • Nigirizushi: “hand-pressed sushi” – Frequently like a salmon roll (See Nigiri below)
      • Makizushi – meaning “rolled sushi” – What most Americans visualize when they hear sushi
        Generally wrapped in Nori (seaweed), but can occasionally be wrapped in a thin omelette, soy paper, cucumber, or shsiso (perilla) leaves.

        • Hosomaki: “thin roll” – rice on inside, nori on the outside
        • Chumaki: “medium roll” – rice on inside, nori on the outside
        • Futomaki: “thick roll” – rice on inside, nori on the outside
        • Uramaki: “inside-out roll” – rice on outside, nori on the inside
        • Temaki: “hand roll” – cone-shaped roll
        • Tekkamaki:  Cut tuna into sticks, put nori on mat rough side up, put down rice then tuna

Nigiri

  1. Shape sushi rice into a bite-sized football, but don’t compress
  2. Schmear wasabi on fish, krab or shrimp
  3. Put wasabi against rice and squeeze only to merge all ingredients.  Do not over-compress

Westernized Sushi

        • Dragon Roll:  Eel, crab, cucumber with avocado on the outside
        • Tiger Roll:  Avocado, shrimp tempura, cucumber
        • California Roll:  Rice down on plastic covered mat, then nori, avocado, crab, cucumber. Roll wrap in rice sprinkled with sesame seeds
        • Rainbow Roll: An assortment of fish and avocado on top of a California Roll
        • Spider Roll: Soft-shell crab, cucumber, sprouts (or lettuce, roe, or avocado) and sometimes spicy mayo
        • Spicy Tuna Roll: Rice, tuna, mayo, and chili sauce wrapped in nori
        • Philadelphia Roll: Salmon, avocado, asparagus, and cream cheese wrapped in rice
        • Dynamite Roll: Yellowtail and/or prawn tempura, bean sprouts, carrots, avocado, cucumber, chili, and spicy mayonnaise
        • Teriyaki Roll: Nori, chicken, teriyaki sauce wrapped in rice
        • Boston Roll: Crab, salmon, and scallion wrapped in rice
        • Alaska Roll: Asparagus, and avocado wrapped in rice, topped with Smoked salmon
        • Scallop Volcano Roll: California roll topped with a baked scallop and mushrooms
        • Summer Roll: Sashimi and veggies inside wrapped in rice paper
        • Spicy Tataki Roll: Spicy tuna inside. Sashimi tuna and avocado outside.
        • Eel Avocado Roll: Rice, avocado, and eel wrapped in nori.  Topped with avocado
        • Seattle Roll: Cucumber, avocado, raw salmon, and smoked salmon wrapped in rice
        • Firecracker Roll:  Spicy scallop inside. Tuna and avocado outside
        • Yellowtail Roll: Yellowtail and scallion California roll.
        • Hawaiian Roll: Garlic and albacore inside. Wrapped in rice with avocado and albacore on top.
        • Mango Roll: Avocado, crab meat, tempura shrimp wrapped in rice, topped with mango slices, and creamy mango paste.
        • Classic Roll: Tuna, avocado, and cucumber wrapped in rice and nori
        • Futomaki Roll: Crab, egg, and vegetables wrapped in rice and nori

See www.Ranker.com for a list three times longer than the one above.

Extra Tips and Information

      • If you are going out for sushi, use these tips:
        • Smell should not be overly “fishy”
        • Weekends are when the fresh fish come in
        • Ask about source of their sushi
      • Japanese style sushi has the rice on inside
      • American style sushi has the rice in outside
      • Sashimi is considered by many to be a type of sushi made with raw high-quality fish or raw meat.  It is actually a completely different dish.
      • Sushi should be freshly but quickly killed, usually with a knife point to sever the brain stem
      • Bleeding fish in ice water immediately after killing keeps the meat clear
      • Wait several hours for rigor to start for a firmer flesh
      • Visit All About Sushi Guide for more information

Jacques Pepin Sushi Tray

      • Jacques Pepin made a sushi platter by putting down a layer of rice, and then cubes of salmon, cubes of tuna, small bay scallops, chopped black mushrooms, pieces of avocado (tossed in lemon juice to prevent browning), diced scallion, sesame seeds, caviar, uni, and fennel leaves.  He served wasabi and soy in a cup.  It was WAY easier than formal pieces of sushi and looked just beautiful.

Common Types of Sashimi

      • Salmon (Sake)
      • Squid (Ika)
      • Shrimp (Ebi)
      • Tuna (Maguro)
      • Mackeral (Saba)
      • Horse Mackeral (Aji)
      • Octopus (Tako) – Usually blanched or cooked
      • Whale Meat (Gei-niku)
      • Sea Urchin (Uni)
      • Scallop (Hotate-gai)
      • Puffer Fish (Fugu)
      • Yellowtail (Hamachi)
      • Fatty Tuna (Otoro)

      • You may also view my page for Dungeness Crab Cakes which was filmed at a class aboard the MS Rotterdam.
      • The below video was taken at the Phoenix Eats Trade Show, so has very little verbal description, but offers some very good video for rolling sushi.

Video from Kikoman

HTML Snippets Powered By : XYZScripts.com