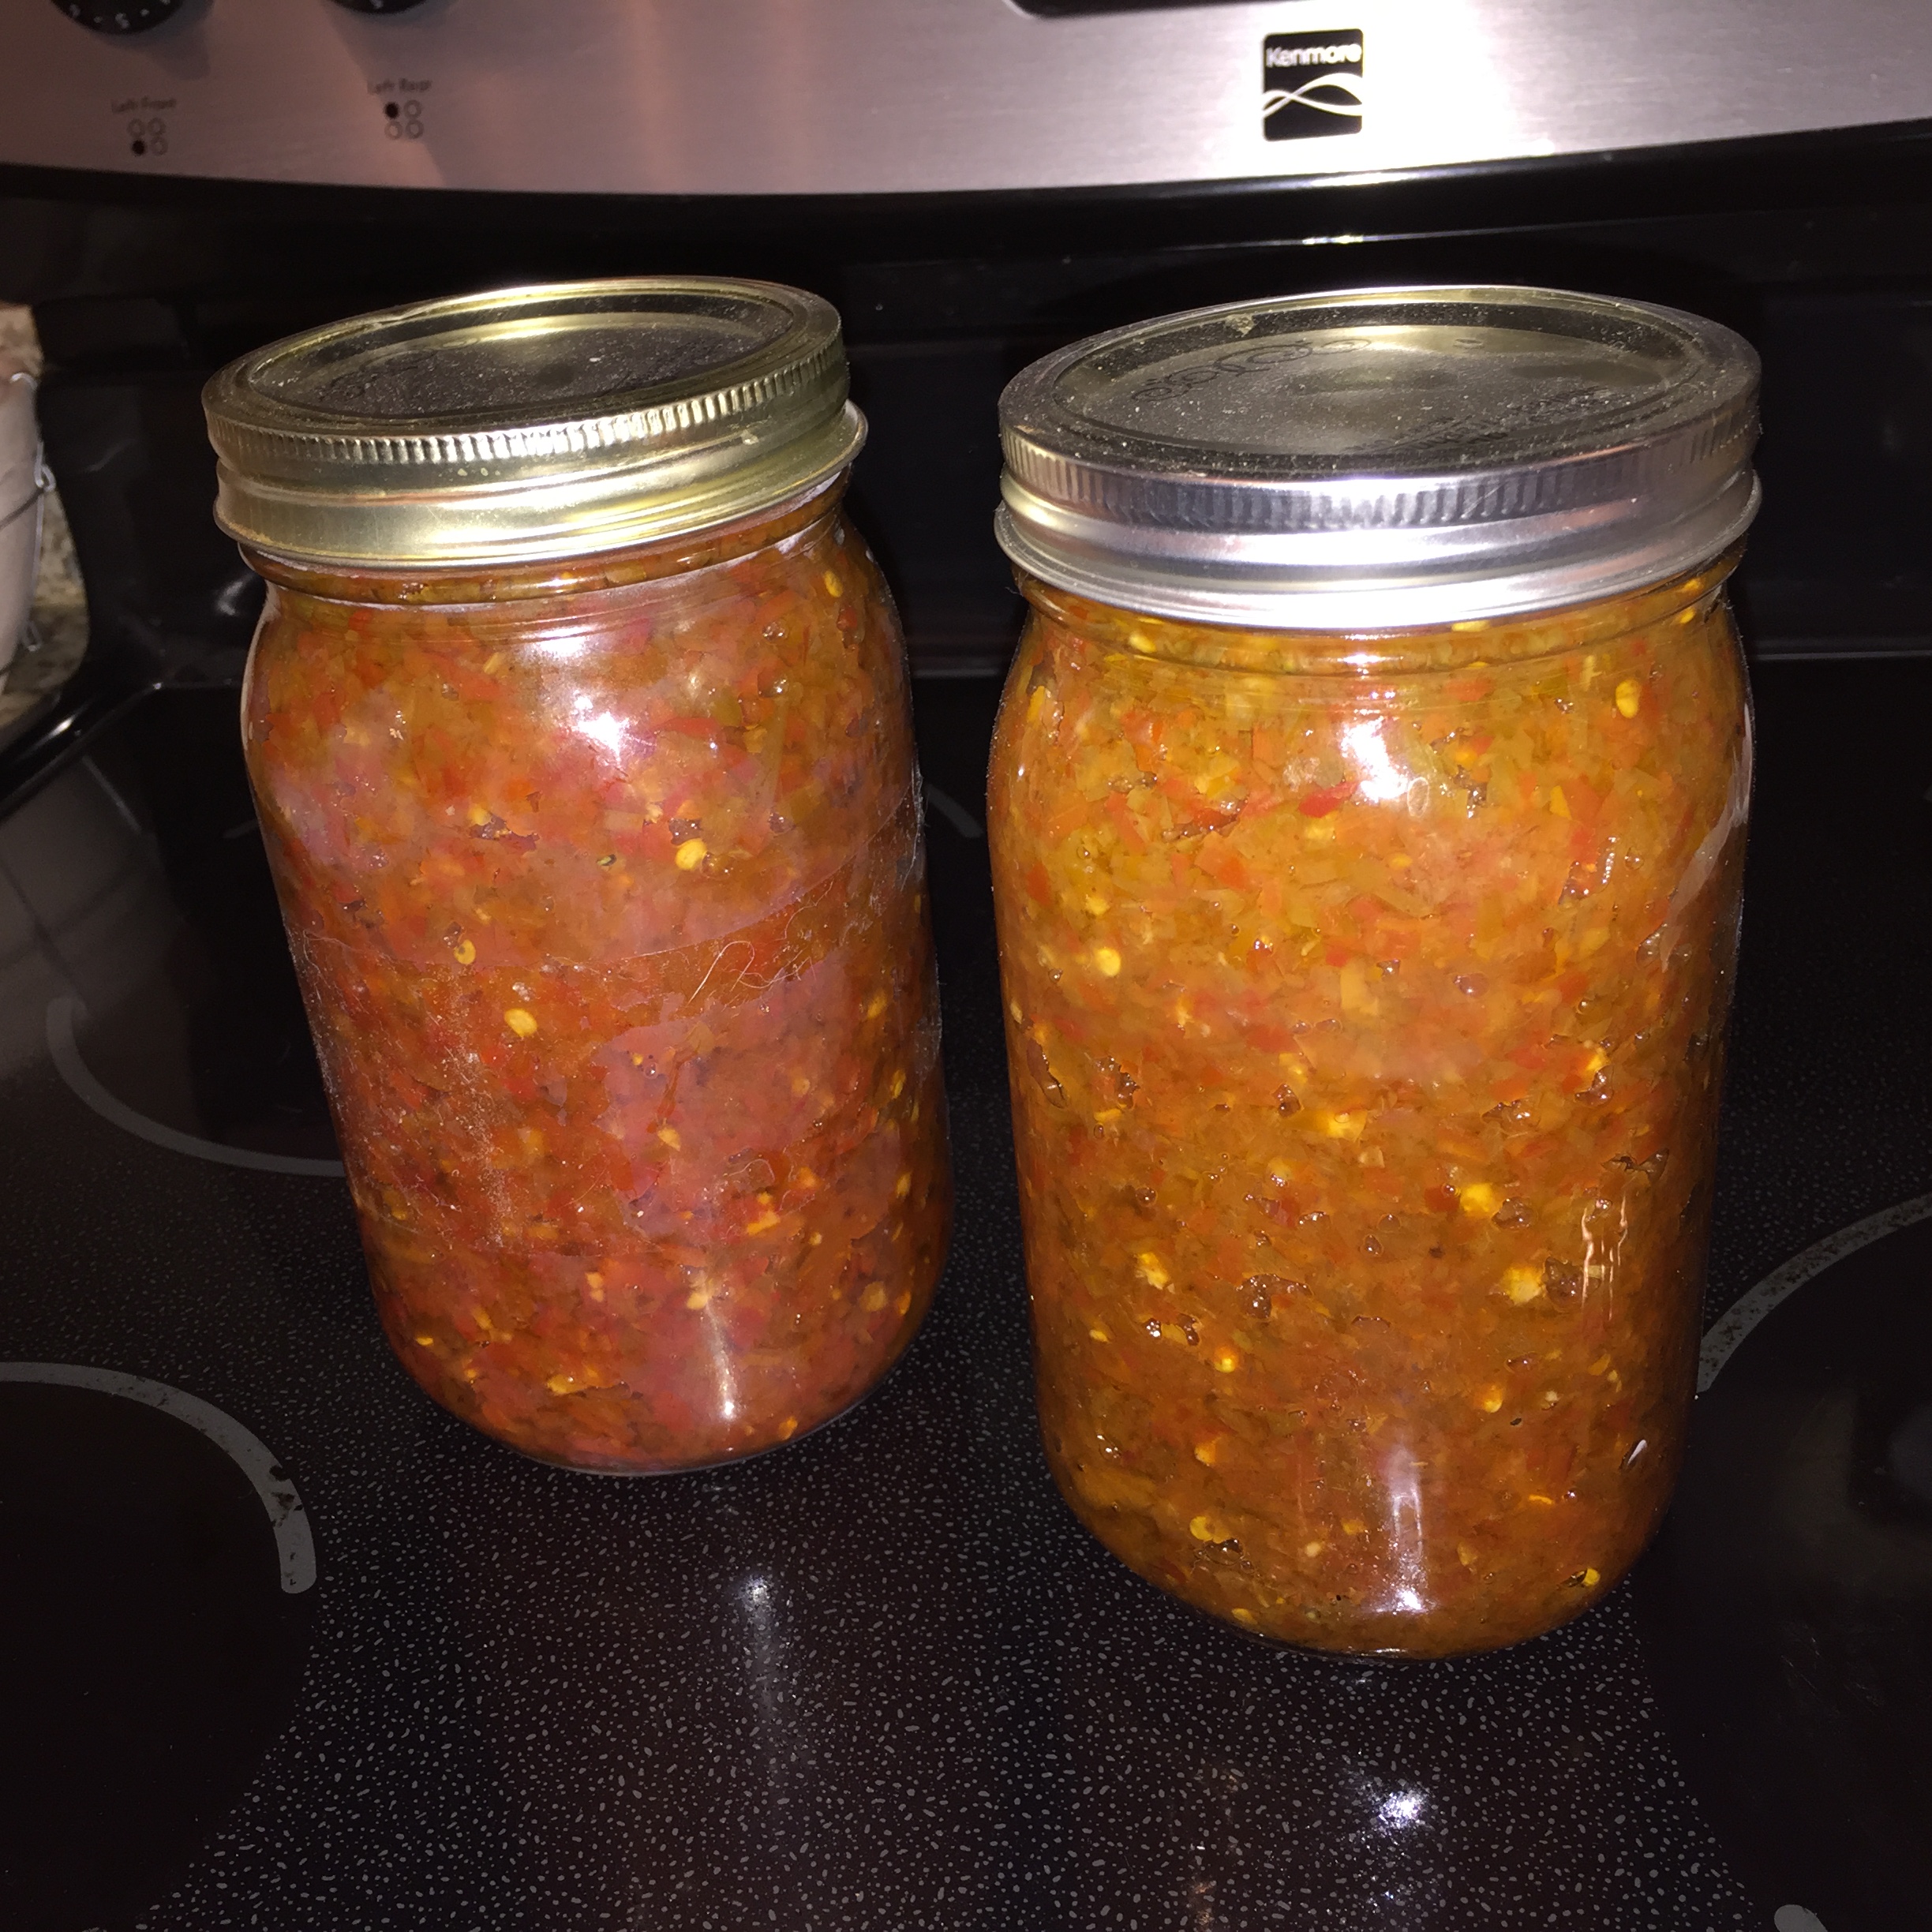
Judy’s Counter Kraut

Note:  This is a lot of information.  If you print out this recipe, you can use the delete function to delete any “tabled” recipes that you don’t want.

1. Shave cabbage thin. Discard hard core.
2. Pack tightly into glass jar sprinkling 1 tsp with each handful (approx 2 TBL per quart jar)
3. Add distilled water to cover (or tap water that has aired out for 24 hours)
4. Place lid on loosely.
5. Stand jars in tray (or plate) and leave on counter for 9-12 days.  A longer fermentation makes a tangier sauerkraut.  Go for as long as six weeks.
6. Add water lost by fermentation process – top off daily – also, remove any floaters from the top of the water.After 9-12 days, kraut is ready to eat or may be canned in boiling water bath. May also be refrigerated for up to 2 months.Caraway seeds or garlic may be added if desired as you pack in the cabbage.

OTHER NOTES FOR SAUERKRAUT AND KIMCHI BELOW.

In the first stage, the cabbage is soaked in a salty brine that kills off harmful bacteria. In the second stage, the remaining Lactobacillus bacteria (the good guys!) convert sugars into lactic acid, which preserves the vegetables and gives them that wonderful, tangy flavor. (If you want to learn more about fermentation, I highly recommend The Art of Fermentation by Sandor Katz.)

How to Make Cabbage Kimchi

Makes 1 quart
What You NeedIngredients
1 (2-pound) head Napa cabbage
1/4 cup sea salt or kosher salt (see Recipe Notes)
Water (see Recipe Notes)
1 tablespoon grated garlic (about 5-6 cloves)
1 teaspoon grated ginger
1 teaspoon sugar
2-3 tablespoons seafood flavor or water (optional, see Recipe Notes)
1-5 tablespoons Korean red pepper flakes (gochugaru)
8 ounces Korean radish or daikon, peeled and cut into matchsticks
4 scallions, trimmed and cut into 1-inch pieces

Equipment
Cutting board and knife
Large bowl
Gloves (optional but highly recommended)
Plate and something to weigh the kimchi down, like a jar or can of beans
Colander
Small bowl
Clean 1-quart jar with canning lid or plastic lid
Bowl or plate to place under jar during fermentation
Instructions

Cut the cabbage. Cut the cabbage lengthwise into quarters and remove the cores. Cut each quarter crosswise into 2-inch-wide strips.

Salt the cabbage. Place the cabbage and salt in a large bowl. Using your hands (gloves optional), massage the salt into the cabbage until it starts to soften a bit, then add water to cover the cabbage. Put a plate on top and weigh it down with something heavy, like a jar or can of beans. Let stand for 1-2 hours.

Rinse and drain the cabbage. Rinse the cabbage under cold water 3 times and drain in a colander for 15-20 minutes. Rinse and dry the bowl you used for salting, and set it aside to use in step 5.

Make the paste. Meanwhile, combine the garlic, ginger, sugar, and seafood flavor (or 3 tablespoons water) in a small bowl and mix to form a smooth paste. Mix in the gochugaru, using 1 tablespoon for mild and up to 5 tablespoons for spicy (I like about 3 1/2 tablespoons).

Combine the vegetables and paste. Gently squeeze any remaining water from the cabbage and return it to the bowl along with the radish, scallions, and seasoning paste.

Mix thoroughly. Using your hands, gently work the paste into the vegetables until they are thoroughly coated. The gloves are optional here but highly recommended to protect your hands from stings, stains, and smells!

Pack the kimchi into the jar. Pack the kimchi into the jar, pressing down on it until the brine rises to cover the vegetables. Leave at least 1-inch of headspace. Seal the jar with te lid.

Let it ferment. Let the jar stand at room temperature for 1-5 days. You may see bubbles inside the jar and brine may seep out of the lid; place a bowl or plate under the jar to help catch any overflow.

Check it daily and refrigerate when ready. Check the kimchi once a day, pressing down on the vegetables with a clean finger or spoon to keep them submerged under the brine. (This also releases gases produced during fermentation.) Taste a little at this point, too! When the kimchi tastes ripe enough for your liking, transfer the jar to the refrigerator. You may eat it right away, but it’s best after another week or two.

Recipe Notes

Salt: Use salt that is free of iodine and/or anti-caking agents, which can inhibit fermentation.

Water: Chlorinated water can inhibit fermentation, so use spring, distilled, or filtered water if you can.  Last resort, you can use tap water than has aired out for 24 hours.

Seafood flavor and vegetarian alternatives: Seafood gives kimchi an umami flavor. Different regions and families may use fish sauce, salted shrimp paste, oysters, and other seafood. Use about 2 tablespoons of fish sauce, salted shrimp paste, or a combination of the two. For vegetarian kimchi, I like using 3/4 teaspoon kelp powder mixed with 3 tablespoons water, or simply 3 tablespoons of water.

Sauerkraut is made by a process called lacto-fermentation. To put it (fairly) simply: There is beneficial bacteria present on the surface of the cabbage and, in fact, all fruits and vegetables. Lactobacillus is one of those bacteria, which is the same bacteria found in yogurt and many other cultured products. When submerged in a brine, the bacteria begin to convert sugars in the cabbage into lactic acid; this is a natural preservative that inhibits the growth of harmful bacteria.

Lacto-fermentation has been used for centuries to preserve seasonal vegetables beyond their standard shelf-life. The fermentation process itself is very reliable and safe, and the fermented sauerkraut can be kept at cellar temperature (around 55°F) for months, although those of us without cellars can make do with storing the kraut in our fridges. Besides preserving the cabbage, this fermentation process also transforms it into something incredibly tasty and gives it additional health benefits — fermented sauerkraut contains a lot of the same healthy probiotics as a bowl of yogurt.

What Do I Need to Make Sauerkraut?

At the most basic, all you need is cabbage, salt, and some sort of container to store it while it’s fermenting. It’s important that the cabbage remain submerged in its liquid during fermentation. When making sauerkraut in a crock, you usually place a weighted plate over the cabbage to pack it down and keep it submerged. When fermenting in a mason jar, inserting a smaller jelly jar filled with rocks or marbles in the mouth of the larger jar serves the same purpose.

The cabbage near the surface tends to float, so when fermenting in a mason jar, you need to either tamp down the cabbage a few times a day or place a large outer leaf of cabbage over the surface of the shredded cabbage to hold it down. Also be sure to keep the jar covered at all times with a clean cloth or piece of cheese cloth. This will allow airflow, but prevent dust or insects from getting into the sauerkraut.

How Long Does It Take To Make Sauerkraut?

For a small quart-sized batch like we’re making today, the minimum time is about three days, though the kraut will continue to ferment and become tastier for many days after that. As simple as it sounds, the best rule of thumb is to keep tasting the kraut and refrigerate (or take it cellar temperature) when it tastes good to you. The sauerkraut is safe to eat at every stage of the process, so there is no real minimum or maximum fermentation time.  It can go for as long as six weeks.

What Can Go Wrong?

Not much! You may see bubbles, foam, or white scum on the surface of the sauerkraut, but these are all signs of normal, healthy fermentation. The white scum can be skimmed off as you see it or before refrigerating the sauerkraut. If you get a very active fermentation or if your mason jar is very full, the brine can sometimes bubble up over the top of the jar. This is part of the reason why I recommend using a larger mason jar than is really necessary to hold the cabbage. If you do get a bubble-up, it’s nothing to worry about. Just place a plate below the jar to catch the drips and make sure the cabbage continues to be covered by the brine.

It is possible that you might find mold growing on the surface of the sauerkraut, but don’t panic! Mold typically forms only when the cabbage isn’t fully submerged or if it’s too hot in your kitchen. The sauerkraut is still fine (it’s still preserved by the lactic acid) — you can scoop off the mold and proceed with fermentation. This said, it’s still important to use your best judgement when fermenting. If something smells or tastes moldy or unappetizing, trust your senses and toss the batch.

I have been making fermented beverages and foods for years, and I have always been amazed by how easy they are and how delicious the results can be. There are a few resources I turn to again and again:

The Art of Fermentation by Sandor Katz – This is a great all-around resource on fermentation in general, fermentation problem-solving, and fermentation health benefits.

Cultures for Health – This is an online resource for fermentation cultures and equipment, but I also turn to them for a lot of information on fermenting. They just released a free e-book on lacto-fermentation that is available if you sign up for their newsletter.

Here’s how to make a small batch of sauerkraut in a mason jar — it’s just enough kraut to get you hooked!

How to Make Homemade Sauerkraut in a Mason Jar

Makes 1 to 1 1/2 quarts
What You Need

Ingredients
1 medium head green cabbage (about 3 pounds)
1 1/2 tablespoons kosher salt
1 tablespoons caraway seeds (optional, for flavor)

Equipment
Cutting board
Chef’s knife
Mixing bowl
2-quart widemouth canning jar (or two quart mason jars)
Canning funnel (optional)
Smaller jelly jar that fits inside the larger mason jar
Clean stones, marbles, or other weights for weighing the jelly jar
Cloth for covering the jar
Rubber band or twine for securing the cloth
Instructions

Clean everything: When fermenting anything, it’s best to give the good, beneficial bacteria every chance of succeeding by starting off with as clean an environment as possible. Make sure your mason jar and jelly jar are washed and rinsed of all soap residue. You’ll be using your hands to massage the salt into the cabbage, so give those a good wash, too.

Slice the cabbage: Discard the wilted, limp outer leaves of the cabbage. Cut the cabbage into quarters and trim out the core. Slice each quarter down its length, making 8 wedges. Slice each wedge crosswise into very thin ribbons.

Combine the cabbage and salt: Transfer the cabbage to a big mixing bowl and sprinkle the salt over top. Begin working the salt into the cabbage by massaging and squeezing the cabbage with your hands. At first, it may not seem like enough salt, but gradually, the cabbage will become watery and limp — more like coleslaw than raw cabbage. This will take 5 to 10 minutes. If you’d like to flavor your sauerkraut with caraway seeds, mix them in now.

Pack the cabbage into the jar: Grab handfuls of the cabbage and pack them into the canning jar. If you have a canning funnel, this will make the job easier. Every so often, tamp down the cabbage in the jar with your fist. Pour any liquid released by the cabbage while you were massaging it into the jar.

→ Optional: Place one of the larger outer leaves of the cabbage over the surface of the sliced cabbage. This will help keep the cabbage submerged in its liquid.

Weigh the cabbage down: Once all the cabbage is packed into the mason jar, slip the smaller jelly jar into the mouth of the jar and weigh it down with clean stones or marbles. This will help keep the cabbage weighed down, and eventually, submerged beneath its liquid.

Cover the jar: Cover the mouth of the mason jar with a cloth and secure it with a rubber band or twine. This allows air to flow in and out of the jar, but prevent dust or insects from getting in the jar.

Press the cabbage every few hours: Over the next 24 hours, press down on the cabbage every so often with the jelly jar. As the cabbage releases its liquid, it will become more limp and compact and the liquid will rise over the top of the cabbage.

Add extra liquid, if needed: If after 24 hours, the liquid has not risen above the cabbage, dissolve 1 teaspoon of salt in 1 cup of water and add enough to submerge the cabbage.

Ferment the cabbage for 3 to 10 days: As it’s fermenting, keep the sauerkraut away from direct sunlight and at a cool room temperature — ideally 65°F to 75°F. Check it daily and press it down if the cabbage is floating above the liquid.

Because this is a small batch of sauerkraut, it will ferment more quickly than larger batches. Start tasting it after 3 days — when the sauerkraut tastes good to you, remove the weight, screw on the cap, and refrigerate. You can also allow the sauerkraut to continue fermenting for 10 days or even longer. There’s no hard and fast rule for when the sauerkraut is “done” — go by how it tastes.

While it’s fermenting, you may see bubbles coming through the cabbage, foam on the top, or white scum. These are all signs of a healthy, happy fermentation process. The scum can be skimmed off the top either during fermentation or before refrigerating. If you see any mold, skim it off immediately and make sure your cabbage is fully submerged; don’t eat moldy parts close to the surface, but the rest of the sauerkraut is fine.

Store sauerkraut for several months: This sauerkraut is a fermented product so it will keep for at least two months and often longer if kept refrigerated. As long as it still tastes and smells good to eat, it will be. If you like, you can transfer the sauerkraut to a smaller container for longer storage.

Recipe Notes

Sauerkraut with Other Cabbages: Red cabbage, napa cabbage, and other cabbages all make great sauerkraut. Make individual batches or mix them up for a multi-colored sauerkraut!

Canning Sauerkraut: You can process sauerkraut for longer storage outside of refrigeration, but the canning process will kill the good bacterias produced by the fermentation process. See this tutorial from the National Center for Home Food Preservation for canning instructions.

Larger or Smaller Batches: To make larger or smaller batches of sauerkraut, keep same ratio of cabbage to salt and adjust the size of the container. Smaller batches will ferment more quickly and larger batches will take longer.

Hot and Cold Temperatures: Do everything you can to store sauerkraut at a cool room temperature. At high temperatures, the sauerkraut can sometimes become unappetizingly mushy or go bad. Low temperatures (above freezing) are fine, but fermentation will proceed more slowly.

Iceberg Disk Salad

INGREDIENTS

  • 1 C mayo or Miracle Whip
  • 1 TBL white wine vinegar
  • 6 oz bleu cheese
  • 1 fresh head of iceberg lettuce
  • tomato, bacon, crushed black pepper and cheese to finish

STEP BY STEP

  1. Put mayo and vinegar in a bowl and whisk together
  2. Mix in crumbled bleu cheese
  3. Slice a nice thick medallion of your lettuce
  4. Drizzle mayo onto medallion
  5. Top with tomato
  6. Crumble crisp bacon over top
  7. Top with black pepper and shredded cheese

Things to Research

This page is not iPhone compatible.


[popup url=”https://en.wikipedia.org/wiki/Theophrastus”]Theoprastus[/popup] – 400 BC
– [popup url=”http://www.newworldencyclopedia.org/entry/Theophrastus”]New World Encyclopedia[/popup]
[popup url=”https://en.wikipedia.org/wiki/Historia_Plantarum_%28Theophrastus%29″]Natural History of Plants[/popup]
About the Reasons for Vegetable Growth


[popup url=”http://www.hellenicaworld.com/Greece/Science/en/Theophrastus.html”]READ MORE HERE[/popup]

The Natural History of Plants, (περὶ φυτικῶν ἱστοριῶν α’-θ’ ) a nine books work (with the following topics):
1. The anatomy of plants

2 – 5. Wooden plants

6. Herbaceous perennial plants

7. Vegetables and their cultivation

8. Cereals

9. Saps and medicine


About the Reasons of Vegetable Growth (περὶ φυτικῶν αἰτιῶν α’-ς’) (6 books)

See: [popup url=”http://www.biologie.uni-hamburg.de/b-online/e01/01a.htm”]Hamburg University[/popup]

Theophrastus in contrast to Aristotle believed that the animals are capable of reasoning. He considered that as the animals are above the plants it is not ethical to eat meat. For this reason he was a vegetarian.


[popup url=”https://en.wikipedia.org/wiki/Chlamydomonas”]Chlamydomonas[/popup] – [popup url=”https://en.wikipedia.org/wiki/Volvox”]Volvox[/popup] – [popup url=”https://en.wikipedia.org/wiki/Kelp”]Kelp[/popup]

[popup url=”http://publicdomainreview.org/collections/nehemiah-grews-anatomy-of-plants-1680/”]Grew’s Anatomy of Plants[/popup]

[popup url=”https://en.wikipedia.org/wiki/Rudolf_Jakob_Camerarius”]Rudolph Camerarius[/popup]
Plant Sexuality

Corn – Self polinating
Sunflower – Males and Females – No seeds? No polination

[popup url=”https://en.wikipedia.org/wiki/Antonie_van_Leeuwenhoek”]Anton van Leeuwenhock[/popup]
invented single lens microscope

[popup url=”https://en.wikipedia.org/wiki/Robert_Hooke”]Robert Hooke[/popup]

[popup url=”https://en.wikipedia.org/wiki/Gregor_Mendel”]Gregor Mendel[/popup] – Czech Republic
Plant inheritence
[popup url=”http://www.encyclopedia.com/topic/Selective_breeding.aspx”]Laws of Selective Breeding[/popup]
[popup url=”https://books.google.com/books?hl=en&lr=&id=_la3H4GVn8MC&oi=fnd&pg=PR7&dq=Experiments+on+Plant+Hybrids&ots=DrwCiWP8Z1&sig=RonvAl9NkzULXBTraE4fUBWwtfM#v=onepage&q=Experiments%20on%20Plant%20Hybrids&f=false”]Experiments on Plant Hybrids[/popup] – 1865
[popup url=”https://scholar.google.com/scholar?q=Genetic+Dominance+via+%22Allele%22&hl=en&as_sdt=0&as_vis=1&oi=scholart&sa=X&ved=0ahUKEwio-PL4xqrLAhUX6GMKHR4nC-MQgQMIGjAA”]Genetic Dominance via “Allele”[/popup]

Five Fathers of Modern Science
Mendel, Mendeleyev, Newton, Darwin, Einstein

[popup url=”https://en.wikipedia.org/wiki/Nitrogen_fixation”]Nitrogen Fixing[/popup] – Peas
[popup url=”https://en.wikipedia.org/wiki/Symbiotic_bacteria”]Symbiotic with Bacteria[/popup]
[popup url=”http://extension.psu.edu/agronomy-guide/cm/sec2/sec28″]Soluble Nitrogen[/popup]

[popup url=”https://en.wikipedia.org/wiki/Joseph_Priestley”]Joseph Priestly[/popup] – Photosynthesis
[popup url=”https://en.wikipedia.org/wiki/Melvin_Calvin”]Melvin Calvin[/popup] – Carbon 14
[popup url=”https://en.wikipedia.org/wiki/Light-independent_reactions#Calvin_Cycle”]Calvin-Benson Cycle[/popup] – Photosynthesis

ATP – necessary for all life – [popup url=”https://en.wikipedia.org/wiki/Adenosine_triphosphate”]Adenisene Triphosphate[/popup]


[popup url=”http://www.npr.org/sections/thetwo-way/2016/03/02/468887190/u-s-announces-hack-the-pentagon-bug-bounty-program”]”Hack the Pentagon” contest[/popup]

Hard boiled eggs in oven at 350º for 30 minutes

Attitude – Intelligence – Loyalty – Communication – Music

Robert’s Jalapeño Ketchup

Before we begin…

  • The Jalapeño Puree (aka Chili Sauce)  takes about six months to age, so you might want to make several jars of the puree.  This will can very well.

This condiment will last you a few months

1/4 cup Franks Red Hot Cayenne Pepper Sauce
1/4 cup of Grandpa’s Jalapeño Chili Sauce
1 cup Heinz Ketchup

Consider MAKING YOUR OWN KETCHUP

Step by Step

  1. Mix well and bottle it up
  2. Keeps for a couple of months in the fridge

Oh, one more thing…

  • If you want REALLY HOT puree, just cut the stem off and use the whole pepper, seeds and all, for your chili sauce.  If you want good jalapeno flavor, but not quite as much heat, remove the seeds and veins from the pepper.
  • Be sure you wear gloves cause if you rub your eyes afterward it will hurt… A LOT.

This is a recipe that has been created or modified by Robert (Grandpa) Andrews.
CLICK HERE for a free sample copies of Grandpa's Cookbooks. © 2016, 2017, 2018.

Mu Shu Vegetables

INGREDIENTS

  • 3 inch piece of ginger – grated and juice squeezed into a bowl
  • 2 garlic cloves – minced
  • 4 scallions – sliced and minced
  • 1/2 onion – cut into thin strips
  • 1 hand of cilantro and parsley
  • 8 oz shitake mushrooms – sliced
  • 1 large red bell pepper – julienne strips
  • 1 medium bok choy
  • salt

STEP BY STEP

  1.  Heat grapeseed oil in hot skillet
  2. Cook two eggs – scramble into medium sized chunks
  3. Add scallions, shitake, garlic and ginger
  4. Stir until onion starts to become tender
  5. Add red bell strips and bok choy
  6. Let bok choy begin to wilt
  7. Add cilantro and parsley and other ingredients
  8. Add bean sprouts
  9. Add a bit of salt and remove from heat into bowl
  10. Toss eggs into the mixture
  11. Serve family style

SAUCE

  1. Combine 2 TBL sake, 1 TBL soy and 2 TBL hoisin and mix well.  Use to dress your pancake.

See Grandpa’s Recipe for Mu Shu Pancakes


Make your own Ricotta Cheese

Taste test on Am Test Kit shows BelGioioso Ricotta con Latte whole milk as the #1 winner, and Galbani Ricotta as the runner up.  Here are a few other recipes as well.

Ricotta should be velvety, luscious, and smooth and should NOT have curds in it like cottage cheese.  It should have a barely sweet taste.

Whole Milk Ricotta

INGREDIENTS

  • 1 1/2 quart whole milk . Organic is better . Homogenized and Pasteurized is OK . ULTRA Pasteurized is not OK
  • 1 pint heavy cream
  • 12± leaves of basil, thyme or cilantro – whole
    Separation Agents
  • 1/3 C lemon juice and 1/3 C vinegar  (or 1/2 C rennet)
  • After removed from heat:  1 tsp salt

STEP BY STEP

  1. Heat milk mixture on medium high until it simmers – about 150º
  2. Add 1 C heavy cream
  3. Lower heat and continue cooking until temperature hits 190º or higher.  Never ever more than 200º
  4. Add lemon and vinegar (or rennet) – preferably lemon
  5. Add whole basil leaves (not flakes) to the milk
  6. Stir to incorporate and simmer 3 more minutes
  7. Remove from heat
  8. Stir occasionally for the next 15 minutes.  This will precipitate out into milk solids
  9. Let rest for 5 – 10 minutes – Remove basil leaves
  10. Spoon into cheese cloth
  11. Use your best judgement: Let it drain until the whey has drained from the edge of the cheese, but the center is still very moist.  This will take AT LEAST 8 minutes.
  12. For a denser ricotta, let it drain until the center is also no longer wet (about 15 more minutes)
  13. (Alternate:  Refrigerate and drain 8-12 hours)
  14. Turn out into a bowl – a bit of residual whey is OK.
  15. Add salt and mix by hand – Add a touch of cream for a smoother consistency – Not too much though, you don’t want it to get runny.
  16. Let rest for at least 2 hours in the fridge before using
  17. Will keep for up to 7 days (covered) in the fridge
    • For a SWEET RICOTTA for desserts
  18. Mix in 1/2 C powdered sugar
  19. 1 tsp vanilla extract
  20. 2 tsp Cinna Sugar
    • To finish, and actually prepare your dessert . . .
  21. Heat up 1/4 C white sugar, 1/4 C brown sugar and 2-3 tsp lemon juice
  22. Bring up to a boil
  23. Add Strawberries and maple syrup
  24. Toss together and bring back to a simmer
  25. Remove from heat
  26. Put Sweet Ricotta onto brioche French toast
  27. and top with Strawberry mixture

The following two recipes are from CheeseMaking.com

Here are others:

Whey Ricotta

Ricotta is produced from a mixture of heat and acid. It can be made from whole or skim milk. Raw milk can be used when making Ricotta, since the heat treatment during curd formation more than meets heat requirements for pasteurization.

When made from a mixture of milk and whey it is called Ricotone.

Heat Whey & Add Salt

When making whey Ricotta, use leftover whey from a batch of cultured cheese. The fresher the whey the better.

Heat the whey, without agitating. Once it reaches 160°F, if desired, you can add 5-12% of fresh milk can be added to improve the richness and yield.

Continue heating to 170°F then add 1/2 tsp of salt for every gallon of whey, mix in quickly.

Continue heating without agitation to 185°F and hold at this temp until the ricotta rises.

Note: Some people heat to jsut below boiling (200F), this is not necessary, but it will not be a problem if the whey heats well into the 190’s.

Add Citric Adic

This step is optional

Mix 1/2 tsp. of citric acid per gallon of liquid. The citric acid should be dissolved in 1/2 cup water. Add quickly the pot and stir briskly for 5-10 seconds.

Watch the curd forming small flakes and gradually larger curd masses. Add a bit more more citric acid solution if necessary.

Note: If too much acid is added, the curds will sink to the bottom and the cheese will not be sweet. The correct amount of acid will produce a clear separation of white curds and bright green whey.

Gently Move Curd

As the curds rise, use a perforated ladle to gently move them from the sides to the center of the pot. These clumps of curd will begin to consolidate floating on top of the liquid.

Let the curds rest for 10-15 minutes. This is important because it is the point where the final Ricotta quality is assured.

Drain Ricotta

Ladle the curds gently into draining forms (No cheese cloth should be needed if you were patient in the previous step). Let the curds drain for 15 min up to several hours.

For a fresh light ricotta, drain it for a short while (until the free whey drainage slows) and chill to below 50F. For a rich, dense and buttery texture allow it to drain for an extended period of time (several hours). before chilling overnight

Move to a refrigerator or cold room. Consume within 10 days.

Another Whole Milk Ricotta


Prepare Citric Acid

Add 2 tsp of citric acid per gallon of milk used and dissolve this in 1 cup cool water.

Add 1/2 of the Citric Acid solution to one gallon of milk, save the rest of the citric acid.

Stir the milk briskly for 5-10 seconds.


Heat Milk

Add 1 tsp of salt to the milk then heat the milk slowly on low to med heat, stirring well to prevent scorching


Extra Citric Acid, if Needed

At 165-170F watch for small flakes forming in the milk and the separation into small flaky curds.

If after a few minutes you do not see the flakes forming, add more of the Citric acid until they form. Do this in 1 Tbsp increments, to avoid over acid milk.

At this point, when you see the curds, A slower stirring is essential to avoid breaking up the small bits of curd that have formed. Excess stirring will cause smaller and very granular curds to form. I tend to just roll the milk slowly with a bottom to top stirring motion.

Gently Move Curd

Continue heating to 190-195F then turn the heat off. The thermal mass of the whey will hold at this temp for quite some time. The higher temp is used here because of the additional proteins found in whole milk vs whey.

As the curds rise, use a perforated ladle to gently move them from the sides to the center of the pot. These clumps of curd will begin to consolidate floating on top of the liquid.

Let the curds rest for 10-15 minutes. This is important because it is the point where the final Ricotta quality is assured.

Drain Ricotta

Ladle the curds gently into draining forms. No cheese cloth should be needed if you were patient in the previous step. Let the curds drain for 15 min up to several hours.

For a fresh light ricotta, drain it for a short while, until the free whey drainage slows, and chill to below 50F. For a rich, dense and buttery texture allow it to drain for an extended period of time (several hours). before chilling overnight

Move to a refrigerator or cold room. Consume within 10 days

Christopher Collins Sweet Ricotta

  1. 2 C heavy whipping cream
  2. 2 C whole milk
  3. Heat until it reaches 200º
  4. 1/4 white vinegar
  5. 1/4 lemon juice
  6. 1 tsp salt
  7. Heat until they start to separate
  8. Ladle through a fine strainer – Keep the solids and discard the whey
  9. Put into a fridge overnight to continue to drain (12 hours)
  10. Mix 1 C powdered sugar, 1 TBL vanilla, and 1 tsp nutmeg
    • In a separate pot
  11. Heat 1/2 C white sugar
  12. 1/2 C Brown sugar
  13. 2 TBL Lemon juice
  14. Bring to a boil and dissolve
  15. Add in 4 C pieced strawberries
  16. Add 1/4 C maple syrup
  17. Heat at a low simmer for 45 minutes
    • Plate the brioche
  18. Toast slices of brioche bread
  19. Put a large dollop of ricotta on the bread
  20. Top with Strawberry preserves


Classic and Custom Salad Dressings – COLLECTION INDEX

This page contains fairly simple recipes for making many of the classic dressings from scratch.

Why make your own?

Making many basic dressings is actually easier than running to the store to buy a bottle of a commercial brand. The one catch: pre-measure all your ingredients so you can be whisking IN ORDER AS LISTED the entire time. Here is how easy it is:

Click print at the top of this page, and then click recipes (click to delete) you don’t want to print and they will be deleted.


General Tips

  • Proportion are important:  3 parts oil to 1 part vinegar with a pinch of salt.
  • You can use an egg yolk or Dijon mustard as an emulsifier
  • Mix 2 oz vinegar, a pinch of salt, 2 tsp Dijon or one egg yolk, scant garlic and pepper and mix
  • Put into blender on low and drizzle in 8+ ounces of very good EVOO

Buttermilk Ranch Dressing

1 C buttermilk
1 C Miracle Whip
2 TBL parsley
1 TBL sour cream
1 TBL good white wine
1 TBL onion powder
1 TBL garlic powder
1 tsp salt
1 tsp pepper
1/2 tsp ground cumin


Italian Dressing

1/4 C White Vinegar
a splash of Apple Cider Vinegar
1/2 C Extra virgin olive oil – whisk continually while drizzling in VERY SLOWLY the oil. This will cause the droplets of oil to remain suspended in the vinegar
– Use Avocado Oil for a different taste
1 tsp fresh chopped oregano
a couple leaves of rosemary
two leaves of fresh basil (chopped)


Cobb Salad Dressing

1 tbl Dijon mustard
2 tbl red wine vinegar
oregano
touch of dill
2 tbl olive oil, drizzled and whisking to emulsify.


Green Goddess – Copy Cat

1 Lemon . zest and Juice
1/2 C mayo or Salad Dressing
2 TBL yellow mustard
1/2 C sour cream
3 anchovies – smashed
2 egg yolks
1 TBL tarragon
1 TBL apple cider vinegar
1 TBL granulated sugar
1 TBL parsley
1 TBL chives or scallions
1 TBL cilantro
1 tsp pepper
Salt is not needed because of the anchovies


Sesame Dressing for Noodles

2 limes (juiced)
1 tsp toasted sesame oil
2 TBL soy
1 TBL brown sugar
scant chili pepper powder
1 handful of cilantro (chopped)


Classic Caesar Dressing

  • 2 TBL apple cider vinegar
  • 1/4 C Miracle Whip
  • 2 TBL low fat sour cream
  • 1 TBL deli mustard
  • 2 TBL grated Parmesan Cheese
  • 3 grated garlic cloves
  • 3 chopped anchovies
  • 1 TBL lemon juice
  • 1 tsp Tabasco
  • 1/2 tsp salt
  • 2 tsp Worcestershire
  • 1 teaspoon black pepper
  • 3 whites of green peppers / chives
  • 1 T brown sugar
  • 3 egg yolks
  • 1 T Sesame oil
  • 1/2 CU olive oil – after initial mix
  • 1 TBL water ++++ as needed for consistency

Instructions
1. Mix all ingredients except water and oil
3. Drizzle oil whisking continually
4. Add water, mixing until approx the consistency of mayonnaise
5. Toss with romaine lettuce


Hot Bacon Dressing

Traditional Dressing for Spinach Salad

4 slices bacon (cooked crisp and drained)
1 tsp brown sugar
1 TBL red wine vinegar
4 green onions (chopped)
salt and black pepper to taste
horseradish to taste

1. Saute bacon until crisp.
2. Drain, and reserve 1 tsp bacon drippings.
3. Crumble into pan.
4. Add sugar, vinegar and other spices into pan.
5. Clean and pat dry baby spinach leaves
6. Toss with dry spinach leaves


Coco’s Sesame Dressing

We moved to Spain from Phoenix nearly two years ago. One of the things that I brought with me was three bottles of Coco’s Asian Sesame Dressing. I am on my last bottle, so I prepared this Copy Cat recipe that I’d like feedback on, and any improvements offered would be appreciated.

The Copy Cat recipe that I created is HERE. I decided to not move it to this page, since I would lose all of the wonderful comments.


Caesar Salad

INGREDIENTS

½ C mayo or Miracle Whip
1 TBL Worchestershire Sauce
1 TBL Dijon mustard
1 tsp red wine vinegar
1 tsp grated garlic
zest and juice from one lemon
salt and pepper

2/3 C EVOO
grated Parmesan for garnish

STEP BY STEP

Place first seven ingredients together in a blender
Turn blender on low
Slowly drizzle in EVOO
Spoon mixture onto lettuce leaves
Sprinkle with grated Parmesan
Eat with your fingers

French Fries / Chips

friesBefore we begin…

  • Potatoes fall into the categories of either starchy or waxy.
  • Russet and Idaho potatoes have a higher amount of starch and less moisture than waxy potatoes, so they are great for baking and frying, but don’t perform well for potato salads or casseroles
  • Waxy potatoes like Red Bliss, Fingerlings or New Potatoes have less starch and more body, so are good choices for potato salads, but NOT this recipe.
  • Yukon Gold is a good example of an all purpose potato.  It does reasonably well for either application.

Ingredients to feed 4 people

1-2 potatoes per person
1 C water and 1 tsp salt (per potato)
Optional Condiments:
Ketchup, sour cream, ranch dressing,
Grandpa’s Jalapeño Ketchup

Step by Step

  1. Cut russet potatoes into approximately 1/3 inch thick strips
    – Just for fun you can cut them into 1/4 inch medallions instead of strips
  2. Soak in salted water overnight
  3. The next day, blanche potatoes in salted water for about sixty seconds to boil and partially cook
    – Potatoes should break apart when bent at this point, so be careful.
  4. Toss gently with oil and salt
  5. Put on a baking tray and cook at 450º for about ten minutes
  6. Flip over fries and cook another 10-15 minutes until golden brown
  7. Sprinkle with salt while oil is still very hot
  8. Some people enjoy a very light sprinkling of black pepper too

Oh, one more thing…

  • French Fries REALLY don’t come from France.  Research has shown that they really come from Belgium, where historians claim they were frying potatoes as early as the late 1600’s
  • The first record of French Fries being served in America was 1802 when Thomas Jefferson served them to guests at the White House.

Chicken Tiki Marsala

Chicken Tiki Marsala

You can use pork for this also.
For vegetarian, use a portobello mushroom

In one pot, sauté above in EVOO or ghee (clarified butter)

HINT: when you cut chicken, put waxed paper down on your cutting board. This will keep it from becoming contaminated

Add to pan: six cloves minced garlic, 1/2 teaspoon salt, 1 teaspoon ground ginger, 1/2 teaspoon cayenne, 1/2 teaspoon curry, 1/2 teaspoon cumin, 1/2 teaspoon turmeric, one half teaspoon cinnamon, 1 tablespoon sugar

Add in one cup diced onion

Once onion has cooked down, put in one can crushed or diced tomato, and 1/2 cup Greek yogurt

Serve with naan

Robert@RobertAndrews.NET

Horchata From Scratch

INGREDIENTS FOR EASY HORCHATA  ( to make 2 bottles )

  • 1 C cooked white rice
  • 1 tsp ground cinnamon
  • 1/4 cup sugar
  • 1 C hot water
  • 1 C hot milk
  • 1/2 tsp vanilla
  • just a pinch of salt Ground cinnamon for garnish when serving.

STEP BY STEP

  1. Mix rice, cinnamon, sugar and 1 cup hot water
  2. Let sit at room temperature for 1 hour
  3. Stir just to mix
  4. Add 1 cup hot milk and stir again just to mix
  5. Let sit for another two hours at room temperature
  6. Strain through a fine sieve into empty bottles
  7. Store in the fridge for up to a week
  8. Shake the bottle before serving
  9. Serve over ice and garnish with a sprinkle of cinnamon

INGREDIENTS FOR A MORE COMPLEX and AUTHENTIC HORCHATA

  • 1 cup uncooked white long-grain rice
  • 5 cups water
  • 1/2 cup milk
  • 1/2 tablespoon vanilla extract
  • 1/2 tablespoon ground Mexican cinnamon
  • 2/3 cup white sugar

STEP BY STEP

  1. Put rice into a bowl and fill with water, pour through strainer
  2. Repeat Step 1 until water in bowl is clear
  3. Add the rice to 3 Cups boiling hot water
  4. Let rest for about an hour
  5. Add 2 Cups cooler water and add to a blender
  6. Blend until the rice just begins to break up, no longer than 1 minute
  7. Let rice and water stand at room temperature for at least 3 hours
  8. .Strain the rice water into a pitcher using double layer of cheesecloth, or a very fine sieve.
  9. Discard the rice.
  10. Add the vanilla, cinnamon, and sugar
  11. Stir until blended
  12. Stir the milk into the rice water.
  13. Chill and stir before serving over ice.
  14. Keeps for no longer than 10 days.

OH, ONE MORE THING …

  • In El Salvador, horchata is primarily made from morro seeds, not rice.
  • Other flavorings that you can grind up with the rice are peanuts, almonds and cashews.
  • Other common ingredients include ground cocoa, cinnamon, sesame seeds, nutmeg and vanilla.
  • If you don’t have a blender, you can use rice flour instead of rice
  • Use emptied water bottles for storing your finished horchata.

Cauliflower

INGREDIENTS

  • Cauliflower – Cut Florettes so that they are bite sized

FOR PAN FRY

  • Garlic and oil in hot pan
  • Bread crumbs and grated cheese on top
  • Fry until browned

FOR OVEN-BAKED

  • Roast in preheated oven at 300º for about 30 minutes or until browned
  • Toss with Dressing – Dijon, white wine, EVOO, salt and pepper

Parmesan Grilled Cauliflower

  1. Slice cauliflower into mini steaks
  2. 1 sweet onion – sliced
  3. Minced garlic, EVOO, salt and pepper – Toss together
  4. Put onto baking sheet covered with foil
  5. Top with sprigs of thyme
  6. Put into oven 350º for 20 minutes
  7. Finish with Parmesan cheese
  8. Dump into serving dish

Caponata

imageINGREDIENTS

  • 1 eggplant
  • 1 zucchini
  • 2 C cubed winter squash
  • 1 Vidalia onion
  • 4 cloves garlic
  • 1 stalk celery
  • 1/2 CU green olive
  • 1/2 CU black olive
  • 1/2 C golden raisins
  • 1 can diced tomatoes (drained)
  • 2 TBL capers
  • 1/4 C apple cider vinegar
  • 1/4 C white balsamic vinegar
  • 1/2 tsp salt

STEP BY STEP

  1. Toss your cubed squash in 1 TBL EVOO and 1 tsp salt
  2. Bake at 350º for 30 minutes
    While this cooks
  3. Cut up onion and mince the garlic – Set aside
  4. Peel the eggplant, leaving just a little bit of purple to make it pretty.
  5. Cut up the eggplant in 1/2 inch cubes – Set aside
  6. Put drained tomato into a third bowl
  7. Cut celery into thin crescents – Add to tomato
  8. Quarter olives – Add to tomato
  9. Add capers, raisins and salt to tomato
  10. Heat up a skillet, add EVOO and saute onions
  11. When the start to soften, add the garlic and celery
  12. As soon as this is all combined, add the eggplant and combine gently
  13. Add tomato mixture to the eggplant
  14. Mix very gently, and continue heating 5 minutes.
  15. Mix gently, and continue to heat another 5 minutes
  16. Add vinegars, stir to combine and heat for another few minutes.
  17. Stir in cooked squash
  18. Can be served hot, but it is great chilled for at least several hours, and served cold.

VARIATIONS

Add any of the following ingredients for twists:

  • Julienne strips from 1/2 carrot
  • Chopped fresh parsley, cilantro or basil
  • Fresh quartered cherry tomatoes
  • Pitted calamata olives
  • Pimiento stuffed olives
  • Add 1/2 tsp red pepper chili flakes to kick it up a notch
  • Substitute Red Wine vinegar for Apple Cider
  • Add tomato sauce to create more of a cold summer soup

NOTES

  • You can serve this hot when you make it, and refrigerate the left-overs. They will keep well in the refrigerator for days, and you can haul it out at any time and just eat it without any to-do.
  • Vinegar is the secret ingredient. It gives it a unique taste and acts as a preservative.

Jalapeño Chili Sauce

Also referred to as Grandpa’s Jalapeño Puree

Before we begin…

  • You can grow your own jalapeños if you life in a warm climate
  • If you don’t, you can buy some at any Mexican grocery or even on Amazon.
  • Any time you are blending the peppers, it will create a toxic gas cloud, so make sure you are in a well-ventilated environment

Ingredients to feed 4 people

A whole bunch of jalapeños – red, green, it doesn’t matter Have some Thai chilies, throw them in there too; as well as your serranos and habañeros if you wish hotter sauce.  If you want a milder Chili Sauce, use Poblano, Anaheim, Bell or Banana peppers. You will also need water, white vinegar, sugar, cumin, tomato paste, garlic powder, onion powder and salt.

Step by Step
2016-03-02 12.29.45

  1. Fill quart mason jars with minced jalapeños
  2. Remove seeds before mincing for milder sauce, leave them in for hotter sauce
  3. Put into mason jar filling about one inch from the top
  4. Place in mixing cup 1/2 C water, 1 C vinegar
  5. Microwave about 2 minutes
  6. Add 1 TBL salt
  7. Add 1 tsp cumin
  8. Mix all mixing cup ingredients to incorporate and dissolve
  9. Pour liquid into mason jars covering peppers
  10. Put the lid on and place jar on counter for a month or two or three – mine just finished eight months

AFTER IT HAS CURED
jal-chi-sauce

  1. Puree in blender – watch out for vapors they are TOXIC
  2. Push pulp through a strainer using a spatula into jars – discard solids
  3. Add tomato paste, garlic powder, onion powder and sugar
  4. Using standard canning procedures, cold pack and hot water batch for 20 minutes

Oh, one more thing…

  • My niece uses this full strength.  That is a bit too hot for me.  This is hotter than Tabasco, and has a lot more flavor.  You don’t need to use too much.
  • My preferred use for this sauce is to make my Jalapeño Ketchup.
  • If you are not good with doing things to taste, for each quart jar that you are aging and processing, Once you have pushed the pulp through a strainer, add 1 tsp salt, garlic powder and onion powder and 1/4 C tomato paste.
  • If you don’t know how to can things, here is a ketchup canning site.  Just follow the same procedure for your chili sauce

Shortcut Chili Sauce

1/2 CU Heintz Ketchup
1/2 CU diced jalapenos (from can)
2 TBL cayenne sauce (Frank’s Red Hot or Durkee)
1 TBL rice vinegar
1 tsp garlic powder
1 tsp onion powder
1 TBL sesame oil
1 tsp cumin
1 tsp oregano
1 tsp salt

1. Blend all ingredients until somewhat smooth.
2. Press through a sieve
3. Store in something like an old Tabasco bottle
4. Refrigerate


This is a recipe that has been created or modified by Robert (Grandpa) Andrews.
CLICK HERE for a free sample copies of Grandpa's Cookbooks. © 2016, 2017, 2018.

Vegetable Crowns

INGREDIENTS

  • 2 metal rings – BUY THEM HERE
    An old tuna can will work if you do not have metal rings.
  • Carrots
  • Green beans
  • 2 CU squash
  • 1/2 CU spinach

STEP BY STEP

  1.  Mix cooked squash with finely chopped spinach
  2. Place julienne strips of carrots and green beans in alternating pattern along side of greased metal form.
  3. Pipe or spoon into ring, making sure a flat side of the beans and carrots remain against the ring.
    If the round side is against the ring, it will get buried.
  4. Cook at 350 degrees for 20 minutes


A Green Feast

Gila Farm Cooperative CSA Delivery Newsletter April 3rd 2012
Pick up produce Tuesdays at 5227 N. 7th St. between 4:00 and 5:30pm
Week three of ten week CSA Spring Season.


Grandpa’s Green Feast with Baked Beets

Sometimes simple is called for. Here is a very simple meal that is just about as healthy as you can get.

INGREDIENTS

  • Carrots – Freshly picked from CSA
  • Green onions – Freshly picked from CSA
  • Radishes – Freshly picked from CSA
  • Lettuce – Freshly picked from CSA
  • Celery – From the grocery store
  • Tomatoes – From the grocery
  • Cooked Beets – Freshly picked and baked (recipe below)

STEP BY STEP

  1. Toss the lettuce in your favorite salad dressing and use as a bed for all other vegetables.
  2. Cut veggies however seems “pretty” and arrange on top of the lettuce.
  3. Optional: Serve with a side of salad dressing for dipping.

BAKED BEETS

  1. Preheat oven to 350 degrees
  2. Peel beets and discard skins
  3. Cut into 1/2 – 3/4 inch squares – try to keep them all about the same size
  4. Toss pieces in 1 TBL olive oil and 1/2 tsp salt
  5. Bake at 350º for about 30 minutes until fork tender

Lettuce Tie-up and Lettuce Wraps

Lettuce Tie-up
Three twelve inch pieces of butcher’s string per person
Three outside leaves per person of Romain or Bibb lettuce
Julienned cuts (or peels) of any five of the following:
– Cucumber
– Cucumber peel
– Bell pepper
– Parsley (chopped)
– Cilantro (chopped)
– Pickle
– Chive
– Cheese
– Salt / pepper (sprinkle to taste)
– Deli, regular or Chinese mustard
– Ground red pepper

OR MAKE UP YOUR OWN TOPPINGS

  1. Spread mustard on top part of leaf
  2. Add selected five ingredients
  3. Roll as tightly as possible, make sure not to burst the leave
  4. Tie lightly near the middle with one length of butcher’s string
  5. Trim excess string
  6. Cut off the white end and discard
  7. Serve aside any meat dish


Baked Squash

INGREDIENTS

  • 1 squash – acorn, butternut or pumpkin
  • 1/2 CU grated Parmesan cheese
  • 2 TBL EVOO

STEP BY STEP

  1. Cut squash into 3/4 inch cubes
  2. Toss with EVOO
  3. Sprinkle with salt
  4. Spread onto baking pan
  5. Bake at 350 degrees for about 30 minutes
  6. Flip pieces to other side and cook anothe 20 minutes
  7. OPTION:  If you want to, you can remove the skin and puree, then continue with this recipe
  8. Place pieces or puree in greased baking bowl and top with cheese
  9. Bake 8-10 minutes at 350 degrees

Asian Salad

INGREDIENTS

  • 1 CU Napa cabbage (sliced thin)
  • 1/2 CU red cabbage (sliced thin)
  • 1 CU Chicken scraps (shredded)
  • 1 TBL scallions (chopped)
  • 1 TBL carrot slivers
  • 2 TBL cilantro (chopped very roughly, include stems)
  • wasabi root (or powder) to taste
  • 1 tsp ground ginger (optional)
    TOPPING
  • 1 TBL cashews (optional) OR 1 TBL peanuts (optional) OR 1 TBL almond slivers (optional)

Top with COCO’S ASIAN SESAME DRESSING – to taste – or simple Asian Dressing listed below

STEP BY STEP

  1. Put serving plate into refrigerator
  2. Toss all ingredients
  3. Add dressing and toss again
  4. Remove plate from refrigerator
  5. Serve cold on top of soba noodles (or other Chinese noodles)
  6. Top with cashews, peanuts or almonds

ASIAN DRESSING

  • 1 TBL soy
  • 1 TBL sesame oil
  • 1 TBL rice wine vinegar
  • 1 tsp sugar
  • 1 tsp Yakisoba sauce or Asian Fish Sauce
  • 1 tsp poppy seeds
HTML Snippets Powered By : XYZScripts.com