Hot Dog Buns / Hamburger Buns

This was originally a recipe for bread sticks. If that is what you want, just roll them a little skinnier and shorten the cooking time by 2-3 minutes.  For hamburger buns, roll them into small baseballs and press them flat to about 1/2 inch thickness – they will rise and thicken.  I frequently roll them into a sheet about 3/4 inch thick, and use a 3 inch biscuit cutter to make the buns.  They end up being about 3.5 inches in diameter.

bunsINGREDIENTS

  • 1 package (or 1 TBL) active dry yeast
  • 2 TBL sugar (split in half for use at two different times)
  • 1/4 C warm water – very warm to the touch, but not hot
  • Three-quarter C milk
  • 1/4 C dried (instant) milk powder
  • 1 tsp Xanthan gum
  • 2 tsp salt
  • 1/4 C soft shortening or lard (bacon grease)
  • 3 C sifted all-purpose flour
  • 1 C spelt or whole wheat flour
  • 1 egg, beaten
  • (optional) 1/4 C sour dough starter

STEP BY STEP

  1. ACTIVATE YOUR YEAST
    Mix your yeast, water, and half your sugar in a small glass bowl
    Stir to mix
    Set aside
  2. SCALD YOUR MILK
    Put into microwave for a minute
    Set aside to let it cool
    Put your lard, salt and the rest of your sugar into the milk
  3. PREPARE HALF OF YOUR FLOUR
    In a large mixing bowl…
    Add your sourdough starter if you are using it
    Add the milk mixture and 1/2 cup flour.
    Add the yeast mixture, dried milk, xanthan gum and everything else
    Mix in bread maker at medium speed until smooth, scraping the bowl occasionally. 100 strokes if by hand.
  4. FINISH YOUR DOUGH
    Add more flour, a little at a time, until dough leaves the sides of the bowl, and surface of dough springs back when pressed.  Dough should not be sticky.
    You may not use all of your flour (or you may need more)
    Turn dough onto lightly floured board.
    Knead until smooth and elastic: 4-8 minutes.
    Place in lightly oiled bowl.
    Turn dough over to oil the top also.
    Cover and refrigerate overnight for a more complex flavor
    When ready to make the buns, cover and let rise in warm place for about 30 minutes.
  5. SHAPE YOUR BUNS
    Form your buns on a greased baking sheet, keeping in mind that they will increase in size by about 125%
    Let them rise for about an hour in the (not turned on) oven
  6. BAKE YOUR BUNS
    Pull the trays of buns out of the cold oven and turn oven to 350º
    Brush the tops of your buns with melted butter
    Sprinkle with sesame seeds or lightly with coarse sea salt if you wish
    Bake at 350º for about 10-12 minutes or until browned
    Let cool 10 minutes before removing from tray

Tips: Around the Kitchen

Kitchen Tools and Gadgets

  • A thermometer helps you repeat success and avoid repeating failures. I have two from Thermoworks:
    >   An immersible/insertable thermometer: Good to take the core temperature of meats
    >   An infrared thermometer: Great for everything from preheating your griddle to acting as a candy thermometer.
  • Use tongs to help squeeze limes or lemons.  Gives you leverage.

Cooking tips

  • When cooking pasta, reserve a cup of pasta water for thinning your pasta sauce. Put at least a ladel back into the sauce to make it stick to your pasta better.  Also, you can use the water with a bit of cheese to make a nice creamy sauce.  Also, don’t rinse your pasta after cooking.
  • Use screaming high heat for searing meat, preferably in a cast iron pan.
  • Select the pan which is best suited for your recipe.  (eg) Don’t use an aluminum pan with anything cooked with acidic ingredients.  Cook pancakes in a non-stick pan, but don’t use metal utinsels.
  • Blanche and shock fresh vegetables (boiling water, then ice water) to make them greener and set the flavor.  If doing two, start with the lighter vegetable and work onto the darker vegetables.
  • Let your oven completely preheat before putting your food in.  You will get uneven heating, and even incomplete chemical reactions.

Kitchen Design

  • When replacing your counter consider ceramic tile or porcelain stone tile. Lay with a thin grout line.

Keeping it Clean

  • Stain Removal: Voted best overall was Oxi-Clean. Very inexpensive, very effective. Soak for about an hour. Removed blueberry, mustard, chili, chocolate, red wine, beets and coffee.
  • CAMEO was voted best Aluminum and Stainless Steel cleaner
  • Never ever put cast iron in the dishwasher, or clean it with soap.
  • Barkeepers friend is good for cleaning steel pans
  • The five second rule is bogus unless the item is totally hard and dry.  If it is the least bit moist, you are probably putting feces into your food or mouth.  Yech.

Preserving Food

  • To freeze fresh berries spread out on cookie sheet and freeze 4 hours. Put into freezer zip locks.
  • Store vegetable oils and most seed oils in a cool dark place to minimize spoilage

Safe Kitchen Tips

  • When cutting cherry tomatoes put them between two cottage cheese lids and slice a bunch of them in half at the same time.
  • Use water bottle with a sports top as your barbecue sauce dispenser
  • Don’t pour bacon grease down the sink.  Instead, pour into a can and let it solidify, then just throw it away.

Entertaining

  • When you are preparing a menu for an important event, always test the recipe before the day of your event. Never use your guests as guinea pigs.


Meat Skillet

Ingredients:

1 stalk celery (chopped)
1 carrot (chopped)
1 onion (chopped)
2 TBL butter
————
1 potato diced small
1 bay leaf
1 tsp thyme
1 tsp poultry seasoning
salt and pepper to taste
————-
2 TBL flour
2 TBL EVOO or butter
————-
1 CU good white wine
1 tsp grated ginger
————-
1 liter chicken stock or broth
1 LB chicken or other meat (cooked)
1 tsp tarragon
1 sm can peas
1/2 CU asparagus (chopped)

Instructions

  1. Add first four ingredients and saute for about 10 minutes
  2. Add potato, bay, thyme, etc. and saute for 5 more minutes
  3. Add 2 TBL flour and butter/EVOO and stir until combined
  4. Add next ingredients including wine and heat to scrape and deglaze pan
  5. Add chicken stock or broth and bring up to a simmer.
  6. Add 1 LB cooked chicken or other meat
  7. Add tarragon and peas, then simmer 20 more minutes
  8. Add asparagus as it starts to thicken, and cook 10 more minutes

Chocolate Saltine Toffee

(with vegan and gluten free options)

  • 30 to 40 saltine crackers (I have seen recipes call for 40 but I used about 32 crackers)
  • 1 c butter (2 sticks)
  • 1 c brown sugar, packed (I used half light and half dark because that’s what I had on hand and open)
  • 1/2 tsp vanilla extract (some recipes I have seen do not call for it, but I recommend it)
  • 1.5 to 2 c chocolate chips (I used one 12-ounce bag of TJ’s semi sweet morsels, also see optional note below)

Directions:

Preheat the oven to 350F.  Line a 9 x 11 pan or similar with aluminum foil and spray it very well with cooking spray.  (Do not try to make this without using foil; you will hate yourself).  Place saltine crackers in a single layer on the bottom of the pan.  (Some recipes suggest using a jelly roll pan which may allow for a slightly bigger batch, i.e. 40 crackers, but it’s a bit too shallow for my comfort zone and didn’t want any bubble-overs)

In a saucepan on the stovetop, combine butter and sugar and bring to a boil while stirring constantly.  Once a boil is reached, reduce the heat and simmer, uncovered, for 3 to 5 minutes or until mixture has thickened some.  Take care not that your simmer is not too fast/too high because it will be prone to bubbling over or scorching.  Stir mixture frequently while it simmers to avoid bubbling over or scorching (The taste of burnt butter and sugar is awful so do not burn it)

After mixture has thickened a bit, remove it from the heat, wait 30 seconds, add the vanilla extract and stir.

Pour mixture over the prepared pan with the saltine crackers.  Bake this in the preheated 350F oven for 5- 7 minutes, or until toffee/liquid becomes bubbly.

After removing the pan from the oven, let it sit for 3-5 minutes.

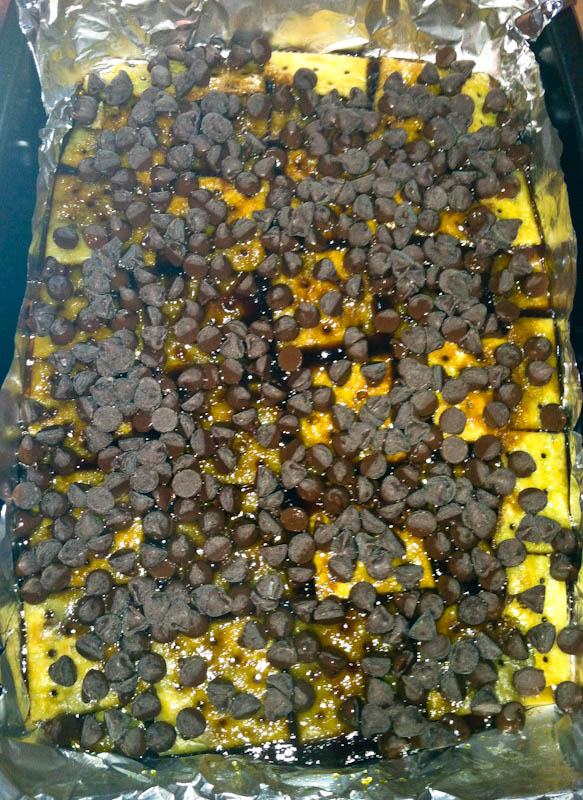
Sprinkle on the chocolate chips and wait for 3-5 minutes, letting them soften and melt a bit, and then spread and smooth them into an even layer with a spatula.

Optional:  After smoothing the chocolate, add nuts, seeds, graham cracker crumbs, toffee bits, dried fruit, candy bits, or swirl in some peanut butter or other nut butter.

Optional: Use other types of chips, such as butterscotch, white, peanut butter, etc. either in addition to or in a half-and-half  combination with the dark chocolate chips for your top layer.

Let cool very well and if desired for expediting purposes, refrigerate or freeze until hardened.  Break into pieces the size of your choice.

Store in an airtight container on the countertop.  Or, for longer term storage, freeze it.  I freeze all my desserts regardless and have been eating this straight out of the freezer.

To keep gluten free, use GF crackers or make your own GF saltine crackers

To keep vegan, use margarine/Earth Balance and use a vegan cracker


Alternate from MrFood.com

Brickle Crunch

Serves: 25
Chilling Time: 30 min
Cooking Time: 10 min

What You’ll Need:
  • 35 saltine crackers (about 1 sleeve from a 16-ounce box)
  • 1 cup (2 sticks) butter
  • 1 cup sugar
  • 1 cup (1 six-ounce package) semisweet chocolate chips
  • 1 cup peanut butter chips
What To Do:
  1. Preheat oven to 400 degrees F.
  2. Line a 10- x 15- inch cookie sheet with aluminum foil. Lay out crackers on cookie sheet, packing tightly.
  3. In a medium-sized saucepan, melt butter, then add sugar and boil, stirring frequently, 2 to 3 minutes, until sugar is completely dissolved.
  4. Immediately pour mixture over crackers and bake 7 minutes.
  5. Remove from oven and immediately sprinkle chocolate and peanut butter morsels over crackers, spreading evenly as they melt.
  6. Refrigerate at least 30 minutes, then break into pieces. Serve immediately or refrigerate until ready to serve.
Notes

This is great topped with chopped nuts or flaked coconut – just sprinkle either on top before refrigerating. It’s best not to substitute margarine for butter in this recipe.


Alternate Similar Recipe from Mr. Food – www.mrfood.com

Homemade Cracker Candy

Homemade Cracker CandyWatch Video

It’s hard to believe that this chocolatey Cracker Candy  is made with such an unusual ingredient! But our Test Kitchen guarantees that once you try ’em, you will make this one again and again!

Serves: 10

Cooking Time: 8 min

What You’ll Need:
  • About 24 round buttery crackers
  • 3/4 cup butter (1-1/2 sticks)
  • 3/4 cup packed brown sugar
  • 2 cups semisweet chocolate chips
  • 1/2 cup chopped pecans
What To Do:
  1. Preheat oven to 350 degrees F. Line a 9- x 13-inch pan with aluminum foil; lightly coat foil with cooking spray. Arrange crackers in a layer in pan.
  2. In a medium saucepan, bring butter and brown sugar to a boil; cook 3 minutes, stirring constantly. Pour mixture over crackers.
  3. Bake 5 minutes; turn off oven. Sprinkle crackers with chocolate chips and let stand in oven 3 minutes, or until chocolate is melted. Spread  chocolate evenly over crackers. Sprinkle pecans over chocolate. Let cool, then break into pieces. Store in an airtight container in refrigerator.


Basic Gumbo

Gumbo is kind of like saying Casserole. It varies drastically. Use this as a base, then expand to your preferences.

Ingredients
1 large onion (chopped)
4 stalks celery (chopped)
1 large bell pepper (chopped)
2 bay leaves
2 TBL cayenne pepper
2 TBL garlic
1 TBL thyme or oregano
1 TBL Worcestershire
1 tsp each salt and black pepper
——-
2 TBL Emeril’s Essence
1 LB some kind of meat

Instructions
1. After finishing cooking for Basic Roux (see recipe)
2. Add all ingredients up to first line and cook 10 minutes
3. Add 2 CU seafood or chicken stock slowly while stirring
– If roux is hot add cold stock, if roux is cold then heat stock first then add roux
4. Simmer 1 hour while proceeding to Step 5
5. Cook meat pieces (unless fish) in whatever manner you desire, and set aside
6. After simmer of 1 hour, add cooked meat or raw fish (Halibut, Cod, Shrimp or Oyster)
7. Add 2 TBL Emeril’s Essence (see recipe)
8. Ladle into bowls and top with parsley or chives

Gumbo should be the consistency of a hearty chicken soup and should always be served with a couple tablespoons of cooked rice.

Cilantro Rice

FROM SCRATCH

General ratio is 2 parts water to 1 part rice

Ingredients

  • EVOO
  • A bunch of Cilantro stems
  • 1 diced onion
  • 1 C white or brown rice
  • 2 C chicken stock

Step by Step

  1. Saute onion in EVOO
  2. Add rice to the onions and stir 60 seconds
  3. Add diced cilantro stems
  4. Immediately add chicken stock
  5. Bring to a boil
  6. Reduce heat to a low simmer
  7. Stir one last time, cover and leave unattended for 20 minutes
  8. Toss rice with 1 TBL softened butter and serve

USING PRECOOKED RICE

Ingredients

  • 1 CU left-over white or brown rice
  • 3 limes per cup of brown rice
  • 1/2 bunch cilantro per cup of brown rice
  • salt to taste

Step by Step

  1. Prepare brown (or white) rice per whatever directions you desire; or use left-over rice
  2. Chop cilantro leaves
  3. Squeeze juice from limes and mix into cilantro
  4. Mix salt, cilantro and lime into rice
  5. Let set at least 1/2 hour before serving

Jalapeño Chili Sauce

Also referred to as Grandpa’s Jalapeño Puree

Before we begin…

  • You can grow your own jalapeños if you life in a warm climate
  • If you don’t, you can buy some at any Mexican grocery or even on Amazon.
  • Any time you are blending the peppers, it will create a toxic gas cloud, so make sure you are in a well-ventilated environment

Ingredients to feed 4 people

A whole bunch of jalapeños – red, green, it doesn’t matter Have some Thai chilies, throw them in there too; as well as your serranos and habañeros if you wish hotter sauce.  If you want a milder Chili Sauce, use Poblano, Anaheim, Bell or Banana peppers. You will also need water, white vinegar, sugar, cumin, tomato paste, garlic powder, onion powder and salt.

Step by Step
2016-03-02 12.29.45

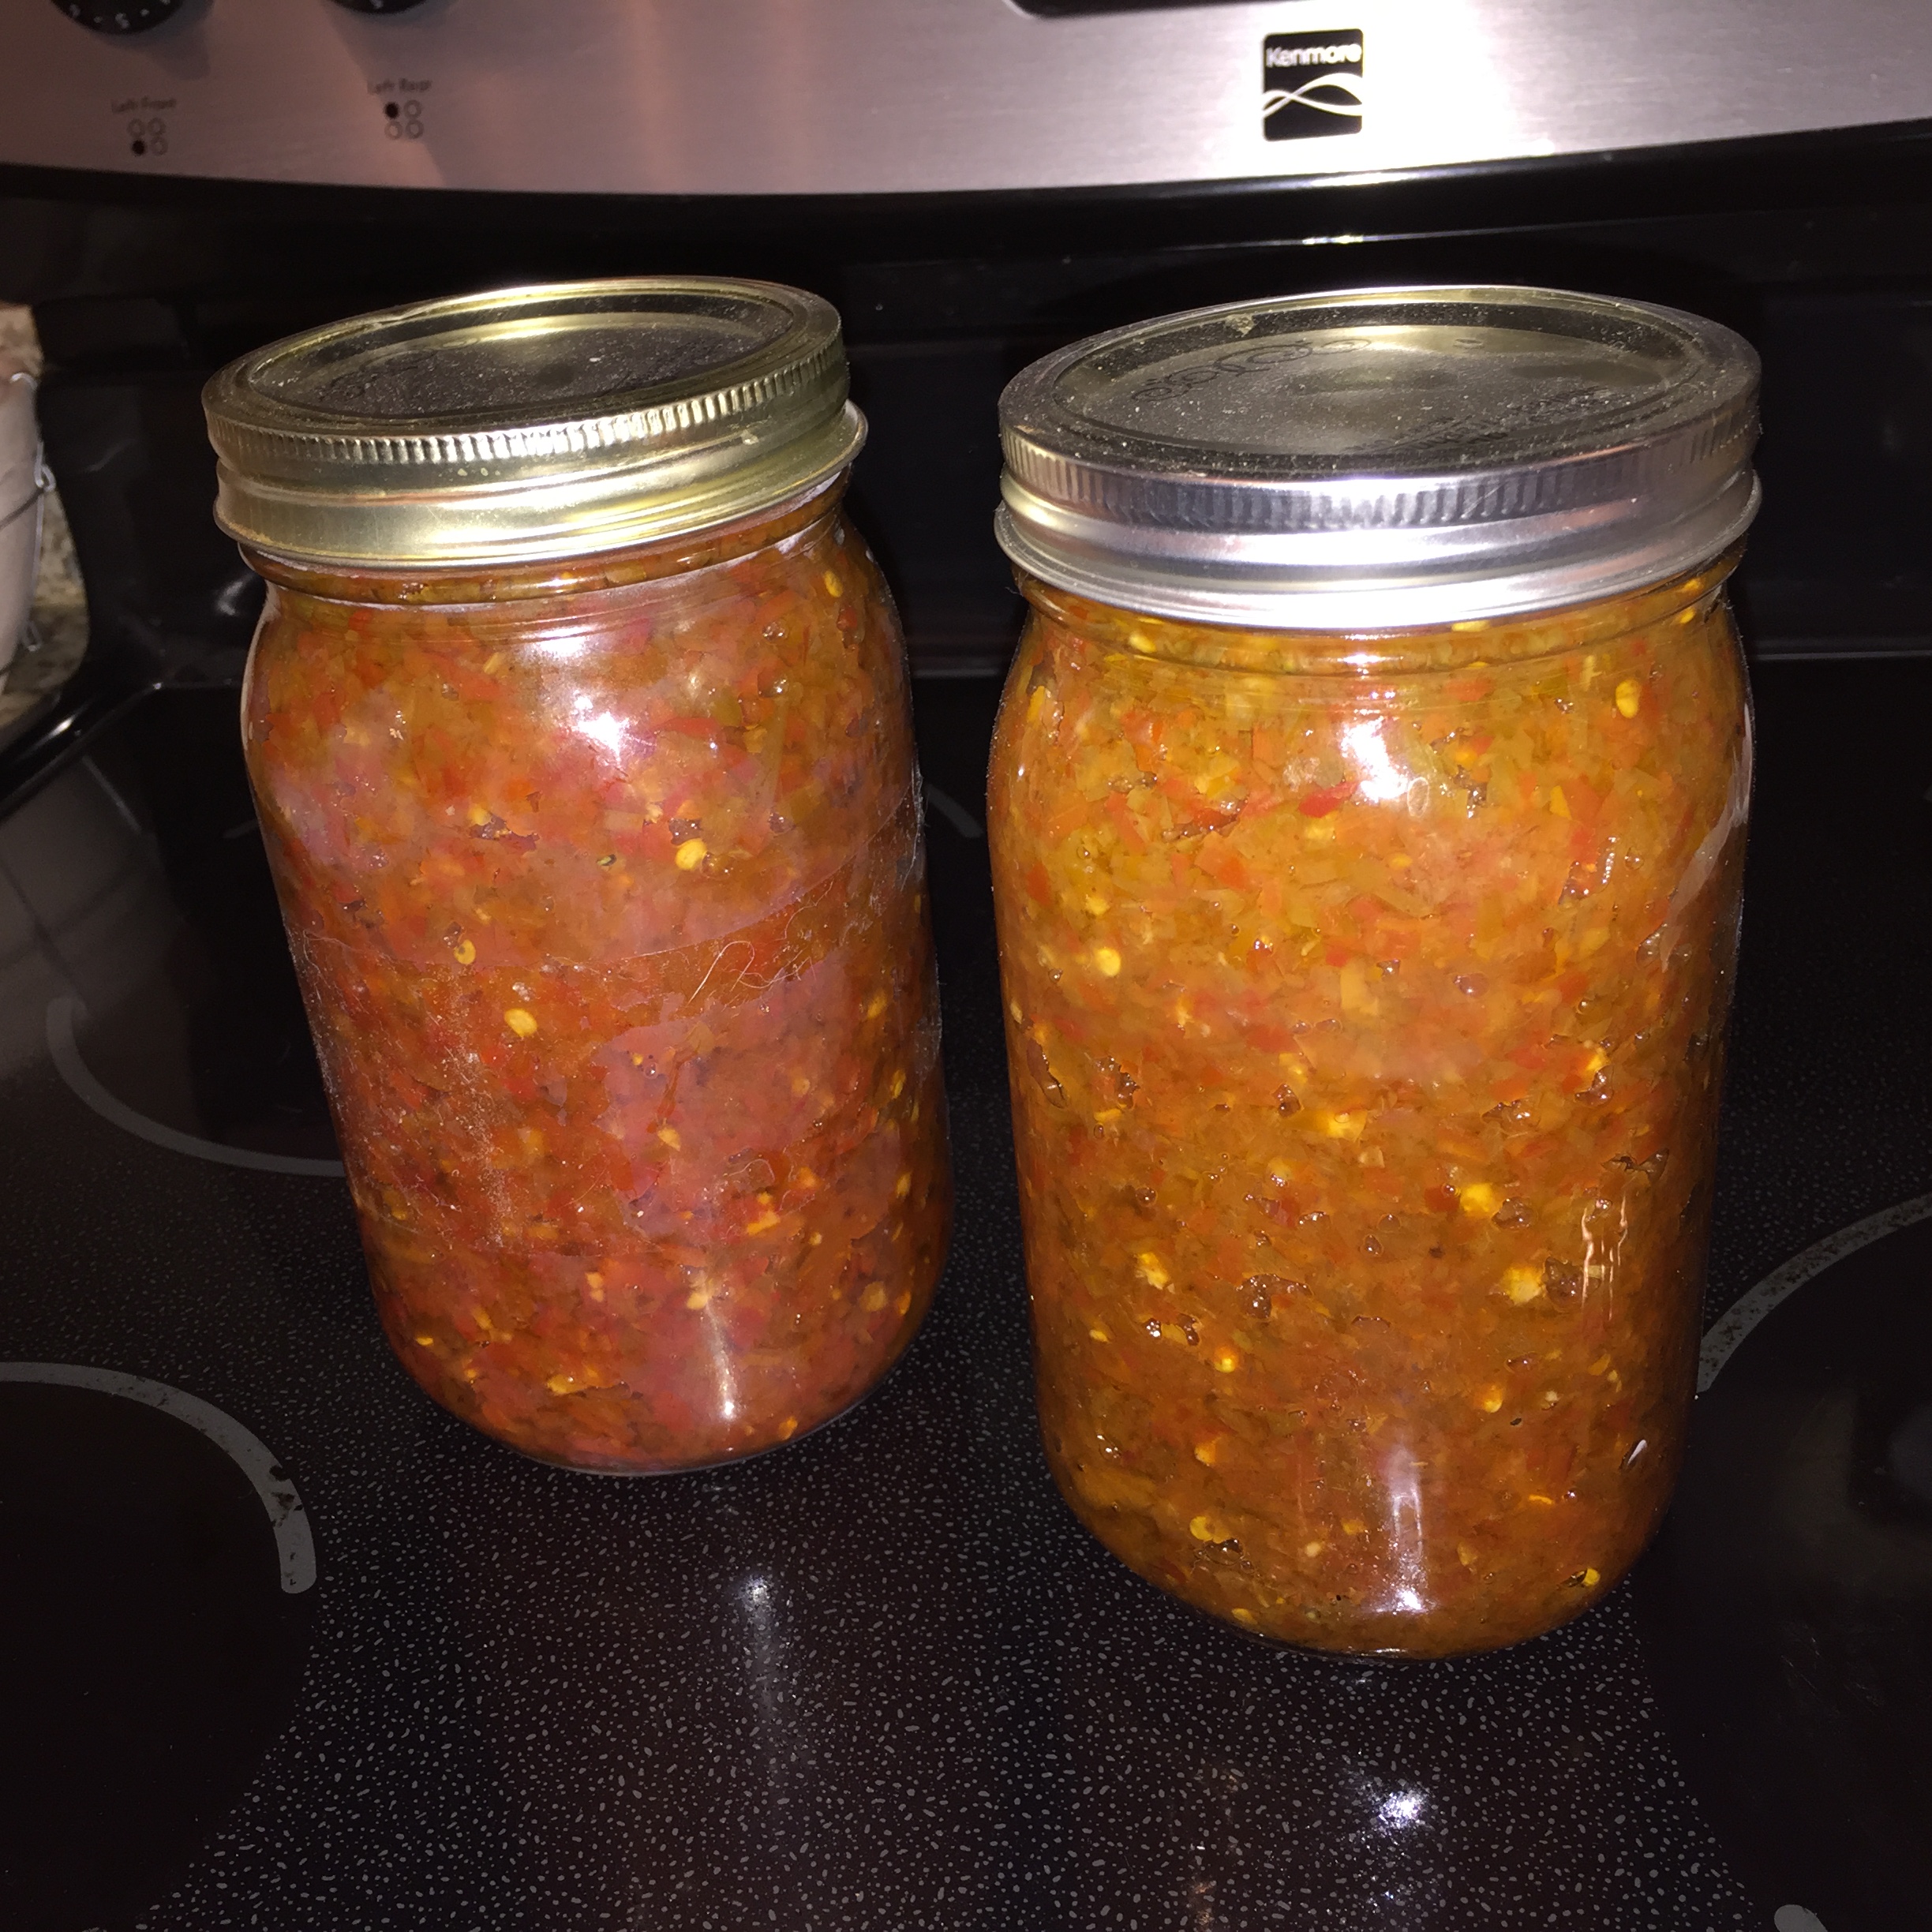
  1. Fill quart mason jars with minced jalapeños
  2. Remove seeds before mincing for milder sauce, leave them in for hotter sauce
  3. Put into mason jar filling about one inch from the top
  4. Place in mixing cup 1/2 C water, 1 C vinegar
  5. Microwave about 2 minutes
  6. Add 1 TBL salt
  7. Add 1 tsp cumin
  8. Mix all mixing cup ingredients to incorporate and dissolve
  9. Pour liquid into mason jars covering peppers
  10. Put the lid on and place jar on counter for a month or two or three – mine just finished eight months

AFTER IT HAS CURED
jal-chi-sauce

  1. Puree in blender – watch out for vapors they are TOXIC
  2. Push pulp through a strainer using a spatula into jars – discard solids
  3. Add tomato paste, garlic powder, onion powder and sugar
  4. Using standard canning procedures, cold pack and hot water batch for 20 minutes

Oh, one more thing…

  • My niece uses this full strength.  That is a bit too hot for me.  This is hotter than Tabasco, and has a lot more flavor.  You don’t need to use too much.
  • My preferred use for this sauce is to make my Jalapeño Ketchup.
  • If you are not good with doing things to taste, for each quart jar that you are aging and processing, Once you have pushed the pulp through a strainer, add 1 tsp salt, garlic powder and onion powder and 1/4 C tomato paste.
  • If you don’t know how to can things, here is a ketchup canning site.  Just follow the same procedure for your chili sauce

Shortcut Chili Sauce

1/2 CU Heintz Ketchup
1/2 CU diced jalapenos (from can)
2 TBL cayenne sauce (Frank’s Red Hot or Durkee)
1 TBL rice vinegar
1 tsp garlic powder
1 tsp onion powder
1 TBL sesame oil
1 tsp cumin
1 tsp oregano
1 tsp salt

1. Blend all ingredients until somewhat smooth.
2. Press through a sieve
3. Store in something like an old Tabasco bottle
4. Refrigerate


This is a recipe that has been created or modified by Robert (Grandpa) Andrews.
CLICK HERE for a free sample copies of Grandpa's Cookbooks. © 2016, 2017, 2018.

Onion Tips

Vidalia Onions – Sweet and Mild

White Onions – Sweet with a bit of a sharp taste

Yellow Onions – no info

Red Onions – Good, hearty, sweet

Spanish Onions – no info

1. Red Onions are good for things like French Onion Soup
2. When cutting onions, cut in half THROUGH the root. Cut horizontally, then vertically. Finally chop as you would normally, and what you end up with are small pieces

#########

Onion Soup, Madera

Ingredients

2 Vadalia Onions
Grapeseed Oil (high smoke point)
1.5 CU Madera Wine
2 CU Chicken Stock
Chives
Butter
Thyme
Bread Crumbs

Instructions

1. Shave onions as thinly as possible.
2. Heat oil to very hot.
3. Carmelize onions for about 15 minutes
4. Add thyme and Madera Wine
5. Cook another 15 minutes
6. Add chicken stock and butter, and bring to boil
7. Cook till browned
8. Pour into soup tureen
9. Garnish with minced chives, garlic, thyme and bread crumbs


Tips: Noodles

UDON – 100% wheat flour – From Osaka area

SOBA – 20% white, 80% buckwheat – from Tokyo area – nutty, low gluten, a good lunch noodle

SOMAN – wheat, thin, angelhair, good summer pasta – Cook and chill

RAMEN – wheat, water, egg, soy, vinegar, mustard

Cook noodles separately because it will make water starchy

Grandpa’s Bloody Mary Mix

Basic Bloody Mary Mix

  • 2 LB cherry tomatoes
  • 1 tsp cayenne pepper sauce
  • 1 tsp Tabasco
  • 2 TBL Worchestershire Sauce (Soy, anchovy and tamarind – Umami)
  • 1 tsp celery Salt
  • 3 tsp Lime juice

Grandpa’s Arghhh Bloody Mary Mix

Similar to Mr. & Mrs. T – Rich & Spicy Bloody Mary Mix, only a bit spicier

Ingredients

32 oz can tomato juice
3 TBS lime juice
2 TBL Grandpa's Thunder Powder or Arghhh Powder
2 TBS vinegar
2 TBS sugar
1 TBS prepared horseradish
2 tsp Dijon mustard
1 TBS celery salt
½ tsp pepper
¼ tsp onion powder
¼ tsp garlic powder
3 TBS Worcestershire
1 TBL Tabasco

Instructions

1. Combine all ingredients in a two quart pitcher
2. Store covered in refrigerator
3. Bloody Mary per original mix: Three parts Bloody Mary Mix to One part vodka, gin, rum or tequila. Serve over ice

Variations

1. Create entire recipe WITHOUT using ANY tomato juice… yet
2. Freeze Bloody Mary mixture in an ice cube tray
3. Buy Campbell’s Tomato juice canned singles
4. Dissolve two or three mixture cubes into your glass of juice
OR
2. Store in lime juice bottle
3. Buy Campbell’s Tomato juice canned singles
4. Add 2-3 TBS mix into your glass of juice

Fun idea: Make your ice cubes out of a mixture of celery and tomato. Fun and Yum.

Breakfast Pizza

Pizza Dough (Optional *)

ALTERNATE:  Use a eight inch pita

  • 3 C High Gluten Flour
  • 1 T sugar
  • 1 Tsp Dry Yeast
  • 1 Cup Ice Water
  • ½ Tsp Salt
  • 1 T Salad Oil (any light vegetable oil)
  1. Put flour, sugar and yeast into food processor and pulse 3 times
  2. Add 1 C ice water till it starts to form crumbles
  3. Let rest 10 minutes
  4. Add salad oil and salt
  5. Run food processor and drizzle in ICE water until it forms a ball
  6. Knead 3 minutes on the counter
  7. Cover and put into fridge for 24-48 hours to rise and let flavors develop
  8. Take dough ball and flatten into a rectangle or a circle
  9. Flatten with a roller then transfer to a baking sheet or a pizza pan
  10. Brush edges with EVOO
  11. Prebake dough about 5 minutes at 350º

Modified Micro Hollandaise

  • 4 Egg Yolks
  • 1 Tbsp Water
  • 1/4 C cheddar cheese
  • 1/2 Cup Melted Butter
  • 3 ½ Tbsp Lemon Juice
  • 1/8 Tsp White Pepper
  • ¼ Tsp Salt
  1. Put egg yolks, water and butter into a glass bowl
  2. Microwave for 10 seconds – remove and stir with a fork
  3. Repeat three times
  4. Add Lemon, pepper and salt.
  5. Microwave for 10 seconds – remove and stir with a fork
  6. Repeat until it BARELY starts to congeal
  7. For Chipotle Hollandaise, add 1/4 tsp ground chipotle
  8. Stir with a fork until congealed lumps are absorbed
  9. Strain through a sieve to remove any lumps that may remain

For Mornaise Sauce substitute Swiss for Cheddar and cream for the water,


Simple Breakfast Pizza

  1. On pizza dough or pita…
  2. Mix 1/4 C cottage cheese, 1/4 C sour cream, 1 tsp oregano, 1 diced bell pepper, a pinch of cayenne pepper and 1 TBL EVOO – SET ASIDE
  3. In second bowl… that is Bowl Number 2 – mix 3 TBL grated Parmesan cheese with 1.5 C shredded mozzarella cheese – SET ASIDE
  4. Cook 3 pieces of bacon till crisp, then break into pieces
  5. Spread bowl #1 onto pizza crust leaving 1/2 inch border
  6. Sprinkle crumbled bacon across the top
  7. Sprinkle mozzarella cheese mixture – Bowl #2
  8. Optional:  Top with 4-6 unbroken eggs (sunny side up)
  9. Bake at 450º for 8-12 minutes

Brizza Pizza

garlic, spinach and mushroom breakfast pizza

  • On pizza dough or pita…
  • 1 small ball Dough
  • 2 Scrambled Eggs
  • ¼ Cup Marinated Spinach Leaves
  • ¼ Cup Sauteed Mushrooms
  • ¼ Cup Monterey Jack Cheese
  • 1/4 Cup Hollandaise Sauce
  1. In an oiled frying pan scramble eggs.
  2. Place 1/4 cup Hollandaise on the Brizza dough and spread evenly with a spoon or spatula.
  3. Evenly top the Hollandaise with the scrambled eggs followed by the marinated spinach leaves and sautéed mushrooms.
  4. Top all ingredients with Monterey Jack cheese and place in a 400 degree oven for 4 minutes or until the cheese has melted and begun to turn light brown.
  5. Remove from oven and allow to sit for 1 minute.
  6. Cut into 4 slices, serve and enjoy.

The Toluca

  • On pizza dough or pita…
  • Chipotle Hollandaise 1 fl. Oz
  • Chorizo (cooked) 2 oz
  • Scrambled Egg 1 each
  • Red Pepper (diced) 1 oz
  • Green Pepper (diced) 1 oz
  • Jack Cheese 2 oz
  • Jalapeno Cream Cheese 1 oz
  1. Place uncooked dough on prep table
  2. Ladle 1 fl. Oz of chipotle Hollandaise and one scrambled egg on top of Brizza dough
  3. Evenly top egg with chorizo, red pepper & green pepper
  4. Cover all ingredients with 2oz of jack cheese
  5. Place pizza in oven at 400 degrees for 6-8 minutes.
  6. Remove & cut pizza into 6 pieces
  7. Add cream cheese drizzle
  • This is something that I had at a restaurant.  Here are a few options.
  • Pizza dough about 8-10 inches
  • Philly Cheese blended with Jalapenos or Spinach in place of red sauce.
  • Topped with your choice of scrambled egg pieces, sausage, bacon, mushrooms, peppers, onions, ham, etc.
  • I would put the cheese / Hollandaise on first, then the toppings.

Margarita Breakfast Pizza

  1. Pizza Dough or Pita
  2. Mornaise Sauce
  3. 1/2 C Mozzarella
  4. 3 scrambled eggs
  5. 1/4 C Mozzarella
  6. Basil

Benedict Breakfast Pizza


  1. Pizza Dough or Pita
  2. Sliced or ground ham
  3. Hollandaise Sauce
  4. 1/2 C Mozzarella
  5. 3 scrambled eggs
  6. 1/4 C Feta cheese
  7. Chopped Chives


Florentine Breakfast Pizza


  1. Pizza Dough or Pita
  2. Hollandaise Sauce
  3. Shredded spinach
  4. 1/2 C Mozzarella
  5. 3 scrambled eggs
  6. 1/4 C Feta cheese
  7. Diced red bell pepper


All American Breakfast Pizza


  1. Pizza Dough or Pita
  2. Melted cream cheese
  3. 3 scrambled eggs
  4. 3 pieces cooked (crumbled) bacon
  5. 1/4 C Mozzarella
  6. Chives


Grandpa’s Peanut Brittle

  • Measure out peanuts in one container, and butter, baking soda and vanilla in another.  Have them ready.  This recipe goes quickly near the end.

Ingredients

  • 2 cups sugar
  • 1 cup light corn syrup
  • 1/4 cup water
  • 2-3 cups salted roasted peanuts
  • 2 tablespoons butter
  • 1 1/2 teaspoons soda
  • 1 1/2 teaspoons vanilla

Homemade Peanut Brittle in 6 steps:

  1. Line a sheet pan with parchment paper. Set aside.
  2. Cook sugar mixture.  Add sugar and water to a medium saucepan and stir well. Stir in corn syrup. The corn syrup helps avoid crystallization.  Cook mixture over medium heat (don’t be tempted to turn the heat up!), stirring occasionally, until it comes to a gentle boil. It is not necessary to start stirring continually until it starts to boil.  Cook until temperature reaches 250F (121°C).
    • Attach your candy thermometer to the edge of the pot, and make sure it is submerged in the liquid, but not touching the bottom of the pot.
  3. Stir in peanuts.  Add peanuts and stir the mixture constantly until the candy thermometer temperature reaches 300 degrees F.
  4. Remove from heat. 
  5. Add remaining ingredients.  Immediately stir in butter, baking soda and vanilla. The mixture will foam and change texture.
    HINT:  I mix this mixture in with about 1/2 C peanuts so it pours easily.
  6. Pour into sheet pan.  Carefully pour the hot mixture onto a sheet pan lined with parchment paper.  Use a knife or spoon to quickly (and carefully!) spread the mixture into an even layer.
  7. Cool and enjoy. Allow to cool completely (at least 30 minutes) before breaking apart and eating.
  8. Store the completely cooled peanut brittle in an airtight container.

Corn Syrup Substitutes:

If you need to substitute corn syrup in this peanut brittle recipe, you can substitute cup for cup of:

  • honey
  • light molasses
  • agave nectar
  • brown rice syrup

You could also substitute a combination of these ingredients and please note that with any of these substitutions, the peanut brittle will have a lightly different taste, texture and consistency as well.


Notes

To make ahead: Peanut brittle can be made several days or even weeks in advance.  It stays fresh at room temperature for 6-8 weeks weeks.

To store: Store peanut brittle (once it’s completely cooled) in an airtight container at room temperature.  Do not refrigerate as the moisture from the fridge will cause the brittle to soften. Store for 6-8 weeks.

To freeze: Peanut brittle can be frozen and stored up to 3 months.  Allow the brittle to cool completely and store it in a freezer safe, airtight container.

Salmon Pate – Internal Recipe from Juneau Raku Smokeries

Ingredients

1 pound smoked sockeye salmon
16 oz cream cheese
1 CU mayonnaise
½ TBL Dijon mustard
½ TBL Lemon Juice
1 tsp dill pinch black pepper

Instructions

1. Remove shin and finely shred smoked salmon
2. Add softened cream cheese in small chunks
3. Blend all ingredients without totally liquefying
4. Enjoy on crackers, bagels or bread

Served on Auk Nu tour boats in Juneau, Alaska


Pastry Dough

You can use a pastry cutter, but it is easier to use your food processor.  Just make sure you do not overprocess your dough, or it will be tough.

INGREDIENTS

  • 4 CU flour
  • 1/4 CU granulated sugar
  • 1/4 CU dark brown sugar
  • Juice and zest from one lemon
  • 1 stick butter (cold) pieces
  • 1 tsp salt
  • 1 egg plus 1 yolk
  • Pulse above together, then add ice cold water
    Pulse only long enough to bring dough ball together

STEP BY STEP

  1. Cut all ingredients together or pulse in food processor
  2. Add water with food processor running only to incorporate – DO NOT OVERPROCESS
  3. Wrap dough in plastic, and refrigerate for 30-60 minutes
    Freezes well too.
  4. Roll dough flat, but not too thin, then transfer to pie pan or parchment paper.  Roll onto your rolling pin to transfer to keep it from breaking apart.
  5. Dock crust so that dough doesn’t puff up
  6. Sprinkle lightly with a bit more brown sugar
  7. Cover with foil, and bake at 375° for 20 minutes
  8. Remove foil and bake 5 more minutes

NOTES

  • Fill with savory or sweet filling.
  • If you are making a rustic free-form tart, put fruit in just after step four

Phở bò – Ken Brown’s Beef Noodle Soup

Main Ingredients:

  • 16 oz bánh phở fresh rice stick noodles, quickly blanched (10 sec), drained
  • 1 large brown onion, very thinly sliced
  • ½ lb raw lean beef or water buffalo eye of round, sirloin, tenderloin, or other fat-marbled meats, sliced paper-thin, or, in a pinch, even shaved rare roast beef from the deli
  • ½ lb other cooked meats – leftover pot roast, VN meatballs, tripe, boiled beef tendon, etc.

Instructions Preparation:

  1. Slice the raw meat very thinly, “deli”-style. Beaucoup meat is needed. Partial freezing makes the task easier, as does a mandolin slicer. Set aside to come to room temperature.
  2. Briefly toast the dry spices in a large (about 4-qt) saucepan to bring up their aroma. Then combine the first twelve (12) broth ingredients, and bring to a boil. A tied cheesecloth or coffee filter bundle is recommended to contain the spices. Lower the heat (to reduce turbidity – we want a clear, delicate broth) and simmer the stock for ½ hour, or long enough to infuse the spices’ fragrance into the broth. (I’ve even microwaved it for Very Phast Phở!)
  3. Add the fish sauce last. The nước mắm provides saltiness as well as subtle, Southeast Asian background flavor. Check for seasoning. The broth should seem strong and slightly salty, since the noodles & herbs aren’t seasoned, but dilute with water if desired.
  4. On a platter, arrange the bean sprouts, chiles, limes, & herbs, family-style, and set out the three bottles of sauce.
  5. Divide the pasta among the four (4) 1½-quart-sized soup bowls. Layer in the sliced onion & meats, and ladle in the boiling broth to cover, plus 1 to 2 inches or so. Garnish with the green onion. Then, at the table, let each diner toss in some bean sprouts & torn-up herbs, add condiments as desired, stir it all up, and imagine dining in an exotic café in Hồ Chí Minh City!
  6. By the way, don’t forget the beer, French wine or champagne, and Vietnamese Iced Coffee!
  7. P.S. Once you fall in love with the beef/buffalo (bò) version, experiment with pork broth and Chinese roast pork, red BBQ pork, sausages, chitterlings, etc. or chicken broth and fowl meats, such as chicken, turkey, duck, etc. or seafood broth and shrimp, squid, cuttlefish, octopus, scallops, mussels, clams, crab, lobster, fishballs, etc. Just don’t forget nước mắm! It’ll be great!

Phở Bò Broth:

2½ qts beef stock, canned low-sodium beef broth or consommé, or Phở-in-a- can
4 tbsp sugar or brown sugar
1 pc ginger, 4”, unpeeled, microwaved on high for 4 min, then well crushed
2 medium white onions, microwaved on high for 4 min, then quartered
4 garlic cloves, microwaved on high for 2 min, then crushed
1 small cinnamon stick, broken
4 star anise, broken
8 whole cloves, crushed
1 tbsp whole black and/or white peppercorns, crushed
1 tbsp coriander seeds, crushed (optional)
1 bay leaf (optional)
2 pods cardamom, crushed, or 1/8 tsp seeds (optional)
¼ cup nước mắm or more, but be careful – depending on the brand, it can be salty!

Garnishes & Condiments:

4 finely sliced green onions
½ lb bean sprouts (Essential!)
+ sweet or Thai basil (Essential!) Sold by the bunch
+ fresh coriander/cilantro sprigs (Essential!) Sold by the bunch
+ other VN herbs, such as spearmint, sawtooth (culantro), purple perilla (shiso), etc.
2 Thai bird, serrano, or Jalapeño chiles – red or green, thinly sliced
2 limes, large, quartered into wedges
+ Chinese Hoisin sauce (bottled)
+ Sriracha or other hot red chili sauce (bottled)
+ nước mắm, to taste (bottled) (Yep, it’s Essential!)

Notes From an eMail recipe exhange from Ken Brown.

“I’m the Will Rogers of VN (or SE Asian or Korean) restaurants. I’m so glad to to get it, that I’ve never met a dish I didn’t like. I recall when Phoenix was a culinary desert in the 70’s. I have tested it and tweaked it many times, I’ve simplified the traditional dish over the years, so it’s a good starting point for those who want to jump into the Pho and experiment!

Notes This ethnic dish will certainly become both a family favorite and a great way to “wow” guests! The many Phở variations ensure recipe longevity though your improvisation!

Phở (~pronounced “fah” or “fəh”) is the quintessential breakfast meal in Vietnam, but it’s great any time! It’s nearly addictive! While it starts out as a basic bowl of pasta, around Sài Gòn, elegantly brightened by fresh herbs, the fragrant, spicy broth has emerged as the real star!

Get fresh Phở noodles from the many local Vietnamese (VN) or Asian markets, along with the Hoisin, chili, and fish sauces. Pre-cooked dry bánh phở is okay, too. Any other thin oriental noodles, or even linguine, can substitute in a pinch.

The fish sauce is essential! Use VN nước mắm, but others, such as Thai nam pla, will work well. If it sounds unappetizing, think again. Its sublime, je ne sais quoi, anchovy flavor is a key constituent of Worcestershire and most bottled brown meat sauces, such as A-1, Heinz, & HP. Start with some in the broth, allowing diners to kick it up at the table. It traditionally replaces soy sauce.

To present Phở as a main course, place the pasta in extra-large, individual serving bowls, add the meats & onion, and ladle in the hot spicy broth, which quickly cooks the raw beef & onion.

Then, at the diners’ discretion, a generous portion of garnishes can be added. Dumping in the sprouts and tearing up the herbs is half the fun! Enjoy with a large soup spoon in one hand and chopsticks in the other to slurp up the noodles! The Hoisin, chili, and fish sauces can be added by the diner directly to each bowl or, better yet, put in individual small bowls for dipping solid morsels fished out of the broth with chopsticks or a fork.


Phở bò – Traditional

Beef Broth:
3 lbs beef bones (ask your butcher to cut them into managable pieces)
1.5 lbs beef short ribs or beef brisket
16 c water (4 quarts)
1 large yellow onion, peeled and quartered
2 large pieces ginger, split horizontally, not peeled
10-12 whole star anise
6-8 whole cloves
1 cinnamon stick
2 tbs salt
1/4 c fish sauce
2 tbs sugar
Thinly sliced raw sirloin beef, if desired

Directions:

  1. Bring water to a simmer, add bones and beef, simmer with onion, ginger, fish sauce and sugar for 1.5 to 2 hours. Strain foam and fat frequently, but be careful to not stir too much as you don’t want to cloud the broth.
  2. Remove brisket/short ribs, shred meat and set aside for service. Add anise, cloves and cinnamon stick in a cheesecloth or spice bag.
  3. Simmer broth with spices for another 30-45 minutes. Remove spice bag, onion and ginger. Strain broth well, keep boiling hot.
  4. Place all accompaniments out on a platter, serve alongside Phở.

Tips: Chicken

Ingredients When buying chicken in the store, look for the following characteristics…

When storing, follow these guidelines…

Instructions

1. Tight seal on package
2. Keep on bottom shelf near back for up to 3 days
3. Avoid cracked packaging & any pink discoloration spots.
4. Pooled juice in bottom of styro container can mean it’s been on the self for a while.
5. Check expiration date.
6. White skin = grain fed… yellow skin = corn fed… taste is about the same.
7. Generally better to buy chicken with the bone in.

Use an instant read thermometer:
Chicken –e.g. 140 F = underdone, needs to be 165 F
Cook chicken to 160 F. If to 180 F it gets tough

Poaching Eggs

Standard Poached Eggs

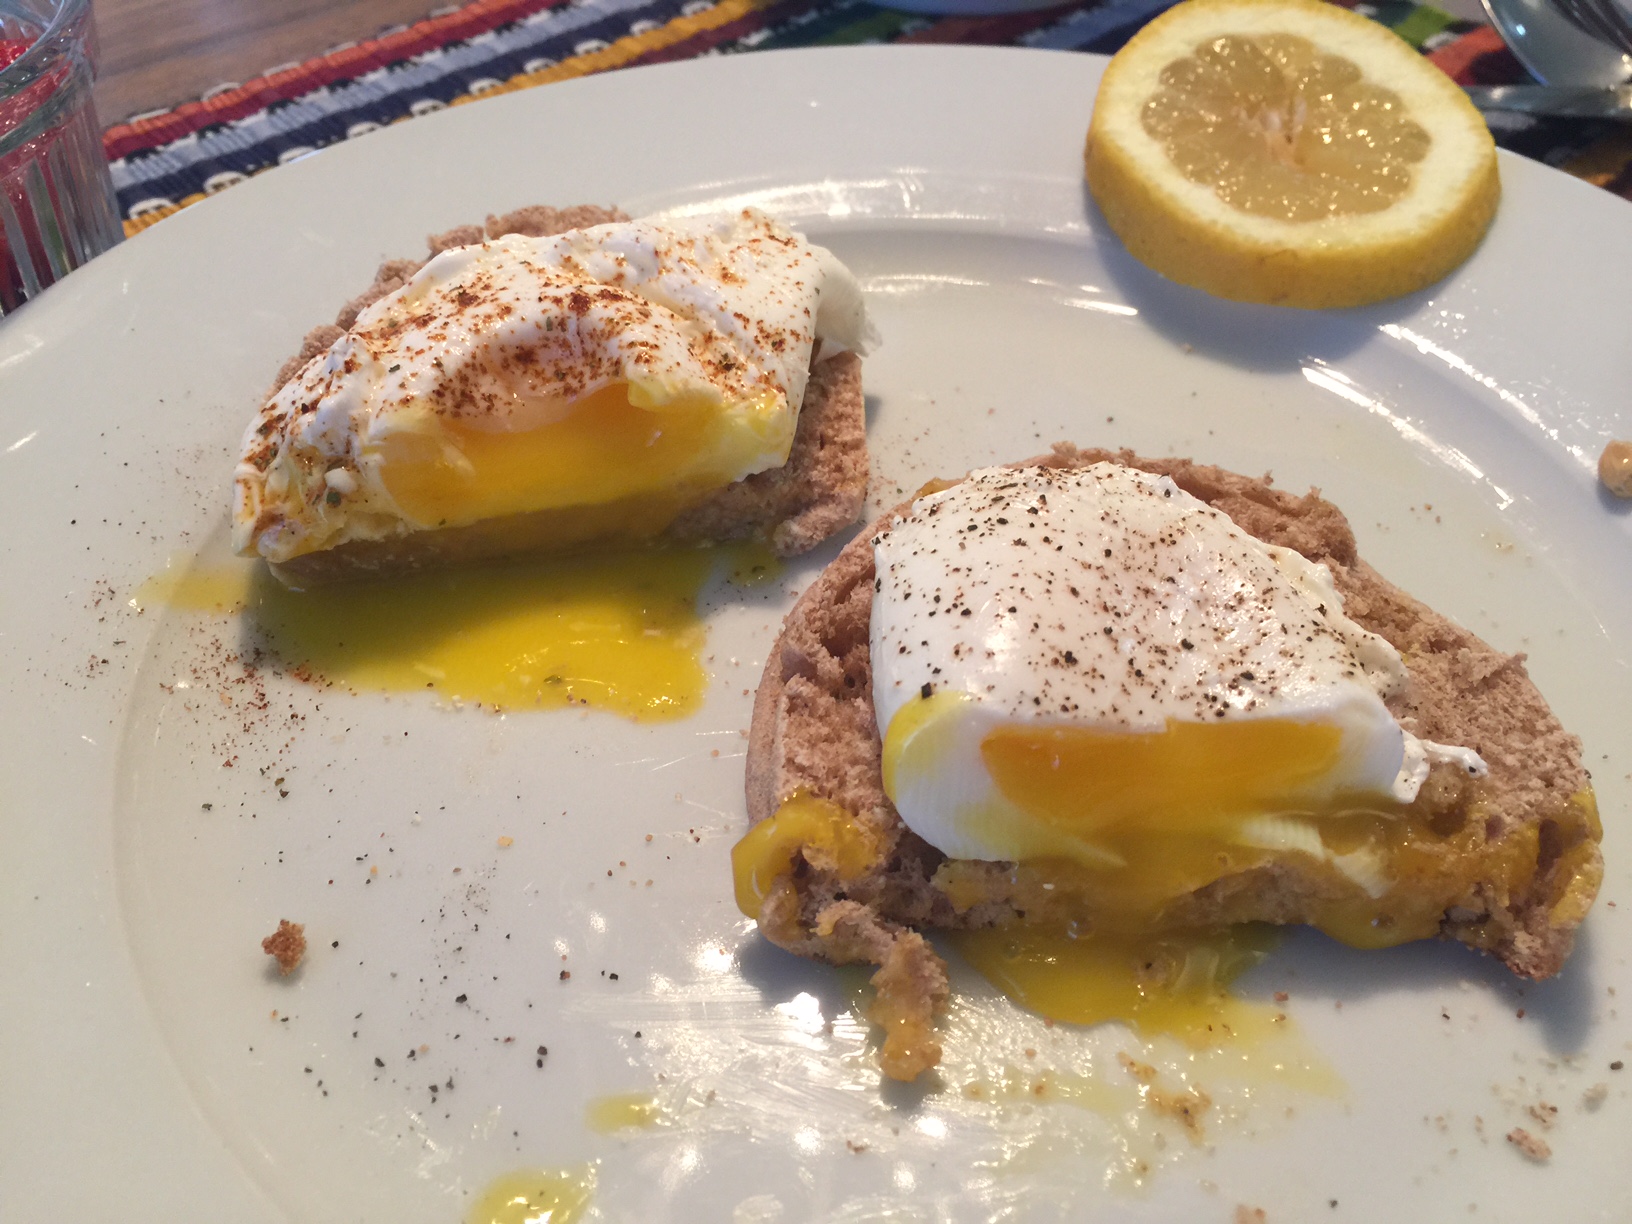
Egg on the left (of the photo on the right) was cooked for 2 1/2 minutes, and has a fully runny yolk. Egg on the right was cooked for three minutes, and has a soft yolk that is only slightly runny.

INGREDIENTS

Fresh COLD eggs
Large pot of simmering (nearly boiling) water (approx 200 degrees)
2 TBL white vinegar and 2 TBL salt

STEP BY STEP

1. Bring large pan of salted water to boiling, then reduce to the merest simmer
2. Add vinegar as a stabilizer
3. Break egg into a dampened bowl (just ran under the faucet and the water dumped)
4. Carefully stir the water to create a SOFT swirling motion
5. Gently slip the egg into the center of the vortex
6. Let cook 2.5 – 3 minutes and remove with a slotted spoon
NOTE: You can discard the loose membrane that floats free from the body of the egg.
7. After you remove it from the water, put it onto a no-lint tea towel to drain slightly.  This keeps it from getting your English muffin wet.
8. Serve on toast with a slice of avocado, some feta cheese, and salsa on the side

Poaching Eggs in the Shell

  1. Start with fresh and cold eggs
  2. Put eggs into room temperature water
  3. Heat water quickly over medium high heat
  4. When water reaches 170º turn burner down to simmer and keep temperature between 165º and 180º
  5. Let cook for exactly 12 minutes (for soft poached)
    Increase to 15 minutes if you like them just a BIT tighter.
  6. Remove to ice bath for 60 second
  7. Crack egg directly onto toast or English muffin.
    (The white that is retained in the shell is the part the floats around when you poach using the first method on this page.  Edible, but not attractive.)
  8. Optionally, serve with hashed browns

Poaching in a Custard Cup

  1. Put custard cups in the bottom of a large pot
  2. Add water so that water comes about one inch above rim of cup
  3. Add 1/4 C white vinegar and 1 tsp kosher salt
  4. Bring water to 205-210 degrees (almost boiling)
  5. Break eggs into a cup outside pot in case the yolk breaks
  6. Slip eggs into custard cups at 30 second intervals
  7. Start timing egg poaching cycle with the first egg.
    NOTE:  It might take extra time to poach your egg to your liking since it is “enclosed.”  Start with four minutes per egg.
  8. After removing the first egg, remove the next egg 30 seconds later
  9. Test this on yourself, before you expose your guests to it.

Commercial Egg Poacher

My wife prefers an Egg Poacher, and I am not covering that preparation here because it is very easy:  Put eggs into the poacher, add some water and press a button.  On the up side, you get nearly perfect poached eggs every time.

Here is the one she uses:   West Bend Egg Poacher  – – available from Amazon for about $35.  Very easy, and very consistent.  This can also be used for hard-boiling eggs, although she uses it just for poaching.

TIPS AND TRICKS

  • You do not need to refrigerate eggs IF they have not been cleaned and processed.  If you get them in a typical supermarket and there are no feathers or poop on them, refrigerate them because the protective coating is gone.
  • Don’t use raw eggs past the “marked date” from the package for anything other than fully cooked eggs.
  • The white of fresh eggs will stay more intact than the white of older eggs, which tend to spread out, so use fresh eggs for poached eggs.
  • Another tip is to break the egg into a colander, and allow the loose white to strain.  Poach only the remaining white and yolk
  • Carmelize onions and serve on English muffin, spinach, ham and cheese. Top with poached egg.
    COOKING FOR A LARGE GROUP?
  • You can par boil them ahead and put into ice water to store.  Cook for only two minutes, the remove to ice water.  To reheat them, just put back into boiling water for two minutes.  This is how cruise ships and hotels do their poached eggs.
  • If you are serving a large group all at the same time, after cooking put them into water at 150º until ready to plate.
  • To cook four eggs at a time, put four custard cups into a boiling pot of water.  Put eggs into each up at 15 second intervals.  Remove the first at 3 minutes, then the others at 15 second intervals.  Put into an ice bath to stop cooking.  Refrigerate up to 8 hours.  Reheat for two minutes in boiling water.

Another good recipe is poaching eggs in marinara sauce.  Heat your canned crushed tomatoes (San Marzano) to boiling.  Cook about three minutes.  Reduce to a simmer and put your whole eggs into the sauce.  Cover and cook for 2 1/2 minutes.  Scoop out tomato with egg in the center and put on toast.


Steaming Eggs

You can put eggs into the basket of a standard steamer.  8 minutes for soft, 10 for medium, and 12 for solid yolks.


Need to test and debug

  • Put water, enough to cover custard cups by 1/2 inch
  • Add 3 TBL vinegar and 1 tsp salt
  • Bring to boiling
  • Prep a bowl of ice and water
  • Use fresh eggs
  • Put egg into the custard cup
  • Add others 30 seconds apart
  • Set water to 205º
  • Cook 5 minutes each

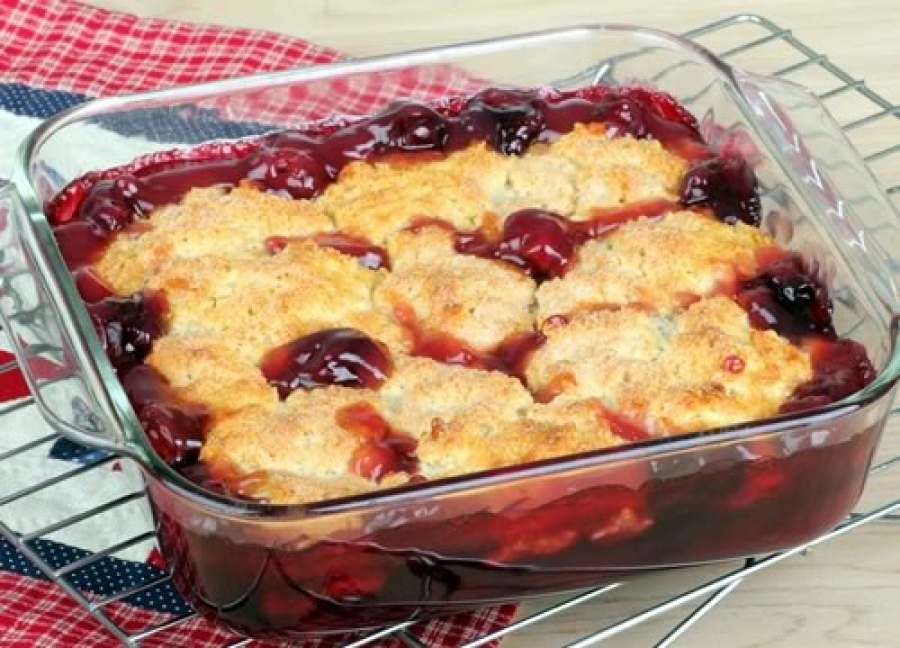
Proper Cobbler

cobblerBEFORE WE BEGIN

  • Use fruit at the peak of ripeness
  • Peel and slice fruit
  • Measure out ingredients and set aside

INGREDIENTS

  • 1/2 cup golden raisins
  • 4 TBL Butter
    .
  • 3 1/2 pounds Gala apples (7 to 8)
    Alternately, use Nectarines, Peaches or Plums
  • 1/2 stick unsalted butter
    .
  • 3/4 cup granulated sugar
  • 1 1/2 cups all-purpose flour
  • 2 teaspoons baking powder
  • 2 tsp corn starch
  • 1 TBL cinnamon
  • 1/2 tsp salt
    .
  • 1/4 C heavy cream
  • 1/2 C whole milk
  • 1 egg
  • Juice and zest from two lemons
  • .
  • 2 TBL Turbinado sugar for garnish

STEP BY STEP

  1. Preheat oven to 475º
  2. Simmer raisins and butter in a small saucepan over medium heat for about 4 minutes.
  3. Remove from heat and set aside to macerate, covered, 30 minutes.
  4. While raisins macerate, peel and core apples, then cut into 1-inch pieces or thin slices
  5. Toss apples with lemon juice.
  6. Spread softened butter in cast iron skillet and sprinkle granulated sugar evenly over it. Put excess into your mixing bowl
  7. Cook apples over medium-high heat, without stirring, until juices are deep golden and bubbling, 18 to 23 minutes (don’t worry if juices color unevenly).
  8. Combine apples and raisins and butter (skillet will be full).
    SEE BELOW FOR AN ALTERNATE BISQUICK CRUST
  9. Stir together flour, sugar, cinnamon, corn starch, baking powder, and salt
  10. Add cream, egg, milk, and lemon – stir just until a dough forms.
  11. Gather dough into a ball and transfer to a lightly floured surface.
  12. Gently knead 6 times, then pat dough into an 8-inch round.
  13. Cut out as many rounds as possible with lightly floured cutter.
  14. Gather scraps and pat out, then cut out more rounds. (You will have about 12)
  15. Don’t re-press more than once because dough will begin to get tough
  16. Arrange biscuits on apples about 1/2 inch apart and brush tops with remaining tablespoon cream
  17. Sprinkle with Turbinado sugar
  18. Bake at 375° for about 35 minutes until biscuits are puffed and golden, about 18-20 minutes

OH, ONE MORE THING . . .

  • The cobbler takes its name from the biscuit dough crust on top – it is rough looking or ‘cobbled.’ It originated in the U.S. sometime in the early to mid 19th century.
  • For best results, use a well-seasoned 10-inch cast-iron skillet; and a 2 1/4-inch round cookie cutter
  • Accompaniment: heavy cream or ice cream

VARIATIONS

  • Like a classic tarte Tatin, this cobbler begins with apples being caramelized in a rich mix of butter and sugar, but we’ve upped the ante by adding raisins.
  • Tender biscuit rounds take the place of traditional pastry to create a true home-style dessert.
  • Cooks’ notes: Cobbler is best when freshly made but can be baked 3 hours ahead and reheated in a 350°F oven.
  • Add egg, sugar, and flour mixed together into your blueberries to create kind of a custard
  • ALTERNATE CRUST: Create a thick batter using the drop biscuit recipe from the Bisquick box, but add an extra 2 TBL of sugar to the box recipe.  Drizzle over top in place of circle toppings.  Then jump to Step 17.


Chicken Breast Brine

Because chicken breast is lean, it gets dry when it is cooked properly.  The problem is that it can be unsafe if you don’t cook it properly.  If you BRINE it prior to cooking, it infuses the meat with more moisture and will stay moister while it finishes cooking.

INGREDIENTS

  • 1 C kosher salt
  • 3/4 C brown sugar
  • 3/4 C apple cider vinegar
  • 1/2 gallon HOT water
  • 2 bay leaves
  • 3 large sprigs of rosemary
  • 3 large sprigs of thyme
  • 2 cloves of crushed garlic
  • OPTIONAL:  1 tsp red chili flakes

STEP BY STEP

  1. Mix all ingredients
  2. Let cool to room temperature
  3. Place chicken in zip-lock bag (if possible)
  4. Place bag in a bowl, and the bowl into the fridge for an hour soak
  5. Agitate about every 15 minutes
  6. After an hour soak, prepare the breasts as you normally would

NOTES

  • Amounts listed are for a four chicken breasts, but just use what you need and store the rest in the refrigerator for up to a month.
    DO NOT reuse brining liquid after it has been used
HTML Snippets Powered By : XYZScripts.com