Tips: Life Hacks

Tips are coming soon.  For now, you can BROWSE HERE.


Links to Third Party Sites

More Hacks

  1. Chip bag – no bowl – bit a hole in the face of the bag and tear a spiral until you have a bowl
  2. No charcoal? chips work here too. Light and use a a substitute for charcoal. Finishes quickly though.
  3. Corn chips are more along the lines of petro chemicals, so if you need something to start a fire on your camping trip, try Doritos.
  4. Sterilize your sponges by putting a damp sponge into the microwave for two minutes
  5. CD Case – Use for transporting bagels
  6. Website for using leftovers – www.MyFridgeFood.com
  7. Repair scratches on a table:
    – Rub with a walnut – get all of the oils into the crack
    – Rub the oils in with your finger
    – Clean with a soft cloth
  8. Elevator – Easter Egg – Close and your floor at the same time – Straight up
  9. Nervous – Chew gum – Body has nothing to fear or wouldn’t be eating
  10. Use a dab of honey for pimples or a cut. Use toothpaste for a bee sting.
  11. Slow sink ? Use a toilet plunger
  12. When buying a used car, NEVER pay the asking price on a car lot.  Have a price in mind, but start at about 20% lower than what they are asking.  Find a couple of flaws, or some things you don’t like about the car.  Also, carry cash to the lot, and they will start foaming at the mouth.  Don’t be afraid to walk away – also don’t fall prey to their guilt trips.
  13. Coffee Filters – Use for pinch pots or splatter guard in microwave
  14. Lock screen on phone or iPad – “if found, please return to”
  15. V to keep waxed paper or saran wrap roll in dispenser
  16. Bagel freshener – wrap in wet paper towel and microwave 15 seconds
  17. Juice bottle for power failure – See tip and picture this website
  18. Book: How to Rebuild the world from scratch by Lewis Dartnell
  19. Separating eggs: Put all eggs into a bowl, then use a water bottle.  Squeeze, touch yolk, release.
  20. Dicing an avocado for guacamole:  Halve the avocado and remove the pit.  Push into a cross hatch bread rack.
  21. Cutting a Kiwi: Halve the kiwi and scoop out meat with a soup spoon.
  22. Pitting a strawberry: Use a (firm) soda straw.  Push through the tip and shove up to the leaves.
  23. Peeling Garlic:  Cut the entire head around the “equator” and put them both face down.  Smack it with your cleaver.
  24. Use a spice grinder to make your own rice flour or bean flour
  25. Cut a hole in the plastic top of your spaghetti storage container to get the right amount every time.
  26. Dip your hot skillet bottom into batter for a perfectly formed crepe
  27. Place a wooden spook across your pot to prevent boil-overs
  28. Use binder clips to help keep cables organized
  29. Fix wobbly furniture by gluing a penny to the bottom of one of the legs
  30. Eat your hamburger upside down.  The tops are more durable.
  31. Use a n emptied chap stick tube to hold your emergency money
  32. Use a needle nosed pliers to hold your nail to get it started
  33. To help clean your microwave, boil 1 C water for 5 minutes.  The steam loosens everything.
  34. Use a can opener to cut open some ridged plastic packaging
  35. \

Tips: Pizzas

Preparing your Dough

  • Many pizza places will sell you a ball of their dough for a couple of bucks.
  • Alternately, you can get oven-ready dough at the supermarket
  • It is not too difficult to make your own dough.  CLICK HERE for several of my recipes
  • Here is my good friend, Steve, that owns Grande Pizza PREPARING HIS DOUGH for an overnight rise.
  • Albert Grande shows you a basic dough recipe and some of the proper techniques WITH THIS VIDEO.
  • Dough that is risen without sugar will take longer, but will have a more fully developed flavor

Flattening your Pizza

  • A rolling pin may seem like a good idea, but it squeezes many of the air pockets out of the dough.  Your pizza will taste more like cardboard
  • Use your finger tips and palms to flatten your pizza
  • Turn it (flip it) often during the flattening

Toppings

  • Sauce is a good thing, but too much will give you a soggy crust.  Serve your pizza with a sauce side for dipping instead.
  • I have a lot of recipes for RED SAUCE and for MARINARA.  I really like pizza!
  • Put onions and pepperoni on the top so they fully cook
  • Generally speaking, try to hold your pizzas to about five toppings (not counting sauce or cheese)

napolitana


Baking

  • Pizzas should be cooked at high heat fairly quickly.  500º for 12 minutes is pretty good for the home oven.
  • Use a baking stone if you have one.  Bring it up to temperature with your oven.  Never put a cold baking stone in a hot oven – it will crack.
  • Never use soap to wash your baking stone.

Reheating

  • Use a baking stone for reheating your left-over pizza.  The microwave will make it kind of soggy.
  • No baking stone?  Put it on a cooling rack and slide that into your oven.  Put a pan under the cooling rack to catch drips.
  • Grandma and I both like different toppings, so we get an extra large cheese pizza and keep it as a base for later toppings.
  • To reheat, we bake at 400º for 8-10 minutes.


Tips: Freezing Things

OVERVIEW

  • These freezer tips are a perfect companion book to our Casseroles and Pan Dishes cookbook. The basics in this tip can be used for many casseroles and pan dishes.
  • Prepare the recipe as you normally would. Instead of putting it in the oven, cover it and put in the freezer. For longer term storage, use a vacuum sealer.

QUICK FREEZE

  • If you have strawberries, or other similar high-liquid produce, it is best to freeze them quickly.
    1. Put a heavy metal baking sheet in your freezer overnight.
    2. The next morning, spread your berries on the cold baking sheet and place back in the freezer for 4-5 hours.
    3. Use a spatula to remove the berries and place in a vacuum sealer bag.
    4. Always thaw out berries overnight in the refrigerator to minimize them becoming mushy.
  • Freezing berries is a good way to create ingredients for smoothies.
    1. Break them into smaller pieces
    2. Freeze them as shown above
    3. Place them right in your blender instead of ice cubes to chill your smoothie.

GENERAL FREEZING

  1. Prepare in large deep-dish baking tray.
  2. Let cool on the counter to the point where it may be warm, but not hot.
  3. Place in refrigerator overnight
  4. Using a sharp knife (see Tips and Tricks) cut into serving-sized portions
  5. Place each serving onto a square of aluminum foil
  6. Carefully fold the corners over so that you don’t end up with any pieces of foil embedded into the sauce
  7. Label and freeze
  8. For extra protection, the next day (when it is frozen solid) enclose the frozen foil-wrapped meal in a twist-tie plastic storage bag – or better yet a vacuum sealed bag.

HOW LONG WILL THIS BE KEPT IN YOUR FREEZER

  • For a couple of days you can just keep it wrapped in the foil. Even better would be a baggie sealed with a twist tie.
  • For a couple of weeks, you need a baggie with a twist tie. Even better would be a vacuum sealed bag.
  • For two weeks or more, you need to invest in a vacuum sealer.
  • Amazon sells a Seal-a-Meal which is OK for occasional use.
  • For more frequent use, invest in a Food Saver System

TO THAW

It is always best to thaw something in the refrigerator overnight (or one or two days before if it is a larger item) to prevent bacteria growth. Thawing something on the counter, or in water for more than a half hour, may cause unsafe and potentially harmful bacteria to grow.

LASAGNA: A POTENTIAL STEP BY STEP

  1. Let thaw out in fridge overnight (over a couple of nights if it is a large piece)
  2. Preheat oven to 350 degrees.
  3. Unfold foil, and place (still on foil) onto baking sheet
    – If foil is frozen into the lasagna, cook for 10 minutes before proceeding to step 4.
  4. Lay another layer of foil over the top (do not tuck or secure foil)
  5. Cook 45 minutes (60 minutes if larger)
  6. To finish, remove top foil, then cook 20 more minutes
  7. Let stand at least 5 minutes before serving

FREEZING AND THAWING SOUPS AND STOCKS

  • These freezer tips are a perfect companion book to our Stews and Soups cookbook. The basics in this tip can be used for many recipes.
  • Anytime you have a chicken, turkey, ribs, or anything with bones, you have the perfect beginnings for GREAT soup or spaghetti sauce.
  • See the recipe in Grandpa’s book Stews and Soups on how to make stock, THEN once it is done, come back here for instructions on how to freeze it.
  • Making your own stock is easy and tastes much better than canned stuff.

GENERAL FREEZING

  1. Clean canning jars. If you want to go the whole canning route, you will need a pressure canner. These steps will prepare your stock for freezing, NOT canning.
  2. Place your canning lids in a bowl of extremely hot water.
    2 cups of water in a microwave for 3 minutes is adequate
  3. While stock is still too hot to touch, ladle stock into your canning jars leaving at least 1/2 inch clearance on top.
    DO NOT COMPLETELY FILL THE JARS, OR THEY WILL CRACK AS THEY FREEZE, AND THE LIQUID EXPANDS
  4. Screw the lids onto the jars
  5. Place jars in an ice bath for about 3 minutes to cool them rapidly.
  6. You will notice the fat start to separate from the stock
  7. You will hear pinging as the jars somewhat seal themselves.
  8. Once the jars cool down to nearly room temperature, put the jars into the refrigerator overnight to cool even further.
  9. Move to the freezer the following day.
    NOTE: Moving them to the fridge or freezer before they have somewhat cooled will thaw other stuff in your freezer, and increase the chance for bacteria to grow in those other foods.  Be patient, and let the jars cool.

HOW LONG WILL THIS BE KEPT IN YOUR FREEZER

  • For up to a couple of weeks, just placing the jars in your freezer is good enough.
  • For two weeks or more, once the liquid has complete frozen, float a thin later of water on top and freeze again.  This will create a flavor barrier that will isolate your broth from freezer burn.

TO THAW

  1. If you have used water to create a flavor barrier, take the lid off your jar and rinse off any ice crystals that have formed.  Discard this tainted water.
  2. Place the jar in your refrigerator for one or two days.  Two or three days if you used a quart canning jar.
  3. Use a spoon to scrape off the congealed fat and discard
  4. Use this stock as the base for any soups or home-made spaghetti sauces at a ratio of about 1 to 1
  5. Add vegetables or meat as desired, depending on what you are making

A NOTE ABOUT SPOILAGE

If this is only a week old, and has been properly refrigerated, you should be safe BUT if it is older than a  week, and has been thawed out that long and in the refrigerator, proceed as follows:

  1. Put your stock in a soup pan over medium high heat.
  2. Make sure that the temperature comes up to at least 185 degrees so that any pathogens are killed.
  3. Let simmer for at least ten minutes.  Longer is better.
  4. Add your other ingredients, and cook for long enough to finish cooking the other ingredients.
  5. Stock should be bubbling on the sides.
  6. Since bacteria growth has started, do not save left-overs.

If it has NOT been refrigerated for several hours or more, please discard it.

Tips: Cheese Info

Information about cheese

Hard cheese is cheese that is aged longer, and thus, has a lower moisture content.  Examples are cheddar, gruyere, manchego and parmesan
Click here for good info about Hard Cheese.

Semi-hard cheese are edam, Swiss, epoisse and langres cheese

Soft cheese is not aged very long and thus have a softer texture and milder taste.  American, brie and camembert are examples.
Click here for more about Soft Cheese.

Store cheese wrapped in waxed paper, never plastic
Keep cool, but not cold – Moist, but not wet

When creating a cheese plate, plate three cheeses max.
Create a theme:  Same type of milk, family, same cheese different age, same style different makers

Strong cheeses:  Roquefort, Gorgonzola, Stilton

Cheese fondues

  • Swiss
    • Vaudoise: Gruyère.
    • Fribourgeoise: Vacherin fribourgeois à fondue,[Note 1] wherein potatoes are often dipped instead of bread. This is the only cheese fondue that does not use wine. The cheese is melted in a few tablespoons of water over low heat.
    • Moitié-moitié (or half and half), also called Fondue Suisse: Gruyère and Fribourg vacherin.
    • Neuchâteloise: Gruyère and Emmental.
    • Innerschweiz: Gruyère, Emmental, and Sbrinz.
    • Genevoise: Gruyère (preferably of several stages of maturity) with a little
    • Emmentaler and Valais cheese. Sometimes chopped sautéed morels are added.
    • Interlaken: Gruyère, Appenzeller, Emmental.
    • Appenzeller: Appenzeller cheese with cream added.
    • Tomato: Gruyère, Emmental, crushed tomatoes, and wine.
    • Spicy: Gruyère, red and green peppers, with chili.
    • Mushroom: Gruyère, Fribourg vacherin, and mushrooms.
  • French
    • Savoyarde: Comté, Beaufort and one or two other local cheese like Reblochon, Abondance,[24] or French equivalent of Gruyère.
    • Jurassienne: Mature or mild Comté.
    • Auvergnate: Saint-Nectaire, Cantal and Fourme d’Ambert[25]
  • Italian alpine
    • Valdôtaine (French: Fondue à la valdôtaine[26] or Italian: Fonduta alla valdostana): Fontina, milk, eggs, and truffles, typical of the Aosta Valley;
    • Fonduta piemontese in Piedmont.

Prepared convenience food

Refrigerated fondue blends are sold in most Swiss supermarkets as convenience food and need little more than melting in the caquelon. Individual portions heatable in a microwave oven are also sold.

Quick Sauces

Quick Hollandaise

FOR ONE FOR TWO
•  1 TBL Knorr Hollandaise powder
•  1 tsp corn starch
• 1/4 C milk
• 1 TBL water
• 1 TBL butter
•  1 dash Worcestershire sauce

    1. Mix water, cornstarch and Knorr
    2. Micro milk for 30 seconds
    3. Add butter and micro 15 seconds
    4. Temper hot milk into Knorr mix
    5. Mix Knorr mix back into glass
    6. Micro in 10 second intervals, mixing each time, till thickened
•  2 TBL Knorr Hollandaise powder
•  2 tsp corn starch
• 1/2 C milk
• 2 TBL water
• 2 TBL butter
•  2 dashes Worcestershire sauce

    1. Mix water, cornstarch and Knorr
    2. Micro milk for 45 seconds
    3. Add butter and micro 15 seconds
    4. If not foaming, micro 15 more
    5. Temper hot milk into Knorr mix
    6. Mix Knorr mix back into glass
    7. Micro in 10 second intervals, mixing each time, till thickened
English Muffin, poached egg, ham or spinach

Quick Vanilla Cream Sauce

FOR ONE FOR TWO
•  1 TBL Birds Custard powder
•  1 tsp corn starch
• 1/4 C milk
• 2 TBL confectioner sugar
• 1 TBL water
• 1 TBL butter
•  1 dash vanilla
• optional: almond extract

    1. Mix water, cornstarch and Birds
    2. Micro milk for 30 seconds
    3. Add butter and micro 15 seconds
    4. Temper hot milk into Birds mix
    5. Mix Birds mix back into glass
    6. Micro in 10 second intervals, mixing each time, till thickened
•  2 TBL Birds Custard powder
•  2 tsp corn starch
• 1/2 C milk
• 1/4 C confectioner sugar
• 2 TBL water
• 2 TBL butter
•  2 dashes vanilla

    1. Mix water, cornstarch and Birds
    2. Micro milk for 45 seconds
    3. Add butter and micro 15 seconds
    4. If not foaming, micro 15 more
    5. Temper hot milk into Birds mix
    6. Mix Birds mix back into glass
    7. Micro in 10 second intervals, mixing each time, till thickened
Serve over top of bread pudding or similar dish.


Quick Gravy

FOR ONE FOR TWO
•  1 TBL AP flour
•  1 tsp corn starch
• 1/4 C milk or broth
• 1 dash Worcestershire sauce
• 1 TBL water
• 1 TBL butter
•  1 dash browning sauce

    1. Microwave flour for 10 seconds
    2. Mix water, cornstarch and flour
    3. Micro milk/broth for 30 seconds
    4. Add butter and micro 15 seconds
    5. Temper hot liquid into flour mix
    6. Mix flour mix back into liquid
    7. Micro in 10 second intervals, mixing each time, till thickened
•  2 TBL AP flour
•  2 tsp corn starch
• 1/2 C milk or broth
•  2 dashes Worcestershire
• 2 TBL water
• 2 TBL butter
•  2 dashes browning sauce

    1. Microwave flour for 15 seconds
    2. Mix water, cornstarch and flour
    3. Micro milk/broth for 45 seconds
    4. Add butter and micro 15 seconds
    5. Temper hot liquid into flour mix
    6. Mix flour mix back into liquid
    7. Micro in 10 second intervals, mixing each time, till thickened
Serve over top of bread or potatoes


Tips: Potatoes

Types of cooked potatoes

  • Home Fries
  • Hashed Browns
  • Baked
  • Twice Baked
  • Mashed
  • Curly Q’s
  • Au Gratin
  • Pancakes
  • Shoestring
  • Scalloped
  • Jackets
  • French Fries
  • Potato Skins
  • Boiled

Starch Content

  • High: Russet, Burbank
    -Whip, mash, fry, bake – 350º – Poke full of holes – Oil and salt the outside – 1 hour – skin cruncy and inside meat soft
  • Medium: Yukon Gold, White, California Longs
    – Scalloped, pancakes, gratins
    – Gratin – sliced potatoes, refrig salvage – buttered casserole
    – layer potato, mushrooms, seasoning, cheese – REPEAT 2-3 TIMES
    – Add 1/2 and 1/2 – Press down – 400º 45 minutes covered – Uncover and another 10 minutes – Let rest for 20 minutes
  • Low: Norland, red, boiling, fingerling, Pontiacs, LaSodas
    – Mashed Potatoes – Peeled Russet and unpeeled red –
    – Bring salted water up to boiling first, then add potatoes – Boil 6 minutes
    – Lowfat buttermilk and butter – Heat up to 185º
    – Add just a bit of milk, and mash potatoes – Be careful to not make too wet
  • STARCHES: 
  • Onions, tomatoes, pesto, bacon, horseradish – Sprinkle on top

Tips: Grinding, Grating, Peeling

Grinding Spices

If you don’t already have a spice grinder, get a porcelain grinder with a metal basin and plastic cover

Grating Cheese

  1. When grating soft cheese, it will go better if you spray your grinder (flat) surface with something like Pam, and if you put your cheese in the freezer for a half-hour before grinding.

Grating other Veggies

  • Carrots: If you use grated carrots in something like cole slaw, they will bleed and turn your entire slaw pink.  You can avoid this by pouring vinegar on the carrots to set the dye.  After they have rested in the vinegar for about five minutes, you can pour off the liquid, rinse your carrots in water, and you are then good to go.
  • Ginger: Use the edge of a spoon to peel your ginger.  If you just want the flavor (not the fiber) you can grate the ginger and then S-Q-U-E-E-Z-E the juice out.  It will measure spoon for spoon as grated ginger.

Microplane Grating

  • Use a microplane for removing the zest from an orange, lemon or lime.  Don’t go too deep.  You don’t want the white pith.
  • I like to keep whole nutmeg in a jar.  About 8 seeds will last you for about a year.  Since they are whole, you can squeak 12-15 months out of it, rather than 6-9 months that the pre-grated stuff will last you.  Microplane these right into your mixture.

Peeling

  • Avocado: CLICK HERE for Avocado Tips and Tricks.

  • Garlic: I will give you this one first – Just buy peeled garlic.  It is not much more expensive than whole garlic, and will save you a lot of grief.  It is ALMOST as good as fresh.  Don’t keep it more than a month though.
  • Garlic: You can separate cloves and then cut the tips off.  Put the clove in a ball created by two bowls – rim to rim – and then shaking the hell out of them.  The skin will simply fall off.
  • Garlic: The old fashioned method is to crush the clove lightly with the side of your knife, then removing the skin.
  •  

Tips: Grocery Shopping

groc-bagGetting the Best Price

  • Pick up newspaper – look for Loss Leaders – These are the items that the store will take a loss on, to get you into that aisle, where frequently other prices have been increased.
  • Cheese . Cheddar is cheddar . It is a regulated label, so go ahead and buy the less expensive stuff
  • Don’t be afraid to ask for a taste
  • Buy in bulk when possible
  • Freeze left over bread . Bread crumbs, croutons, bread pudding, etc.
  • Buy artisinal fresh-baked breads near the end of the day . They are usually marked down
  • If you are going to eat something THAT NIGHT, don’t be afraid to buy things that are on the last day of sale.  They are still perfectly good.
  • A lot of stores have SENIOR DAY.  Don’t be too proud to go on that day.  With a $100 grocery bill, if you go on Senior Day you could save up to $20.

Selecting Vegetables and Fruit

  • Cantaloupe: Sniff the bottom.  It should smell like ripe cantaloupe.  True cantaloue is sold only in Europe.  Most in the US are hybrids.  There should be no cracks or blemishes, and it should be heavy for its size.
  • Avocados: When selecting an avocado, if you are planning on eating it right away, get one from which the stem falls off easily, but is still somewhat green underneath.  If the underneath has turned brown they are overripe.  If the stem does not come off, it is good to sit on your counter for a few days until it ripens. CLICK HERE for Avocado Tips and Tricks.
  • Watermelons:  You’ve heard of people flicking melons with their finger.  They are listening for a hollow sound.  As the sugars mature, the chemistry changes and they start to sound hollow rather than solid.  A flat spot is where it sat on the ground.  If it is white, it is not ripe.  If the spot is yellow, it is ripe. 
  • To cut and piece a melon, cut a flat spot on the top and bottom, and then cut off the skin
  • Shake the water off your veggies and you could save up to a quarter just in water weight.
  • Artichoke should be tight and compact.  If the tips have started to open, it means that they are losing their moisture and flavor and will be tougher
  • Garlic should be heavy for its size, and should absolutely not have tiny sprouts of green on them.
  • Grapefruit should be heavy for its size
  • Peaches, nectarines and plums should have a slight give to it – should not be too firm or too soft.
  • Bananas should have a few brown dots on the skin, indicating that they are at the peak of ripeness.  Too much brown would indicate that they are overripe and are great for banana bread.

Pharmacy Tips

  • Try dark chocolate for cough suppression
  • Black tea has tannins . Use them for baggy eyes
  • Fish oil . Look for EPA and DHA  . Omega 3 fatty acids help headaches
  • Keep steri strips handy for knife cuts, rather than standard band-aids
  • Some stores give fuel points.  Even though a prescription might be a bit more expensive, consider the hidden benefits.

Get cold things last – take a cooler

  • Get cold things like milk, eggs, cheese, meat and ice cream last, so that they don’t start to spoil before you even get them home.  Better yet, take a small cooler.  First stop will be the deli, where you can put some ice into your cooler.

Things that fall through the cracks

  • Ice reminder: Why do they put the ice machine AFTER the checkout line.  I frequently forget ice until I have finished checking out.  To help you remember, write a note card and laminate it in plastic.  Put it in your cart with your other groceries.  The clerk will see your sign that says something like “Don’t forget the ice.”  and life is good once again.

Organize your list

  • If you make a shopping list (which you should) put dairy together, fruits and vegetables together, as well as cereals, meats, canned food, etc.  It will make your shopping trip much more efficient.

Sandwich toppings

  • For jelly/jam sandwiches, use fruit preserves rather than spreadable fruit.  Actual preserves have a bit less fruit in them, but have a better texture and balance of sweetness than the spreadable fruits, which are flavored with miscellaneous fruit juices.

Buying Damaged Goods

  • You can buy older bananas for a discount.  If you are making banana bread, rather than buying fresh bananas and letting them age, ask for the discount.
  • If you are making marinara, ask for a discount on bruised tomatoes.  They won’t sell as sandwich tomatoes, and they are usually glad to get rid of the damaged product.
  • The same goes for a head of lettuce or a melon.  If a piece of it is damaged, ask for half off.  The soft spot frequently means that it is at the peak of ripeness, and as long as you are eating it that night, it will be delicious.
  • Dented cans are another source of good savings, but if the top lid is puffed out at all, turn it in to the manager.  You will keep someone from getting sick that doesn’t know better.

Buying Ground Meats

  • You can usually ask your butcher to grind your meat for you.  That way, you know you are getting 100% meat without fillers.  The exception to this could be chicken or turkey.  Because of the potential for contamination, small butcher shops may grind chicken only one or two days per week.  Larger shops will have a dedicated grinder.  Call before you go.
  • It is risky to grind your own poultry.  There are special contamination issues that need to be addressed.  Trust me – it is more of a hassle than a benefit.  Let the grocery store deal with the grinding.  Ask them if their chicken is ground by them or by a third-party provider.  If it is them, they can tell you if it is 100% meat, or if it has other chicken parts in it.  You can ask them if they grind chicken on demand, or on a specific day of the week.  If it is the later, you can buy poultry and ask them to grind it for you.
  • Meat Dept . Look for the loss leaders and freeze it.
  • One of the newest scams is buy one get TWO free.  Check out the unit price for one, and compare it to the same item at other stores.  You will be shocked.
  • 80/20 meat is a good meat for grilling and for sausage.  A bit more grease than leaner portions, but a whole lot more flavor.
  • Use a coarse plate grinder for a more robust hamburger.

Buying Quality Meats

  • I think it is safe to say that you have all had a $4 steak from the grocery store, and wondered why it doesn’t taste as great as those that you pay $15 for in a restaurant.
  • The reason is not only atmosphere, it’s quality of product. Here in Arizona, you can go to The Meat Shop to preorder restaurant-quality cuts of meat. Another good source is Hobe Meats at 16th Street and Bethany Home Road; or if you are not in Phoenix visit Omaha Steak Company.
  • A much more convenient option is to buy from Omaha Steaks.  You will pay a bit more than a quality local grocery store, but your meat will arrive at your front door step the day after you order it.
  • YES, they cost you more than what you would pay at the grocery store, but you are worth it. The old adage “You get what you pay for,”  really comes true in this scenario.
  • Sterling Beef is one of the top quality meats available to consumers.  One of the chief factors is the inter-muscular marbling.  Good quality meats will be under 2 years of age.  The grades are:
    • Utility Grade – Good for ground beef.  Cows about 3 years old.   This is good for raw dishes such as carpacio or steak tar tar, because eating raw fat is not something we do often in America.  Usually entirely grass fed.
    • Select – This is good meat, but it is fairly lean, so will not be as fall-apart tender as meat with marbling. 30 months old or less.  (about $5/lb)  Sear and keep center about medium.  Cut against grain for something like fajitas.
    • Choice – Bit more marbling.  A very good choice for home grilling.  (about $8/lb)  A top quality home steak.  Fed its final days on ground corn, so it can be easily digested.
    • Prime – Lots of marbling, lots of fat.  Represents only about 3% of the meat available for purchase.  (about $12/lb)  Seared over very high heat, leaving the center rare to medium rare
    • Wagyu or Kobe Beef – Even more marbling… almost too much for some people. (can be as high as $25/lb or more) Usually slice VERY thin and then seared briefly, not cooked as a steak.
    • There are visual differences:  Check them out BY CLICKING HERE

Buying Fish

Use this link for tips on buying fresh fish.

CLICK HERE FOR TIPS ON BUYING FRESH FISH


Food Fraud

  • Meat . Have them reweigh meat . Frequently has juice added
  • Veggies . Shake off all excess water
  • Real lemon juice . Look for 100% lemon juice, not just contains real lemon juice.
  • Look at ounces and portion size and number of portions
  • Check Unit price
  • Paper towels . Consider sq ft, square size, etc
  • Cheese counter vs dairy section . Labeling in the dairy section is regulated
  • Peanut butter . Look for a bottom dimple . The same goes for many similar items: if they indent the bottom, they can make the container appear larger, and actually give you less product.  Always look at ounces and unit price
  • EVOO . Look for certification seal CERMET . Don’t get blended olive oil
  • Honey . Look for raw, unfiltered, unheated, unpasturized  Locally produced honey also provides anti-allergens that can help you if you have local allergies.


Tips: Vegetables

Tips are coming soon:

Shopping

  • When shopping for Eggplant or Zucchini, blemishes are OK on the skin, but make sure there are no bruises or soft spots; and that they are firm.

Storing

Cutting

Vegetables

  • Avocados: CLICK HERE for Avocado Tips and Tricks
  • Potatoes: There are two types of Potatoes
    • Starchy: Russetts – Good for baking, roasting
    • Waxy: Yukon Gold, New Potatoes and Fingerlings – Low in starch, creamy texture and hold their shape well


Tips: Kitchen

Keeping it Clean

  • Cast Iron: Never use soap or steel wool with your cast iron skillet.  If you have a particularly nasty pan to clean, create a thick paste with salt and water.  Use a scrap cotton cloth to rub it in.  If entirely necessary, heat up some water and scrape with a spatula.  After cleaning, make sure it is completely dry, then re-season with a dab of canola oil.
  • Raw Meat:  Always use a paper towel to wipe off if you are touching raw meats.  After wiping off, use soap and water to finish up.  Any utensils that touch raw meat should be equally cared for.
  • Knife Blocks: As popular as these are, there is nothing in your kitchen that harbors more germs than a knife block.  Too frequently people use a knife lightly and then put it back in the block.  Consider a knife magnet.  There is a good one by Norpro that is really inexpensive from Amazon.

Keeping it Organized

Keeping it Efficient

  • The Work Triangle:  Keep all of your motion within a triangle.  (Eg) Stove, refrigerator, counter.  You will find that 90% of your movement is within this small area.

Keeping it Safe

  • The single biggest thing for safety is to keep your senses about you.  Most accidents happen when you become distracted.

Tips: Eggs

All About Eggs

Egg Categories Demystified

  • CONVENTIONAL :: The lowest price for a reason.  Four hens per one square foot.  Injury and infection are outweighed by the higher egg production.  Chickens are usually artificially induced into laying more eggs than their body was intended.  When chickens die, they are sometimes unable to lay down, and are held up by the other chicken bodies.  Brand:  Usually store brands and the eggs that are occasionally on sale for a dollar a dozen.
  • ORGANIC :: All this means is that the chickens are not fed hormones, pesticides and antibiotics.  They are still frequently crammed into living spaces.
  • CAGE FREE :: Not in cages, but still usually confined to a barn.  Space is a bit better, with 1 square foot per bird.  Often little to no exposure to sunlight.
  • FREE RANGE :: Conditions are getting better, but eggs are getting more expensive.  The birds are allowed to roam outdoors, similar to what they should expect.  Space is still limited though, and “free to roam outdoors” may mean one small door for thousands of birds.  Also, birds must be antibiotic free.  Brand:  Pete and Gerry’s and Organic Valley
  • PASTURE RAISED :: Dozens to hundreds of square feet per bird.  Usually from smaller farms, just because of the space the birds get.  This is what egg production was a hundred years ago.  The egg yolks are darker, and the eggs taste better.  Brand:  Vital Farms and Simple Truth
  • CERTIFIED HUMANE :: A non-government category.  These birds are monitored by a watch group called Certified Humane, one of the most respected animal welfare groups in the world.
  • NUTRIENT ENHANCED :: Similar to Certified Humane, but not monitored.  Birds are given a nutritionally balanced vegetarian feed.  Recycled, processe, hormones or antibiotics are also avoided.  Brand:  England’s Best
  • ————–
  • AA :: Freshest – white is firm, yolk is round and sturdy.  Good for over easy, poached and hollandaise sauces
  • A :: A week or two old – white is aceptable, and yolk is starting to sag.  Good general purpose egg, but use within the week.
  • B :: Old – White is beginning to look milky and sad.  Yolk will break easily.  HOWEVER, these eggs make the best Hard Boiled Eggs because the white has lost its attachment to the shell.
  • ————–
  • Keep eggs in the fridge at (or near) 40º – An egg on the counter ages about 7x faster than eggs in the fridge.  Storing eggs in their original carton ON THE SIDE will help the yolk stay centered.  Also, pasturized eggs are complete safe these days to eat poached, over easy, or even raw.

Hard Boiled Eggs

There are many ways to hard boil an egg. Here are several methods. Try them all, and pick your favorite

  • Grandpa’s Way of Doing It

    • It doesn’t matter if you start with cold or room temperature eggs.  Put eggs into a large pot, and cover (by two inches) with water.  Bring the water up to a quick boil, then cover and leave for 15 minutes.  After 15 minutes, dump the hot water and cover the eggs with ice and then run cold water into the pot.  Let set for at least 5-10 minutes
    • Start with eggs that are at least a week old, preferably about 10 days. This gives time for the albumin, the white, to separate from the shell membrane.
    • Least amount of sticking will happen if you peel under slow running water tap.
    • In my family, we put a pencil or grease-marker circle around the eggs to show that they have been hard-boiled.
    • Test an unmarked egg to see if it is hard boiled or raw, by SPINNING the egg on its point. A raw egg will not spin, while a hard-boiled egg will spin like a top.
    • When you hard-boiled eggs, and air sac is usually on the fat and. Start peeling here.
    • Eggs should always be stored pointy end down.
    • Refrigerate cooked eggs for up to two weeks.
  • Third Party Hints


    The information below this section is from a third party. It is part of Grandpa's Personal Recipe box. Feel free to browse, but know that this information is from someone else.
    • It will take longer to heat up a cold than a warm egg to the desired temperature. Start with an egg that has been brought to room temperature (set out on counter 1 hour)
    • Alton Brown notes that carefully cooking an egg at 67 degrees Celsius (153°F) yields a yolk that bends to the scientist’s will. 10 minutes in boiling water—is not ideal. 212 degrees Fahrenheit is far higher than the temperature at which the egg whites and the yolks coagulate. – (My personal preference is water heated to about 185 degrees)
    • Egg white begins to set at 145º
    • Egg yolks set at about 158º
    • Egg white firms completely at 180º
    • AB says that because the yolk contains fat, it floats above the aqueous white, both in the shell and in a beaker. To achieve a centered yolk, one must rotate the egg while cooking it.
    • As eggs cook, their balled-up proteins uncoil into strands, and the strands bind together to form an intricate mesh that traps water. In essence, the proteins form a gel, a liquid dispersed in a solid. Boiling causes too many egg proteins to bind and form dense meshes, “so there is less sensation of water in the mouth,” says Alton Brown (Good Eats). Voilà: rubbery egg whites and sandy, grayish yolks.
    • IF YOU ARE GOING TO USE THEM RIGHT AWAY, at the tail end of the cooking process, shake them against the side of the pan to lightly crack the shell to let water in. This will make them easier to peel.  DO NOT do this if you are planning on storing the eggs for later use.

Cooking with Eggs

  • Large eggs are the standard for cookbooks. If you use a medium or extra large egg, adjust the recipe accordingly.
  • 1 egg is 1.5 ounces – two is 3.0 ounces – three is 4.5 ounces

Storing Eggs

  • Eggs, fresh from the chicken, do not have to be refrigerated if used within a week or so.  Look for tell-tale signs such as a bit of chicken poop or feathers.  This is actually good news.  Just be sure to wash it before cracking it.
  • United States markets wash the eggs, which remove the protective coating. Refrigerate these eggs – or at least don’t set out for more than a few days.  Warm them to room temperature an hour before cooking.

Using Egg Whites

  • When egg whites are beaten, the whites stretch and trap air bubbles.  The smaller and more even the size of the bubbles; the more stable the foam.
  • Large bubbles break more quickly, and the foam collapses faster.
  • A large whisk with many fine wires will create smaller bubbles and a better foam.
  • Whites foam better when beaten at a cool temperature: About 65-75º
  • Whites will generally increase about 8-10 times in volume
  • If whites are underbeaten, they haven’t stabilized enough to hold bubbles.  Overbeaten, and the bubbles are stretched too far and will pop easily.  When overbeaten, you will see cottony bits of solidified (coagulated) egg whites.
  • Plain whipped whites make a fragile and short-lived foam.  Even their own weight will cause the bubbles to burst.
  • Bubbles that burst become liquid again, and will not whip up again.
  • Cream of Tartar or a little white vinegar will stabilize the foam.  Use about 1/8 tsp cream of tartar for 1 large egg white.
  • Sugar also strengthens the egg white protein, but you should still use cream of tartar.
  • Once a foam is established, 1 TBL every 30-45 seconds will dissolve uniformly.
  • If sugar is added too quickly, it won’t dissolve and your whites will be grainy.
  • If sugar is added BEFORE the foam is established, the whites can’t incorporate enough air to make a stiff foam.
  • Even a slight bit of egg yolk will keep your egg whites from foaming.  Even oil on the side of your bowl or your whisk will prevent the whites from foaming.
  • Use a large bowl.  Whisking in a small bowl will allow the bubbles to escape as quickly as they form.
  • A copper bowl is best.  In a metal bowl, the simple action of beaters or whisks will increase the temperature enlarging the bubbles.  Copper will transfer the heat rapidly from the whites, keeping them cooler.  Copper ions will also help bubbles to form.

Spaghetti Pie

INGREDIENTS
Per 1 C of (not compacted) cooked pasta
(eg) 2 cups = 2x the ingredients below

1/2 C shredded mozzarella or Provalone cheese

  • Leftover spaghetti pasta strings
  • 1 egg
  • 1/4 C marinara sauce
  • 1/4 C sweated onion (diced)
  • 1/4 C Ricotta cheese
  • 1/4 C grated Parmesan
  • 1/2 tsp salt
  • 1/2 C ground beef (browned)
  • parsley to taste
  • Tomato sauce – only if needed to thin mixture

STEP BY STEP

  1. Dump each ingredient into a large mixing bowl
  2. Toss well
  3. Place into cake pan
  4. Top with a extra sauce
  5. Top with mozzarella cheese
  6. Sprinkle with a bit of extra Parmesan
  7. Bake 25 minutes @ 350º
  8. Stop with Parmesan and basil chiffonade


Salami Cup

INGREDIENTS

  • Thin slices of Genoa Salami or high qality (low moisture) ham
  • TWO identical mini muffin pans
  • FILLER
    • 1/4 C Ricotta cheese
    • 1/4 C marscapone cheese
    • 1/4 C honey
    • 1/2 tsp red pepper flakes (or ground)
  • Thinly sliced figs
  • Hazel nuts
  • Lemon zest
  • 5 basil leaves

STEP BY STEP

  1. Get mini muffin and place meat rounds over each cup
  2. Place the other muffin pan over top of the rounds, compressing them into the cup
  3. Turn pans (together) upside down (to allow for grease to run out)
  4. Put into a larger cookie sheet to avoid a mess in the bottom of your oven
  5. Place heavy cast iron pot on top to hold everything down tightly
  6. Bake at 400º for 30 minutes
  7. Set on top of stovetop and let cool completely
  8. Mix filler in separate bowl
  9. Spoon into piping bag and HALFWAY fill meat cups
  10. Top with figs, then hazelnuts, lemon zest and then basil strips
  11. Serve with sprigs of rosemary on the plate as garnish

ALTERNATIVES

You can use many different fillings with salami cups

  • Poached egg with cracked pepper and basil chiffonade
  • Chopped hard boiled egg topped with sun dried tomatoes and basil
  • Chopped ham, cheese and bell pepper
  • Chopped spinach mixed with cream cheese and sour cream
  • Tomato, avocado and cheese
  • … or just use your imagination.  Be sure to try it before you spring it on your guests though.

Beef Carbonara

Use Braised Beef (or any slow-cooked shredded meat) from a previous dinner.

INGREDIENTS

  • Leftover Braised Beef
  • 2 eggs
  • Ham
  • Parm cheese
  • Bacon pieces
  • Hot Pasta

STEP BY STEP

  1. In bottom of small cast iron skillet, melt 2 TBL butter and spread evenly over bottom
  2. Add pieces of uncooked bacon
  3. Spread shredded beef over bottom of the skillet, covering bacon
  4. Crack eggs and put whole on the beef
  5. Add seasoning (Salt, pepper, coriander, cayenne)
  6. Start on stove top until edges start to cook
  7. Grate Parmesan cheese
  8. Sprinkle with shredded cheddar/mozzarella mix
  9. Put in oven at 300° for 20 minutes
  10. Turn out of the skillet and serve “upside down” with bread, tortilla or drop biscuits


Shepherd’s Pie

Use Braised Beef (or any slow-cooked shredded meat) from a previous dinner.

shep-pie
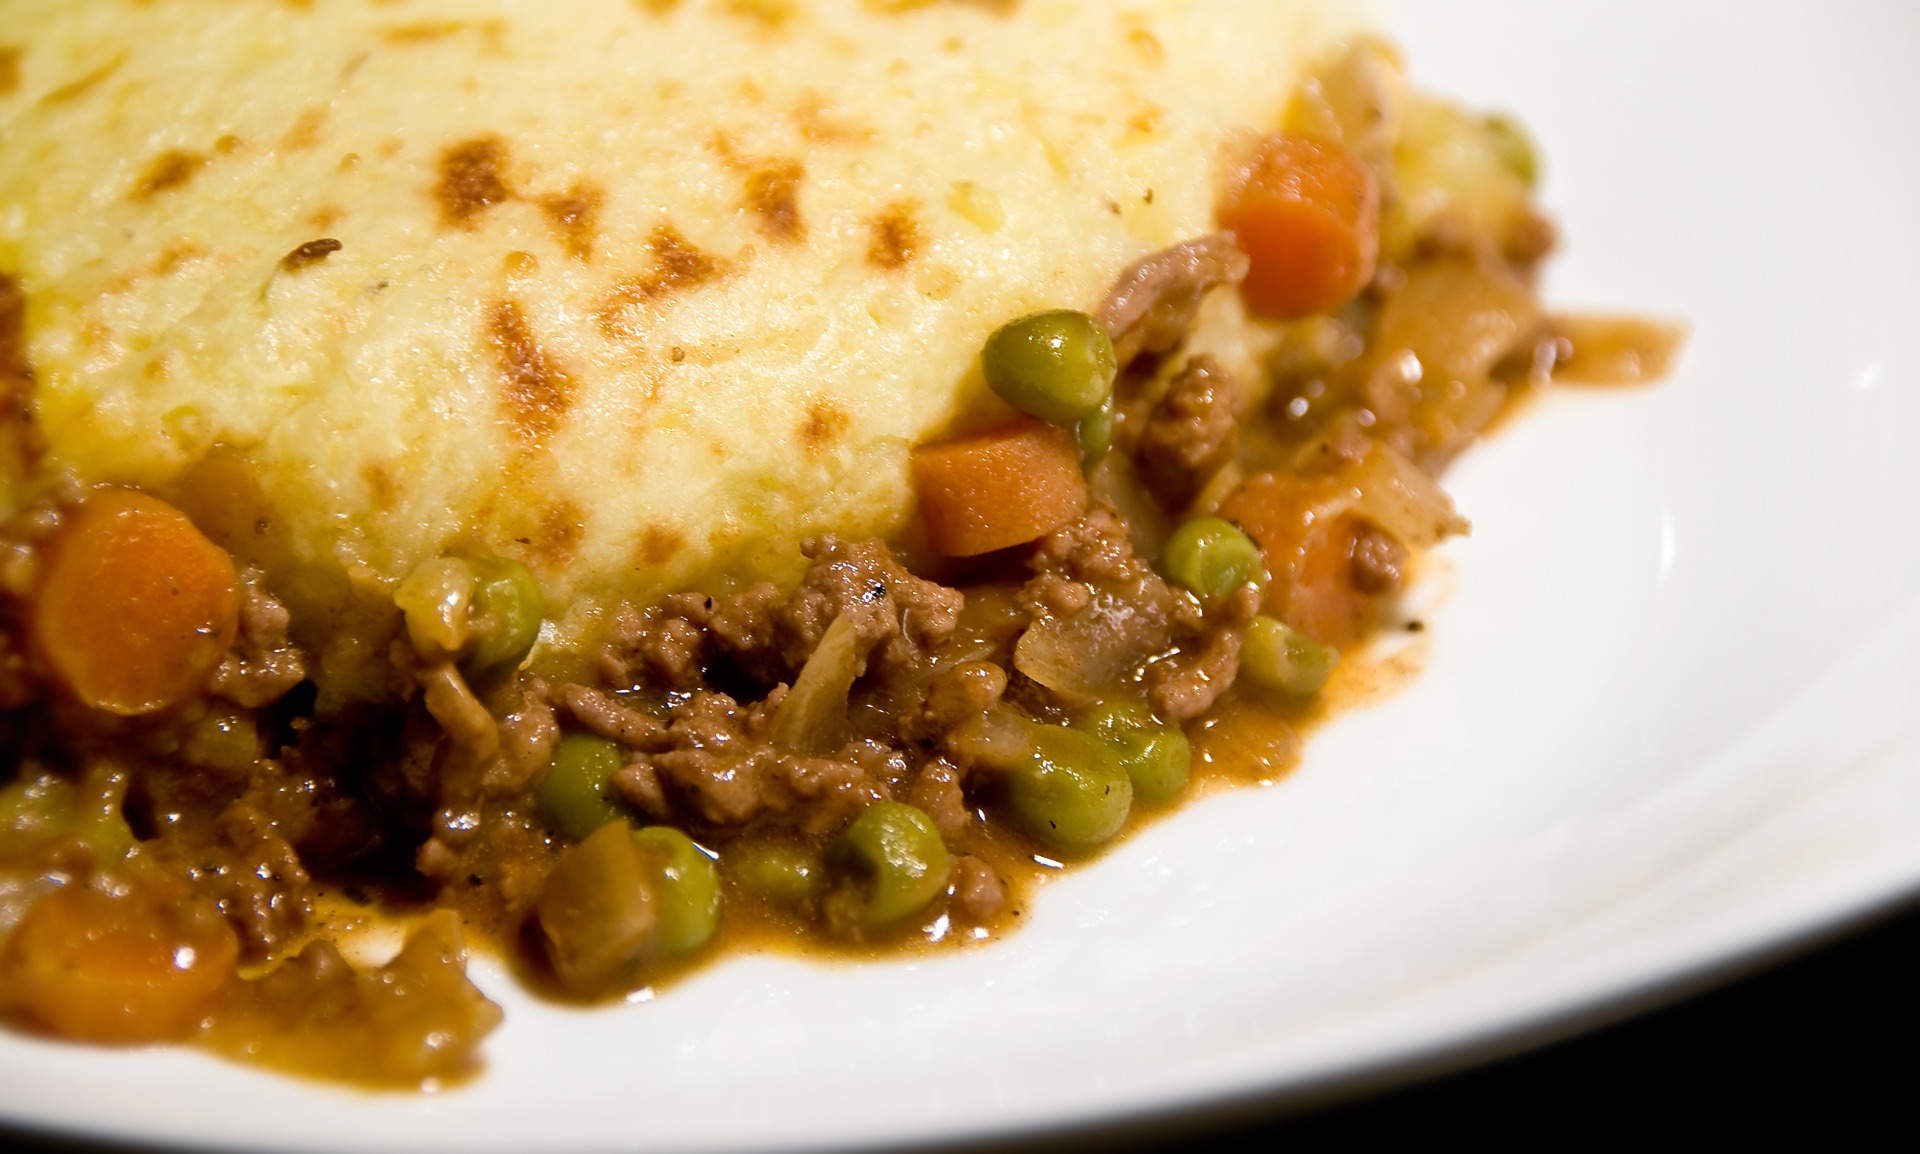
INGREDIENTS – FILLING

  • Leftover shredded beef or (traditional) ground lamb
  • 4 TBL butter
  • 1/4 C AP flour
  • 1-1/2 C chicken broth
    IN A SEPARATE MIXING BOWL, COMBINE
  • 1 small carrot – diced small
  • 1/2 C baby peas
  • 1 small stalk celery – diced small
  • 1/2 C shredded cheese
  • 4-6 black olives – diced
  • 1/4 C grated onion

INGREDIENTS – TOPPING

  • 2 C mashed potatoes
  • 1/2 tsp salt
  • 3 TBL cold butter
  • 1/2 C shredded cheddar cheese
  • 1/4 C cream cheese

STEP BY STEP

  1. Bring sauce pan up to medium heat
    FILLING – – – –
  2. Add butter to hot pan
  3. As soon as butter is melted, add flour
  4. As soon as flour starts to ball, add half your broth
  5. Stir until it starts to turn smooth
  6. Add the rest of your broth
  7. Stir until it starts to thicken
  8. When it has thickened (per video below) add it to the mixing bowl with your chopped veggies
    TOPPING
  9. Mix potatoes with salt, butter and cheeses
  10. Separate into 4 pieces and let rest five minutes
  11. Meanwhile, spoon your filling into ramekins for cooking
  12. Carefully spoon potato topping onto filling
  13. Gently spread it out covering the filling
  14. Drag fork tines across the top making a pattern
  15. Poke holes in the top so that steam can escape, otherwise the top may fail.
  16. Bake at 350º for 25-35 minutes until browned
  17. Let rest five minutes before serving, or cool on counter and refrigerate for reheating later.

Photo from The Little GSP.

HTML Snippets Powered By : XYZScripts.com