This recipe makes enough marmalade to last you for a couple of months. If you want enough marmalade to last you through to next season, CLICK HERE for the amounts used to make a larger batch.
Marmalade is traditionally made with Seville oranges (also called sour oranges) which are FAR too sour to eat. They do, however, have a high amount of pectin in them. With the proper amount of sugar, this makes a great marmalade base to which other fruits can be added. Prep your oranges the day before, so they can soak overnight. Total hand-on time for this recipe is 3 – 4 hours, so make sure that you allow yourself enough time to cook safely.
PREPARATION
Wash one lemon and 3 Seville oranges thoroughly.
Peel the orange skin using a peeler. Don’t peel too deeply, you do not want the white (pith) which tends to be bitter. The orange peel will remain in the marmalade after cooking.
Cut apart, discarding any bad spots
Separate the innards and pith from the outermost orange peel. Keep the innards and tie them into a cheesecloth bag. This is where most of your pectin lives.
OVERNIGHT SOAK
Pulse pith, pips and guts in food processor
Place 2/3 C pips, guts, seeds, membrane innards into 1+1/3 C of water
Pulse peel in food processor – only briefly
Place 2/3 C peel into a second bowl containing 1+1/3 C of water
You should put the cut up and pulsed skin and innards into bowls covered with water overnight in the refrigerator. This will soften them so that the pectin is more easily released.
FIRST BOIL (90 MINUTES)
Strain innards, pouring the soaking water into your stock pot
Put innards into a cheesecloth – a bouquet garni – and secure with a string, keeping the end available for easy removal.
Pour water and peel into your stock pot
Add 1/3 C orange juice into your stock pot
Bring up to boil, then reduce heat to simmer
Skim foam as necessary. Stir with a WOODEN spoon. Metal will react with the acids in the orange
Simmer for 90-120 minutes over low heat – this will release much of the pectin
If the oranges have not been soaked for at least 8 hours, go ahead and simmer for 120 minutes.
The seeds contains the pectin, and will be discarded after about 90 minutes. The outer orange peel will become the meat of the marmalade. I prefer to dice half and mince half of the rind, so that you have a variety of sizes of orange rind in your marmalade.
Definition: bouquet garni – A bag (frequently in a cheesecloth) that is used for infusions, and removed later as the recipe progresses. CLICK HERE to read more.
NOTE: DO NOT ADD SUGAR YET. If you add sugar too early, it will freeze the production of pectin, and your jam may not set properly, so don’t add it until after the 90 minute boil.
SECOND BOIL (HEAT TO 221º F – 105º C )
Remove pips and pith in the mesh bag at 208º. Use a tongs to squeeze the juices from the bag back into the pot. Discard the bag.
Increase heat and stir to dissolve. If sugar is added too soon, peel may become tough. Wait until temperature reads at least 210º
BRING HEAT UP TO 210º BEFORE ADDING SUGAR
1 1/4 C granulated sugar
2 TBL Karo Syrup
1 TBL lemon juice
Add the Second Boil ingredients slowly, stirring continually
As soon as it starts boiling, stop stirring. Stir very infrequently.
IMPORTANT NOTE: Until most of the water boils away, the sugar may stay at 215º for about 10 minutes. Once it hits 216º it will increase about one degree per three minutes.
Keep heating until the temperature reaches 221º This could take up to an hour. I’ve had success with 119º but only marginally. Be patient and wait until it reaches full jell temperature. A few minutes will make all the difference. If possible, use a calibrated thermometer (or a scientific thermapen) to make sure your thermometer is not off by 2-3 degrees.
Meanwhile, sterilize canning jars. Details not included on this page.
When 221º is reached, remove the pot from the heat and let rest for 5-10 minutes. Skim off any scum or foam.
Orange rind will rise to the top. Stir the rind back into the mixture before canning.
Put into canning jars and cover with a lid put into hot water for at least 60 seconds. When properly canned and cooled, this will last you for about a year.
NOTE:
Temperature will plateau at 215 for quite awhile – for as long as 15 minutes
After that, you will get 1º increase in temperature about every 3 minutes
Be patient.
MORE INFORMATION
Alternative Recipes
There are SWEET ORANGE marmalades which do not use as much sugar as this recipe. CLICK HERE for Alton Brown’s recipe for Sweet Orange Marmalade, or USE THIS LINK for Strawberry Marmalade.
A Word of Caution
A word about POT SIZE. The first time I made this I nearly boiled over. It was a constant battle between foam and the size of my pot. This will foam up about 400% of its size. NO KIDDING. Make sure you use a pot large enough, or you will end up with a huge dangerous mess. This does not ALWAYS happen, but you can be prepared if it does.
I reuse my canning lids. If they fail to seal, I eat that jar first. Put an X on the failed lid so you don’t save it after the jar is empty. If they seal, they will generally not fail after cooling. I prefer to use the small canning jars, because once exposed to light and air, the marmalade starts to lose its flavor.
The canned jars will last longer if you process them in a water bath for 10 minutes after putting into jars.
Put marmalade into sterilized canning jars
Soak lids about 60 seconds in boiling water
Wipe rim clean and put lids on
Tighten only finger tight
Submerge in water (1″ over top) and process 10 minutes
Cool (undisturbed) on the counter
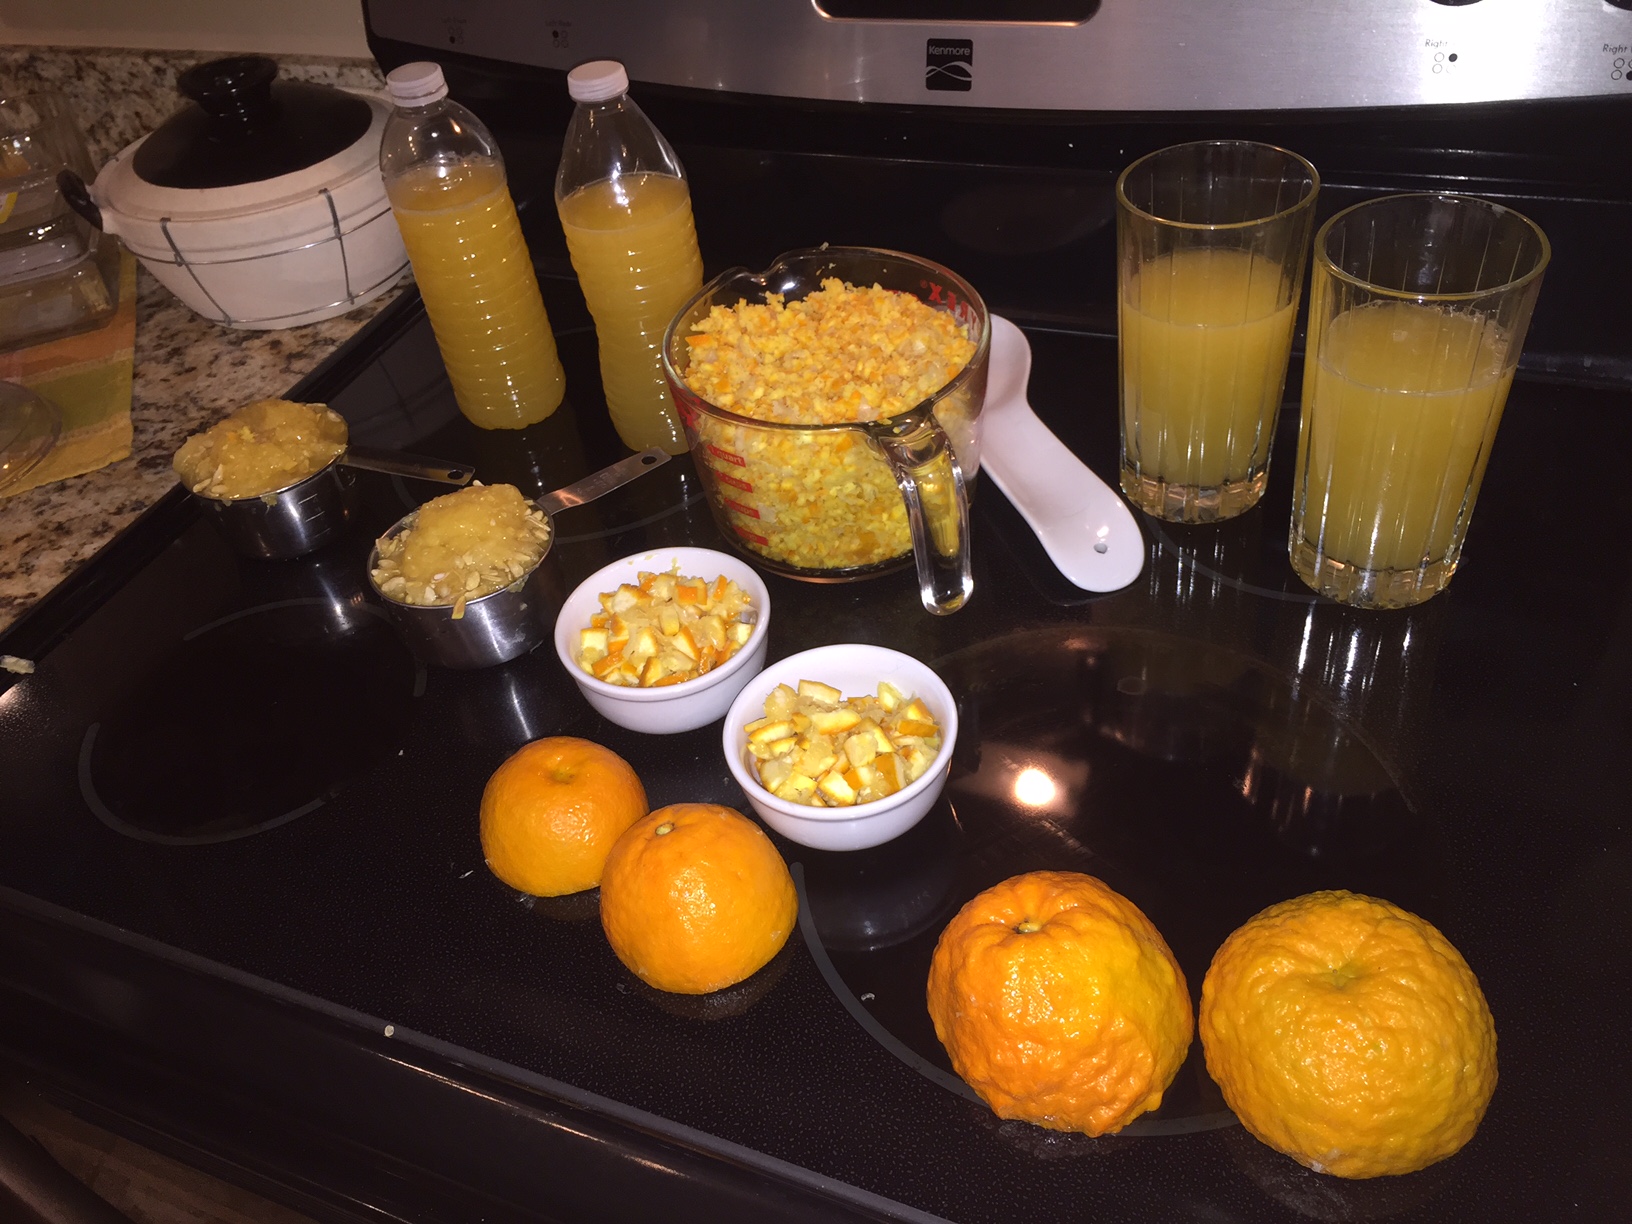
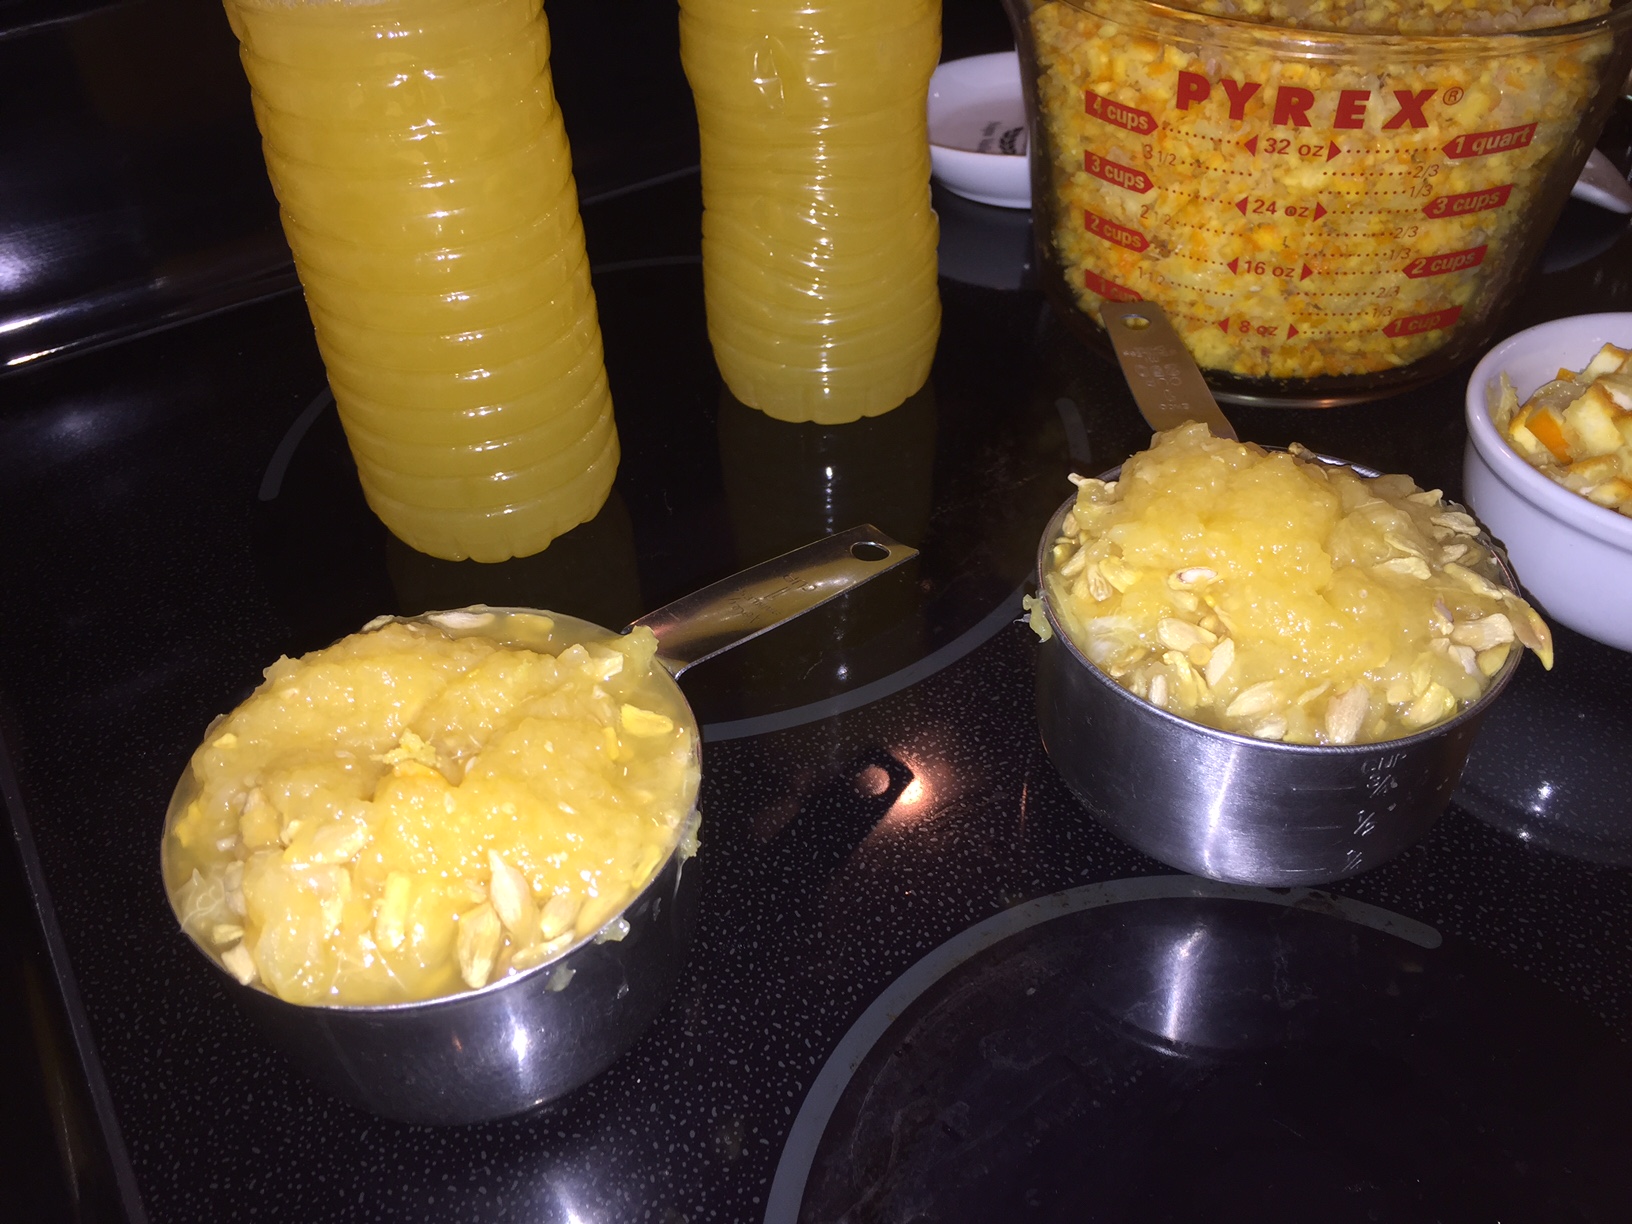
What is shown in the photos are quantities to make two entire large batches of marmalade.
Optional Ingredients
Optional ingredients reserved for the very end:
Minced strawberries, blueberries, rhubarb, shredded carrot, or other contrast
Chemistry
If you do not use enough sugar, the liquid will be unable to reach 221º (as water only gets 212º) and it will NEVER set. Sugar can get up to 300º If you try to decrease the calories, and use a marginal amount of sugar, you may heat it too long and you will get inverted sugar which has a longer shelf life, but is similar to high fructose corn syrup and is not as good for you as regular sugar.
Realistically, if you don’t have a thermometer, you can test the gel level but putting glass plates in the fridge, and then dripping jam onto the plate to see if it runs or just sits there. CLICK HERE
If desired, after the temperature has reached 221º you can mix in some contrast fruit such as minced strawberry – but something that is ready to eat just as it is. Don’t use anything that needs cooking or softening.
Pour into canning jars. If you completely can the marmalade, it should last for up to a year. Otherwise, refrigerate it for up to six months. I personally just put them on my shelf for up to a year, but if you do this, proceed at your own risk.
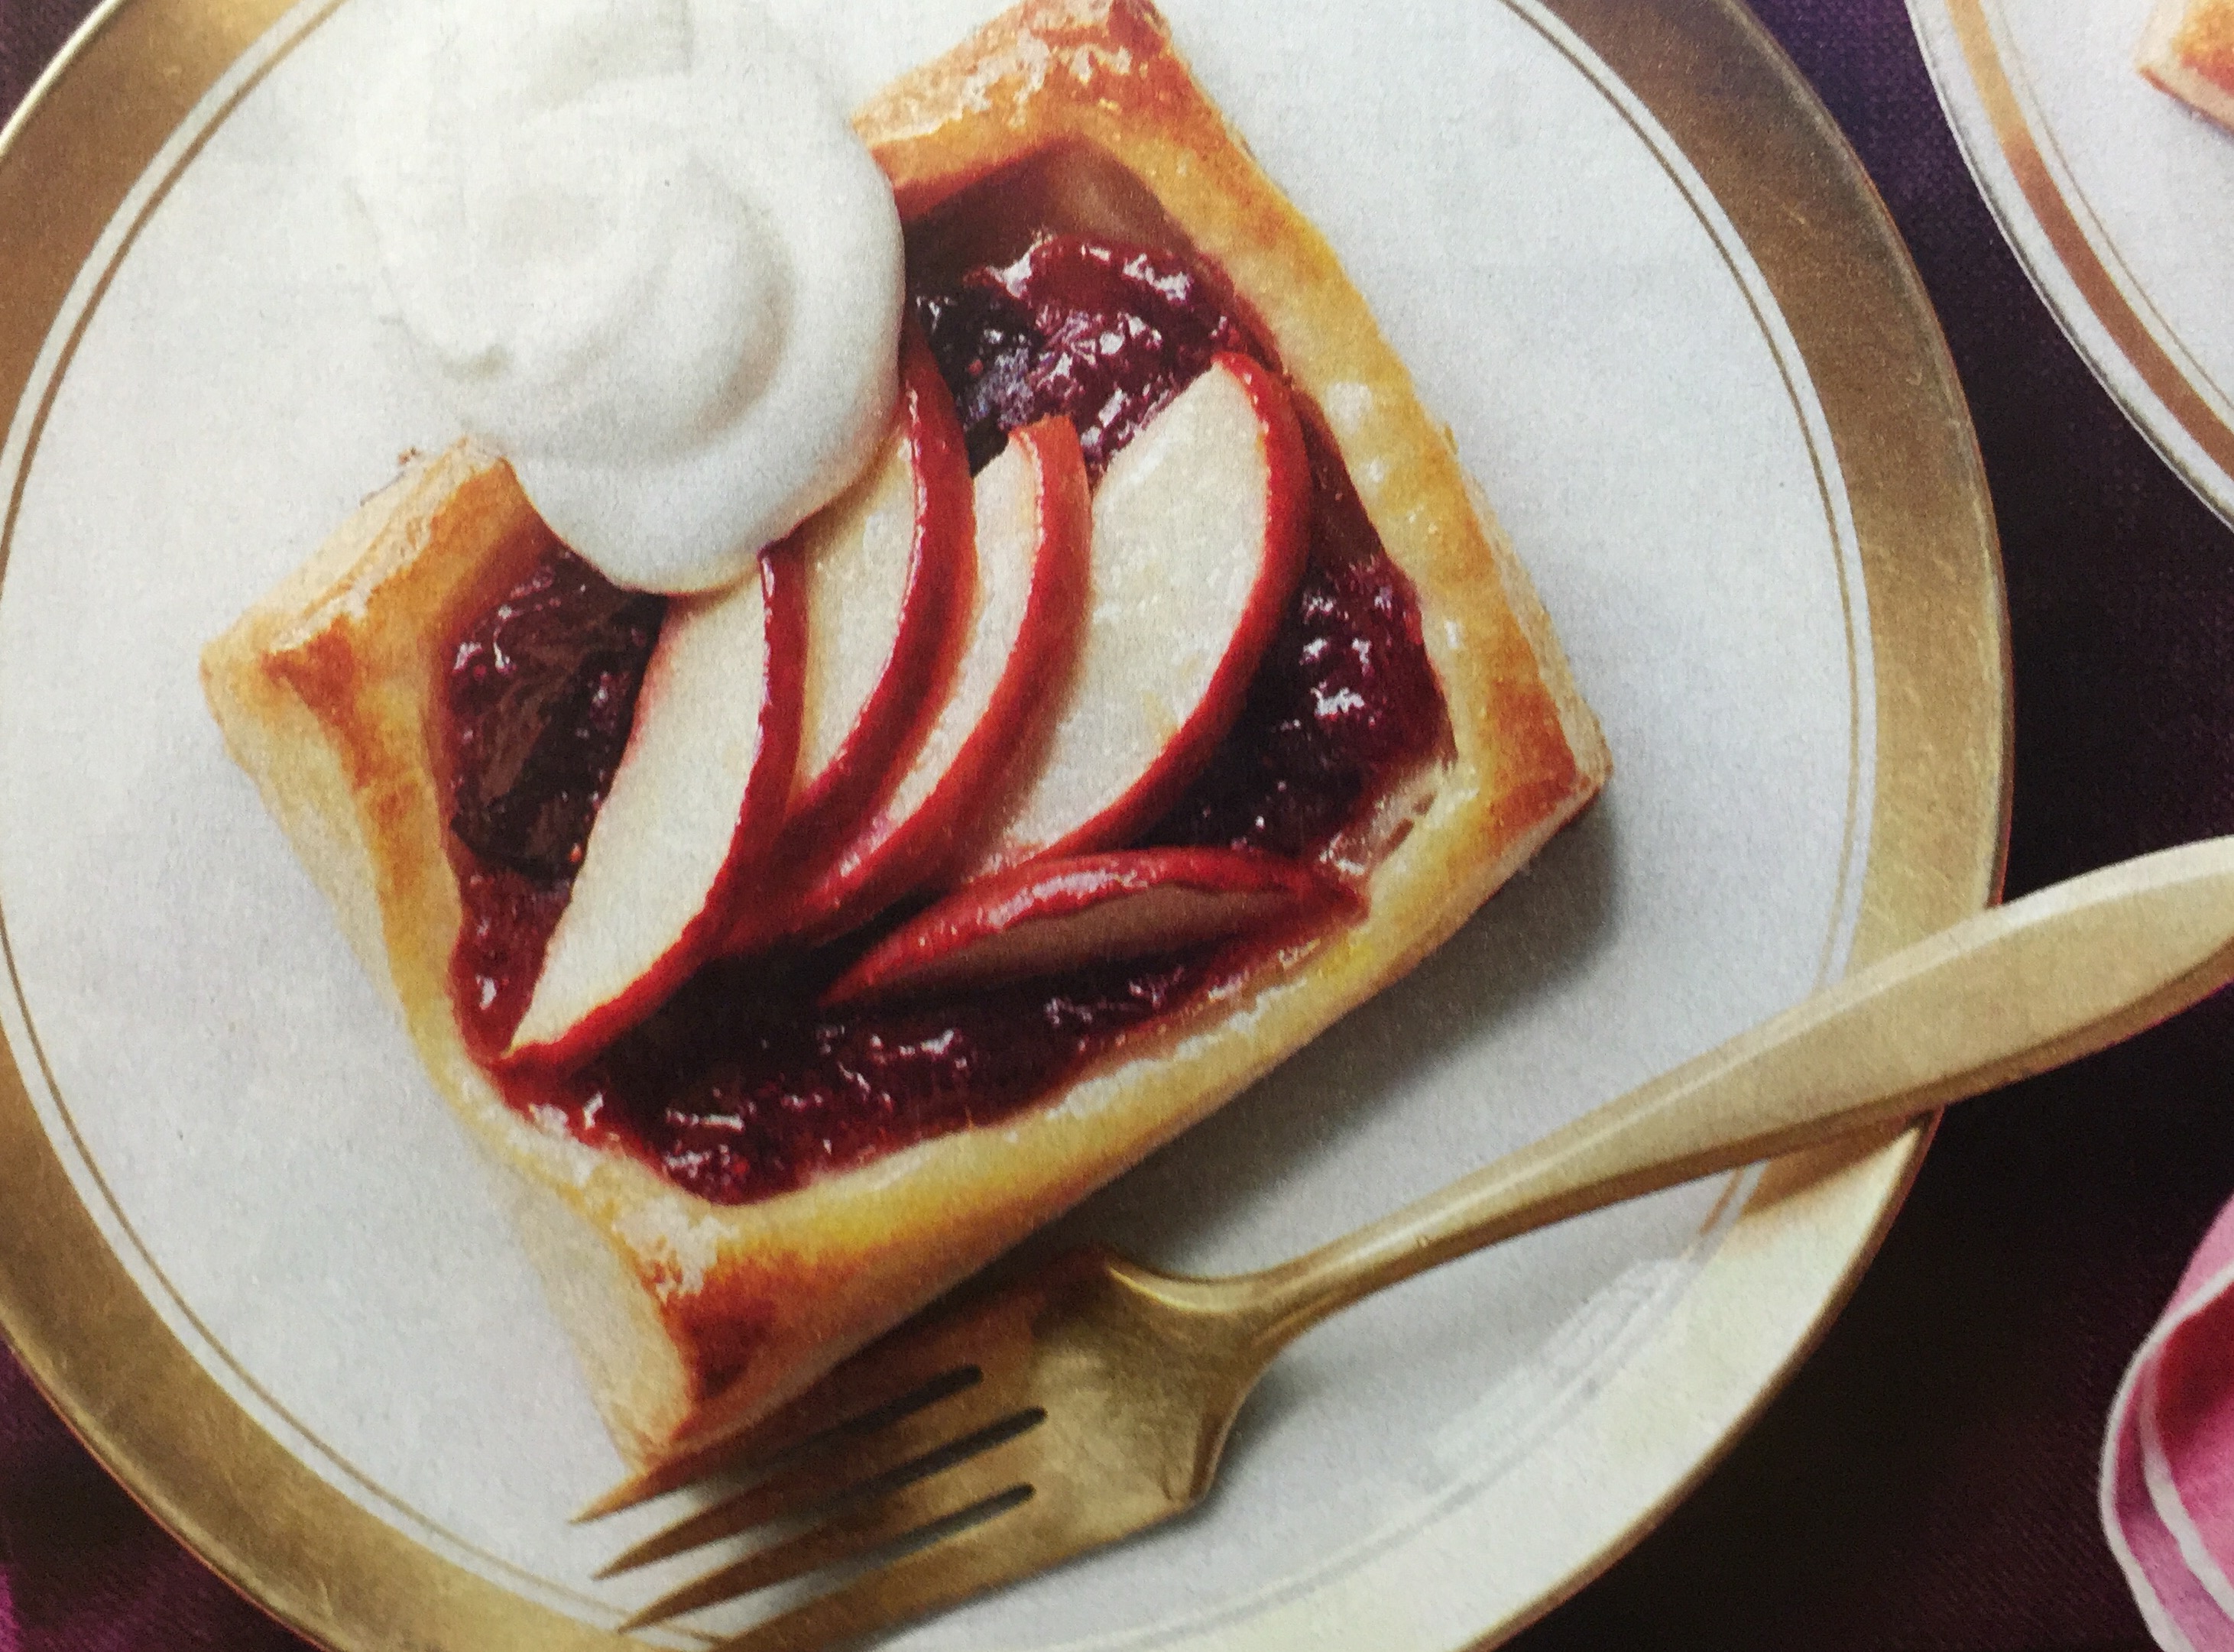
If your marmalade does not set, it is still good for steamed marmalade pudding, marmalade tarts, marmalade ice cream and much more. CLICK HERE if your marmalade did not set properly.
Bottom right: Some of your oranges may be older and nubbly. You will need juice from many oranges, but the peel that you want to use is from about eight oranges that have fairly smooth skin.
Top right: To get the amount of pips and pith that you need for the larger sized recipe, you will have to juice a lot more than eight, but just throw the extras into the trash.
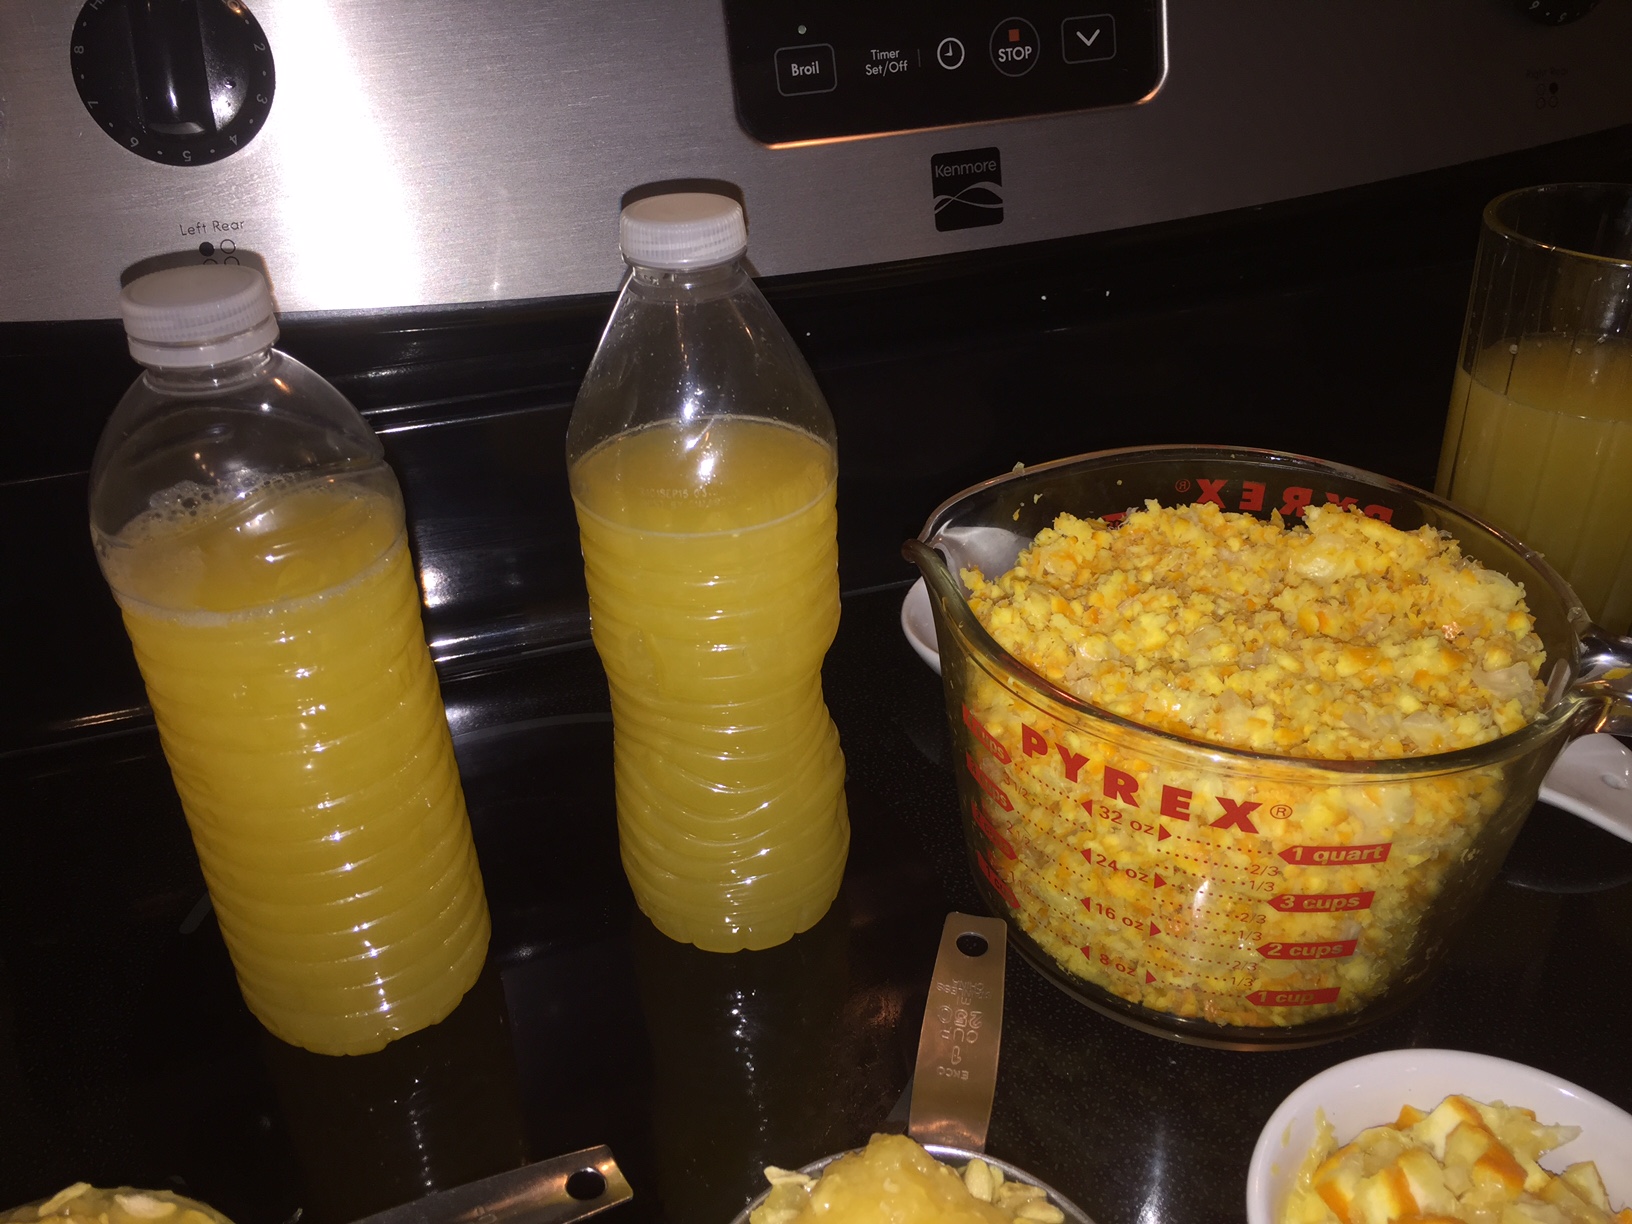
The ingredients freeze really well. Hot pack canning is another good option. If you freeze, be sure to leave an inch of headroom in your water bottles.
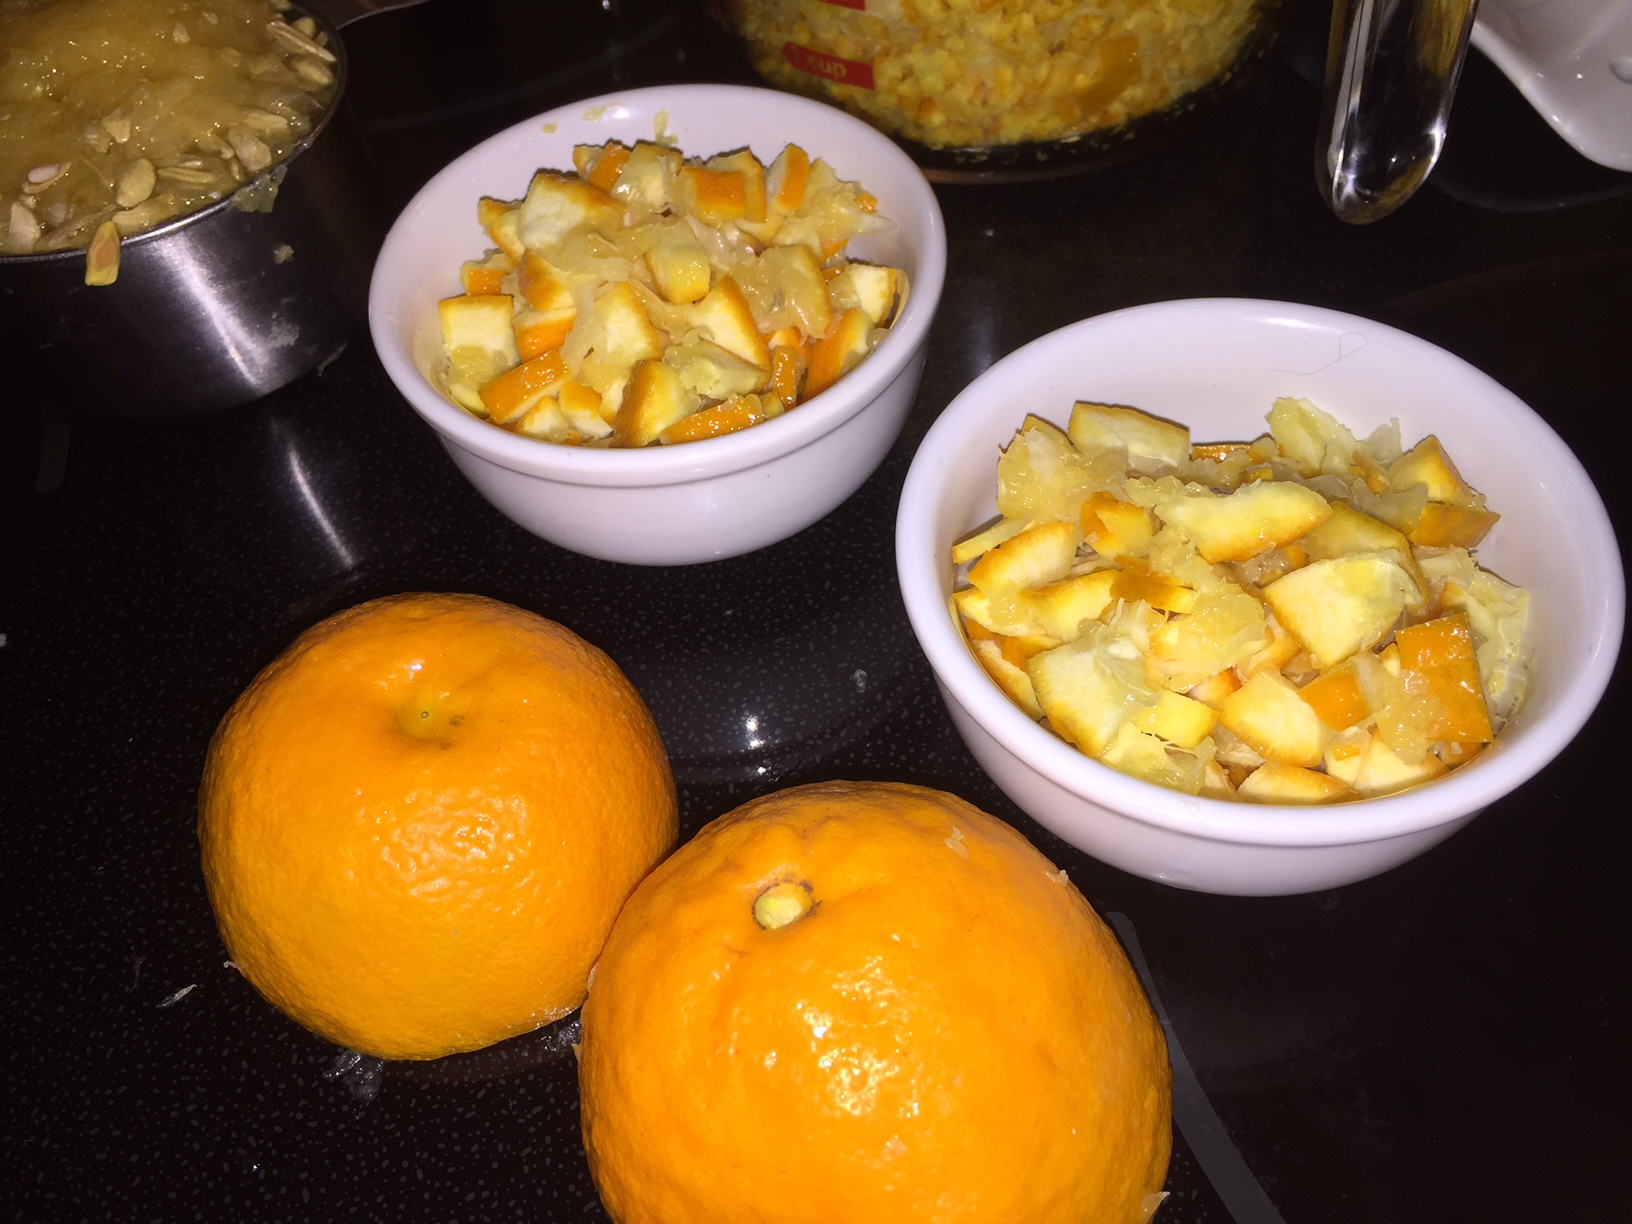
This photo gives you a good close up of the smoother skinned oranges and the older nubbly ones. The juice from the older oranges is perfectly usable, but the skin will be a bit more bitter than the younger oranges, so get rid of them.
I prefer just a few larger dices of orange, but most of the skin that I use is minced in a food processor.
Another good way to do it is with a zester. It takes more oranges, but you can leave the white pith behind, which actually gives you a better end product.
Mix corn syrup and sugar (corn syrup will help keep the sugar from crystallizing)
Cook on low heat until sugar is completely liquefied.
Use an immersible candy thermometer to monitor your temperature. THIS IS WHAT I USE and it works great. Great for perfectly cooking meats too.
Stir fairly frequently with a wooden spoon.
Stop stirring when everything is completely dissolved.
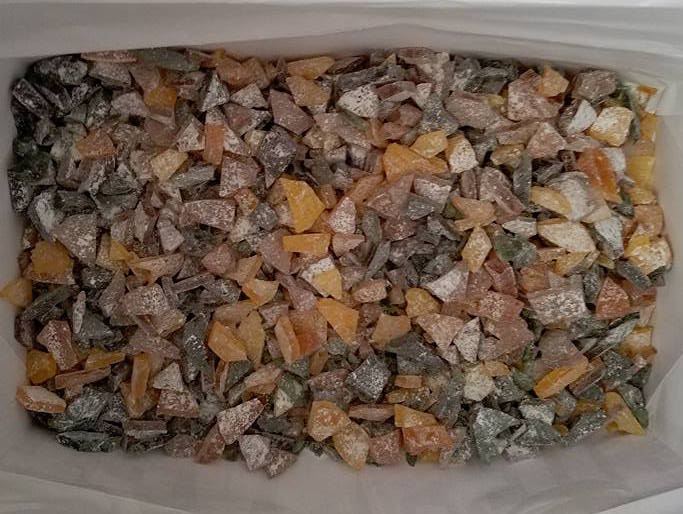
At 260º add your food coloring, but don’t mix it. Let the bubbles do the mixing.
Yellow for lemon, red for cinnamon, black for licorice, blue for… well, you get it.
Increase heat to high and heat until mixture is AT LEAST 300º but no more than 310º
– This temperature is called CRACK, and it is when the crystals become rigid. It will boil for quite awhile before the temperature gets to 300º but be patient – the high temperature is necessary, or you will have sticky hard caramel kind of things.
Pour onto a lightly buttered marble slab (or Coreon slab) and use a bench knife to keep the molten from spilling onto the floor. You can also use a very large silicone mat. BE CAREFUL. THIS MIXTURE WILL BURN YOU TO THE BONE
–
SPECIAL NOTE: Alternately, you can use old cookie baking sheets with edges. Don’t use nice new ones, because they will take a beating in a little while. If you do it this way, let the mixture come to a NON-BOILING STATE before you add the flavor oil. Mix it in, then pour it onto your baking sheet.
–
Another alternative, just use heavy duty aluminum foil.
–
Pour in flavoring oil and continue to fold the edges to the middle of the mass
AS SOON as it can be handled without raising blisters, use a poultry scissors, cut into strips, then into pieces.
Drop pieces into a bowl with 1 C confectioner sugar
Toss until coated, then sift out and put onto a newspaper to cool.
If you go with the baking sheet method, let it cool completely ON THE COUNTER and then whack it with a small hammer and clean screw driver to shatter the pieces into whatever size you desire. Discard the dust, and keep only the pieces.
Preheat oven to 375°F. Drain chickpeas in a colander and let them dry completely. Pat dry with a paper towel if needed, I usually leave them on the counter an hour to make sure they are very dry.
Arrange on a baking sheet in a single layer and roast for about 35 to 45 minutes, shaking the pan every ten minutes. All ovens are different so make sure they don’t burn. They will be golden brown and crunchy on the inside when done, not moist.
In a medium bowl, combine all the spices. Remove chickpeas from oven when done and spray with olive oil. Immediately toss with spices while hot. Eat at room temperature.
Lightly spray a baking sheet with non-stick spray. Set aside.
Rinse and thoroughly dry the chickpeas.
In a small bowl, mix together cumin, paprika, garlic powder, sea salt, onion powder and pepper. Set aside.
Bake dried chickpeas in the preheated oven on prepared baking sheet for 15 minutes (do not add any of the other ingredients yet)!
Remove the chickpeas from the oven and drizzle ½ TBS olive oil over the chickpeas, stirring until evenly coated. If necessary, slowly add more olive oil until all the chickpeas are lightly coated with olive oil.
Add spices to chickpeas and stir until evenly coated.
Bake at 400 for 10 more minutes, then stir.
Return stirred chickpeas to the oven and bake them for an additional 5-10 minutes, until desired crispiness is achieved (a total of 35-40 minutes of baking).
Turn off oven and crack the door a bit. Let chickpeas cool in the oven to achieve maximum crispiness
Notes
Store
Store these roasted chickpeas in an airtight container at room temperature.
Re-crisp
If you don’t bake them long enough the chickpeas could get a little soft, simply re-crisp them in the oven for 2-5 minutes.
Ingredient notes:
Olive oil: I enjoy using flavored olive oil to make these! Some of my favorite varieties come from this store in my hometown! You can use your favorite oil of any kind (avocado, sunflower, etc)!
Spices: Let your imagination run wild! I have given you my favorite combination of delicious flavors here, but feel free to use whatever you prefer! You can even just use simple old salt and pepper if you like!
Recipe Five
Ingredients
2 (15-ounce) cans chickpeas
2 tablespoons olive oil
1 to 1 1/2 teaspoons kosher salt
2 to 4 teaspoons spices or finely chopped fresh herbs, such as chili powder, curry powder, garam masala, cumin, smoked paprika, rosemary, thyme, or other favorite spices and herbs
Instructions
Heat the oven to 400°F. Arrange a rack in the middle of the oven and heat to 400°F.
Rinse and drain the chickpeas. Open the cans of chickpeas and pour the chickpeas into a strainer in the sink. Rinse thoroughly under running water.
Dry the chickpeas. Pat the chickpeas very dry with a clean dishtowel or paper towels. They should look matte and feel dry to the touch; if you have time, leave them to air-dry for a few minutes. Remove any chickpea skins that come off while drying, but otherwise don’t worry about them.
Toss the chickpeas with olive oil and salt. Spread the chickpeas out in an even layer on a rimmed baking sheet. Drizzle with the oil and sprinkle with the salt. Stir with your hands or a spatula to make sure the chickpeas are evenly coated.
Roast the chickpeas for 20 to 30 minutes. Roast, stirring the chickpeas or shaking the pan every 10 minutes. A few chickpeas may pop – that’s normal. The chickpeas are done when golden and slightly darkened, dry and crispy on the outside, and soft in the middle, 20 to 30 minutes total.
Toss the chickpeas with the spices. Sprinkle the spices if using over the chickpeas and stir to coat evenly. Serve while the chickpeas are still warm and crispy. They will gradually lose their crispiness as they cool, becoming addictively chewy.
Recipe Notes
Using roasted chickpeas: Besides eating these chickpeas as a snack, you can toss them with salads or sprinkle over soup in place of croutons.
Recipe Six
Roasting chickpeas is simple! Start with three basic ingredients: cooked or canned chickpeas, extra-virgin olive oil, and salt. Then…
Preheat the oven to 425° and drain and rinse your chickpeas.
Spread the chickpeas on a kitchen towel and gently pat them dry. It’s essential to make sure they’re totally dry before you toss them with the olive oil – damp chickpeas won’t crisp up in the oven. Discard any loose skins from the outside of the chickpeas.
Transfer the chickpeas to a parchment-lined baking sheet and toss them with a drizzle of olive oil and generous pinches of sea salt. Spread evenly on the baking sheet.
Transfer the baking sheet to your preheated oven and roast until crispy. I start checking at 20 minutes, but it can take up t0 30 minutes for them to become really crisp.
Remove from the oven and, while the chickpeas are still warm, toss with pinches of your favorite spices.
Preheat the oven to 425°F and line a large baking sheet with parchment paper.
Spread the chickpeas on a kitchen towel and pat them dry. Remove any loose skins.
Transfer the dried chickpeas to the baking sheet and toss them with a drizzle of olive oil and generous pinches of salt.
Roast the chickpeas for 20 to 30 minutes, or until golden brown and crisp. Ovens can vary, if your chickpeas are not crispy enough, keep going until they are!
Remove from the oven and, while the chickpeas are still warm, toss with pinches of your favorite spices, if using.
Store roasted chickpeas in a loosely-covered container at room temperature. They are best used within two days.
Recipe Seven
How to roast chickpeas
This easy, savory snack is very easy to make, all you need is a hot oven and three key ingredients: chickpeas, olive oil, and salt. Here is what you do:
First, Dry Chickpeas very very well! In this recipe, I start with 2 cans of chickpeas. The most important step is to make sure the chickpeas are absolutely dry. So once you’ve rinsed the chickpeas, use paper towels to dry them very well. Then leave them in a colander for a while so that they would release any moisture. The dryer and less moist (not my favorite word btw!) the chickpeas, the crispier they will be once roasted.
Coat with olive oil and a good pinch of kosher salt. And transfer the chickpeas to a large baking sheet, making sure to spread the chickpeas well so that they are in one layer.
Roast in a high heated oven at 400 degrees F for 20 to 35 minutes or until the chickpeas turn golden brown and crispy to your liking. Shake the sheet pan on occasion (every 10 minutes or so).
Season the chickpeas immediately after roasting. In this recipe, only kosher salt and olive oil are applied to the chickpeas before roasting. I like to wait until I pull the chickpeas from the oven before adding any more spices or seasonings. This way, the spices don’t interfere with the “crisping” process. More importantly, spices have the tendency to burn and become bitter.
Drain and dry chickpeas very well. Dry them up using some paper towels and leave them in a colander until they have dried as much as possible (OR you can spread them on a large baking sheet lined with paper towel for a while.)
Heat the oven to 400 degrees F and position a rack right in the middle.
Spread the chickpeas well on a bare baking sheet (do not line the baking sheet with parchment or foil.) Drizzle a generous amount of extra virgin olive oil and season with kosher salt. Toss chickpeas and make sure they are well-coated with the olive oil. Spread them out well on the sheet.
Roast in heated oven anywhere from 20 to 35 minutes, shaking the pan every 10 minutes or so for even cooking. Don’t rush it, make sure the chickpeas turn a deeper golden brown and the exterior is nice and crispy, that’s when they’re ready.
Season roasted chickpeas. Once you take the chickpeas out of the oven, immediately season with spices of your choice. This time, I used za’atar, sumac, and harissa blend (up to 2 teaspoon each) for warm Middle Eastern and Moroccan notes. Play with the amounts to your liking, and change up the spices according to what you have. (see more flavor ideas up in the post)
Notes
Makes nearly 2 cups or 30 tablespoons. The serving size here is 1 tablespoon.
Roasted chickpeas from dried: If you’d like to make this recipe from dry chickpeas, do not cook them! Simply soak the dry chickpeas in plenty of water for 24 hours. They will expand and at least double in size, that’s what you want. Follow the same instructions for drying and roasting.
How to Keep Chickpeas Crispy: roasted chickpeas are best warm right out of the oven, they are crispiest at this point. Once they cool off and are stored for a time, they will maintain some crunch, but they will soften a bit on the inside. Still a very tasty and additive snack. If you want to re-crisp them, you can put them in the oven for 2 to 3 minutes when you need to.
Storage Tip: You can store cooled roasted chickpeas in a glass jar. They’ll last for 4 to 5 days. And Leaving the jar lid a bit lose allows the chickpeas to breath, keeping them crispy for longer. You can also freeze them for later.
Let butter come up to room temperature or soften butter in microwave at 30% power for 60 seconds
Put into a Kitchen Aid with the sugar and mix with paddle attachment on high for about 5 minutes, or until it starts to become creamy.
At a low speed, add both the flours. Mix – increasing speed a bit when flour is mixed in.
Pre-heat oven to 300º F.
DECISION TIME: Are you making Millionaire Shortbread, or simply Shortbread Cookies?
REGULAR COOKIES
On a floured surface roll out 1/3 of dough to about 1 cm (but not more) thickness. Cut out round biscuits and move to lightly greased trays.
Dock cookies with the tines of a fork
Once all the dough has been used, put trays into oven on the bottom two shelves and bake for 1 ½ hours, shuffling the trays around halfway through
The biscuits should be pale and short, not doughy (test 10 minutes after coming out of the oven – if doughy = wet, put back and bake for further 10 – 15 minutes).
Sprinkle with sugar immediately after coming out of the oven, leave to rest for 10 minutes before putting them on racks
Store in air tight containers.
MILLIONAIRE SHORTBREAD
Prepare basic shortbread dough as shown above.
Grease a 9×12 rimmed baking sheet and line COMPLETELY with parchment paper
Press dough onto sheet evenly and dock thoroughly with tines of a fork
Bake at 350º for 30 minutes
Remove from oven and press down using another baking sheet so that it is completely flat and compressed
Let cool while you prepare the caramel CARAMEL PREPARATION
Heat 1 can (14 oz) Sweetened Condensed Milk over medium heat to near boiling
Remove from heat and mix in 1 C compressed brown sugar, 1/2 C corn syrup (Karo), 8 TBL softened butter, 1/2 tsp salt and 1/2 C heavy cream
Continue to heat (about 16-20 minutes) until temperature is between 236º and 239º – BE EXACT – Stir occasionally
Pour onto shortbread crust and smooth using offset spatula
Cool on counter, then refrigerate for 90 minutes before the next step CHOCOLATE TOPPING
Microwave 6-10 oz bittersweet chocolate at 50% power for 60 seconds. Repeat at 30 second sessions, until stirring creates a smooth chocolate mixture
Add 2 oz cocoa powder
Pour over top of the caramel topping using an offset spatula to smooth.
Sprinkle very sparingly with sea salt on some, Turbinado sugar on some, and crushed graham crackers on others… or not!
Refrigerate only 10 minutes, then remove to cut into strips or squares using a serrated knife
Cool and wrap in plastic, waxed paper or foil pieces
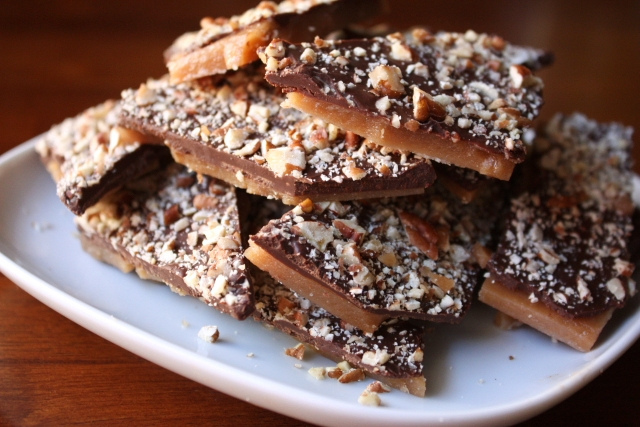
This recipe is adapted from one provided by Becky Butcher. She made this for all the neighbors every Christmas when we lived on Orchid Lane.
8 ounces Ghirardelli 60% Cacao Bittersweet Chocolate Baking Bar
Optional: Use some white chocolate as well for a nice contrast
3/4 cup pecans, finely chopped
1 cup butter
1 cup sugar
2 tablespoons water
1/8 teaspoon salt (optional)
1 teaspoon pure vanilla extract
Preheat oven to 350º F
Toast the chopped pecans on a baking sheet in the oven for 6 minutes
Wrap baking sheet with heavy duty aluminum foil, and set aside.
In a heavy saucepan, cook the butter, sugar, water, and salt over medium heat until the temperature reaches 305F (hard-crack stage), stirring occasionally
Temperature will climb rapidly after 285º but this whole process will take awhile. Be patient – it will come.
Stir in the vanilla.
Pour the mixture into the lined pan. It will spread but you may have to help it along with a spatula.
Grate the chocolate bar in a food processor or by hand
Sprinkle and spread melted dark (and white) chocolate over the toffee
Sprinkle with the toasted pecans, pressing to set pecans into chocolate.
– OTHER OPTIONS: Instead of pecans, you can use dried fruit such as raisins or cranberries, seeds, crushed candy canes or other candy, pretzels, crushed coffee beans, etc. Feel free to use your imagination.
Let set at room temperature on the counter for 1 hour, or until the chocolate is set. THIS IS MANDATORY to allow the hot sugar crystals to harden.
Refrigerate for another hour, but NOT UNTIL it has set on the counter for an hour.
Break toffee into pieces.
Store covered at room temperature for up to 1 month.
This recipe makes a BUNCH of marmalade. Enough to last you through to next season. If you just want enough jars to last you for a couple of months, CLICK HERE for the amounts used to make a smaller batch.
Marmalade is traditionally made with Seville oranges (also called sour oranges) which are FAR too sour to eat. They do, however, have a high amount of pectin in them. With the proper amount of sugar, this makes a great marmalade base to which other fruits can be added. Prep your oranges the day before, so they can soak overnight. Total hand-on time for this recipe is 3 – 4 hours, so make sure that you allow yourself enough time to cook safely.
PREPARATION
Wash 9 Seville oranges thoroughly and two lemons.
Peel the orange skin using a peeler. Don’t peel too deeply, you do not want the white (pith) which tends to be bitter. The orange peel will remain in the marmalade after cooking.
Cut apart, discarding any bad spots
Separate the innards and pith from the outermost orange peel. Keep the innards and tie them into a cheesecloth bag.
OVERNIGHT SOAK
Pulse pips and guts in food processor
Place 2 C Pips, guts, seeds, membrane – innards into 4 C of water
Pulse peel in food processor – only briefly
Place 2 C peel into a second bowl containing 4 C of water
You should put the cut up and pulsed skin and innards into bowls covered with water overnight in the refrigerator. This will soften them so that the pectin is more easily released.
FIRST BOIL (90 MINUTES)
Strain innards, pouring the soaking water into your stock pot
Put innards into a cheesecloth – a bouquet garni – and secure with a string, keeping the end available for easy removal.
Pour water and peel into your stock pot
Add 1 C orange juice into your stock pot
Bring up to boil, then reduce heat to simmer
Skim foam as necessary. Stir with a WOODEN spoon. Metal will react with the acids in the orange
Simmer for 90-120 minutes over low heat – this will release much of the pectin
If the oranges have not been soaked for at least 8 hours, go ahead and simmer for 120 minutes.
The seeds contains the pectin, and will be discarded after about 90 minutes. The outer orange peel will become the meat of the marmalade. I prefer to dice half and mince half of the rind, so that you have a variety of sizes of orange rind in your marmalade.
Definition: bouquet garni – A bag (frequently in a cheesecloth) that is used for infusions, and removed later as the recipe progresses. CLICK HERE to read more.
NOTE: DO NOT ADD SUGAR YET. If you add sugar too early, it will freeze the production of pectin, and your jam may not set properly, so don’t add it until after the 90 minute boil.
SECOND BOIL (HEAT TO 221º F – 105º C )
Remove pips and pith in the mesh bag at 208º. Use a tongs to squeeze the juices from the bag back into the pot. Discard the bag.
Increase heat and stir to dissolve. If sugar is added too soon, peel may become tough. Wait until temperature reads at least 210º
BRING HEAT UP TO 210º BEFORE ADDING SUGAR
5 C granulated sugar
1/4 C Karo Syrup
2 TBL lemon juice
Add the Second Boil ingredients slowly, stirring continually
As soon as it starts boiling, stop stirring. Stir very infrequently.
IMPORTANT NOTE: Until most of the water boils away, the sugar may stay at 215º for about 20 minutes. Once it hits 216º it will increase about one degree per five minutes.
Keep heating until the temperature reaches 221º This could take up to an hour. I’ve had success with 119º but only marginally. Be patient and wait until it reaches full jell temperature. A few minutes will make all the difference. If possible, use a calibrated thermometer (or a scientific thermapen) to make sure your thermometer is not off by 2-3 degrees.
Meanwhile, sterilize canning jars. Details not included on this page.
When 221º is reached, remove the pot from the heat and let rest for 10 minutes. Skim off any scum or foam.
Orange rind will rise to the top. Stir the rind back into the mixture before canning.
Put into canning jars and cover with a lid put into hot water for at least 60 seconds. When properly canned and cooled, this will last you for about a year.
NOTE:
Temperature will plateau at 215 for quite awhile – for as long as 20 minutes
After that, you will get 1º increase in temperature about every 5 minutes
Be patient.
MORE INFORMATION
Alternative Recipes
There are SWEET ORANGE marmalades which do not use as much sugar as this recipe. CLICK HERE for Alton Brown’s recipe for Sweet Orange Marmalade, or USE THIS LINK for Strawberry Marmalade.
A Word of Caution
A word about POT SIZE. The first time I made this I nearly boiled over. It was a constant battle between foam and the size of my pot. This will foam up about 400% of its size. NO KIDDING. Make sure you use a pot large enough, or you will end up with a huge dangerous mess. This does not ALWAYS happen, but you can be prepared if it does.
I reuse my canning lids. If they fail to seal, I eat that jar first. Put an X on the failed lid so you don’t save it after the jar is empty. If they seal, they will generally not fail after cooling. I prefer to use the small canning jars, because once exposed to light and air, the marmalade starts to lose its flavor.
The canned jars will last longer if you process them in a water bath for 10 minutes after putting into jars.
Put marmalade into sterilized canning jars
Soak lids about 60 seconds in boiling water
Wipe rim clean and put lids on
Tighten only finger tight
Submerge in water (1″ over top) and process 10 minutes
Cool (undisturbed) on the counter
What is shown in the photos are quantities to make two entire large batches of marmalade.
Optional Ingredients
Optional ingredients reserved for the very end:
Minced strawberries, blueberries, rhubarb, shredded carrot, or other contrast
Chemistry
If you do not use enough sugar, the liquid will be unable to reach 221º (as water only gets 212º) and it will NEVER set. Sugar can get up to 300º If you try to decrease the calories, and use a marginal amount of sugar, you may heat it too long and you will get inverted sugar which has a longer shelf life, but is similar to high fructose corn syrup and is not as good for you as regular sugar.
Realistically, if you don’t have a thermometer, you can test the gel level but putting glass plates in the fridge, and then dripping jam onto the plate to see if it runs or just sits there. CLICK HERE
If desired, after the temperature has reached 221º you can mix in some contrast fruit such as minced strawberry – but something that is ready to eat just as it is. Don’t use anything that needs cooking or softening.
Pour into canning jars. If you completely can the marmalade, it should last for up to a year. Otherwise, refrigerate it for up to six months. I personally just put them on my shelf for up to a year, but if you do this, proceed at your own risk.
If your marmalade does not set, it is still good for steamed marmalade pudding, marmalade tarts, marmalade ice cream and much more. CLICK HERE if your marmalade did not set properly.
Bottom right: Some of your oranges may be older and nubbly. You will need juice from many oranges, but the peel that you want to use is from about eight oranges that have fairly smooth skin.
Top right: To get the amount of pips and pith that you need for the larger sized recipe, you will have to juice a lot more than eight, but just throw the extras into the trash.
The ingredients freeze really well. Hot pack canning is another good option. If you freeze, be sure to leave an inch of headroom in your water bottles.
This photo gives you a good close up of the smoother skinned oranges and the older nubbly ones. The juice from the older oranges is perfectly usable, but the skin will be a bit more bitter than the younger oranges, so get rid of them.
I prefer just a few larger dices of orange, but most of the skin that I use is minced in a food processor.
Another good way to do it is with a zester. It takes more oranges, but you can leave the white pith behind, which actually gives you a better end product.
November 16, 2012 is the date of the demise of one of This Country’s Traditions: The Twinkie. I’ve pieced together several recipes, and I think that this is the best of all of them, which results in something close to the original.
(Update: The world is saved. In July 2013 they started making the Twinkie again.)
See multiple recipes on this page. Take your pick and see which one is right for you.
The Twinkie was invented in 1930 by the late James A. Dewar, then the Chicago-area regional manager of Continental Baking Company, the parent corporation behind the Hostess trademark. At the time, Continental made “Little Short Cake Fingers” only during the six-week strawberry season, and Dewar realized that the aluminum pans in which the cakes were baked sat idle the rest of the year. He came up with the idea of injecting the little cakes with a creamy filling to make them a year-round product and decided to charge a nickel for a package of two.
But Dewar couldn’t come up with a catchy name for the treat – that is, until he set out on a business trip to St. Louis. Along the road he saw a sign for Twinkle Toe Shoes, and the name Twinkies evolved. Sales took off, and Dewar reportedly ate two Twinkies every day for much of his life. He died in 1985.
The spongy treat has evolved into an American phenomenon, from which nearly everyone has slurped the creamy center. Today the Twinkie is Continental’s top Hostess-line seller, with the injection machines filling as many as 52,000 every hour.
You will need a spice bottle, approximately the size of a Twinkie, ten 12 x 14 -inch pieces of aluminum foil, a cake decorator or pastry bag, and a chopstick.
Twinkie Recipe #1
The Cake
Nonstick spray
4 egg whites, beaten until stiff
one 16-ounce box golden pound cake mix
2/3 cup water (160 ml)
The Cake – From Scratch
Creme Filling
2 teaspoons very hot water
1/4 teaspoon salt
2 cups marshmallow creme (one 7-ounce jar)
1/4 cup (57g) non-hydrogenated shortening or coconut oil (Crisco in a pinch)
1/4 cup (57g) margarine
1/2 cup powdered sugar
1/2 teaspoon vanilla (See Tidbits)
1. Combine the salt with the hot water in a small bowl and stir until salt is dissolved. Let this mixture cool.
2. Combine the marshmallow creme, shortening, powdered sugar, and vanilla in a medium bowl and mix well with an electric mixer on high speed until fluffy.
3. Add the salt solution to the filling mixture and combine.
Makes 1 1/2 cups.
1. Preheat oven to 325 degrees F.
2. Fold each piece of aluminum foil in half twice. Wrap the folded foil around the spice bottle to create a mold. Leave the top of the mold open for pouring in the batter. Make ten of these molds and arrange them on a cookie sheet or in a shallow pan. Grease the inside of each mold with a light coating of nonstick spray.
3. Disregard the directions on the box of cake mix. Instead, beat the egg whites until stiff. In a separate bowl combine cake mix with water, and beat until thoroughly blended (about 2 minutes). Fold egg whites into the cake batter and slowly combine until completely mixed.
4. Pour the batter into the molds, filling each one about 3/4 of an inch. Bake in the preheated oven for 30 minutes, or until the cake is golden brown and a toothpick stuck in the center comes out clean.
5. For the filling, combine the salt with the hot water in a small bowl and stir until salt is dissolved. Let this mixture cool.
6. Combine the marshmallow creme, shortening, powdered sugar, and vanilla in a medium bowl and mix well with an electric mixer on high speed until fluffy.
7. Add the salt solution to the filling mixture and combine.
8. When the cakes are done and cooled, use a skewer or chopstick to make three holes in the bottom of each one. Move the stick around inside of each cake to create space for the filling.
9. Using a cake decorator or pastry bag, inject each cake with filling through all three holes.
Makes 10.
Credits for Recipe Components:
www.TopSecretRecipes.com
www.instructables.com
Twinkie Recipe #2 – from Scratch
Ingredients
Nonstick cooking spray or vegetable oil
1/2 cup cake flour
1/4 cup all-purpose flour
1 teaspoon baking powder
1/4 teaspoon salt
2 tablespoons milk, preferably whole
4 tablespoons unsalted butter
1/2 teaspoon vanilla extract
5 large eggs, at room temperature
3/4 cup granulated sugar
1/4 teaspoon cream of tarter
Seven-Minute Filling, er, Frosting
Directions
1. Preheat the oven to 350°F (175°C) and adjust the oven rack to the lower-middle position.
2. To make your shiny, single-use Twinkie molds, start with a piece of aluminum foil, preferably heavy-duty, that’s approximately 14 inches long. It should be just a little longer than it is wide. Fold the foil in half lengthwise, then fold it in half again to create a rectangle that’s about 6 inches long and 7 inches wide. Repeat to make a dozen rectangles.
3. Place 1 sheet of folded foil on your work surface, with the long side facing you. Place a standard-size plastic or glass spice jar on its side in the center of the foil, the jar’s long side also facing you. Bring the long sides of the foil up around the jar. The foil won’t reach all the way around, and that’s okay. Fold the foil in around both top and bottom ends of the spice jar, nice and tight. You’ll end up with a sort of trough situation. (Cookbook author Todd Wilbur has a video of the process here; if you’re impatient, fast forward to 1:10, where the action starts.) Repeat until you have 12 foil Twinkie molds. Spritz the molds with an obscenely generous amount of nonstick spray or use your fingertips to coat the molds with vegetable oil. Place the Twinkie molds on a baking sheet or in a roasting pan.
4. Whisk the flours, baking powder, and salt together in a bowl.
5. Heat the milk and butter in a small saucepan over low heat until the butter melts. Remove from the heat add the vanilla. Cover to keep warm.
6. Separate the eggs, placing the whites in the bowl of a standing mixer fitted with the whisk attachment (or, if using a hand mixer or whisk, a large mixing bowl) and reserving the yolks in another bowl. Beat the whites on high speed until foamy. Gradually add 6 tablespoons of the sugar and the cream of tartar and continue to beat until the whites reach soft, moist peaks.
7. Transfer the beaten egg whites to a large bowl and add the egg yolks to the standing mixer bowl—there’s no need to clean the bowl (or, if using a hand mixer or whisk, simply place the egg yolks in a separate large bowl). Beat the egg yolks with the remaining 6 tablespoons sugar on medium-high speed until the mixture is very thick and a pale lemon color, about 5 minutes. Add the beaten egg whites to the yolks, but do not mix.
8. Sprinkle the flour mixture over the egg whites and then mix everything on low speed for just 10 seconds (or, if using a hand mixer or whisk, until blended but not thoroughly combined). Remove the bowl from the mixer, make a well in one side of the batter, and pour the melted butter mixture into the bowl. Fold gently with a large rubber spatula until the batter shows no trace of flour and the whites and yolks are evenly mixed, about 8 strokes.
9. Immediately scrape the batter into the prepared molds, filling each with about 3/4 inch of batter. Bake until the cake tops are light brown and feel firm and spring back when touched, 13 to 15 minutes. Transfer the pan containing the molds to a wire rack and allow the cakes to cool in the molds.
10. Just before filling, remove each cake from the foil. Using the end of a chopstick, poke three holes in the bottom of each cake, just like in the bottom of real Twinkies. Wiggle the tip of the chopstick around quite a lot to make room for the filling. (Again, you can see this in action here, beginning at minute 3.)
11. Transfer the frosting to a pastry bag fit with a small tip (about 1/4 inch across). Pipe the frosting into the holes you created in the bottom of the cakes. As you fill each cake, hold it in your hand and press your palm gently around it so you can feel the cake expand, taking care not to overfill and crack the cake.
12. Unlike real Twinkies, these won’t last indefinitely. They’re best served still slightly warm.
My kitchen smells like a Hostess bakery. Those of us who grew up in a town that had a Hostess bakery will never forget that smell. Driving through that part of town was always pleasant, since the air smelled of Wonder bread, Twinkies, or whatever snack they happened to be baking that day.
And now it’s in my kitchen. Sweet, sugary Twinkie goodness. Even better than the original.
I’ve only eaten Twinkies a few times in my life. As a kid, I wasn’t allowed to eat very many “fake” foods. It seems to have worked out well because to this day I don’t have much desire to eat processed foods. Thanks mom!
I won’t say that these Twinkies are healthy, but they certainly are worth the rare indulgence. I made these as a surprise treat for my boyfriend. He loves Twinkies, but knows that I don’t really approve of the store bought variety. The verdict? Much better than store bought!
To get the light, spongy cake shell requires a few extra steps. First, beat the egg whites until they are very stiff.
After mixing the batter, fold the egg whites in gently. The volume of the batter will increase greatly. See all those bubbles? This batter is fluffy!
To get the authentic Twinkie shape, use this canoe pan. Or, if you prefer, use a cupcake pan. I couldn’t resist trying the canoe pan. The cakes came out looking exactly like Twinkies!
The fun part is filling the cakes. Hold them in the palm of your hand, stick the icing tip into the cake and squeeze! Not too much, or the cake may explode. When you’re done, they’ll look very professional.
Final score? Store bought Twinkies: 39 ingredients. Homemade Twinkies: 12 ingredients.
Twinkie Recipe #4
Vanilla Snack Cakes (Twinkies)
Adapted from King Arthur Flour
Yield: 24 cakes
Preheat the oven to 350°. Spray a canoe pan or muffin tins with cooking spray and set aside.
Using an electric mixer, beat the egg whites until they are very stiff. They should hold their shape when removed from the bowl. Set aside.
Combine the flour, corn starch, sugar, baking powder, and salt in a large bowl. Whisk together or beat on low speed for a minute, until combined. Add oil, water, Princess flavoring, and egg yolks. Beat on medium speed until smooth.
Using a rubber spatula, gently scoop 1/3 of the egg whites into the batter. Fold the egg whites in by slicing the spatula through the center of the bowl, gently scooping batter from the bottom and wrapping it over the top. Turn the bowl 1/4 turn and repeat until the egg whites are barely visible. Repeat this process with each remaining 1/3 of the egg whites.
Spoon the batter into the pan, filling the wells 2/3 full. Bake for 8-12 minutes, or until cakes are golden brown and just starting to pull away from the sides of the pan. Cakes will puff up when cooking, but will settle as they cool. Cool the cakes in the pan for 5 minutes, then gently remove them from the pan using a rubber spatula. Allow them to cool, flat side down, directly on the cooling rack.
Filling:
2 tablespoons all-purpose flour
1/2 cup milk (I used soy milk)
1/2 teaspoon vanilla extract
1/2 cup unsalted butter
1/2 cup granulated sugar
In a small saucepan, heat the flour and milk over medium heat, stirring constantly. When the mixture becomes a paste (about 5 minutes), remove from heat and allow to cool for 1 minute. Stir in the vanilla extract. Place a piece of plastic wrap directly onto the surface to prevent a skin from forming, and set aside to cool completely.
With an electric mixer, cream the butter and sugar until light and fluffy. Add the cooled milk mixture and beat for about 5 minutes, until smooth and creamy.
Use the pastry filler that comes with the pan (or a pastry bag with round tip) to fill the cakes. Place the tip about halfway into the cake and squeeze gently. Holding the cake in your palm while filling it will allow you to feel when it is full. Fill each cake 3 times to ensure that each bite contains cream filling!
Twinkie Recipe #5
Hostess Twinkie Sponge Cake. Photo by NorthwestGal
6 eggs
1 cup sugar
1 cup flour
1 teaspoon baking powder
1/4 salt
1/2 cup scalded milk
1 teaspoon vanilla extract or 1 teaspoon almond extract
Directions:
1 – Beat eggs til thick&lemon colored (about 5 minutes with an electric mixer on medium speed).
2 – Gradually add the sugar a few spoons at a time; beat another 3 minutes.
3 – Slowly add flour, baking powder, salt.
4 – Beat in milk in three equal portions till blended.
5 – Add Flavoring.
6 – Beat 2 minutes.
7 – Pour batter into greased & floured jelly roll pan.
8 – Bake in the center of a preheated oven at 350 degrees for 38-42 minute (or till toothpick inserted in center comes out clean.
9 – Cool on rack, 1 hour.
10 – Cut into finger shapes to resemble the original Twinkie cakes.
11 – Spread with filling and form into sandwiches.
12 – Wrap and refrigerate or freeze to use as needed.
13 – Keeps for up to 3 weeks refrigerated. Freezes almost indefinitely if wrapped well.
Read more at: http://www.food.com/recipe/hostess-twinkie-sponge-cake-356820?oc=linkback
Twinkie Recipe #6 – Golden Twinkie
2 cup all-purpose flour
3 tsp. baking powder
¼ tsp. salt
½ cup unsalted butter, softened
1 cup sugar
2 large eggs
1 tsp. vanilla extract
1 cup whole milk
Preheat your oven to 350 degrees F. Spray molds/pan with non-stick spray.
Sift together flour, baking powder and salt into a bowl and set aside.
In a large bowl, beat together butter and sugar at medium-high speed until pale and fluffy. Next, beat in the eggs one at a time, beating for 1 minute in between each addition. Reduce the mixer speed and add flour mixture alternating with the milk, beginning and ending with the flour mixture. Add the vanilla and mix until the batter just comes together. Over mixing with make your cake chewy. Makes 12 cakes.
Spray your Twinkie canoes and bake at 350 for 15 minutes, or until the cakes are just a light golden color and a tester inserted in the center of the cakes comes out clean. Remove from the oven and let cool.
Cream Filling
¼ cup shortening (I prefer Crisco brand)
¼ cup margarine
1 cup sifted powdered or 10x sugar
2 tsp. vanilla
Beat together the shortening and margarine until light and fluffy. Add the powdered sugar in a little at a time and beat on high until peaks form. Add vanilla and beat for one minute. Place in prepared icing tubes for piping into cakes.
To fill the cakes, insert the icing tip – preferably a large star tip – into three points along the flat-side of the cake, about 1/8 of an inch deep. Squeeze lightly until you see the filling begin to ooze out.
For more on food and for more recipes check out twinklevanwinkle.com.
Slightly softened cream cheese
. Spread onto plate
Chili sauce or cocktail sauce
. Spread over cream cheese
1 can fancy crab meat or miniature shrimp
. Spread over meat
Scallions, cilantro, minced red bell pepper
. Sprinkle over top


