Make your own Stevia

From the FoodBabe.com –

Stevia is a sweetener made from a plant, so theoretically it should not be bad for you, but keep in mind that arsenic is made from apple seeds. Also, I would not want to eat poison ivy or hemlock, which are also plants, but alas I digress. The FDA has deemed stevia (after my lobbying) an acceptable artificial sweetener. That being said, I’ve decided to use it for myself. I eat much of my own food, and the result is I am starting to swell up like a tick. Yech! I need to lose weight. I bought some from Amazon.com to give it a try. After that is gone, perhaps I will try this method. Meanwhile, if you want to read more about stevia, you can read all about it on Wikipedia.

2015-11-20 08.41.01

Growing and Making Pickles

CLICK HERE for an index of all Grandpa’s Pickle Recipes.


Lacto-fermentation

Simply put, lacto-fermentation is a microbial process using beneficial bacteria including Lactobacillus and Bifidobacterium spp. and other lactic acid bacteria (LAB) (commonly known as probiotics), which thrive in an anaerobic fermenting environment.  Beyond preservation advantages, lactofermentation also increases or preserves the vitamin and enzyme levels, as well as digestibility, of the fermented food.

Balance is crucial.  Too salty and fermentation does not take place.  Not salty enough, and they rot.  It is not a fine line, but one that needs to be considered.

Planting your own Pickles

  • Plant specifically pickling cucumbers.
  • They are a bit smaller than regular ones.
  • The take about 4-5 weeks to harvest, so plan your time accordingly.
  • The first part of August is a good time to plant.

Pickling ingredients

  • Enough for a one quart canning jars
  • Different vinegars contain different acid levels, which affect the taste of your pickled ingredients.
    – LOW ACID: Apple cider vinegar
    – MEDIUM ACID: White wine vinegar
    – HIGH ACID: Red wine vinegar – increase sugar
  • Main pickling ingredients:
    – 1/2 C sugar (dissolved in heated vinegar)
    – 1/2 C salt (dissolved in heated vinegar)
    – 2 C heated white vinegar – heated in microwave 1 minute
    – 1 C water – also heated
  • Flavor ingredients:
    – 2 large (or 3 small) cloves garlic – whole, but squashed
    – 1 dried arbol chili – dried, but flexible – not brittle
    – 1 lemon – zest and juice
    – 1 bay leaf
    – 1 rosemary sprig
    – 1 tsp black peppercorns
    – 1/2 tsp mustard seeds
    – 1/2 tsp tarragon
    – 1/2 tsp thyme
    – 1/2 tsp vanilla

Basic Steps… Really Easy

  • Stuff jar full of whatever you are pickling
  • Pour in hot salty brine – About 1 sugar, 1 salt, 2 water, 4 vinegar
  • Process with hot water bath for 10 minutes

If you are going to eat them within a month or so, you can skip the canning process, but you still want to use jars and lids that have been sterilized.  If you do this, they will stay good for up to four months.

  • Pickles should always set for at least 36 hours before you eat them.  A week is even better.  In the case of olives or peppers, a few weeks is in order.

Items that are good pickled

  • Hard boiled eggs – whole
  • Red  or sweet white onion – cut into slices
  • Cucumber medallions with sweet onion slivers
  • Radishes – small ones whole, big ones halved
  • Jalapeño peppers
  • Small pickling cucumbers
  • Cauliflower
  • Broccoli
  • Asparagus
  • Zucchini
  • Red or brown olives fresh from the tree (2 week cure time) – Black is too ripe
  • Shredded cabbage (sauerkraut)
  • Green beans

Most seasonal vegetables can be pickled as long as they have some structure to them. Forget leaf vegetables, apples, pears, etc.

Grandpa’s Refrigerator Pickles

PREPARE YOUR BRINE

  • 2 C water – About 1 sugar, 1 salt, 2 water, 4 vinegar
  • 2 C apple cider vinegar
  • 3 TBL kosher salt
  • 3 TBL sugar
  • Several sprigs fresh dill – whole
  • 1 tsp celery seed
  • 1 tsp coriander seed
  • 1 tsp mustard seed
  • 1/2 tsp black peppercorns
  • 10 cloves peeled garlic – whole

PREPARE YOUR CUCUMBERS

  • 6 Kirby or Pickling Cucumbers – Quartered lengthwise
  • English Cucumbers and Persian Cucumbers are also good choices.

    OTHER VEGETABLES YOU CAN USE

  • Carrots
  • Onions
  • Peppers
  • Green beans
  • Cauliflower

COMBINE IT ALL

  • Bring your brine up to boiling
  • Simmer 5 minutes
  • Place 1 clove of garlic and some of the peppercorns into your jars
  • Pack with vegetables as full as you can get it.
  • Pour the boiling brine into the jars
  • Put lids on them
  • Process in hot water bath if keeping for more than 4 months, otherwise just put the lid on and you are good to go.
  • Always best after a few days.

Grandpa’s Bread and Butter Pickle Chips

INGREDIENTS

  • 15 Small Cucumbers
  • 3 onions – thinly sliced
  • 1 green bell pepper – thinly sliced
  • 2 cloves garlic
  • 1/4 C salt
  • 2 C apple cider vinegar
  • 1 C white sugar
  • 1 TBL mustard seed
  • 1 tsp celery seed
  • 8 whole cloves
  • 1 tsp ground turmeric

STEP BY STEP

  1. In a large bowl, toss together cucumbers, onions, green bell peppers, garlic and salt. Allow to stand approximately 3 hours.
  2. In a large saucepan, mix the cider vinegar, white sugar, mustard seed, celery seed, whole cloves and turmeric.
  3. Drain liquid from the cucumber mixture. …
  4. Transfer to sterile containers.
  5. Store in the refrigerator for up to three months

Twice Baked Potato

This recipe is not much more difficult than making a baked potato, but is a lot fancier and always very well received.

Bake two large potatoes just as you normally would:
( Poke them full of holes, bake at 450º and then let cool to the touch )

Cut the potato in half, and scoop out the white part making sure you don’t tear the skin
Crush and mix the white with 4 TBL butter, garlic powder and onion powder
Add in 1 TBL sour cream, 1/4 C cheddar cheese
Mix in 1/4 C chives, salt and pepper to taste and 1/2 tsp oregano

Pack all of this back into the shell of the potato skin, top with cheese and bake at 400º for 20 minutes.

Grandpa’s Dry Rub

This is a good coating for when you are planning to bake chicken, pork loin, rib roast or beef roast.  In a pinch, add a teaspoon of it to an entire container of sour cream for a quick party dip.  It is easy and can store for up to six months, so make more than you need.

INGREDIENTS

  • 1/4 Cup each :: Granulated white sugar, brown sugar
  • 2 TBL each :: Salt, peppercorns, ground sumac, dried oregano, dried cilantro, corn starch
  • 1 TBL each :: Red pepper flakes, cumin, cayenne pepper powder, dried oregano, sweet paprika, smoked paprika, ground onion powder, granulated garlic, dried mustard
  • 1 tsp each :: Baking powder

PULVERIZE ALL in food processor

NOTE:  This has a lot of ingredients, and has a lot of flavor, but not a lot of heat.  If you don’t have any one (or even two) of these ingredients, don’t worry – it will still be wonderful.  This is about nuances of flavor, not a specific recipe.

Breakfast Enchilada

  1. Scramble an egg in a skillet and then dump onto a plate and set egg aside
  2. In the empty (but not yet cleaned) skillet add 1 TBL butter and 1 TBL flour
  3. Cook until the flour starts to brown
  4. Add 1 tsp paprika
  5. Add 2 TBL chicken broth and stir to incorporate
  6. Add 2 TBL more broth, stir
  7. Add 2 more TBL broth and then stir until it is smooth
  8. Put a corn tortilla on a heat resistant plate or bowl
  9. Top with your egg
  10. Pour sauce on top of the egg
  11. Add shredded cheese
  12. Bake under broiler for 2-3 minutes or until cheese starts to brown
  13. Serve with strong hot coffee


Tips: Caul Fat

Caul fat is the thin membrane that encases an animals intestines. While it sounds gross, the caul fat gives a roast body and supports it while it cooks. The fat melts away, and the roast stays formed.

One interesting tip is to lay it out on plastic wrap. The Caul Fat itself is like trying to wrestle a spider web. The plastic wrap gives it a foundation on which it can be handled.

 Here are a couple of links to research it.

 Chef’s Resources
Overview of how to use it

Here are a couple of recipes.

 Roasted Pork Loin
 Stuffed Pork Loin with a Video
 Wrapped Halibut

Here are a couple of places where you might be able to buy it.

 Amazon.com – Try it from your butcher first. Amazon wants you to buy A LOT.

Photos for Guys Grocery Games

About Robert and the Photos…

Appetizers, Condiments and Sides


Breakfast


Lunch


Dinner


Home and Family Life


Travel


Robert is 57 years old. He retired from Software development in 2005 and turned his attention to cooking. He has taken several classes in cooking, but mainly relies on learning from other chefs and his own intuition. His travels have taken him to kitchens around the world, and to countries including Spain, France, Istanbul and the Czech Republic.

Here are some of the high points from the enclosed photographs.

Bread Two photos of some of the loaves that Robert has created.

Breakfast Photos include lots of eggs, French Toast, breakfast tarts, quiches, and muffins.

Lunch We usually eat out, sampling different restaurants in The Valley.  In the photos are a sample plate, mini pizza, burrito, quiche, pitas and a lunch pie.

Dinner Photos include lots of casserole type dishes, vegetables, pasta, Mexican cuisine, and other International cuisine.

Grand Kids I have two year-old grand children, and six others ranging from 8 to 14  The oldest is in the Phoenix Childrens’ Chorus, which travels around the world.

Jalapeno The jalapeño chili paste is my own creation. The photo shows the aging bottles. At about eight months, I blend the ingredients and run them through a food mill

Robert Photos of Robert show him on his travels, with his grandkids, his wife in the center of their Urban Farm, and in his hospital uniform. His service dog and him are on staff at Banner Hospital as volunteers in the therapy dog program. Every easter I prepare about 80 omelets over a 30 minute period for breakfast.

The Girls are in the last photo. Fresh eggs every morning!

PROMOTIONAL

Burrito Medallions


INGREDIENTS

  • Leftover burrito
  • Marinara sauce or salsa
  • Provalone cheese

CLICK ON PHOTO FOR AN ENLARGEMENT

STEP BY STEP

  1. Cut burrito into 3/4 inch thick medallions
    NOTE:  Burrito will cut better if it is cold.
  2. Lay flat on baking sheet
  3. Spoon salsa over top
  4. Put cheese on top
  5. Bake at 350º for about 12-15 minutes

Serve with a side of fruit

You will note that sauce was not used on the medallions in the photo.  It was OK, but was a bit dry.  Some sort of sauce would keep it nice and moist.

Auntie Goman’s Doughnuts

  • 1/2 tsp nutmeg and cinnamon
  • 1 tsp baking powder
  • 1/2 C milk
  • salt
  • 1/2 C sugar
  • 2 small eggs
  • 1/2 TBL shortening
  • 2 C flour – mix gently

Alternate Recipes

Regular Donuts

  • 1.5 C whole milk – about 150º
  • 2.5 oz veg shortening
  • 5 tsp Instant Yeast (or just under 2 TBL) in 1/3 C warm water
  • 2 whole eggs
  • 1/4 C sugar
  • 1 tsp freshly ground nutmeg
  • 1.5 tsp salt
  • 1 gallon hot vegetable, safflower, or peanut oil for frying
  • 23 oz AP flour (by weight)

Sour Dough Donuts

  • Reduce the dough by 3/4 C
  • Reduce the milk by 1/4 C
  • Add 1 C sour dough starter
  • Add 1/4 C dried milk
    • Add all of this mixture as part of Step 1
  1. Combine yeast mixture, shortening, eggs, salt, nutmeg, sugar and half of the flour in your food processor – Paddle stir to mix
  2. Add 1/4 more of the flour, stir
  3. Put on dough hook, then add the remainder of the flour
  4. Knead for bout 5-8 minutes
  5. Cover and let rise for 1 hour in cold oven with 4 C container of boiling hot water placed in the oven next to the dough
  6. Tap the dough down and fold the dough into thirds – twice
  7. Roll to about 3/8 inch thickness – Use two baking trays or sticks for a spacer to get even thickness
  8. Sprinkle your baking sheet with flour
  9. Cut big circles and place them on your baking sheet
  10. Cut a smaller hole in the center
  11. Let the holes rise on their own tray for donut holes
  12. Use all of the leftover dough to make more
    Roll back into a ball and let rise for 30-60 minutes
    Roll flat and cut into squares or more donuts
  13. Let the donuts (and holes) rise for 30 minutes
  14. Heat your oil up to 365-370º in a Dutch oven
  15. Put four in at a time
  16. Flip after 60 seconds per side
  17. Let drain on cooling rack placed over newspaper
  18. Optional:  Put into paper bag with confectioner sugar and shake
  19. Optional:  Glaze with Sugar Glaze as follows:
    1. Combine 1/4 milk and 1 tsp vanilla in a double boiler
    2. Heat to 150º
    3. Put 2 C confectioner sugar in a whisk together
    4. Dip donuts into the mixture then put on rack again
    5. Rest at least 5 minutes
  20. Optional:  Create a Chocolate Glaze as follows:
      1. Combine 1/4 milk and 2 tsp vanilla in a double boiler
      2. Heat to 150º
      3. Put 2 C confectioner sugar in a whisk together
      4. Add 1/2 C butter (one stick) and 1 TBL corn syrup
      5. Add 4 oz bittersweet chocolate or Cocoa Mix
      6. Don’t overheat
      7. Dip donuts into the mixture then put on rack again
      8. Rest at least 5 minutes


Russet Chips

    • Slice washed russet potatoes as thinly as possible on a mandolin
    • Put into heavily salted water so that they don’t brown while you prepare for the next step.
      • Soak/brine in 2 C solution of 2 TBL salt, 2 TBL sugar and 1 C vinegar overnight in the fridge
    • Drain, spin and towel dry

      • FRY METHOD
    • Fry at 370º in small batches until golden brown the following day.
      You do not need to season after frying cause they brined already

      • OVEN METHOD
    • Brush parchment paper with EVOO
    • Put sliced potatoes on parchment paper
    • Brush top of slices
    • Baked at 450º for 15 minutes
      • Flip and bake another 15 minutes
    • Salt while still warm

Tips: Storing Fruits and Veggies

Fruits and Veggies – Storing Them

Strawberries
. No mold
. Smaller is sweeter
. Moisture is BAD
. wash, dry, spin
. Put in paper towels, refrigerate

Melons . Cantaloupe
. Look and feel heavier than it looks
. Netting should be raised
. Soft, but not mushy
. Should not be yellow . Over ripe
. Deseed over a strainer
. . Press over 1 C simple syrup . Smoothie?
. Celophane is a good wrap for cut melons

Corn
. Buy . Tight hush is fresh
. . Loose is drying out
. . Pop off one kernel easily is fresh
. Store . On counter in bag with hole or paper
. . Store as they are displayed at the grocery
. Freeze . Cut off, spread out, freeze, bag
. . 6-8 months
. Prepare . Do not overcook

Herbs – parsley, thyme, rosemary, cilantro
. Buy . Make sure not wilted . Smell
. Rinse them and shake
. Wrap in paper towel, store in plastic bag
. BASIL – Stay away from water
. . Store like flowers . Put in a vase
. . Plastic bag here is OK
. Long term storage – Cut them up and put them in an ice cube tray

Broccoli, Lettuce and Celery
. Wrap loosely in aluminum foil

Berries and Cherries
. Don’t wash
. Store in humidor

Avocado
. Store halved avocado with the pit still in it – – GUACAMOLE
. Store in the container with water over the top
. When ready to use, pour off the water and stir it a bit


Tips: Salads

  • Tomatoes are at their tastiest when eaten at room temperature. If you’re assembling a salad in advance and refrigerating, put the tomatoes in a small separate  bowl, and let them sit out on the counter for 30 minutes or so before serving the salad.
  • Cut a tomato “upside down” because it tends to dull your knife when you cut through with the skin side on top.

Pepperoni Pizza Pinwheels

INGREDIENTS

  • 1 PKG Pillsbury crescent rolls
  • Pepperoni
  • Red sauce – Your choice of Marina
  • Mozzarella cheese
  • Parmesan cheese
  • Garlic and onion powder

STEP BY STEP

  1. Spread out a sheet of Pillsbury crescent rolls – lay lat and uncut
  2. Spread a THIN layer of red sauce
  3. Spread out a later of pepperoni
  4. Sprinkle with grated mozzarella and Parmesan cheeses
  5. Season with garlic and/or onion powder
  6. Roll into a long rope
  7. Cut 3/4 inch medallions and place in a lightly greased muffin tin
  8. Bake 25-30 minutes at 350 degrees
  9. Let rest just a few minutes before serving

OPTIONAL FILLINGS

  • Ham and Cheese
  • Turkey
  • Veggie and Cheese
  • Pig in a Blanket

Tips: Omelets

  • Don’t get your skillet too hot, or it will burn before it fully sets
  • Be patient.  Slower is better.
  • 1 egg is 1.5 ounces – two is 3.0 ounces – three is 4.5 ounces
  • Some great omelet and frittata filling suggestions
    • Asparagus, ham, Parmesan cheese, parsley
    • Gruyere and mushroom
    • Feta and spinach
    • Bellpeppers and onion.

OTHER COMMENTS

The easiest way to get egg shells in your eggs is to baby them. Slap them firmly on the edge of the sink to crack the shell, then decisively split the shells apart. No fuss, no muss.

If you do get a shell piece in your egg, use the edge of the broken shell to scoop it out.

Slumber Party Personal Pizzas

INGREDIENTS

  • English Muffins – Make your own BY CLICKING HERE
  • Spaghetti sauce – Make your own BY CLICKING HERE
  • Mozzarella Cheese – Shredded
  • Oregano
  • Misc pizza toppings
  • Parmesan Cheese – Grated

STEP BY STEP

  1. Split and pre-toast your English muffins (in the toaster)
  2. Spread Pizza Red Sauce on it (or make Grandpa’s Red Sauce ahead of time)
  3. Sprinkle shredded Mozzarella cheese
  4. Add just a pinch of oregano
  5. Add a few of your favorite toppings (not too many)
  6. Bake at 400° till cheese starts to brown
  7. Garnish with fresh Parmesan

VARIATIONS

  • You can also use pitas or small flour tortillas.  Pre-toast them in the oven.
  • In a pinch, you can use a roller and flatten out a piece of white bread (with the crust removed)

Tips: Pizza

For Easy and Good level recipes, try not to confuse the budding chef with too much information. By the time they (or you) are ready for Better and Best level recipes, here are some extra recipes, tips and tricks to keep in mind.


Pizza Tips

– Pizzarias use a very hot oven – 800-900° – Use at least 500° at home

Types of Pizza

– New York flat – Very thin – “Saturday Night Fever pizza”
– Neopolitana is a thin crust, but with a little substance to it
– Siciliana – This is a thicker crust – not quite deep dish
– Chicago Style Pizza – Also known as deep dish. This is a very thick pizza

How to THROW a pie

– Flour your peel
– Start to flatten Dough
– Smash air out
– Flatten from outside in
– Leave some thickness in the middle to stretch
– Flip hand to hand
– Toss on fists . Thumbs up
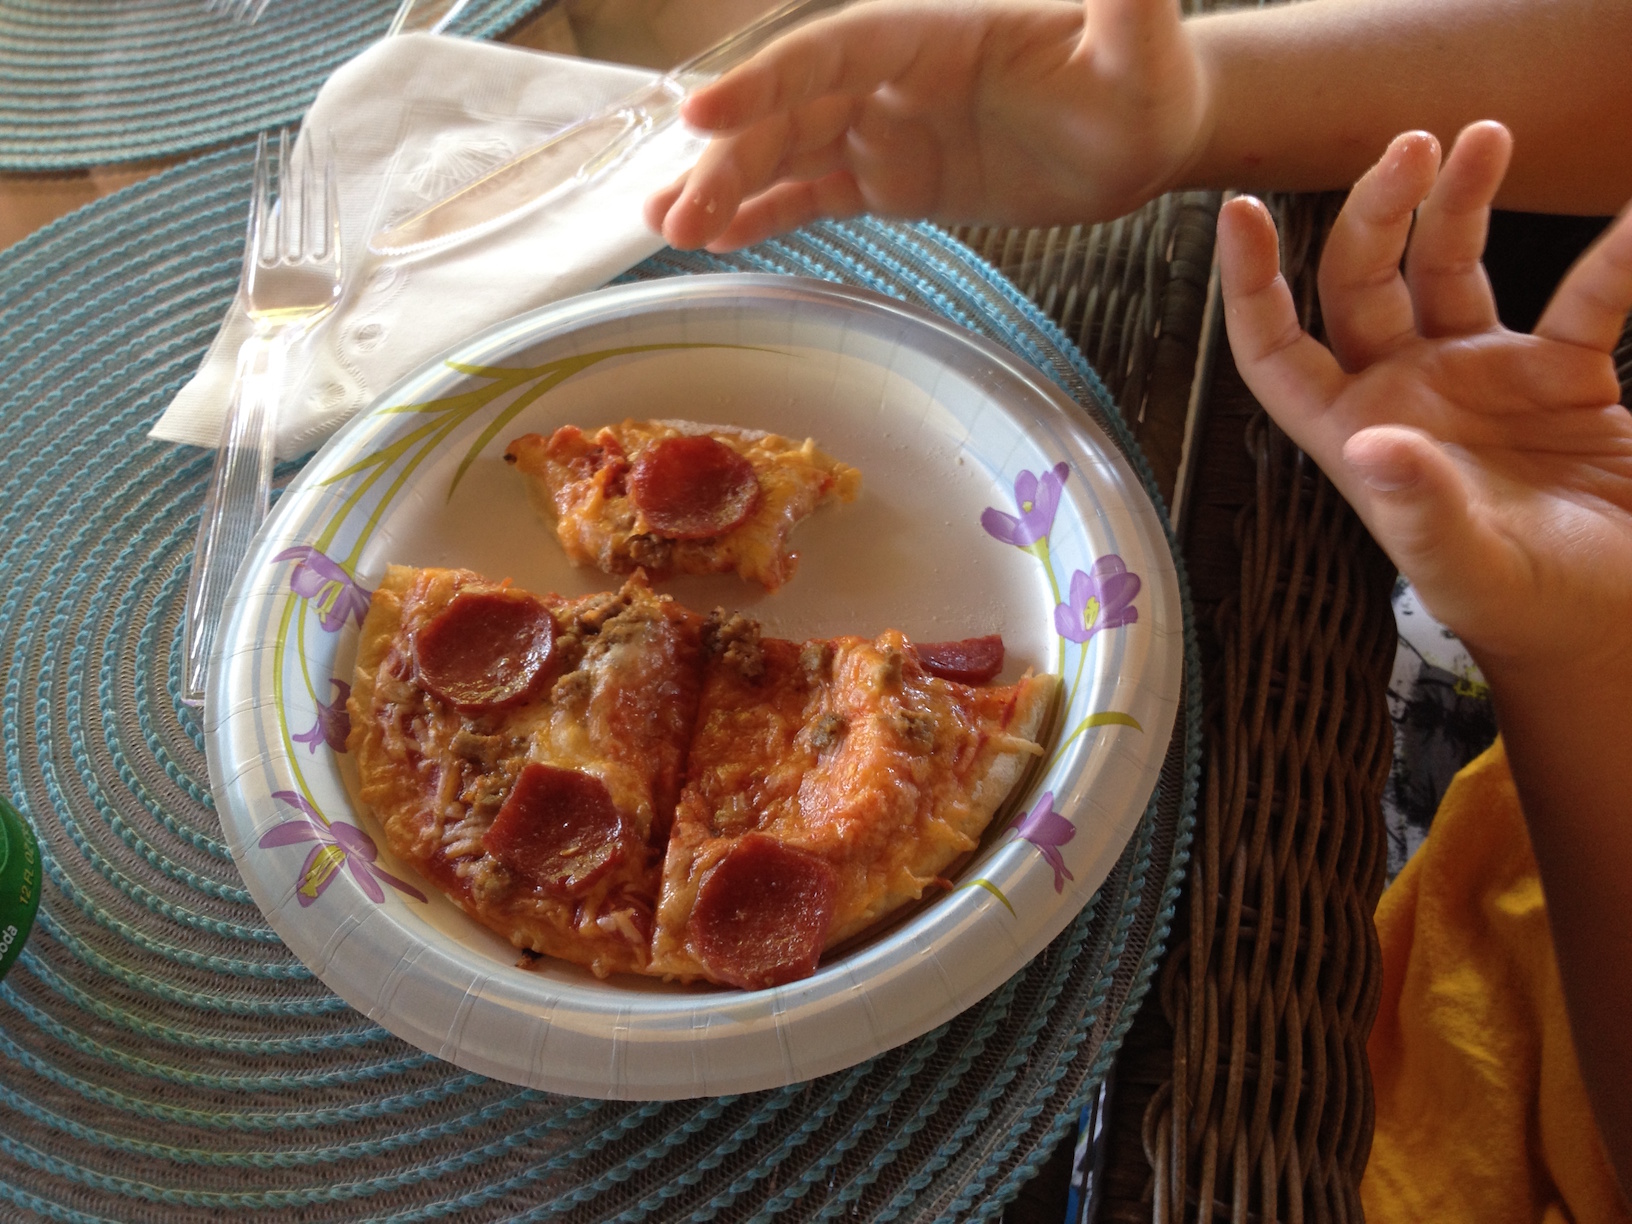
Making your Pizza

– Put onto peel
– Put firm Wisconsin Mozzarella cheese down first
– Then sauce . Tomatoes, evoo, puree, salt
– Dot your pizza with sauce, don’t drown it
– Pecorino cheese . Make it snow
– Fresh Mozzarella on top
– Parmesan regiano cheese
– Drizzle EVOO over top
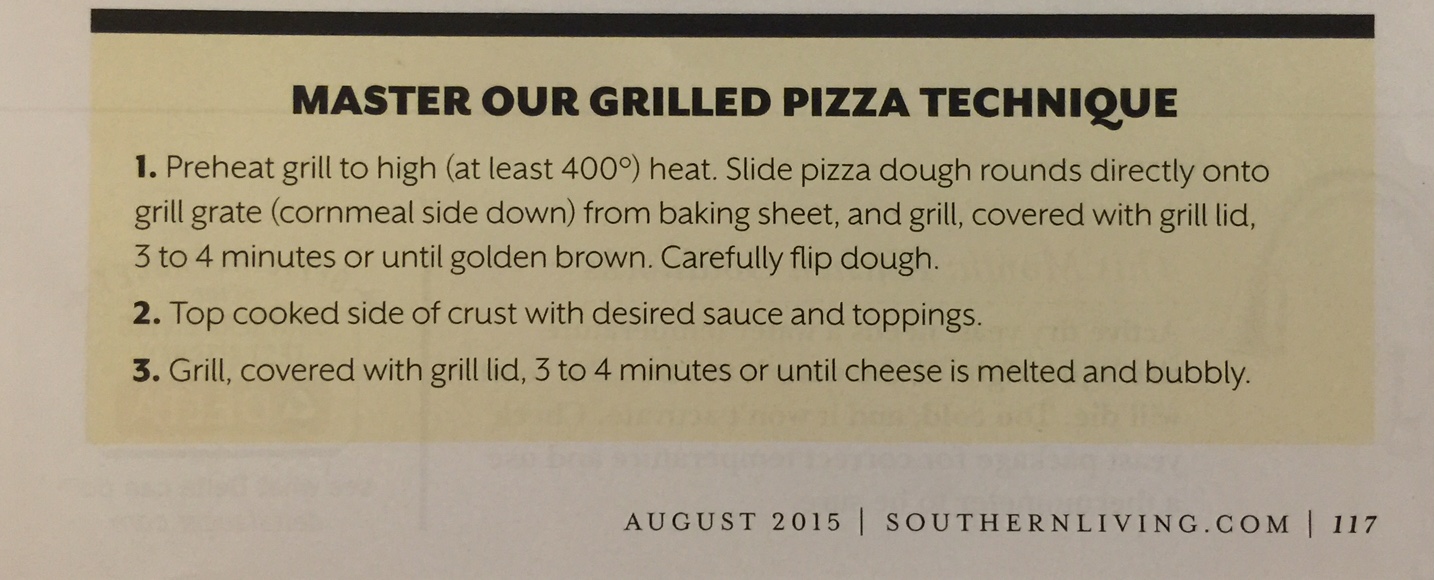
Cooking at home

– 500° – best with a pizza stone
Put the stone in first to preheat and become hot
– Cook 4-5 minutes
– OPTION: Then turn broiler 2-3 minutes
– Basil after oven and more evoo and more parm

Reheating Leftover Pizza

– Use a hot baking stone or skillet for crisp pie

Alt sauce

– Evoo in skillet
– Tomatoes, chipotle in adobo, oregano

ALT Cracker Crust – St Louis Pizza

– Flour
– Salt
– Baking Powder
– BLEND
– Add 2 TBL oil
– Bind with water – Adjust so that it just comes together
– – Better not enough than too much !!
– Create rounds and wrap in plastic – let rest in fridge 2 hours
– Crush canned whole (drained) tomatoes with basic for sauce – Use EVOO also
– Add salt, pepper, oregano, basil
– For cheese, use a chopped mix of provolone, cheddar, Swiss, Parmesan
– Roll out dough very flat
– A bit of sauce, cheese, toppings
– Use preheated pizza stone – Use parchment paper and slide off cookie sheet

Alt Chicago Style Deep-Dish Pizza

– – – The only difference to your standard pizza dough, is that you add a bit more yeast, and let it rise more than you might with a thin crust, and a bit of extra EVOO oil
– Water, oil, yeast, sugar, flour, cornmeal
– Finish on the counter on a bed of flour
– Let raise in the fridge overnight
– Finish rise next day on the counter
– Sliced peppers in hot cast iron skillet
– Brush with oil
– Salt and pepper
– Bit of sugar and vinegar near end
– Sliced sausage
– Oil iron pan again
– Dough in hot deep dish pan
– . Let set 1/2 hour to rise
– EVOO on dough
– Sauce to edge
– Cheese, pepperoni, cheeses, other toppings
– Peppers on it, sausage, salt
– Bake 20 minutes at 425 till browned
– uncover until the cheese starts to brown and things crisp up

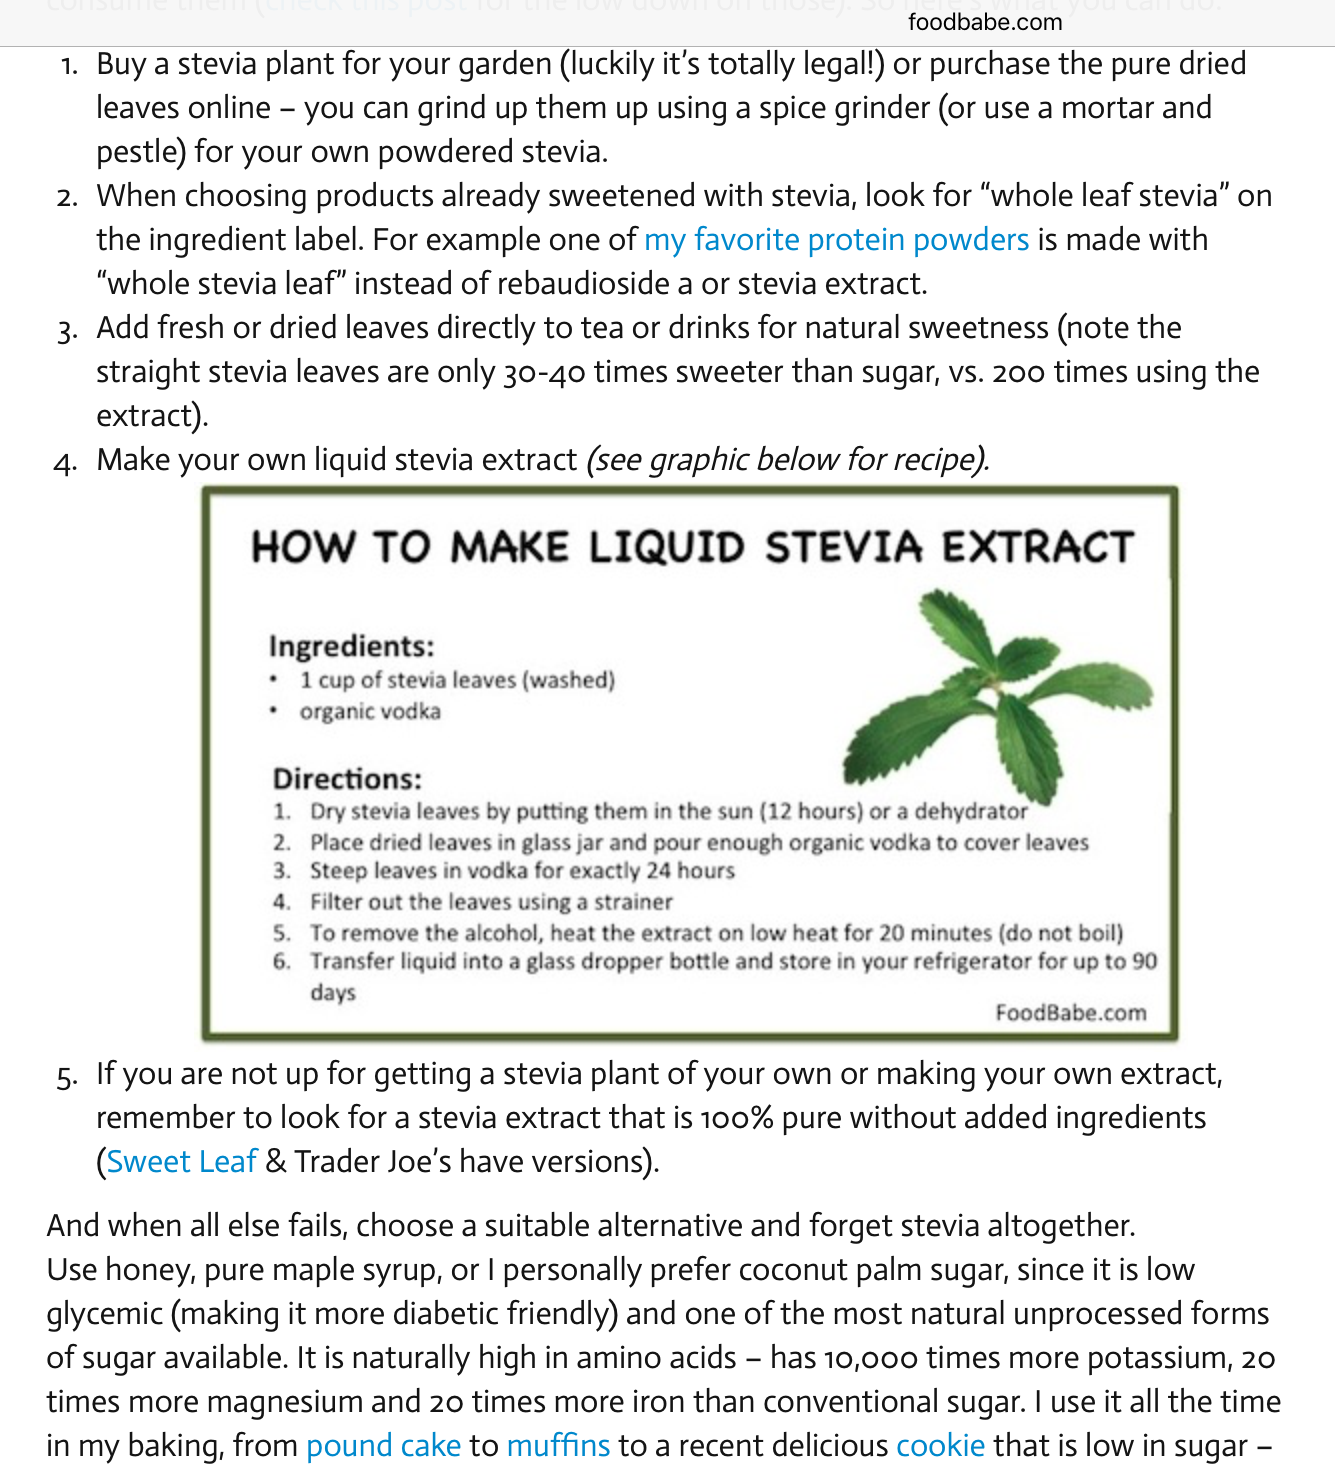
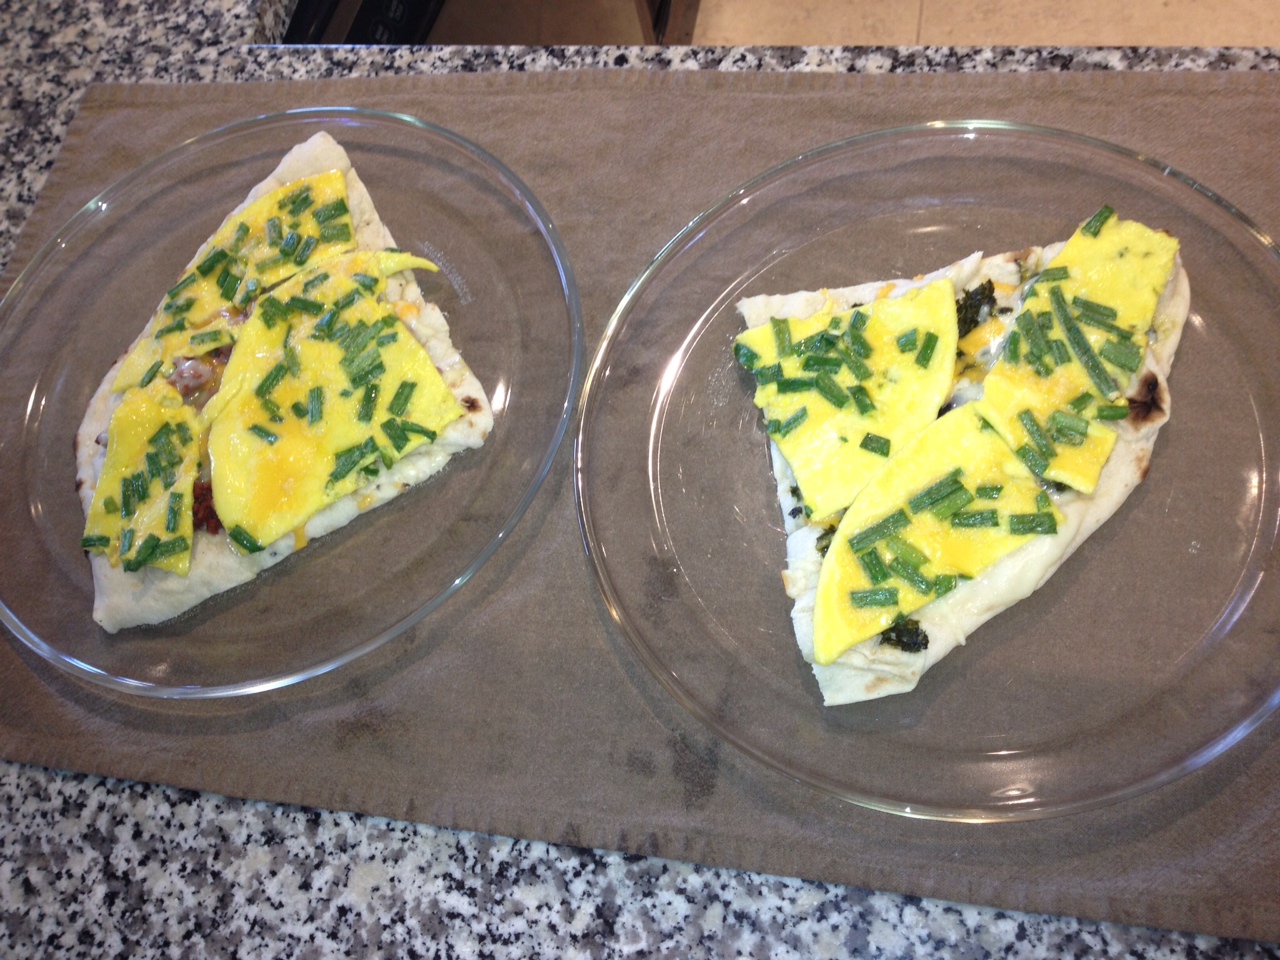
For a Special Italian Treat, try Farinata

– Chickpea flour, water, oil and salt
Mix to the consistency of a thin pancake batter
Pour onto a RIMMED pizza pan
Put into oven
Top and eat when it’s hot
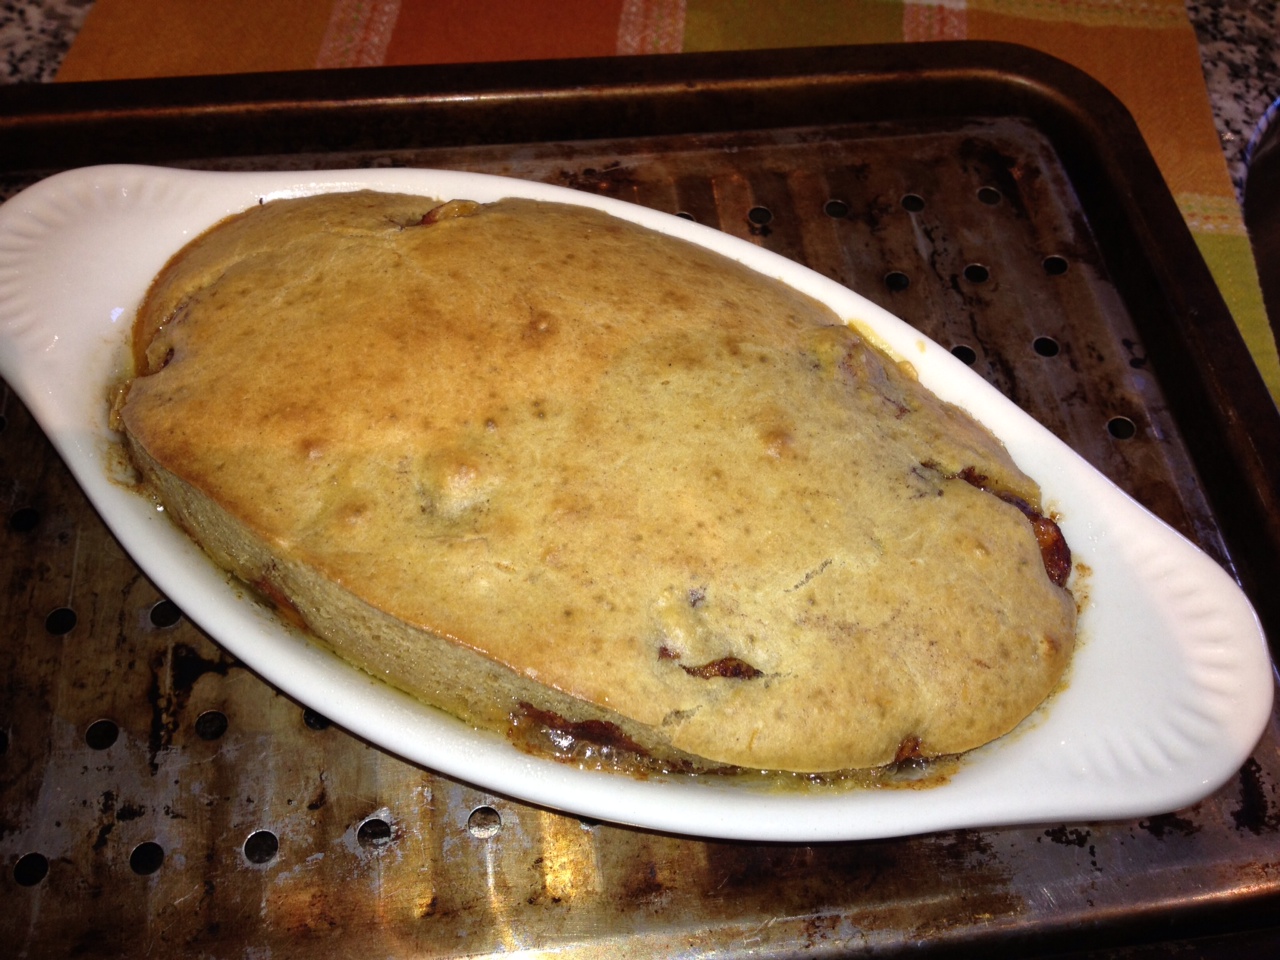
Stovetop Pizza

CLICK HERE TO WATCH VIDEO
In cast iron skillet (with cover) or dutch oven
– start with 1 tbl olive oil in bottom of pan
mix the following in the pan
– 1/2 cup AP flour
– 1/2 cup self-rising flour
– 1 tsp yeast
– 1 tbl honey
– 2/3 cup lukewarm water
– 1 tbl olive oil
– pinch of salt
Top with sauce, then your favorite toppings, and then cheese
Turn stovetop surface to medium heat
Cook 5 minutes with lid on and lid vents closed
Rotate lid to open vents (do not remove lid)
Cook another 10 minutes with lid vents open
Remove to cutting board, cut and serve


Basic Red Sauce – San Marzano

INGREDIENTS

  • 1 TBL butter
  • 1 TBL tomato paste
  • 1/2 sweet chopped onion
  • Two cans San Marzano tomatoes
  • 1 TBL oregano
  • 1 bay leaf
  • several dashes Worcestershire Sauce
  • 1 TBL sugar
  • 2 TBL balsamic vinegar
  • Several cloves of peeled and minced garlic
  • salt and pepper to taste

STEP BY STEP

  1. Melt butter in a sauce pan
  2. Put in tomato paste and saute it for about 30 seconds
  3. Add chopped onion
  4. Crush canned tomatoes with your hands or a potato masher
  5. Put tomato pieces and the water from the can into your sauce pan
  6. Add all other ingredients
  7. Heat to near boil in a sauce pan, then reduce heat and simmer for 30-60 minutes
  8. Remove bay leaf
  9. Blend sauce if you like it smooth, or mash more with potato masher if you like a rustic sauce.

Grandpa’s Pizzas and Calzones

Dough #1 – Easy and Tasty, but no adventure

Making your own pizza dough is really not that hard, but if you are not quite ready to tackle making your own, but want that pizzeria-quality dough, call one of your local NON-CHAIN pizzerias. Ask what they would charge for a ball of dough.  It should be somewhere between $3 and $5.

Dough #2 – Pretty Good, and Really Quick

8 hours before making your pizza, combine the following in a glass bowl

  • 1 TBL fresh yeast
  • 1 C water – very warm to the touch, but not hot – About 105-110º
  • 1 TBL sugar

Sift together in a large mixing bowl

  • 4 C flour
  • 1 tsp sea salt

Create a pile of flour, with an indentation (well) in the middle using 2 C of your flour

  • Pour your yeast mixture into the well, a little at a time, stirring to incorporate
  • Add more flour if necessary to firm up your ball
  • Once it is kind of firm, knead it in the remaining flour spread onto your counter
    Pull it in with your fingers, and push it away with the ball of your hand
  • Knead until it becomes elastic like Buddah’s stomach
  • Pinch, pull together, and form into a smooth ball
  • Let rise in a large lightly oiled bowl for about 1/2 hour
  • For Family Pizza Night, cut off softball sized pieces
    Roll them into small balls and put into glass bowls for about 2-4 hours
  • When you are ready, flatten them into shape as described below.

Dough #3 – Quality taste and an adventure, but overnight

About 24-36 hours before you will be making pizzas, combine the following in a glass bowl.
PLEASE NOTE: NO SUGAR IS USED IN THIS DOUGH RECIPE.

Sift together in a large mixing bowl

  • 4 C flour
  • 1 tsp sea salt
  • 1 TBL fresh yeast

Prepare 1 C water – very warm to the touch, but not hot – About 105-110º
Create a pile of flour, with an indentation (well) in the middle using 2 C of your flour

  • Pour your water into the well, a little at a time, stirring to incorporate
  • Add more flour if necessary to firm up your ball
  • Once it is kind of firm, knead it in the remaining flour spread onto your counter
    Pull it in with your fingers, and push it away with the ball of your hand
  • Knead until it becomes elastic like Buddah’s stomach
  • Pinch, pull together, and form into a smooth ball
  • For Family Pizza Night, cut off softball sized pieces – otherwise, this will make about two 14 inch pizzas
  • Let rise in a large lightly oiled bowl for about 2 hours at room temperature
  • Cover and refrigerate for AT LEAST 20 hours – and as long as 36 hours
  • When you are ready, flatten the cold dough into shape as described below.
    There is no need to let it come up to room temperature.

How to Handle your Dough

  • Flatten dough ball with your fingers
  • For a pizza, top with red sauce and your favorite ingredients for a great pizza.
    It makes it easier to get into the oven if you flatten your pizza onto parchment paper.
  • For a calzone, fill it half-way with sauce and ingredients for a classic calzone.
    When you fold your calzone in half, you will want to pinch or roll the edge so it doesn’t leak

Some Tips about Cheese

  • Mozzarella cheese is a given.  Buffalo mozzarella is a plus
  • Provalone is an OK substitute for Mozzarella
  • Gruyere has a nice melty stringiness about it
  • Pecorino cheese is another good one to use

Some Tips about Sauce

  • Canned whole Marzano tomatoes – Put through a food mill or use food processor
  • If you have typical store bought tomatoes, halve or quarter them, drizzle them with EVOO and a bit of salt, then bake them at 400º for an hour.  THEN run them through a food mill.

Topping Suggestions

  • Slivered garlic
  • Baby spinach leaves
  • Sun dried tomatoes
  • Basil chiffonade
  • EVOO drizzle
  • Black and red pepper

Tips for a Successful Bake

  • Cook on pizza stone for nice crisp crust
  • Preheat up pizza stone to 500º – – – 550º if your oven supports it.
    Use your fingertips to flatten dough to a wide disk

Other Yummy Tips

  • Don’t use too much sauce, or your ingredients will get lost.  If you want, serve with marinara dipping sauce for the crust pieces, but not too much sauce.
  • Don’t overcrowd your pizza with cheese.  Leave some space between cheeses.
  • Use real Parmesan, not the stuff in the green can
  • A few leaves of basil give a good taste to your pizza
  • Dirzzle EVOO onto your pizza before baking.
  • Your pizza will bake in about 6-10 minutes at 500 degrees


Basic Calzone Recipe

Make substitutions to taste

  1. Remove Bratwurst or Italian Sausage from their casings and brown in a skillet – Set aside
  2. Saute onion in a bit of EVOO in the same skillet
  3. Add salt, pepper, garlic and green chilies
  4. Cook about 3 minutes, then add tomato sauce
  5. Toss in buffalo mozzarella
  6. Put into rolled pizza dough, fold and seal
  7. Bake at 550º for about fifteen minutes

Consider a rolled cheese edge.

HTML Snippets Powered By : XYZScripts.com