Taco Shells
Use golden corn for hard tacos, and white corn tortillas for soft tortillas. Soften shell, fill, fold in half, secure with a toothpick and then fry.
If you make a one-inch foil “log” you can use that to shape the taco. Fry the bottom “fold” for 30 seconds in peanut oil at 370º then each side for 30 seconds each. Salt immediately, and cool on a rack or paper towel.
Alternate Preparations for the Meats
OK… so a taco is some sort of filling in a corn (or flour) tortilla shell. Usually corn. Usually crispy. Not necessarily though. The filling can be vegetable, beef, chicken, pork, fish or even sweet. There are far too many permutations to include here, so I will start with some basics. You will have to take it from there.
- Carnitas
- Machaca Beef
- Tacos al Pastor (with pineapple)
- Beef Barbacoa
- Lingua (tongue)
- Chicharones (fried pork skin)
- Pescados (fish)
Simple Tacos
- Shred leftover turkey or chicken
Alternately use ground sirloin and brown it in a skillet
- After browning, saute chopped onion, and one Serrano chili (minced) or chili flakes, tossing in minced garlic after onion has browned, then add spices and cornstarch, then 1/2 C chicken broth. Stir to thicken
- Optional: add in some store-bought salsa verde
- Make pico de gallo – cilantro, tomatoes, lettuce, onion, pepper
- Sweet pickles and scallions is another good option.
- I’ve used BBQ sauce with chicken on soft flour tortillas too.
- Serve on hard or soft taco shells
Dallas Andrews’s Tacos al Pastor
 I first experienced this style taco at the food truck of Taqueria 5 in Connecticut, of all places.
Tacos al Pastor translates as Shepherd Tacos, so it is a very rustic, yet very flavorful taco.
Start with 1 lb pork butt cut into 1/2 inch pieces
Mix with 1 can pineapple pieces
1 white onion – julienne slices
1 handful of cilantro
3 cloves minced garlic
1 minced pasilla or poblano pepper
1 tsp ground chili or poblano paste or Adobo
1/2 tsp cumin
1/2 tsp oregano
salt and pepper to taste
1/4 C EVOO
Put into zip lock back and marinate overnight
Next day in a very hot skillet, add
the (drained) pork mixture
1/2 C orange juice
1 minced tomatillo
When cooked (about 10 minutes) serve in corn tortillas with slices of lime
In researching this fantastic unique taco, I came across several other GREAT recipes.
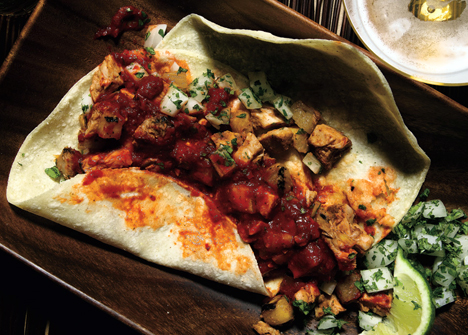
Crispy Pork Belly Tacos
INGREDIENTS
- 3 pounds boneless skinless pork belly
- 2 tablespoons granulated sugar, divided
- 2 tablespoons Kosher salt
- 1 tablespoon ancho chili powder
- 8 tortillas, warmed
- Ancho Chili Roasted Pineapple (recipe below)
- 2 avocados, chopped
- Pickled Onions (recipe below)
- Queso Fresco, crumbled
- Cilantro, chopped, for garnish
- Lime wedges, for garnish
for the Ancho Chili Roasted Pineapple
- 1½ cups finely diced fresh pineapple
- 1 tablespoon olive oil or canola/vegetable oil
- ½ tablespoon + 1 teaspoon ancho chili powder
- 1½ teaspoons granulated sugar
for the Pickled Onions
- 1 medium red onion, thinly sliced
- ½ cup apple cider vinegar
- 1 cup warm water
- 1 tablespoon sugar
- 1½ teaspoons Kosher salt
STEP BY STEP
- Place pork belly in a glass baking dish and rub evenly with granulated sugar and Kosher salt.
- Cover with plastic wrap and refrigerate for at least 12 hours and up to 24 hours.
- Remove from refrigerator and discard plastic wrap
- Preheat oven to 275°F.
- Let pork rest on the counter during this preheat time
- Pat dry and remove any liquid that has accumulated.
- Rub with ancho chili powder.
- Roast pork belly for 3 hours, until pork belly is tender.
- Let pork belly cool slightly, then slice into approximate ½” slices.
If you want perfectly clean slices: cool pork belly completely
- Remove from baking dish and wrap in aluminum foil.
Refrigerate until cold.
- When ready to serve, heat cast iron skillet to about 350º
- Sear on skillet 3-4 minutes, compressing it down with another skillet
- Chop strips against the grain.
- Top tortillas with a couple slices of pork belly, chopped avocado, ancho chili roasted pineapple, pickled onions, and a sprinkle of queso fresco and cilantro.
- Serve with lime wedges and preferably a margarita.
for the Ancho Chili Roasted Pineapple
- Heat oil in a medium skillet over medium high heat.
- Add pineapple, sugar, and ancho chili powder and stir to coat.
- Cook, stirring occasionally, for 4-5 minutes, until pineapple caramelizes with a nice golden brown color.
for the Pickled Onions
- Combine vinegar, water, sugar, and salt in a medium bowl.
- Whisk together until sugar and salt is fully dissolved.
Place onion in a jar or bowl (I like to use a mason jar).
- Pour vinegar mixture over the onions and let sit at room temperature for at least 1 hour if you’re in a rush.
- Preferably, cover jar or bowl and place in the refrigerator for at least 1 day.
- Pickled onions will last for a couple weeks stored in the refrigerator.
Fajita Tacos
Ingredients
- 2 LB Pork shoulder / Pork butt
- Salt, pepper, garlic
- 1/2 C water
- 1/2 C white wine
- 1 C cola
- 2 bay leaves
- 1 tsp tarragon
- 1 tsp thyme
- 1 tsp cumin
Step by Step
- Cut pork shoulder into large (about 3 inch) pieces
- In Dutch oven, over medium-high heat sear meat on all sides
- Set aside meat and add water and white wine to deglaze
- Add all other ingredients, and return pork to the pan as well. OK to crowd the pot.
- Simmer on stovetop 2 hours, or bake covered for 2 hours at 275º covered, and then 350º uncovered for 30 more minutes
- Let cool for 30 minutes
- Shred meat and put back in the baking juices
- When ready to serve, place meat and juices in a glass bowl and serve along side of diced onion, cilantro, avocado, radishes and salsa
- Serve with corn taco shells or small flour tortillas
Alton’s Tacos
The meat info is good, but the taco seasoning is what got me. It sounds great.
As far as the meat:
- Dont use Hamburger – Can be any primal meat with up to 30% added fat
- Don’t use Ground Meat – Can be any primal meat, but no added fat. They use fatty meat to begin with.
- Don’t use Ground Chuck – This usually contains a lot of connective tissue
- Don’t use Ground Round – This ends up being dry when it is cooked
- Use Ground Sirloin – This is near the loin, so there is a lot of flavor. Ideally, find a piece with a lot of marbling, and ask the butcher to grind it for you.
For the seasoning:
- 2 TBL chili powder
- 1 TBL cumin
- 1 tsp coriander
- 1/2 tsp cayenne
- 2 tsp kosher salt
- 2 tsp corn starch (as a thickener)
- 1 1/2 tsp smoked paprika
- 2 tsp Worcestershire
To cook it all up:
- Add 2 TBL butter to a cast-iron skillet
- Add 1 diced tomato and saute
- Near the end, add 2 cloves diced garlic
- Add the sirloin and brown it
- Then add the spices and 1/2 C chicken broth
Fried Fish Tacos
INGREDIENTS
- Tilapia, Pollock, Bass or Cod – Something that is fairly mild
Corbina Sea Bass is a popular selection
Cut into medium-thin strips about 3 inches long
Seasoned Dredge
- 1 tsp Cumin
- 1 tsp ground paprika
- 1 tsp ground oregano
- 1 tsp Garlic powder
- 1/2 C AP flour
- 1/4 C cornmeal
- 10 Ritz crackers
- 1 tsp baking powder
- 2 TBL corn starch
- Salt to taste
- Alt to above: Use 1.5 TBL Grandpa's Thunder Powder or Arghhh Powder
Batter
- 1/2 C of the Seasoned Flour just prepared
- 1 egg
- ± 1/2 C beer – batter should be like thick milk
- 1 tsp Cholula
FRIED FISH TACOS
- Dredge the fish strips in the flour, then liberally in the mixture – let drip slightly
- Put into canola oil at 350-360º for 3-4 minutes
Oil is ready when a tortilla strip turns brown in about 15 seconds
BAKED FISH TACOS
- Dredge the fish strips in the mixture – let drip slightly
- Put on greased baking sheet
- Bake at 425º for 10-12 minutes
- Also good on the grill
SALSA OPTION and TOPPINGS
- Individual toppings could include lime, avocado, mango, pineapple, papaya, cabbage, tomato, basil chiffonade, romaine chiffonade, cilantro ( medium chop )
- You can also make Tomatillo Sauce using 1 C Miracle Whip, 1 grated Vidallia onion, 4-6 pieces of pickled jalapeño – diced, 1 tomatillo – washed and minced – chopped fresh cilantro, 1 tsp sugar, 1 tsp lime, 1/4 C sour cream, salt and pepper to taste.
- Serve on a small corn tortilla (warmed) with lettuce and Tomatillo Salsa
Skirt Steak Tacos
INGREDIENTS
- 1 LB skirt steak (cut into very thin strips)
- Large flour tortillas
- 1 TBL olive oil
MARINADE
- 3 TBL olive oil
- 1 TBL Worcestershire
- 1 onion (minced)
- 5 cloves garlic (minced)
- Tabasco to taste
STEP BY STEP
- Put strips of skirt steak into Zip Lock bag
- Add marinade and refrigerate bag
– If marinading for 1 hour, agitate every 10 minutes.
– If marinading 4 or more hours, agitate about every hour.
– If marinating overnight, agitate hourly till bedtime, then just let rest overnight.
- Let come up to room temperature before cooking
- When ready to cook, season both sides liberally with EVOO and salt
One side will have more fat and marbling than the other
That side goes up
- Cook quickly over very high heat ( 400-500º ) on an oiled cast iron grill pan (or the BBQ grill)
Cook until completely browned, and until edges start to blacken
You want this at least medium, NOT rare because of the fibers in the meat
Cook about 2 minutes each side, then rotate 90º to get crosshatching
and cook about 1 minute more on each side.
- Let rest 10 minutes before cutting
- Cut against the grain into thin strips – about 1/4 inch
- Roast tortillas over flame briefly or microwave for 10 seconds each
Serve with toppings
TACO and FAJITA TOPPINGS
- Sour Cream
- Sauteed onion strips
- Grilled green peppers
- Shredded cheese
- Lettuce (shredded)
- Salsa (store-bought, or use the recipe here)
- Avocado mixed with salt, pepper and lime juice (to taste)
- Avocado
- Black olives
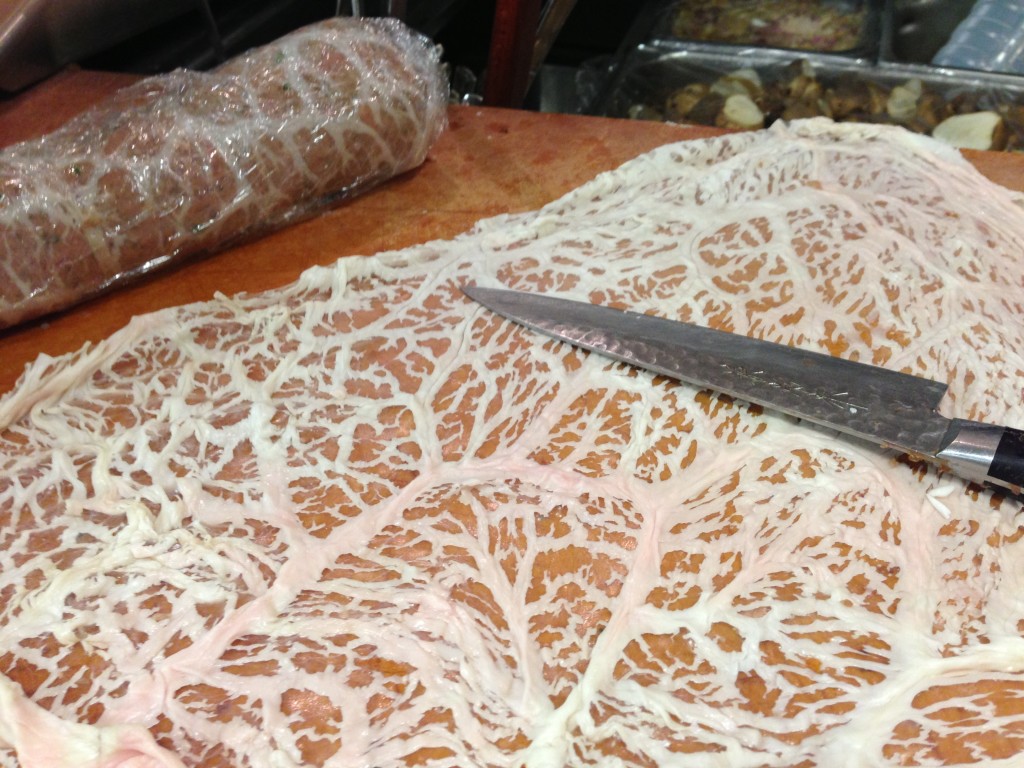
Beef Belly Tacos
Plate of Cow – Belly – or short ribs (same thing)
Cut into 1 inch steaks, then into 2 inch strips, then into 2 inch cubes
Add to Dutch oven
2 TBL lard or renderings from three strips of bacon
Add cubes of meat and sear them on all sides
Remove cubes of meat, then add
1 onion minced – cook 5-7 minutes
6 cloves garlic – minced – cook another 30 seconds
2 TBL tomato paste and cook for about 3 minutes
1/4 C chorizo and cook another 4-6 minutes
then add
1 bottle beer
1/2 C cider vinegar
3 dried Ancho chilies (seeds and stems removed) torn apart
3 bay leaves
2 tsp salt
2 tsp oregano
2 tsp cumin
1/2 tsp black pepper
1/2 tsp cinnamon
1/2 tsp ground clove
Bring liquid to a near boil
Add thick slices of onion to elevate the meat – about 1/2 inch thick
Add meat onto tops of onion
Bake at 350 degrees for about 3 hours
Pull out beef and set aside
Drain braising liquid, retaining liquid – set aside to cool
Pull out (in separate bowl) the chilies, big pieces of onion, garlic
Put solids into a blender
Ladle out fats from the liquid
Measure out about 1 cup of liquid and add it to the blender
– make up any difference with water
Add juice from two limes
Blend all until nice and smooth
Add the sauce back into the drained pot
Shred the beef and add it also back into the pot with
2 diced Roma tomato
8 black olives – chopped
1 TBL capers
2 TBL golden raisins
1/4 C chopped pineapple
==================
Slaw Topping
1 C cider vinegar
1/2 C water
1 TBL sugar
1 tsp salt
1 tsp dried oregano
Shred 1 carrot, 1/4 cabbage, 1 jalapeno and about 1/4 onion
Coat in liquid and refrigerate 1 – 24 hours – overnight works well
Drain slaw, discarding the liquid
Add 1 C fresh minced cilantro
Heat up tortillas
Top with meat, slaw, and Queso fresco
Other Recipes
 Another good option
is to use slices of left-
over beef tenderloin.
Pour melted blue cheese, butter and garlic over
top and serve on a
flour or corn tortilla.
Garnish with cilantro
and chili flakes.
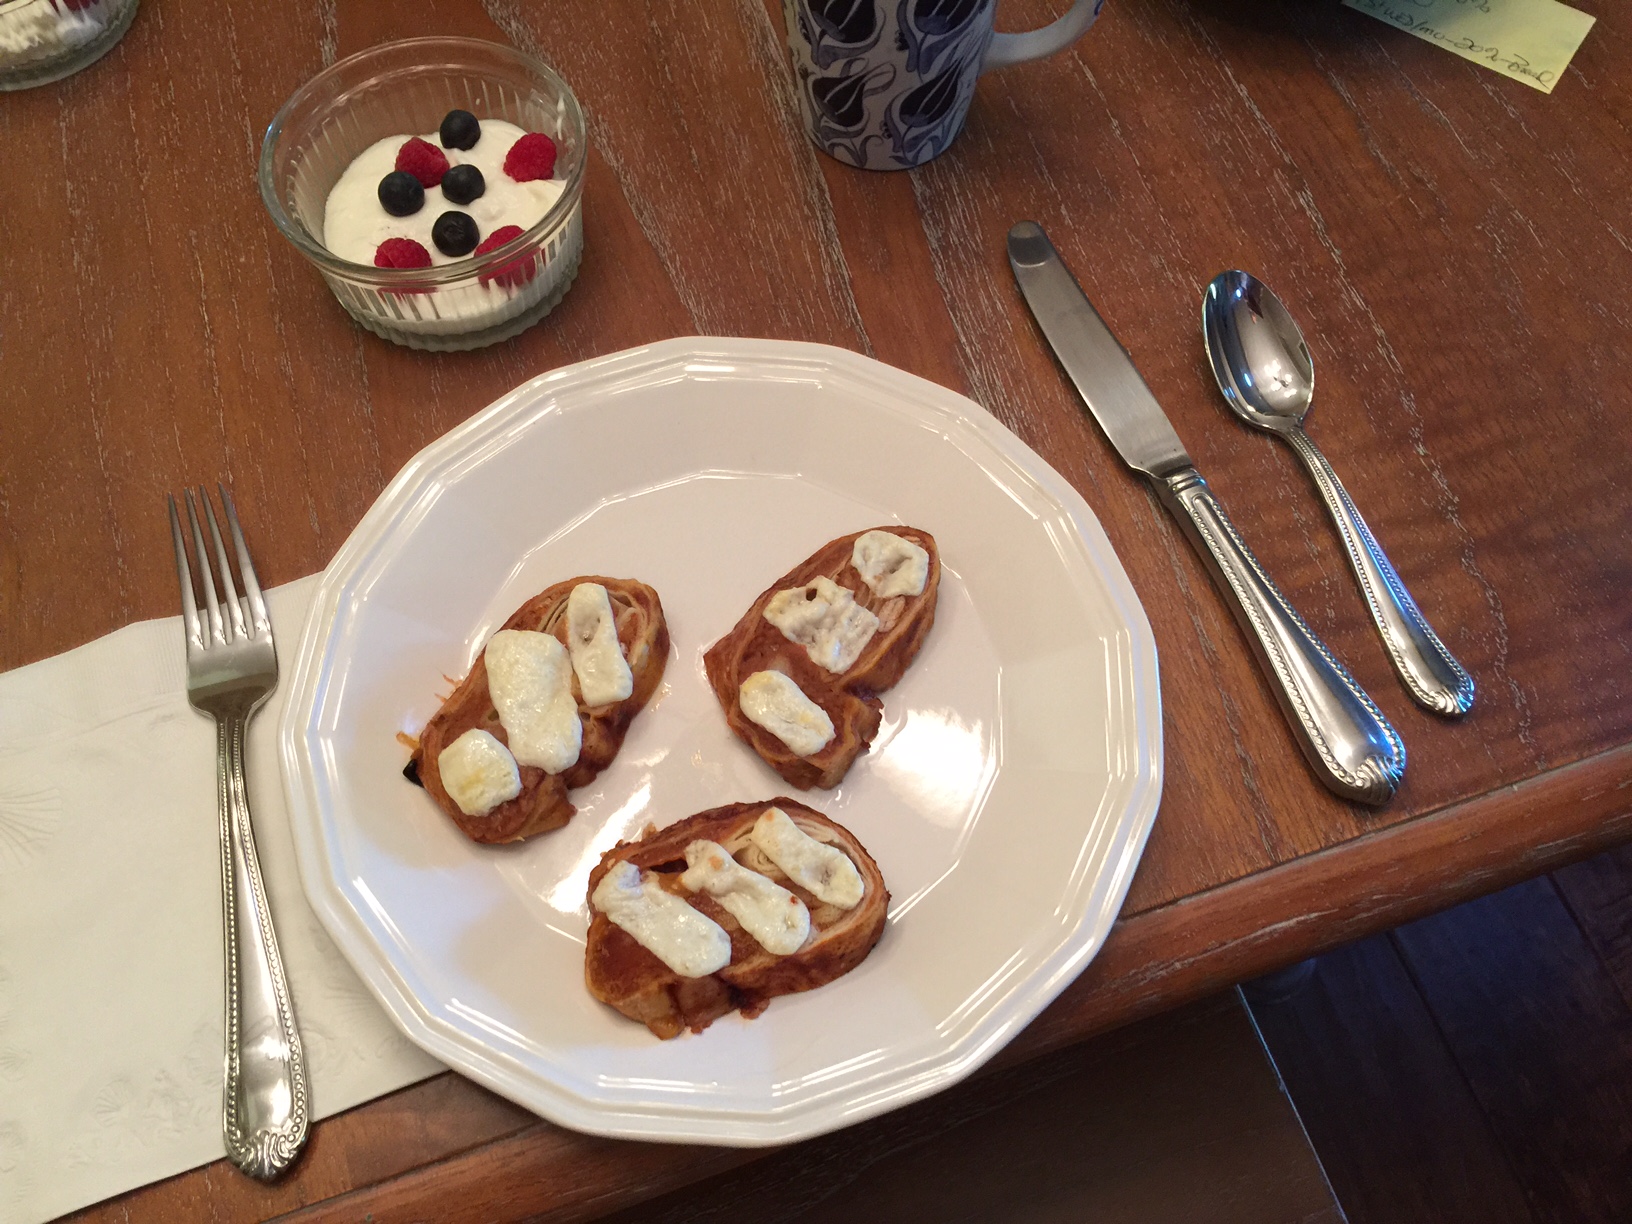
Banana Tacos with Chocolate Sauce
Banana “Tacos” with Chocolate Sauce
Serves 8 – 10
Raw sugar in stainless steel pan
Cook on medium high heat until dark brown
As soon as it changes color, it is done
Don’t over cook or it will become brittle
For a dessert, cut up bananas
Put in cinnamon and tequila
Mix in a splash of cream
Chocolate crepes
Whisk eggs, vanilla
Sifted flour, sugar, ancho chili, cocoa powder
Whisk together
Add melted butter and milk
Strain back into measuring cup
Let set 1 hour
Chocolate sauce
Ancho chili powder and shaved chocolate
Pour over hot cream and coffee
Build crepes and sprinkle with hazelnuts
Drizzle chocolate sauce
Dust with powdered sugar
…..
Ingredients
Tacos:
1/2 cup all-purpose flour
1 tablespoon unsweetened cocoa powder
1/4 cup granulated sugar
¼ teaspoon ancho chile powder
1/8 teaspoon salt
1 cup whole milk
1 tablespoon unsalted butter
2 large eggs
1 tablespoon vanilla extract
Banana filling:
5 ripe bananas
1 teaspoon cinnamon
¼ cup tequila
3/4 cup granulated sugar
¼ cup heavy cream, heated
Chocolate Sauce:
8 ounces finely chopped semisweet or bittersweet chocolate
¼ teaspoon ancho chile powder
¼ teaspoon cinnamon
½ cup heavy cream
¼ cup strong coffee
1 cup hazelnuts, toasted, skinned, and coarsely chopped
Procedure
Tacos: Sift together the flour, cocoa powder, sugar, chile powder, and salt. Set aside. In a small saucepan over low heat or in a non-metal container in the microwave, heat the milk and butter until the butter is melted. In a large bowl, whisk together the eggs and vanilla. Add the sifted dry ingredients to the eggs, whisking vigorously until well incorporated. Slowly pour the warm milk and butter mixture into the batter, whisking to mix well. Strain the batter through a fine sieve into a large measuring cup; allow to rest for 1 hour at room temperature. Heat a flat griddle to medium high heat, and using a ladle, and drop about 2 tablespoons of the batter onto the griddle, forming a 4-to 5-inch pancake. When bubbles begin to form, turn the pancake over, cook briefly, and then flip it onto a flat plate. Continue cooking and stacking the pancakes until the batter is gone. You should have about 18-20 pancakes. They can be cooled, wrapped well, and frozen at his point.
Filling: Peel bananas; halve lengthwise and cut crosswise into ½-inch pieces. Put bananas, cinnamon, and tequila in a large bowl and mix well. Heat a large, heavy skillet over high heat and add the sugar. Cook until sugar is melted and turns light brown; add cream and continue cooking until mixture is smooth. Add the banana mixture and sauté until the bananas are softened and well caramelized.
Chocolate Sauce: Put the chocolate, chile powder, and cinnamon in a medium bowl. Combine the cream and coffee in a glass measuring cup and heat in the microwave until boiling, about 1 minute. Pour cream mixture over the chocolate and let sit for one minute. Stir until smooth and put into a plastic squeeze bottle. It should be served warm but it will keep refrigerated for up to one week.
Assembly: Place two pancakes on each dessert plate. Spoon equal portions of the banana filling on one half of each pancake. Sprinkle some chopped hazelnuts over the filling. Fold the other half of the pancake over to resemble a soft taco. Drizzle warm chocolate sauce over the tacos.
Pork Belly Tacos
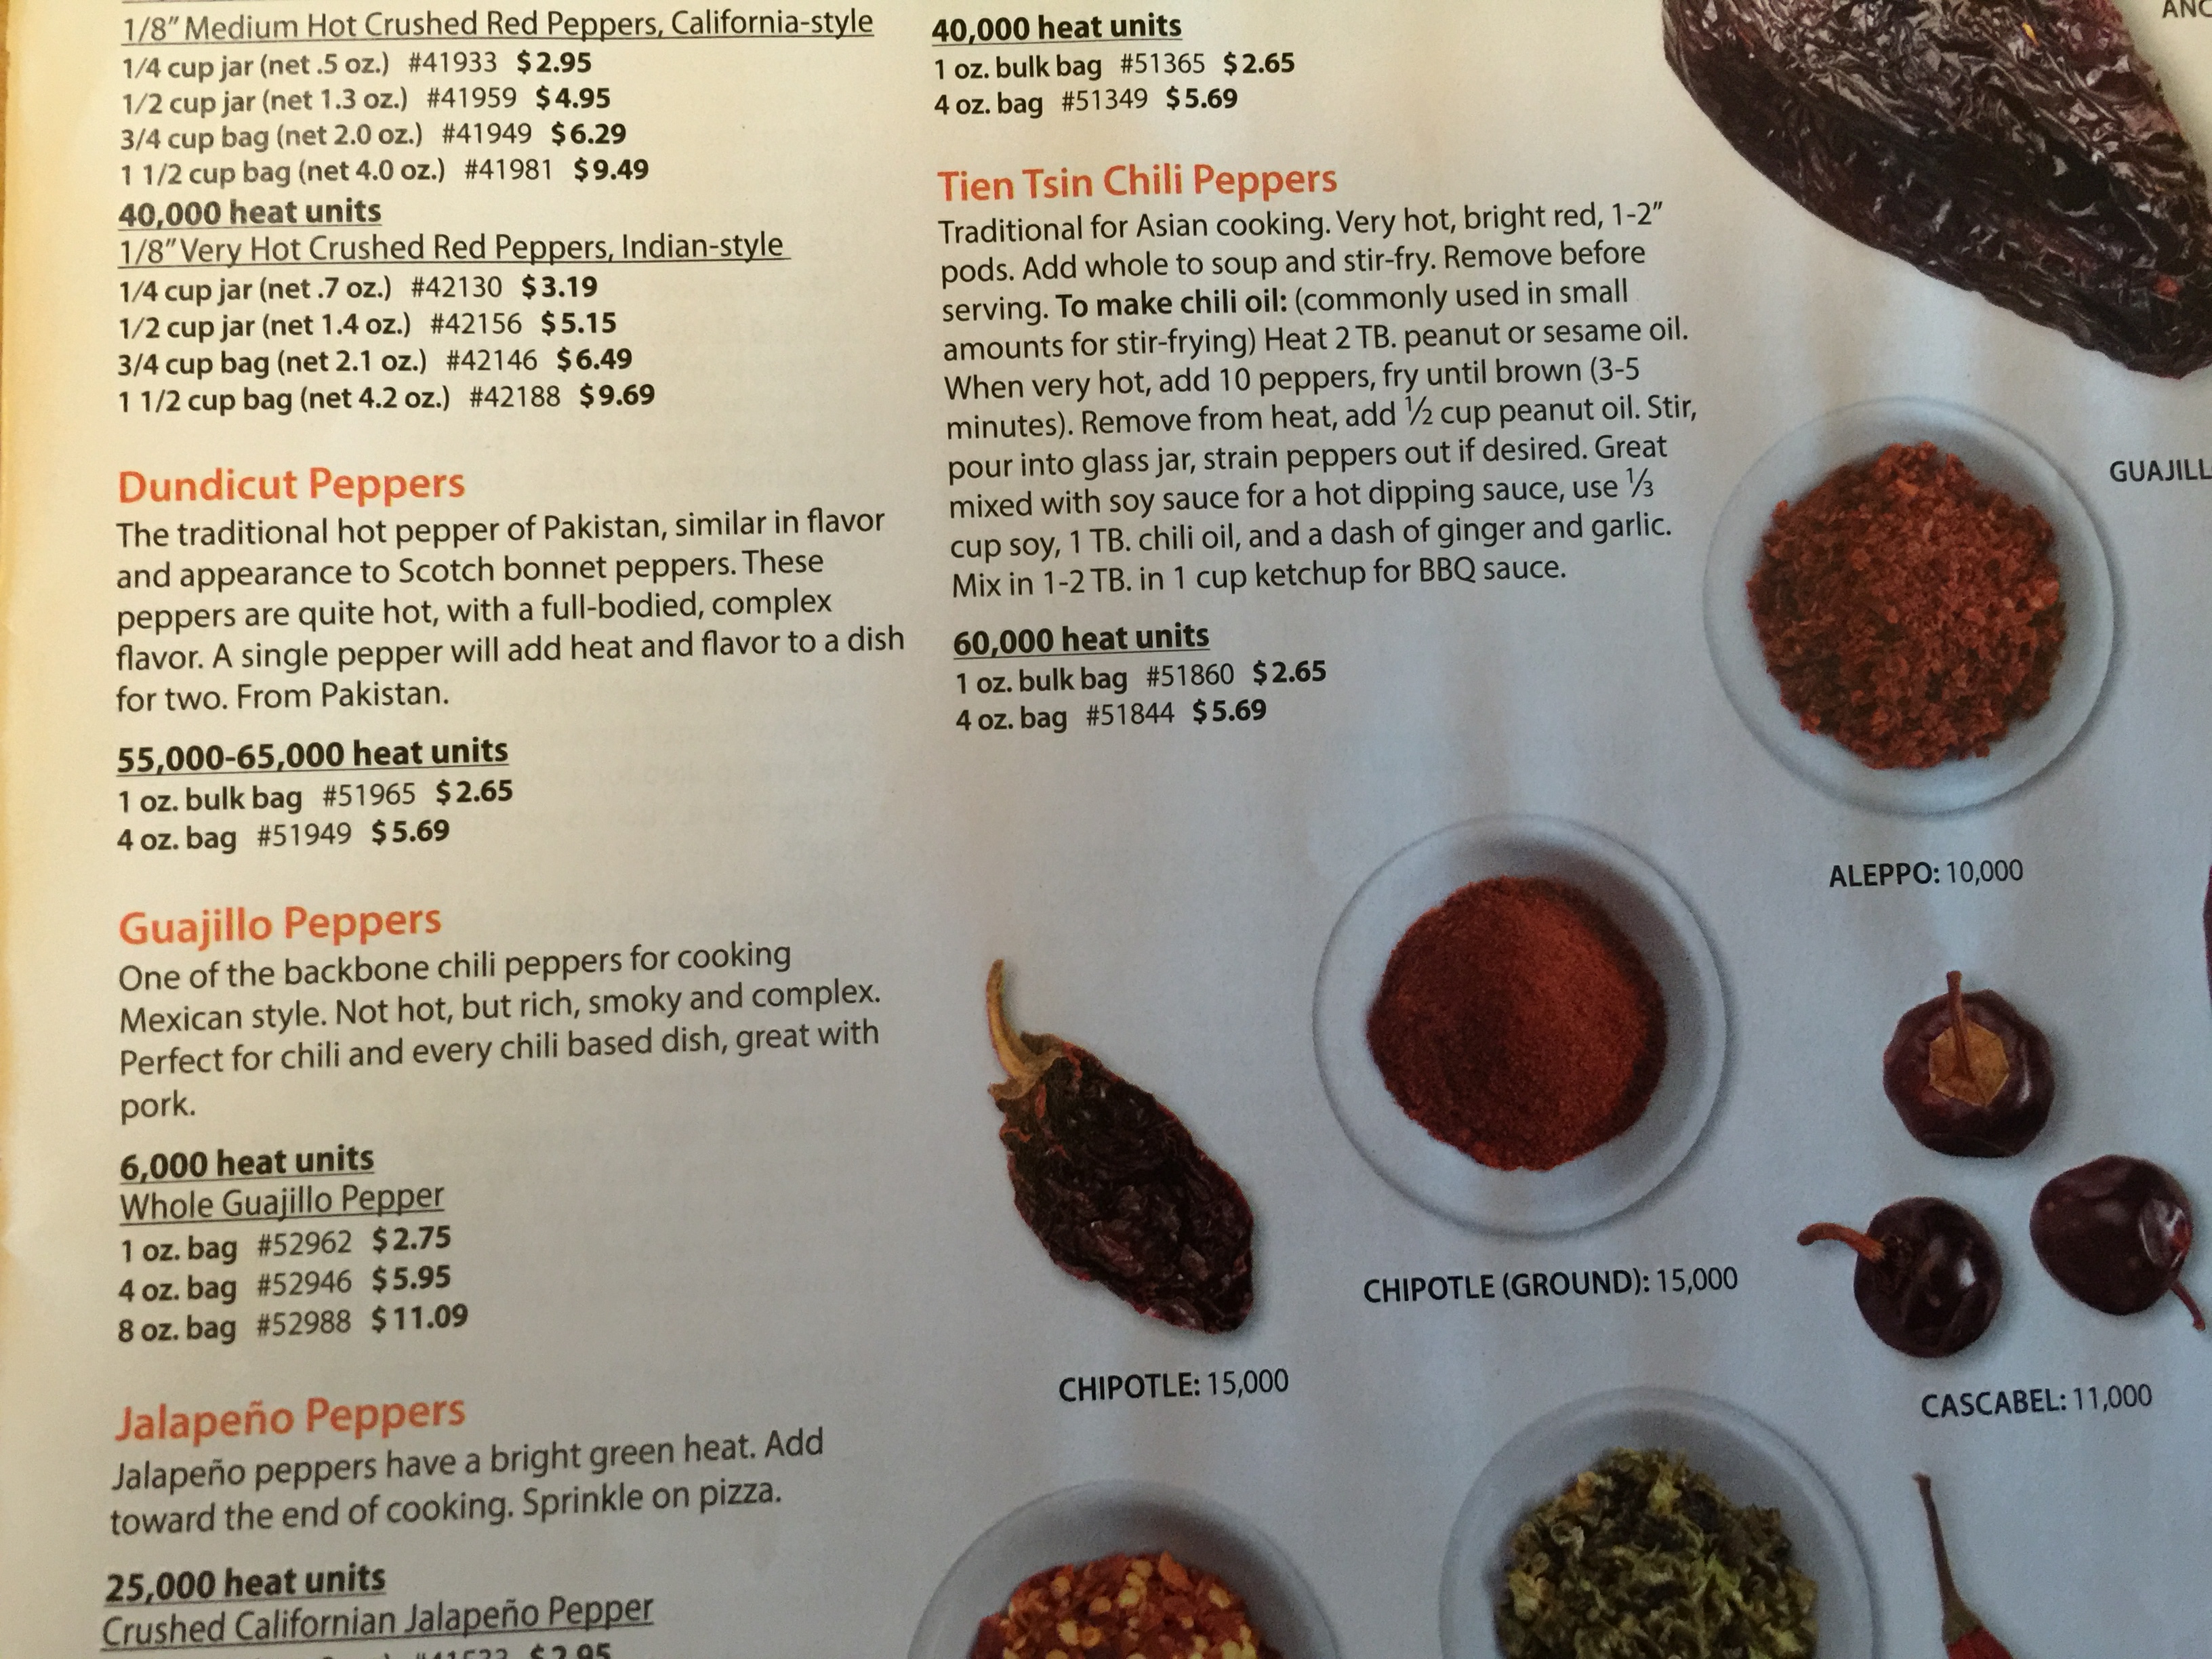
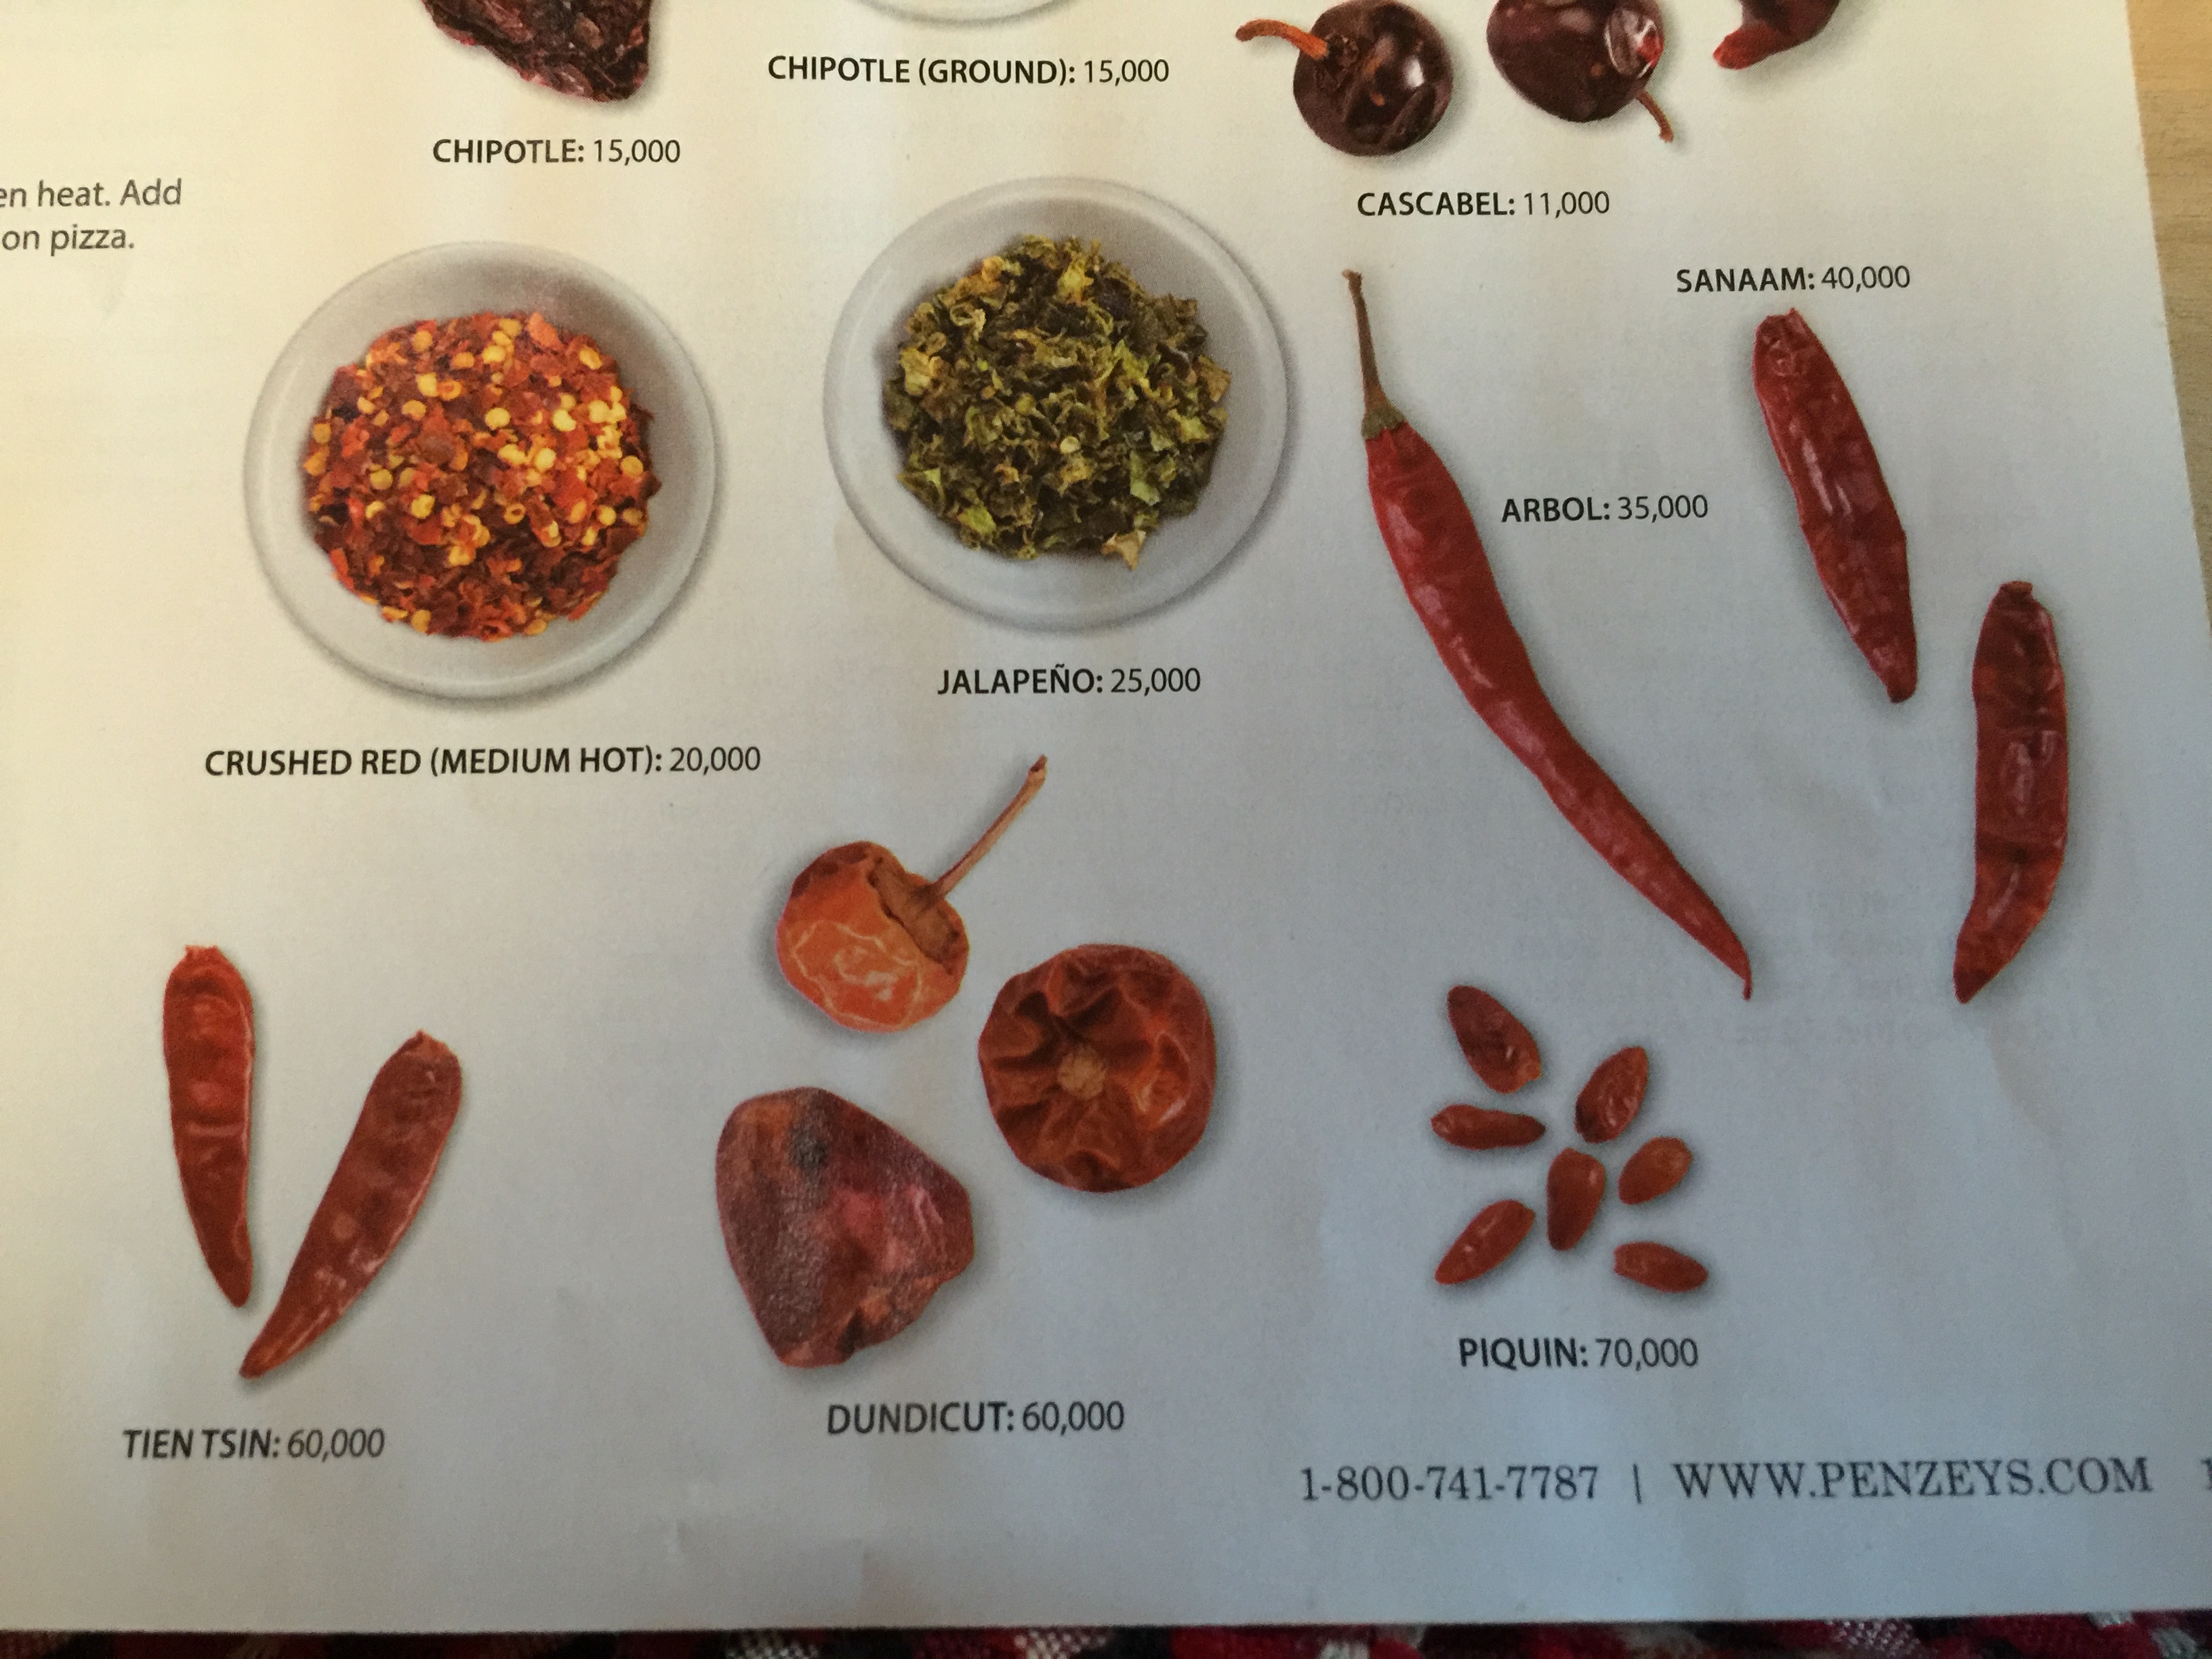
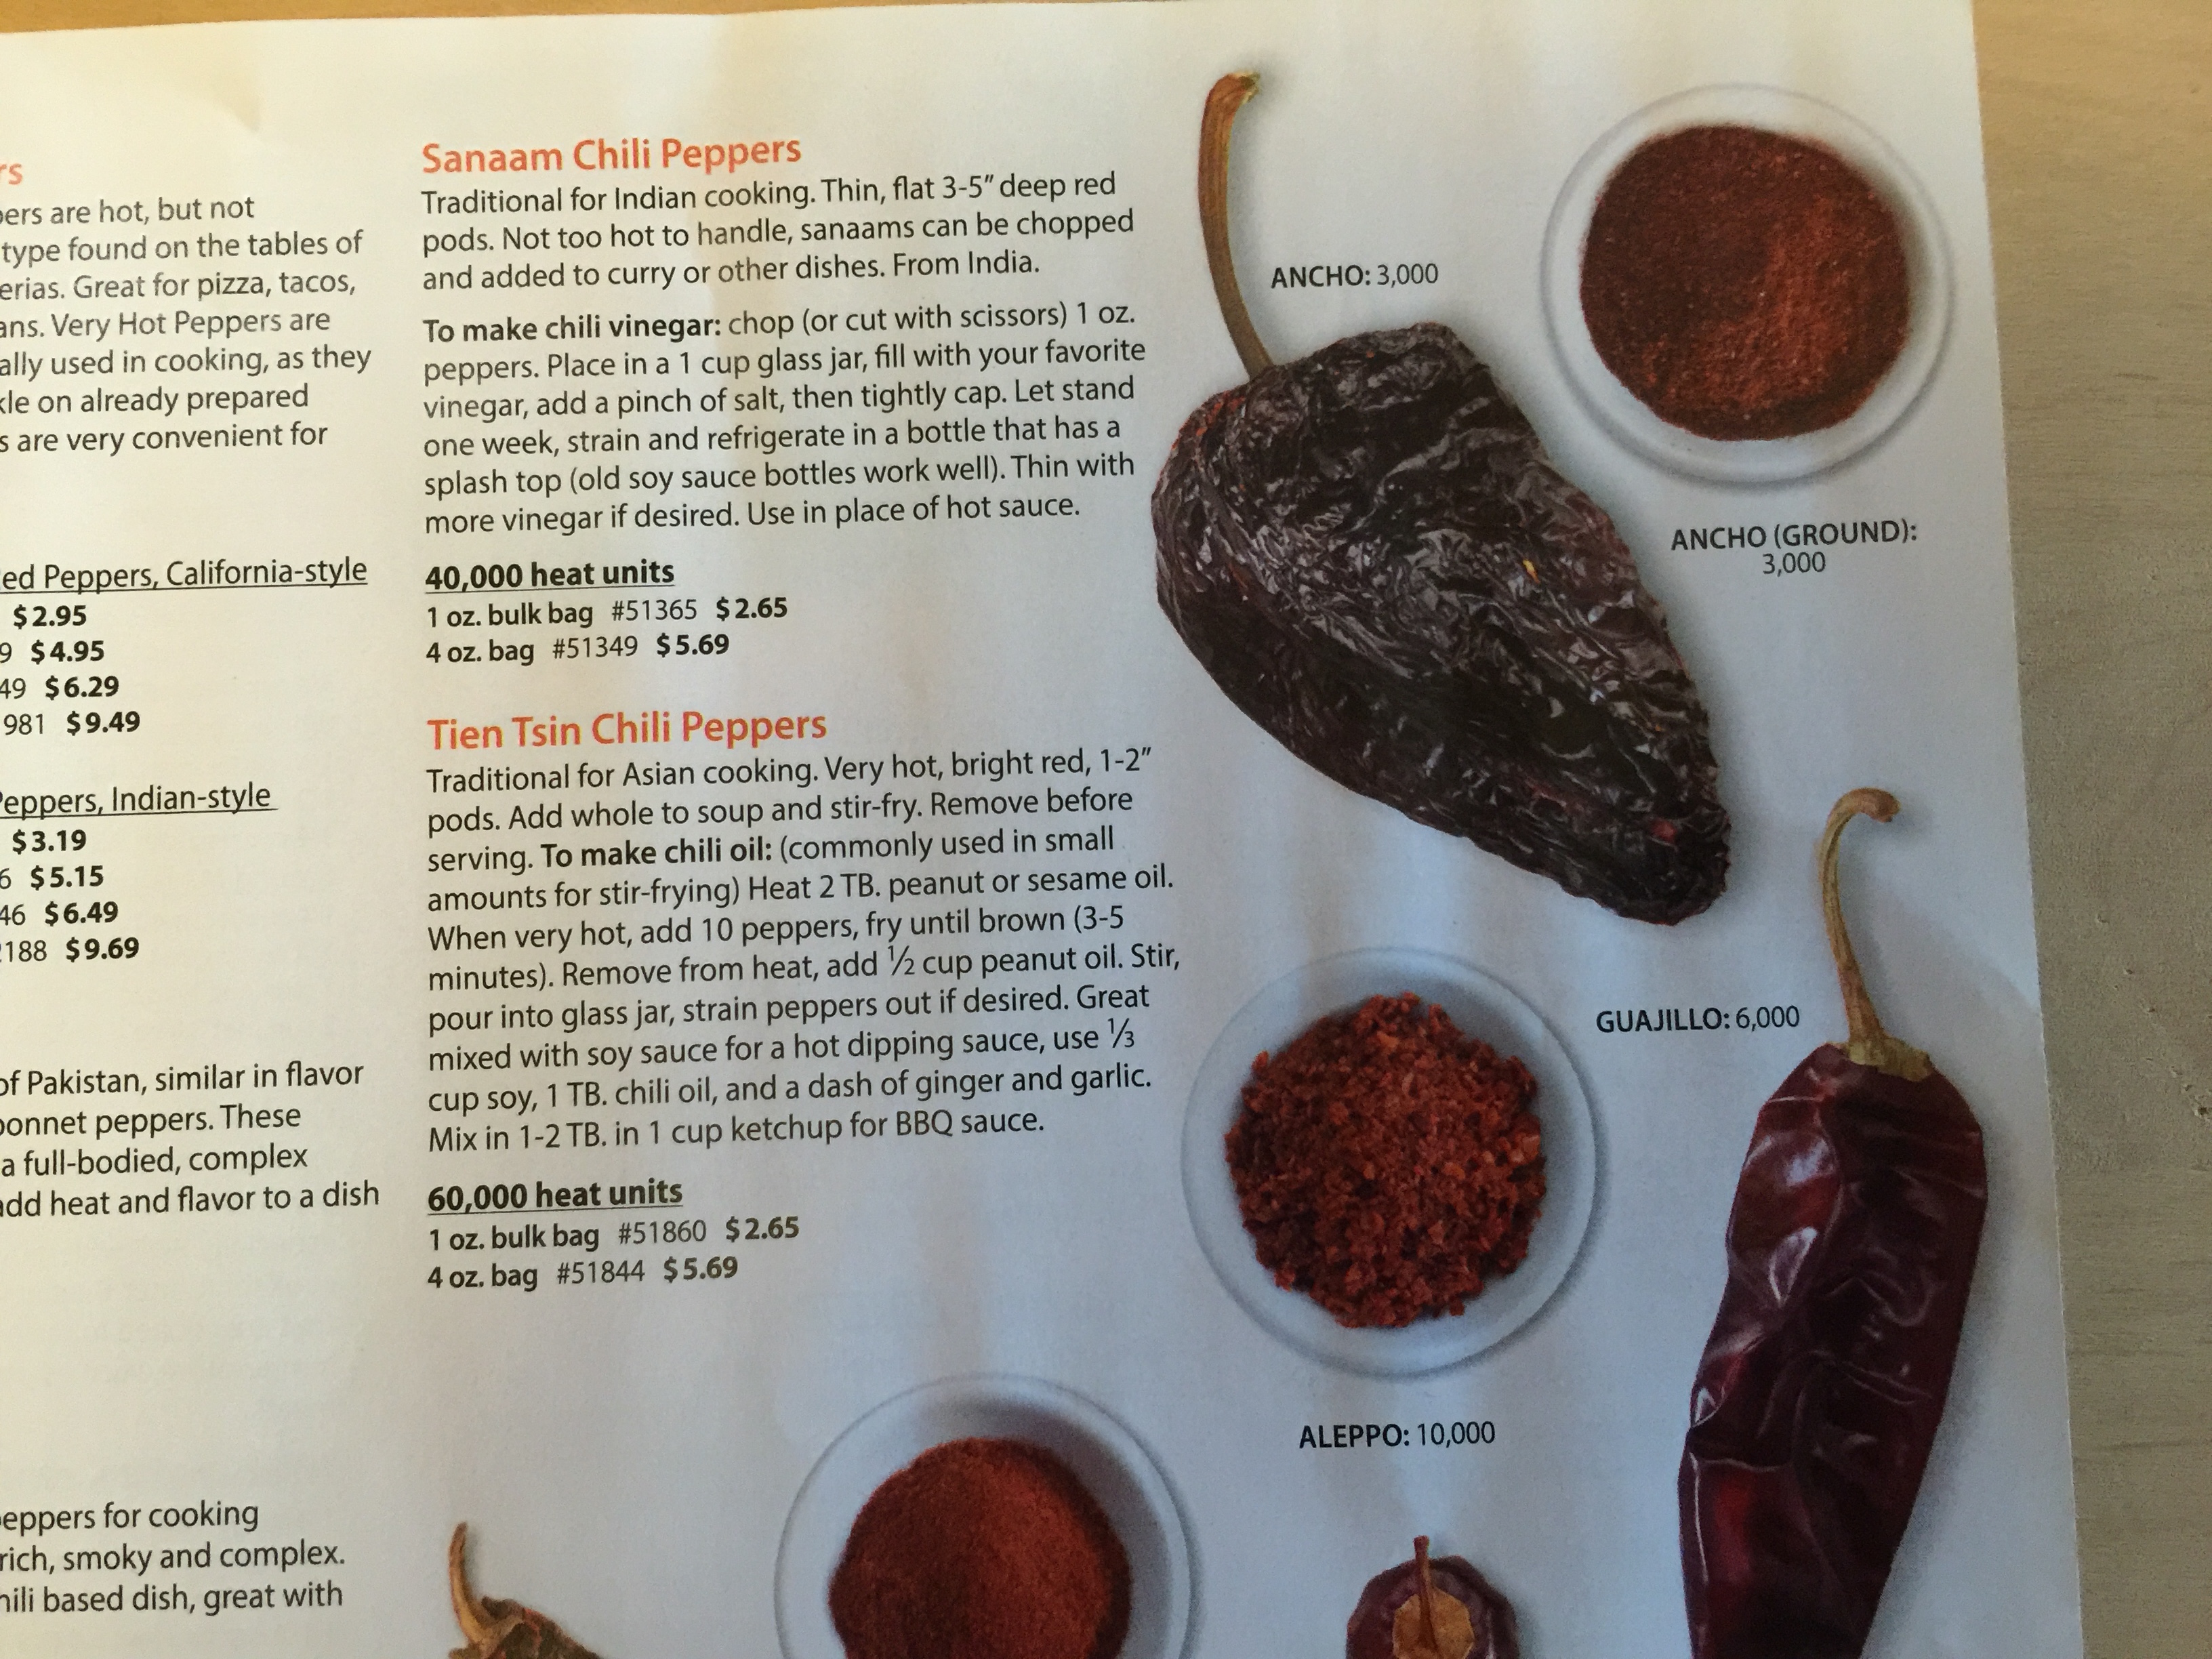
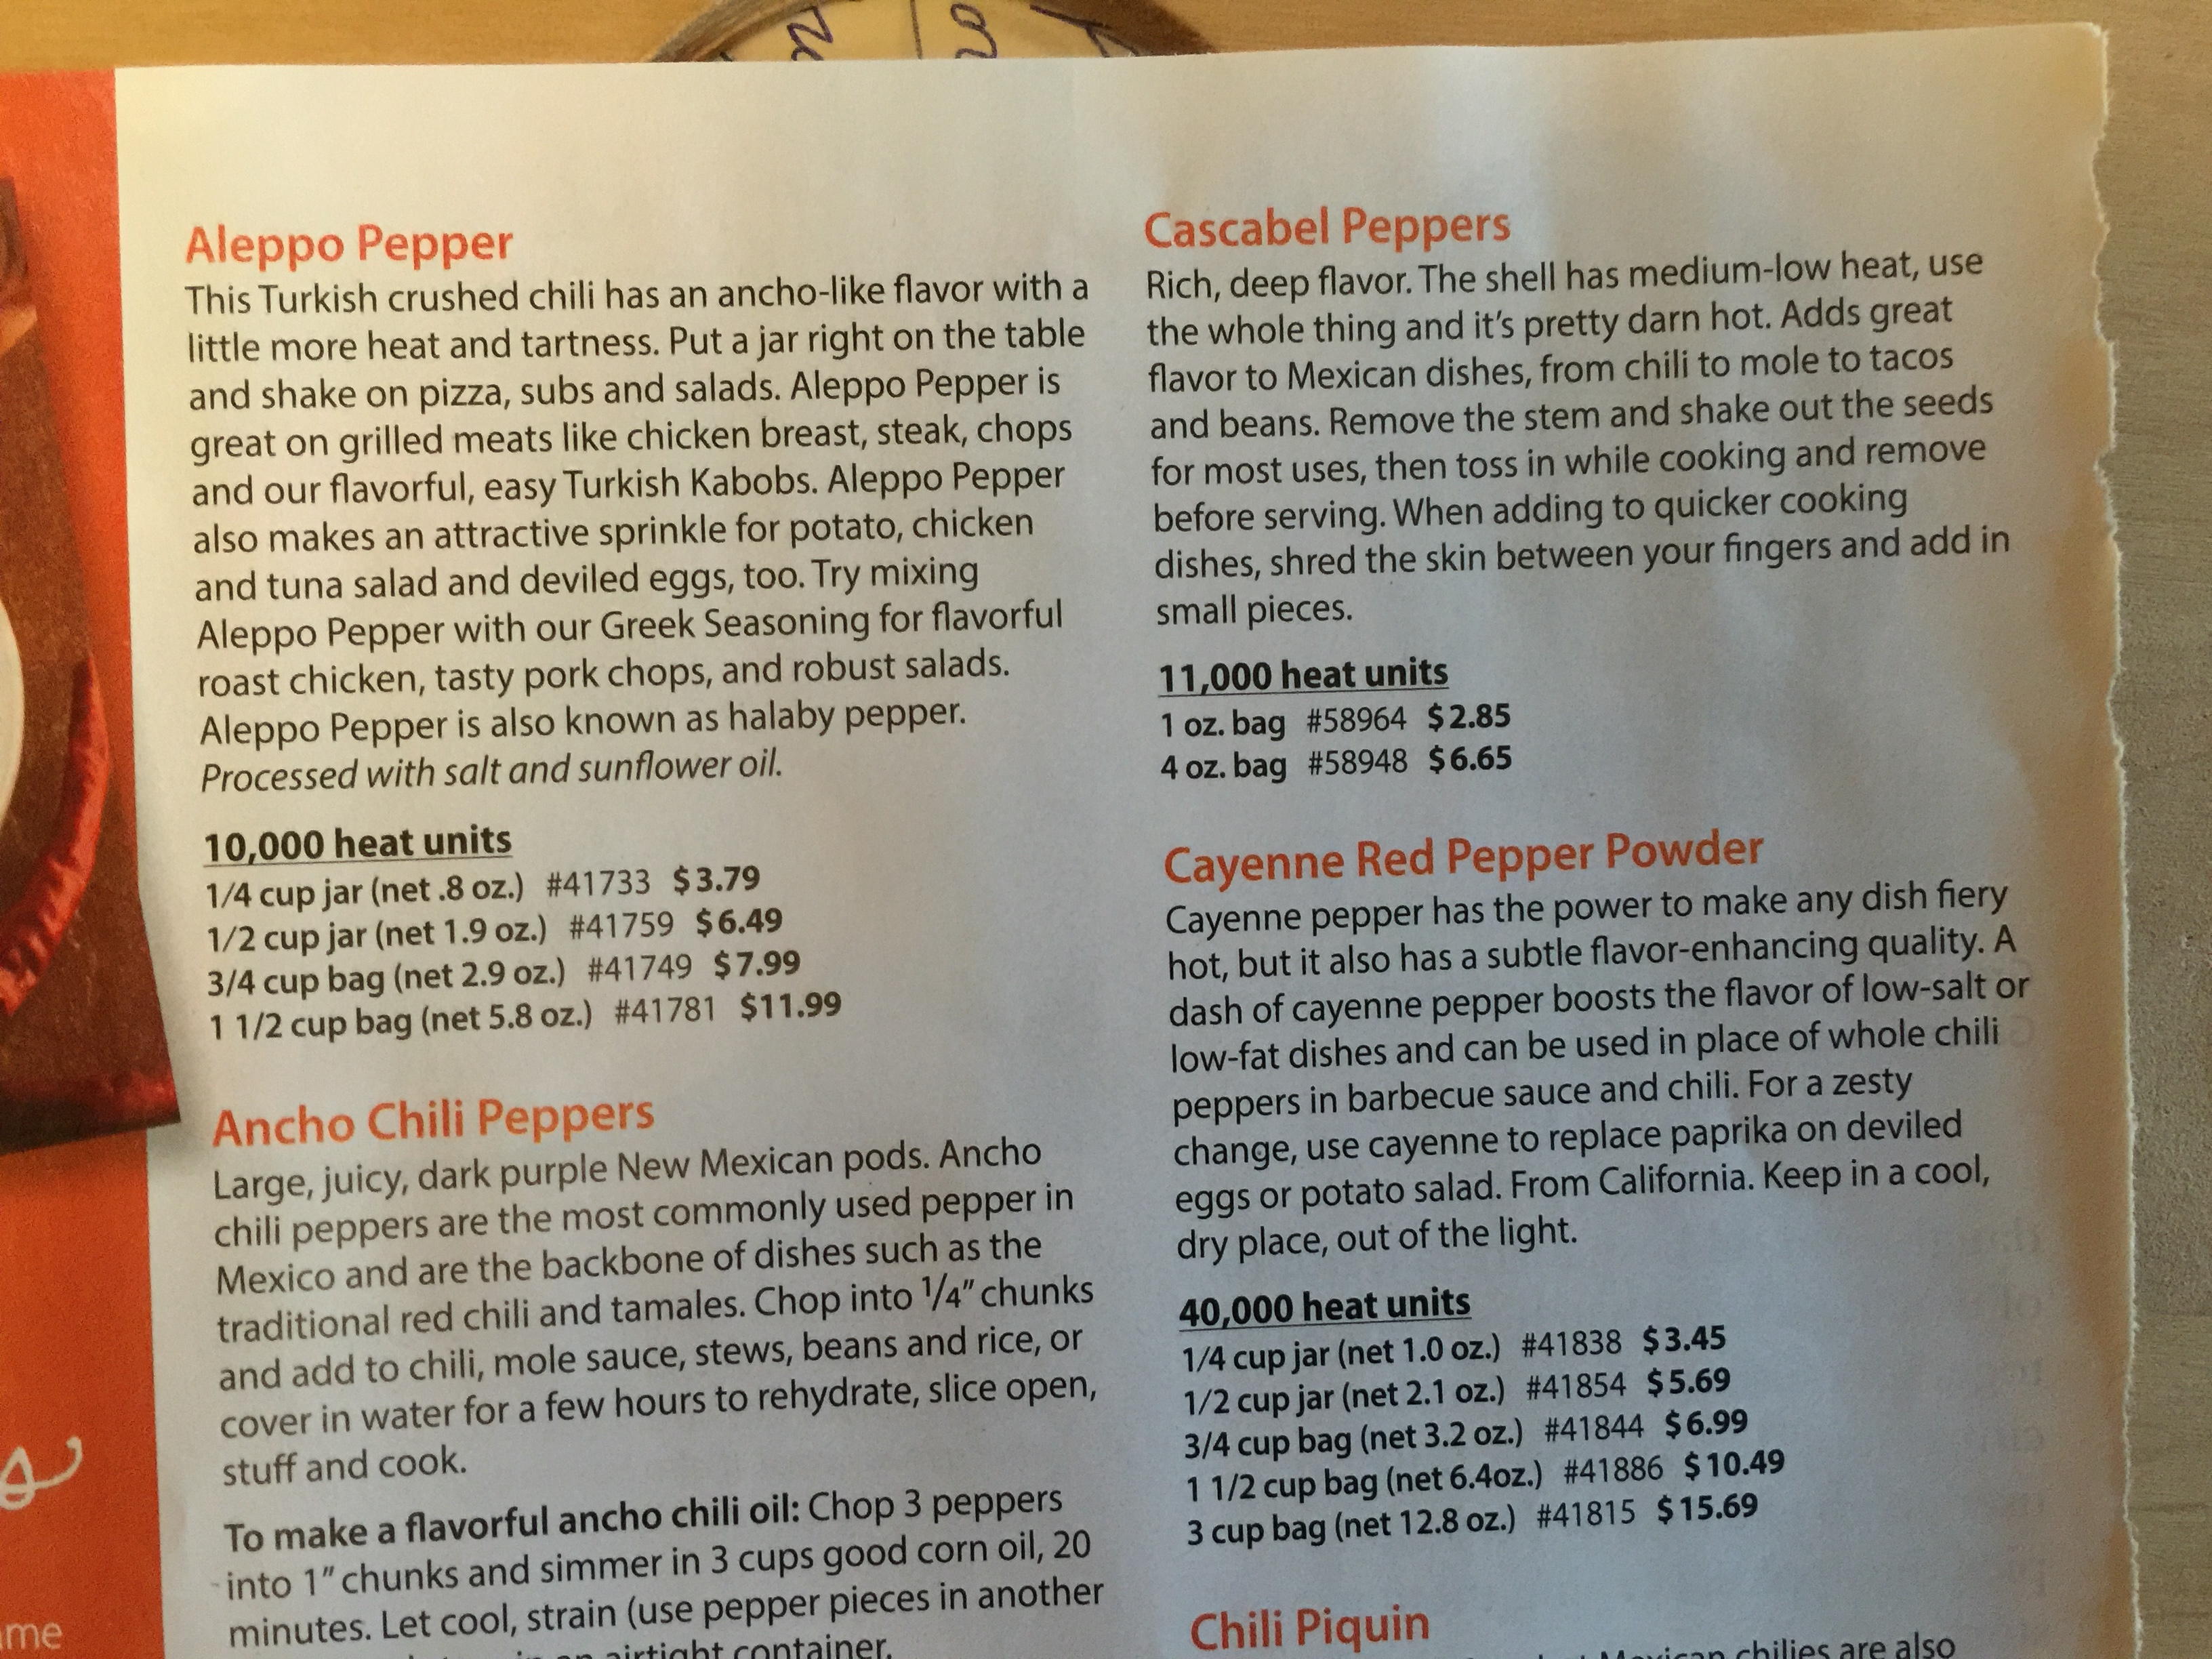
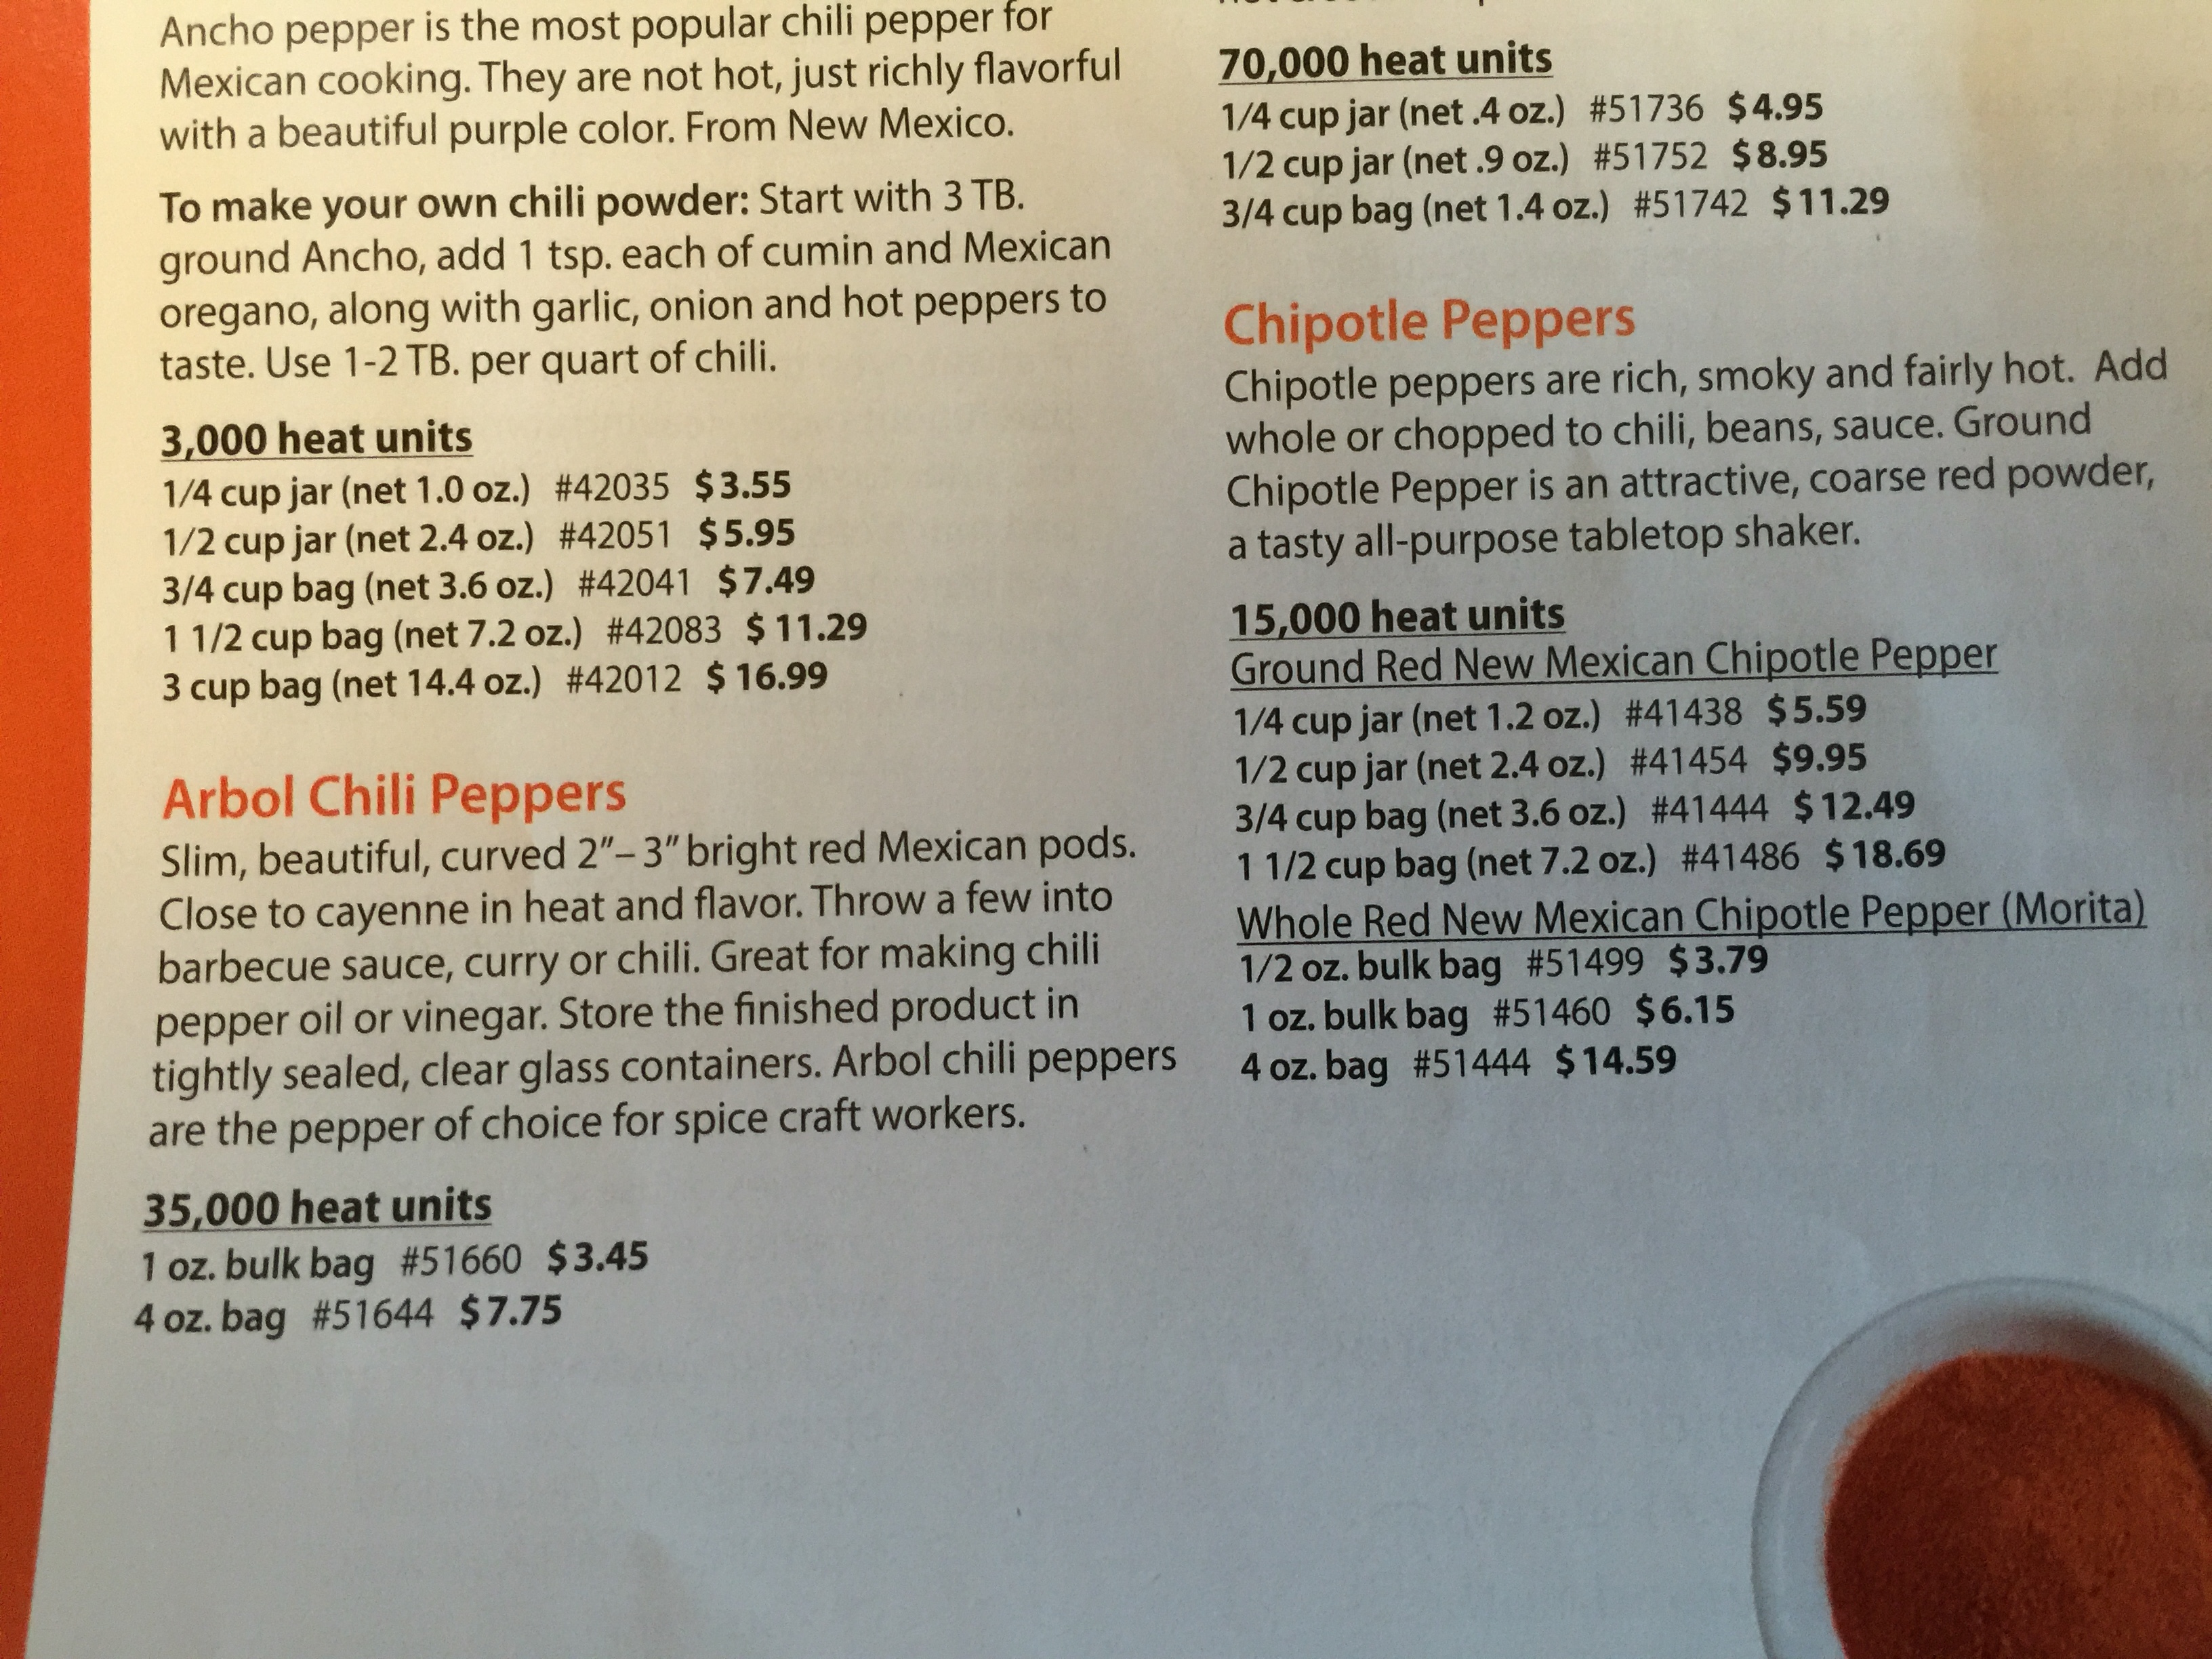
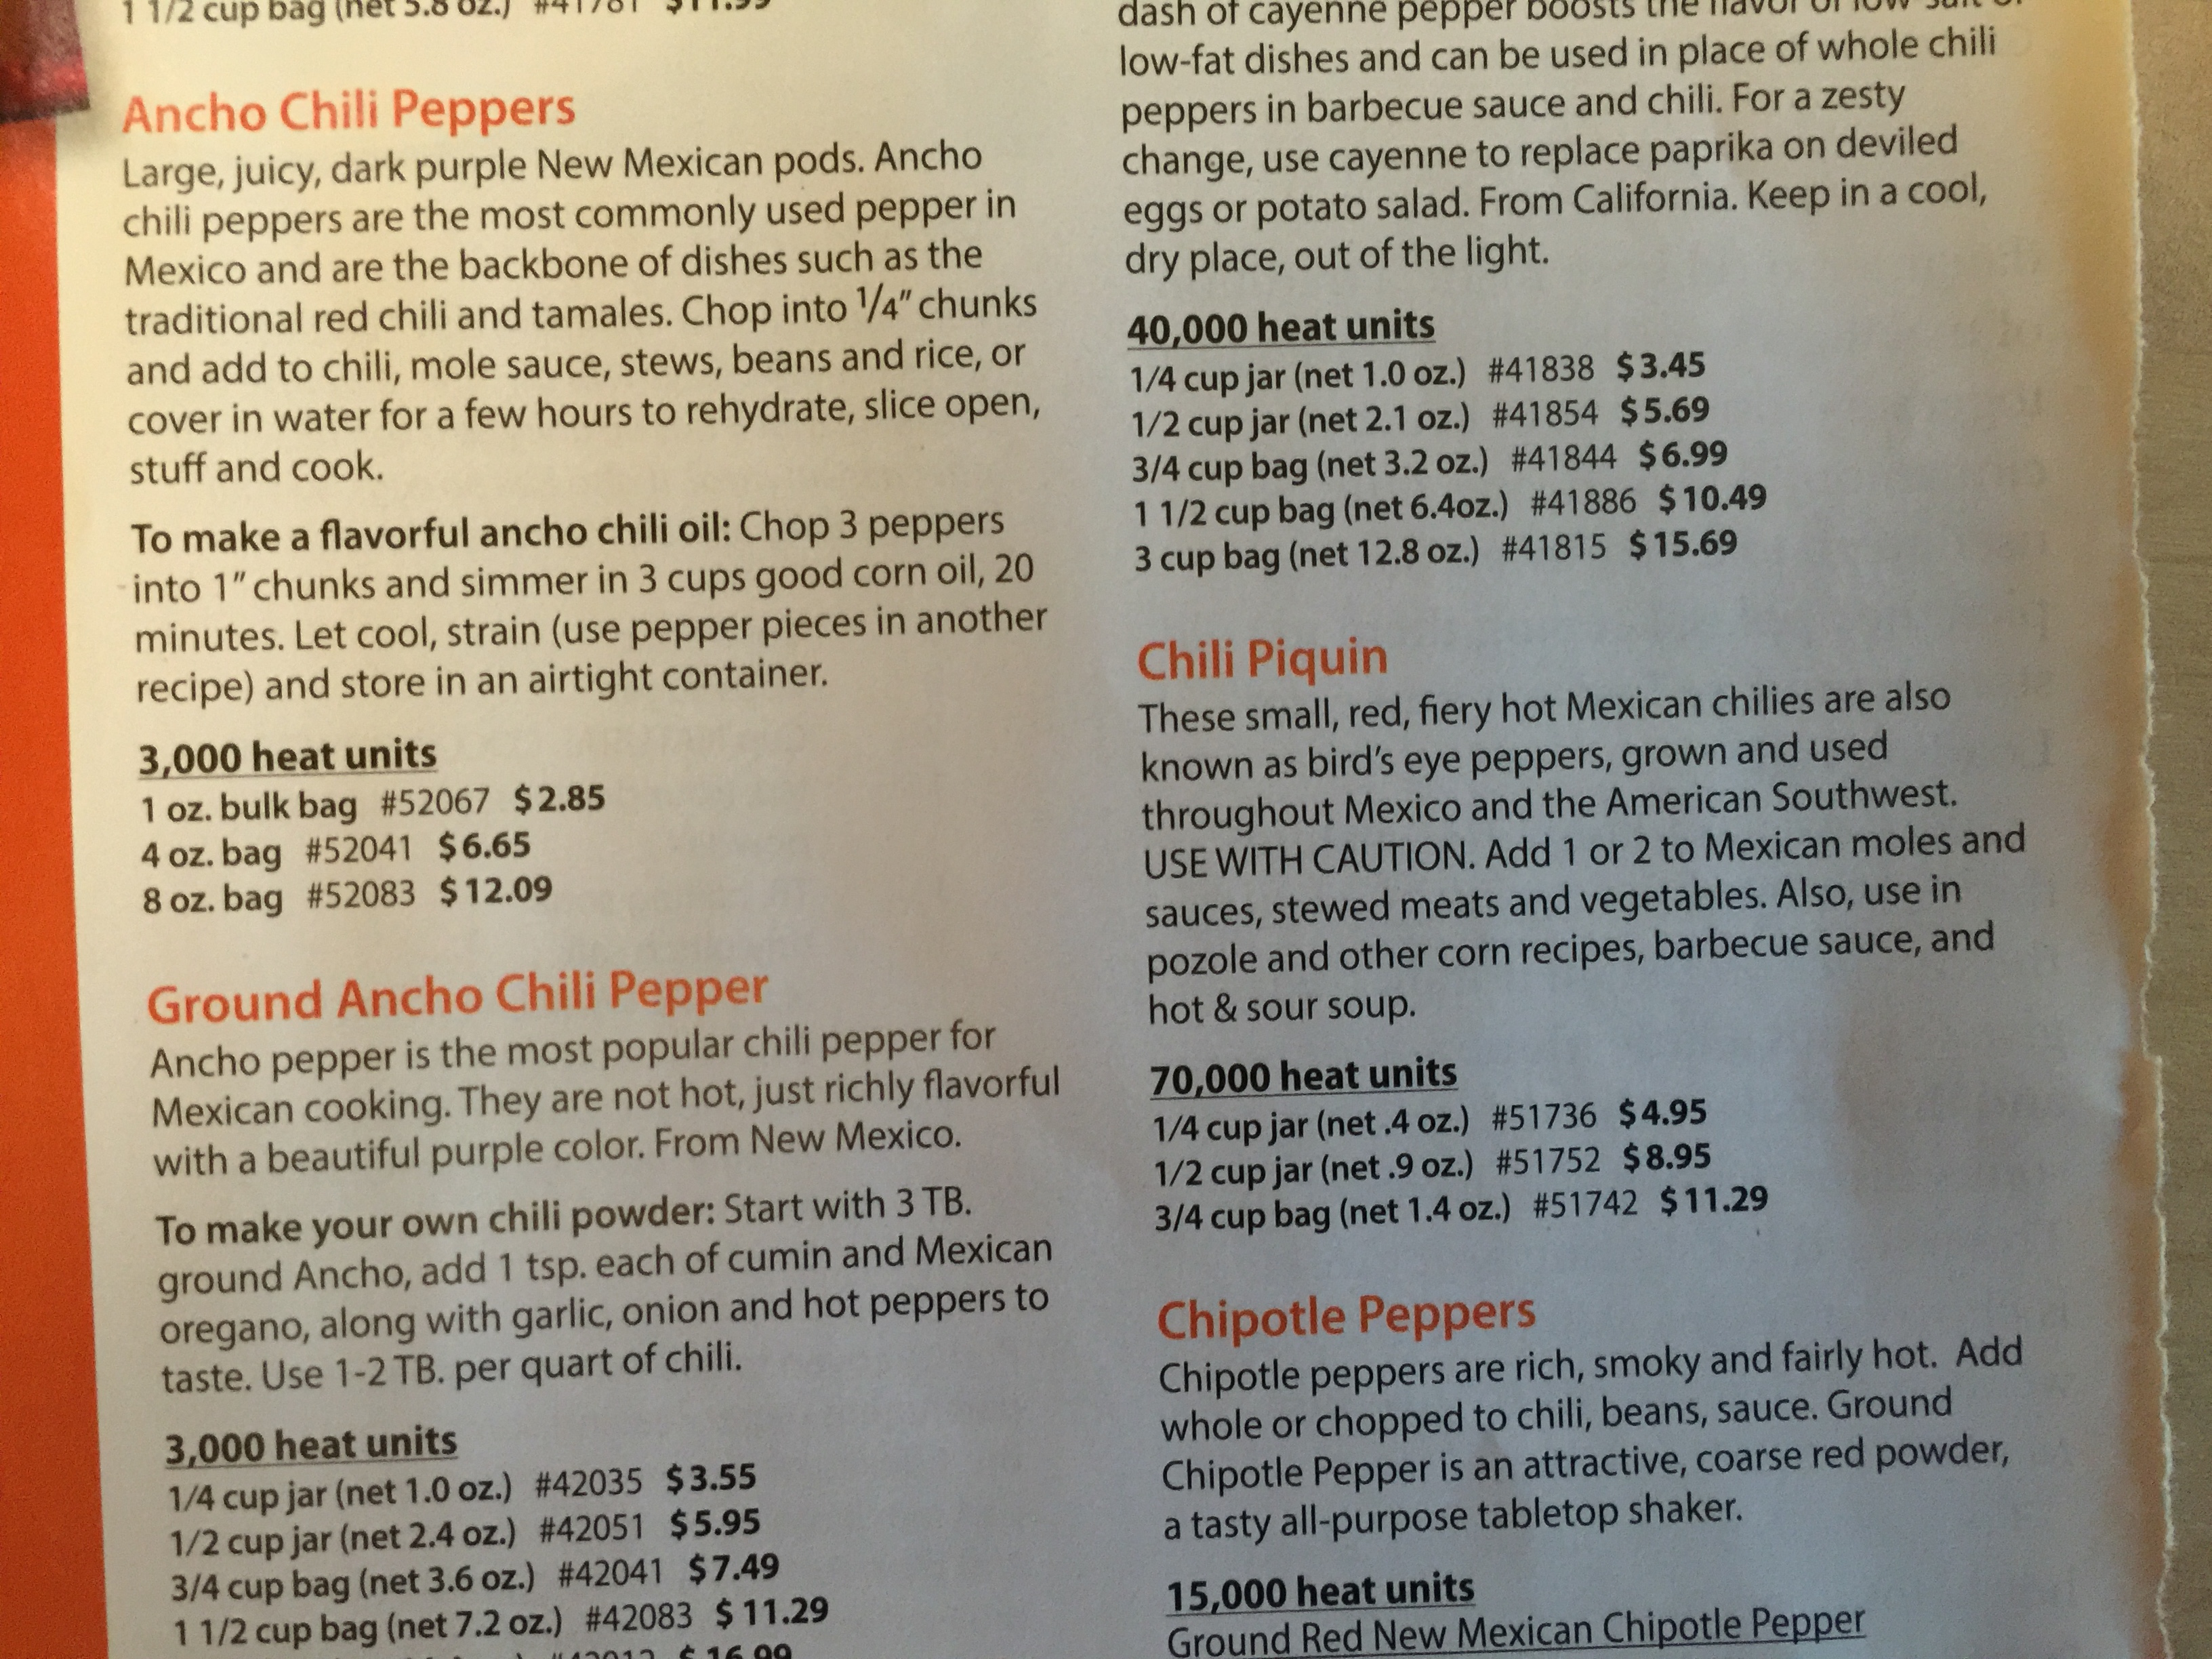
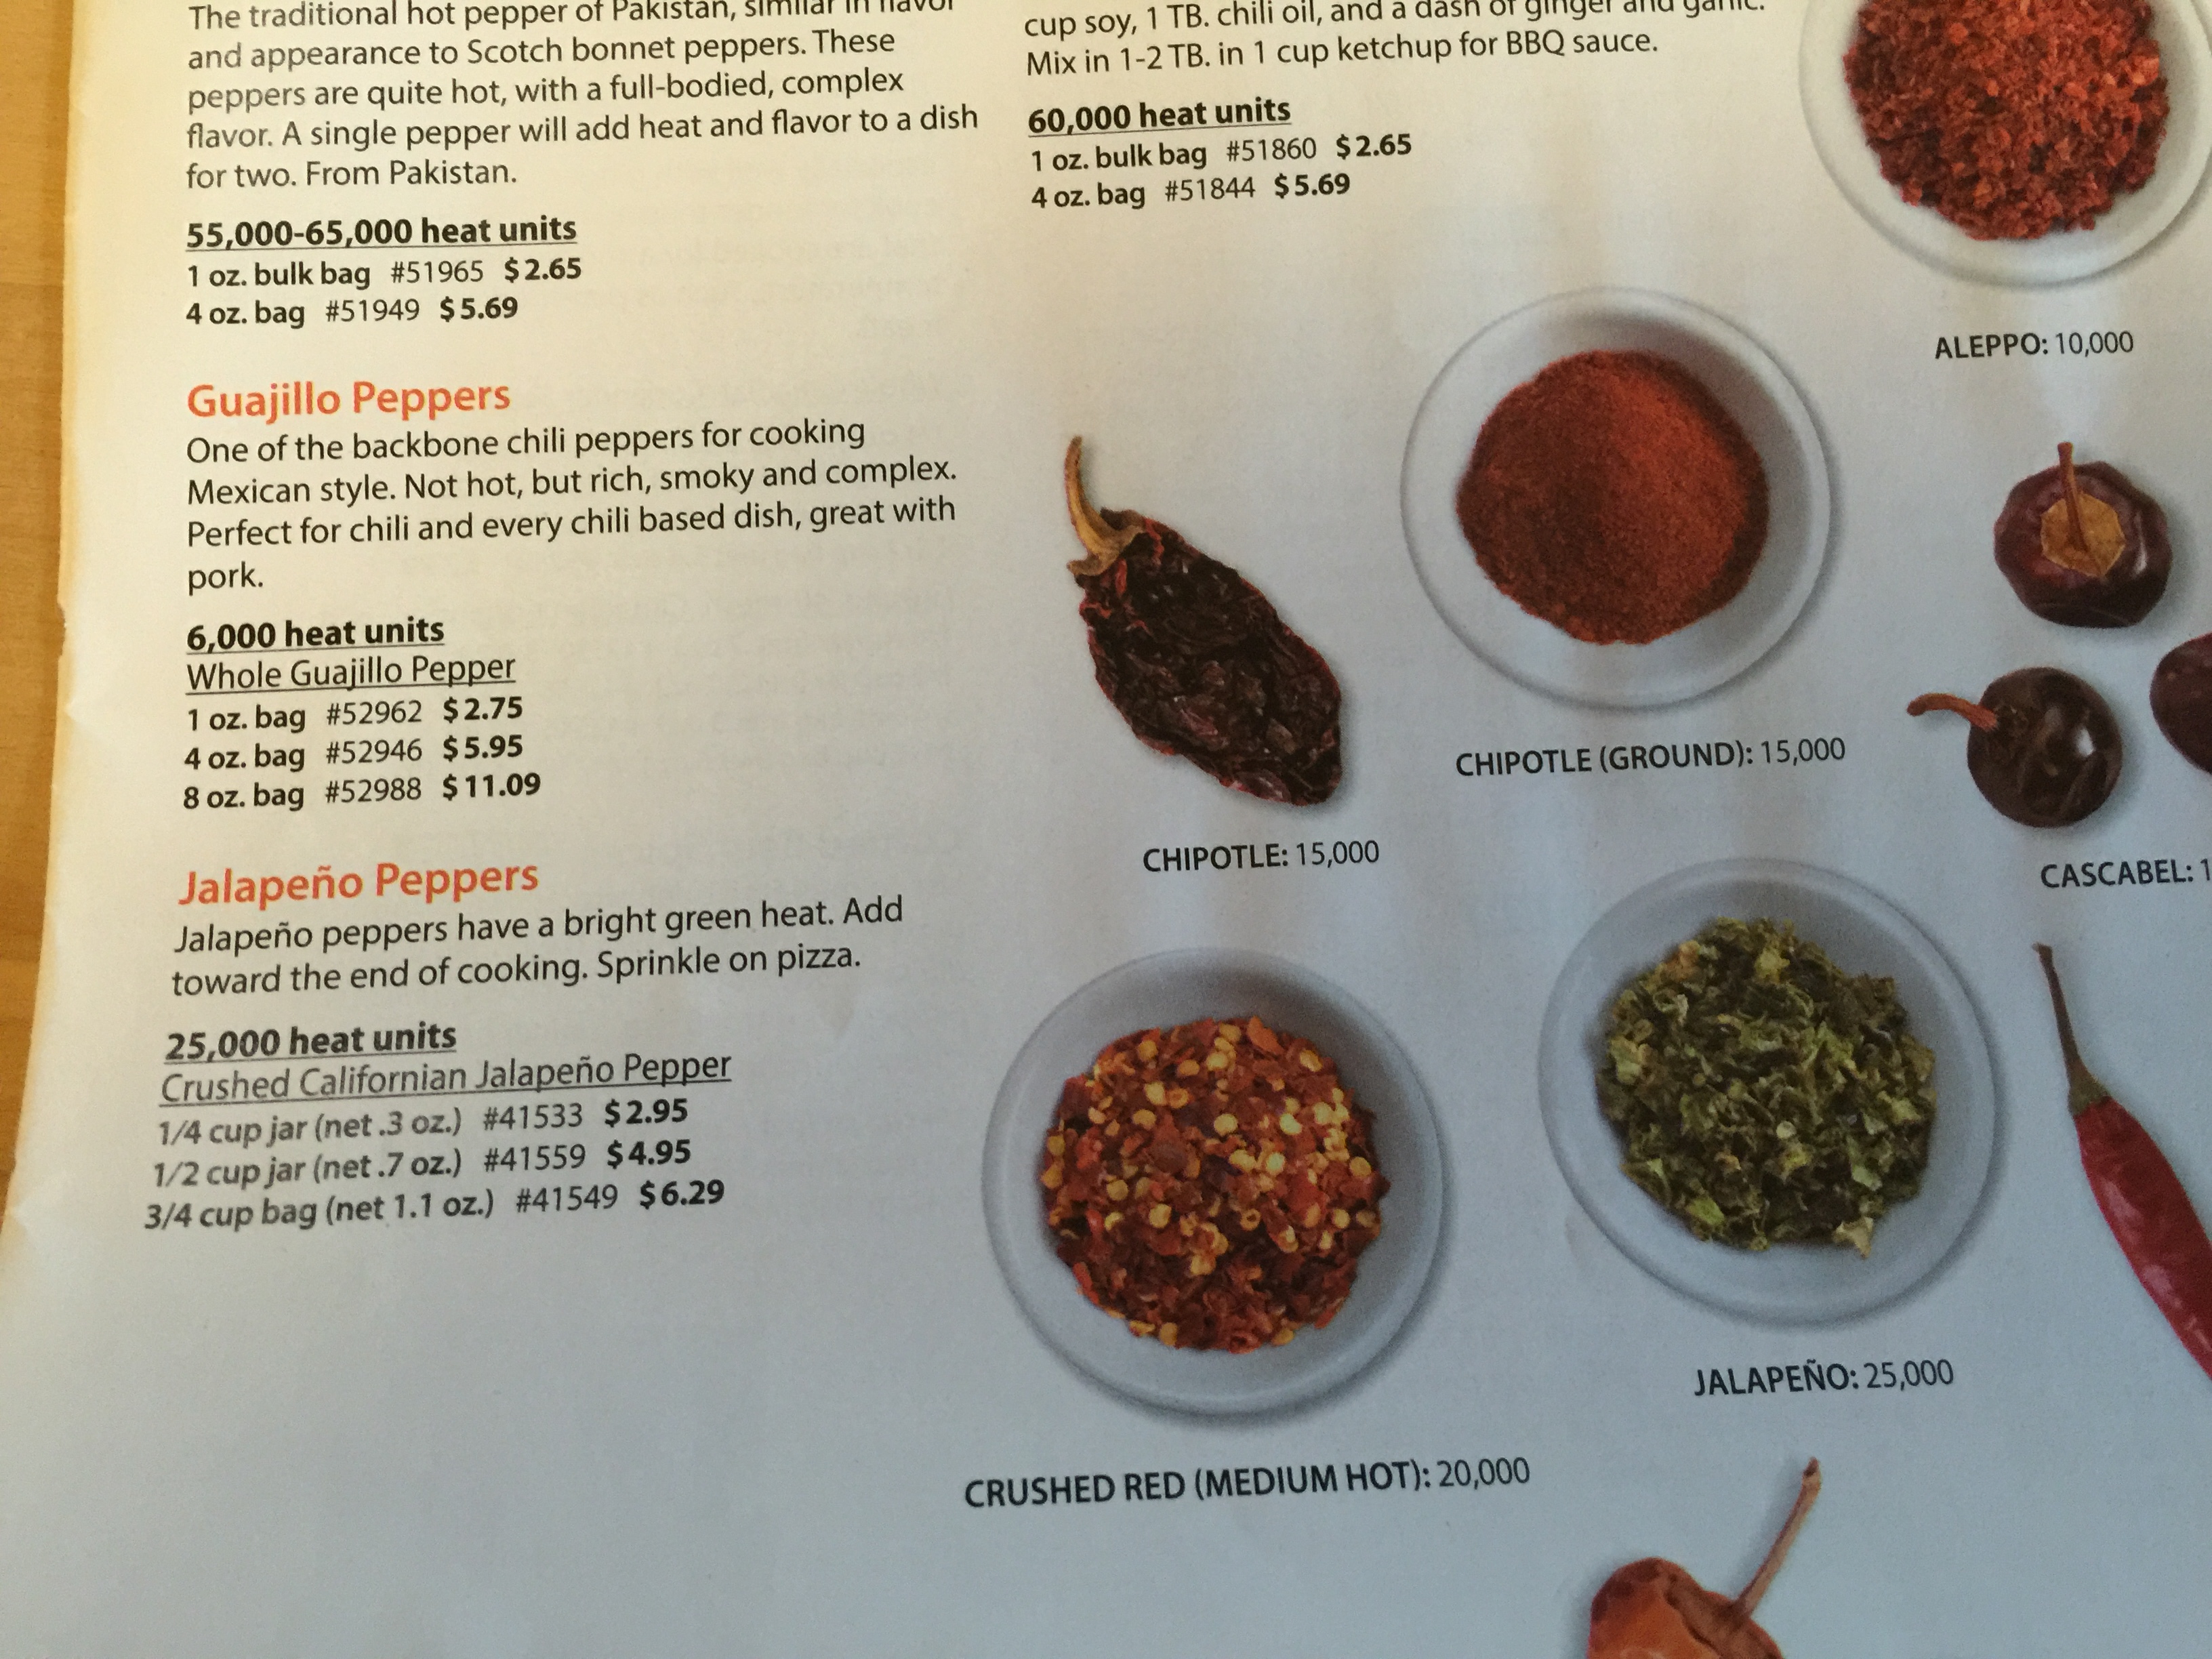
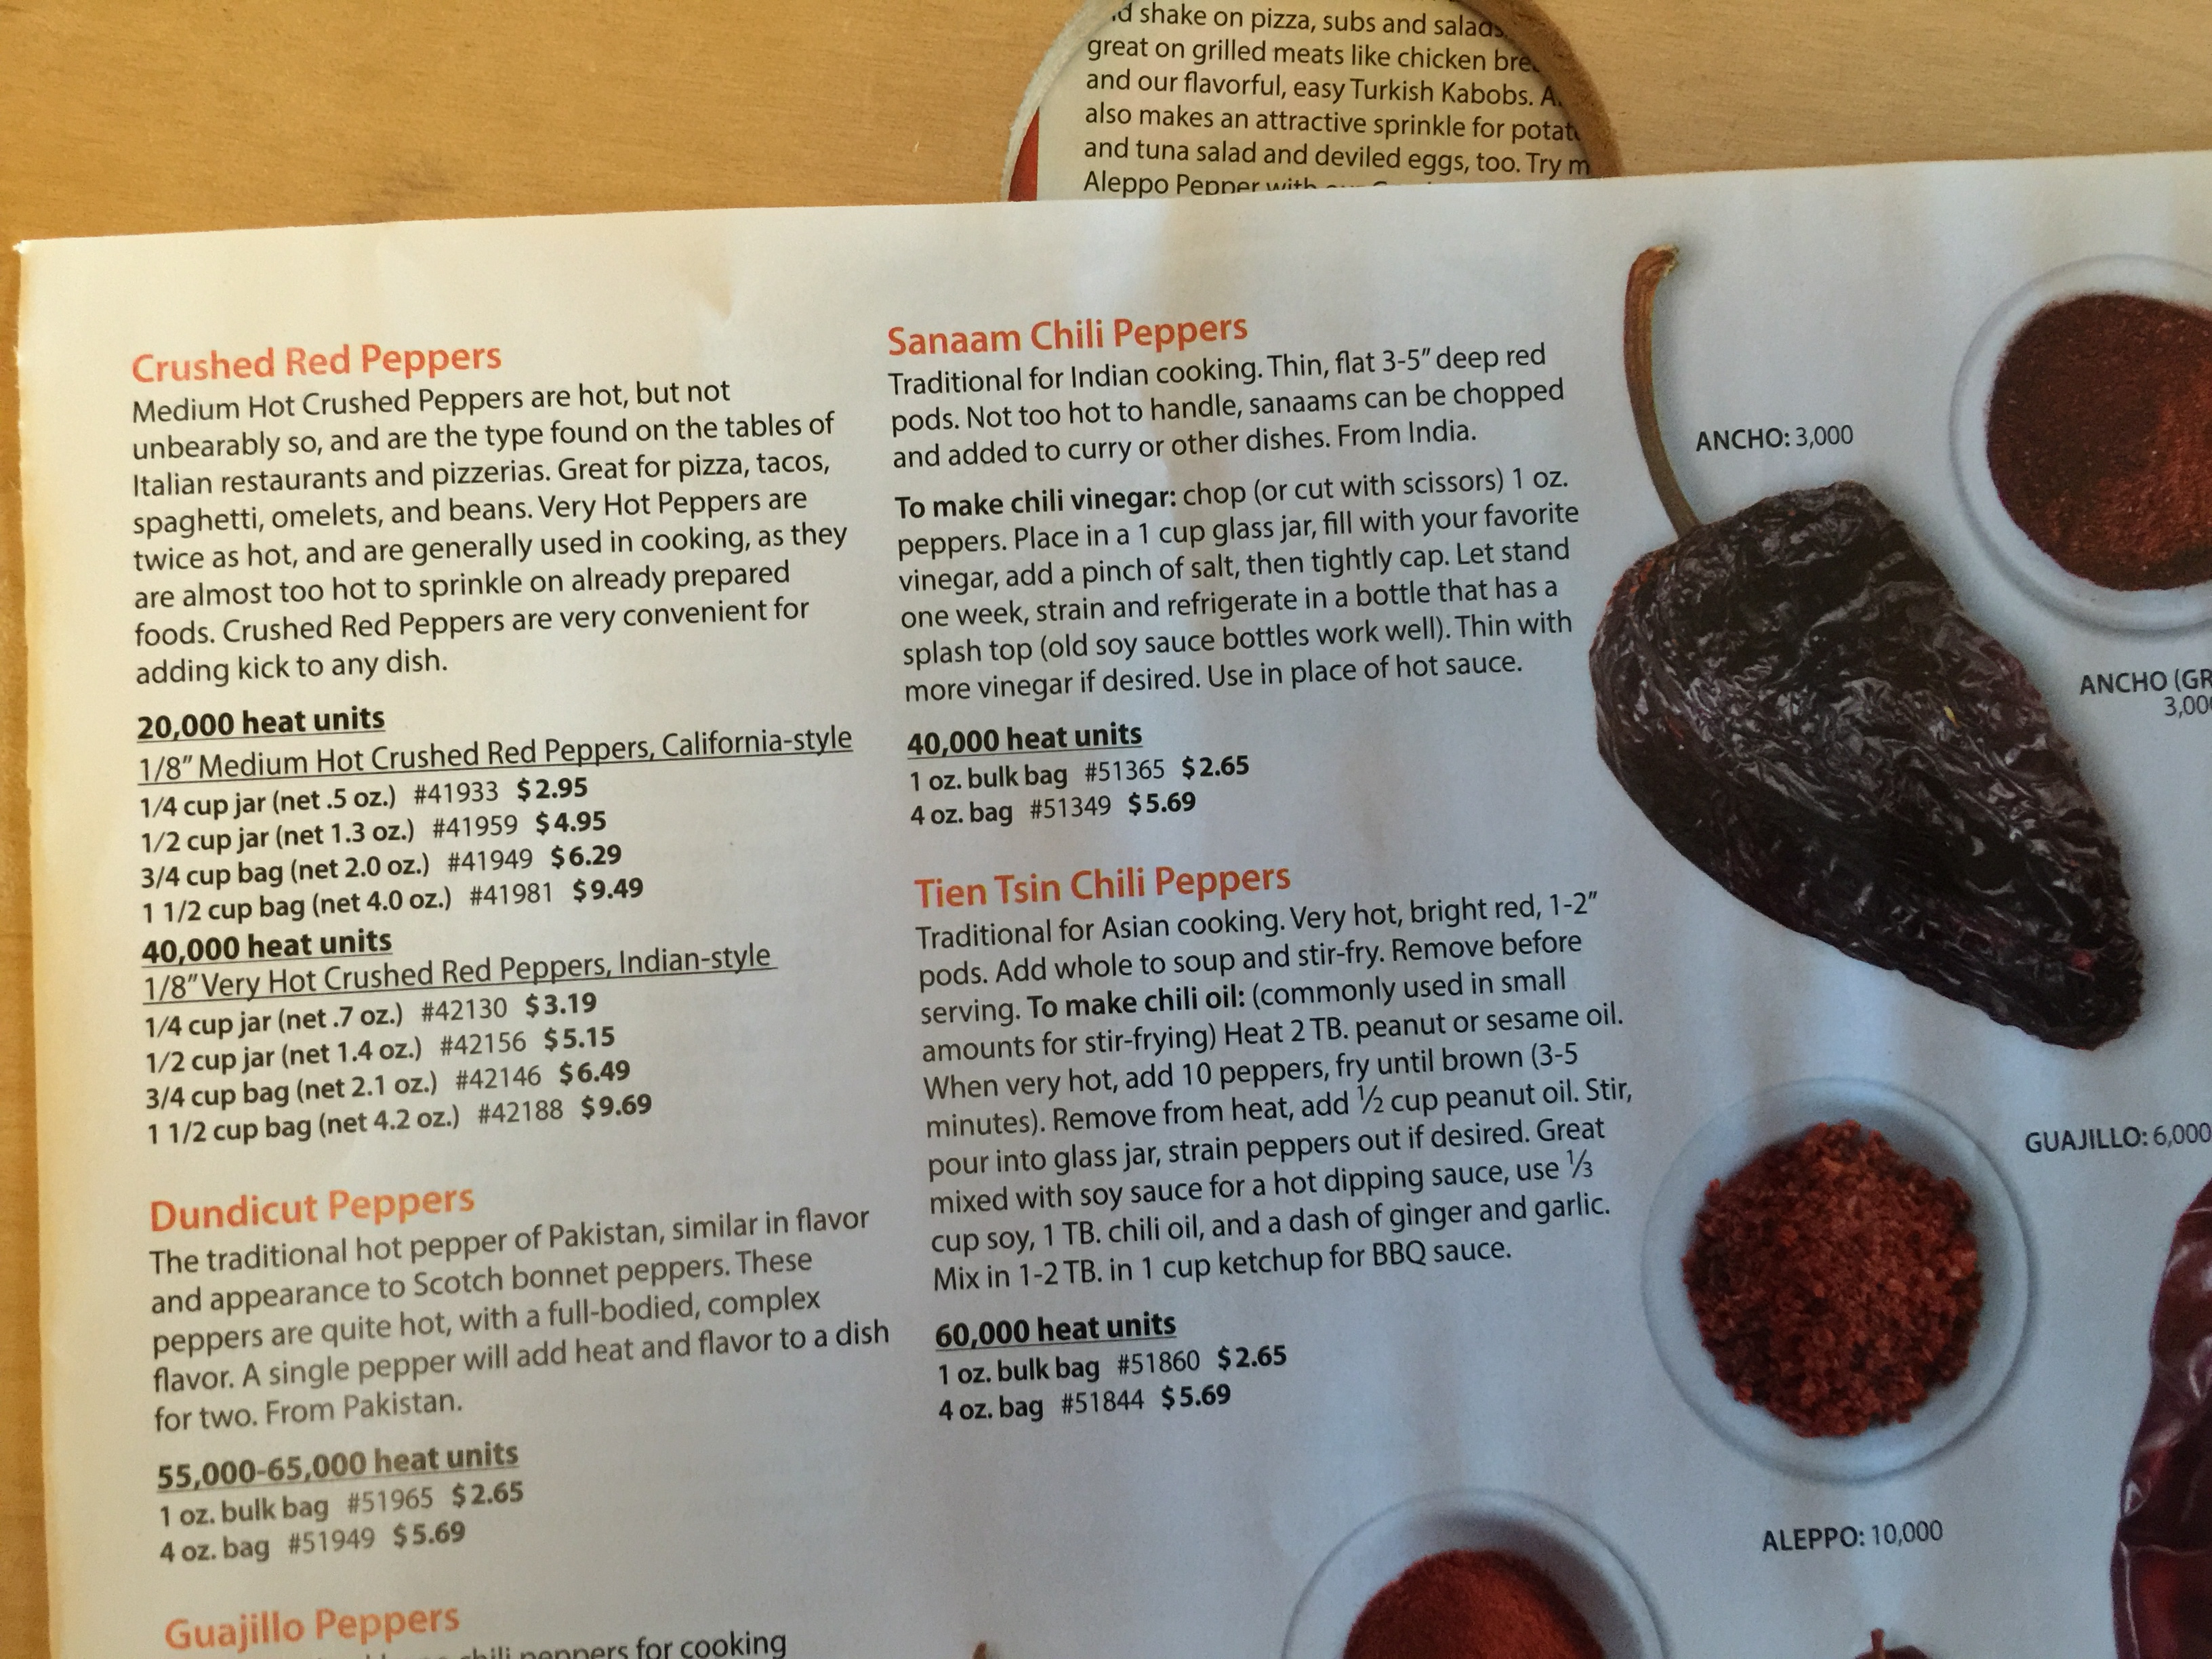
 Chili powder is a blend of seasonings that usually includes ground chilies, cumin, oregano, and garlic. It is usually only mildly hot – and is used in things such as Chili con Carne. On the other hand, ground chili is 100% chilies and may be mild to fiery hot, depending on the variety.
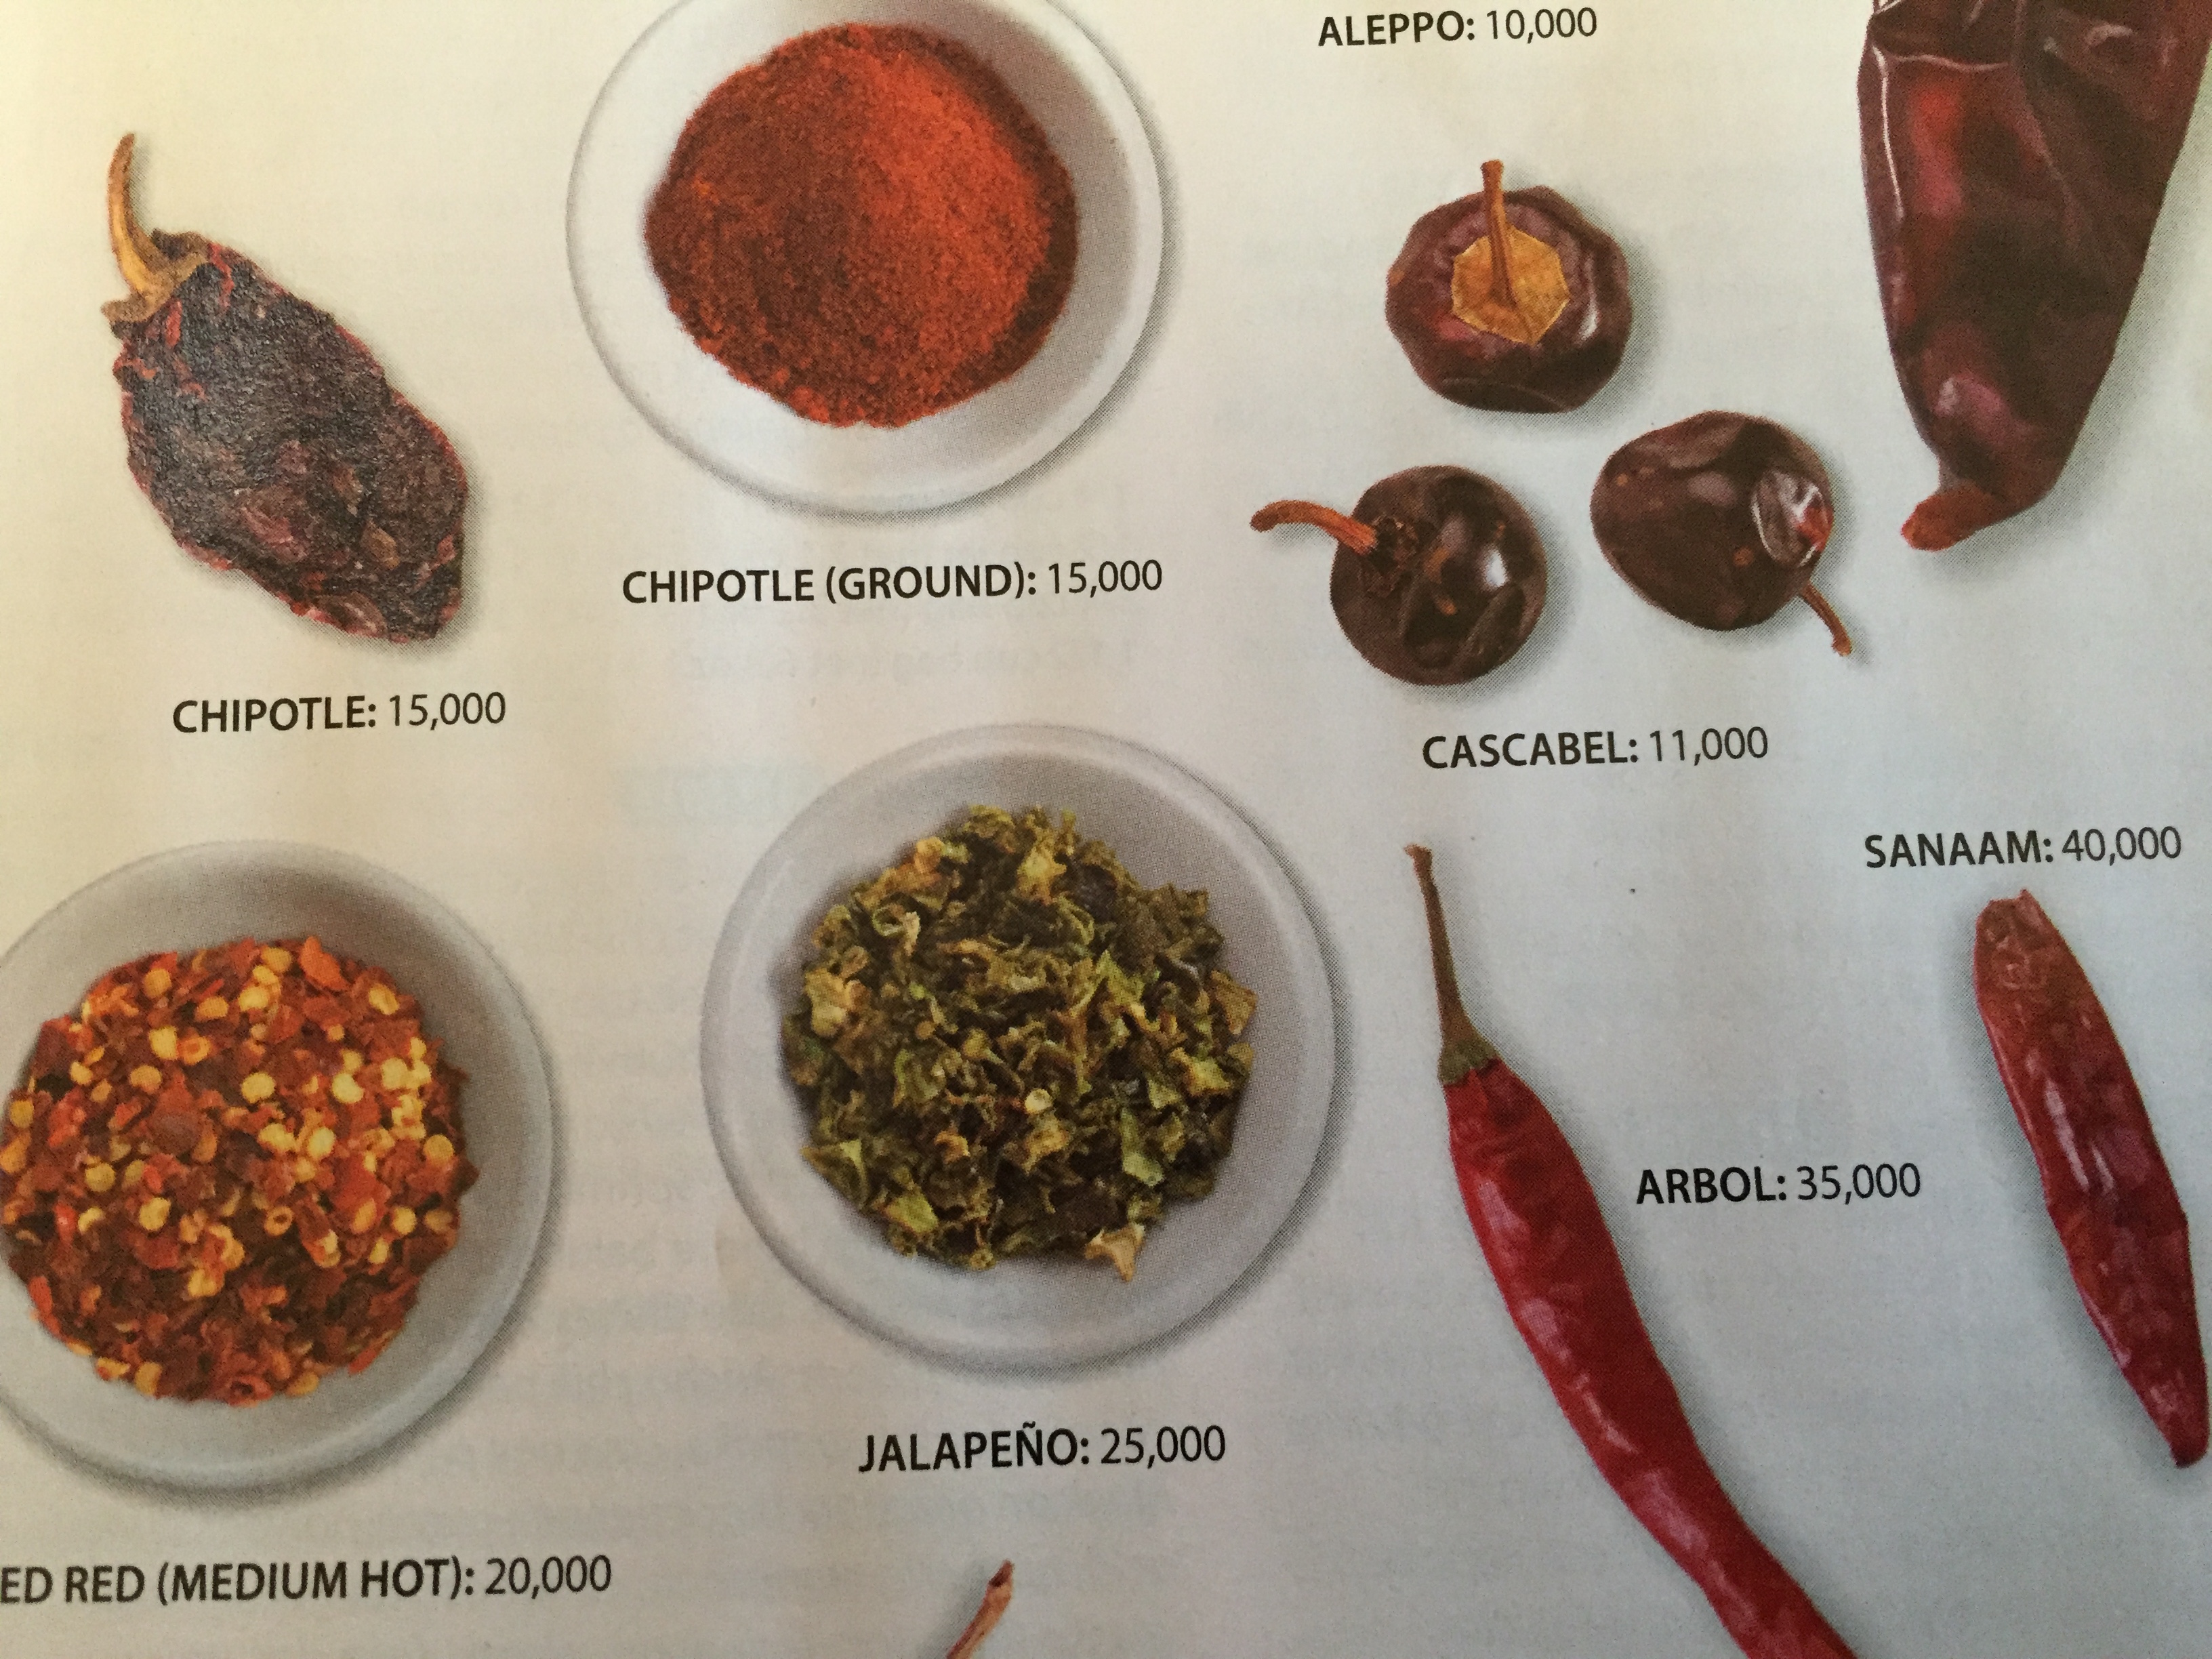


