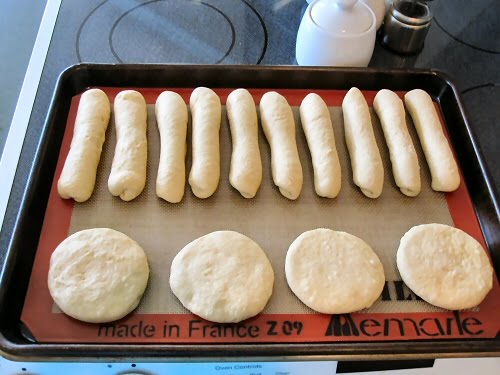
Pretzels – Basic Recipe

The double knot is not necessary, but makes it look pretty.
  • 2 TBL yeast
  • 2 C warm water – about 105º
  • 2 tsp granulated sugar
    • PROOF ABOVE INGREDIENTS,
    • then SIFT TOGETHER
  • 1/4 C brown sugar
  • 6.5 C bread flour
  • 4 TBL salt
  • 2 TBL EVOO
  • 1/4 C Butter . Cut in

Optional extra step, replace 1 C bread flour with 1 C sour dough sponge

See Step 15 for ingredients for a water bath you will use after the second rise.

PRETZEL CHEESE DIPPING SAUCE

Step by Step

  1. Create a well in your dry ingredients
  2. Add liquids into the well
  3. Pull together with your hands for 10 minutes
  4. Alternately you can use a Kitchen Aid on low for 5 minutes until incorporated, then switch to medium
  5. Finish on the bench for 1-2 minutes
  6. Form into a ball and place in a slightly oiled bowl.  Spray the top with vegetable oil
  7. Let rise 30 minutes on the counter, or even better 8 hours in the fridge
  8. If you used the fridge, give the dough 1 hour to come back to room temperature when you are ready to make your pretzels
  9. Divide dough ball into half, then half, then half, then half again.  You will have 16 balls of dough.  Work one at a time, and keep the others covered with plastic or a damp cloth during that time to keep from drying out.
  10. Roll into a thick rope about 22 – 24 inches long
  11. Shape into a U with the ends away from you
  12. Criss cross the rope, cross hands again, then bring the ends down, crossing hand again – creating the knot
  13. Put onto parchment paper lined baking sheet as you finish each one, keeping covered with a slightly damp towel.  Occasionally spritz with water.
  14. Allow about 45 minutes to rise
    • MEANWHILE PREPARE THE WATER
  15. Combine the following in a large heavy pot and bring up to a boil, then reduce to a simmer
    • 8 C water
    • 1/2 C baking soda to raise the pH level
    • 1/4 C brown sugar
    • 1/2 C Beer
    • 1 TBL salt
  16. Gently float one pretzel at a time into the hot water
  17. Cook about 30 seconds per side
  18. Flip using a spider strainer
  19. Put onto a wire rack to drain for 5 minutes before setting back on your parchment paper lined baking sheet.  Brush with egg wash, then sprinkle with Maldon salt.
  20. Put the salted side down on the baking sheet.
  21. Brush the unsalted side with melted butter and sprinkle newly buttered side with salt as well
  22. Optional toppings are Parmesan cheese, pepper, poppy seeds or sesame seeds
  23. Bake 450° for 10-12 minutes
  24. Rotate pan
  25. Bake 5 minutes more.  Remove when browned.
  26. Cool on a wire rack

For an interesting pretzel dip, mix 1 block of softened cream cheese with
1 TBL each mayo, chives, sour cream, Dijon mustard
1 tsp each garlic powder, onion powder
1/2 C grated sharp cheddar
Spinach Bread Casserole

  1. Chop an onion and saute in 2 TBL butter – 3-5 minutes
  2. Add sour dough pieces into a lightly greased casserole
  3. Add 1/2 C spinach (cooked and chopped)
  4. Top with 1/2 C grated cheddar and 1/4 C Gruyere
  5. Top with onions
  6. Optional:  Add crumbled bacon
  7. Combine egg mixture
    1. 4 eggs
    2. 1-1/2 C milk
    3. 1/2 C cream
    4. 1 tsp Dijon mustard
    5. 1/2 tsp CinnaSugar
    6. 1 TBL sugar
    7. 1/2 tsp salt
    8. 1 sprig thyme
    9. 1/2 tsp vanilla
    10. 1 tsp brandy
  8. Dump eggs over top of casserole
  9. Sprinkle with another 1/4 C Gruyere
  10. Cover with foil
  11. Cook now or refrigerate overnight
  12. If you are cooking from a cold dish, let it come up to room temperature for a half hour before putting it into a hot oven.
  13. Bake 30 minutes covered
  14. Uncover and bake an additional 3o minutes

Care and Feeding of your Sourdough

Questions? Always start out at GRANDPA'S SOURDOUGH COLLECTION INDEX

MAINTAINING YOUR SOUR DOUGH

COMBINE WITH THIS PAGE

THE BEGINNING

If you’ve received a container of dried Sour Dough Starter, don’t start with this page.  You will first need to revive your starter.

You will return to this point every time you pull your starter out of the fridge.   After your starter sponge has been created, you need to feed your starter (which should be about 1 cup) every time you use it.

If you have a large family, you should *** increase the amount of all ingredients presented here to 2 cups.

TODAY

  1. Take 1 C of water *** and put it into a glass bowl and set it on the counter for 30-60 minutes.   Chlorine evaporates quickly, and this will allow much of the chlorination that is present in tap water to dissipate.  Alternately, you can use any type of bottled water.  Chlorine will evaporate through the plastic.
  2. Take your GLASS jar (with approx 1 C *** starter) out of the fridge and place it in the glass bowl.
  3. Mix 1 C *** flour, 1/4 tsp *** Rapid Rise Yeast, and 1 TBL *** sugar or honey to your starter.  (Honey is a mold antagonist) Cover and let rest in the refrigerator overnight.
  4. Meanwhile, wash your GLASS storage jar.
    –
    TOMORROW
  5. The next morning, take 1 C *** of your mixture and put it back into your storage jar and put it into the fridge.  This will create your renewed starter ready for use next time.
    –
    SOMETIME OVER THE NEXT FEW DAYS
  6. Your renewed starter will be ready to use again the next morning, or you can wait as long as 7-10 days.  Two weeks is pushing it, but I’ll admit that I’ve done it.
  7. From this point forward, if two weeks go by and you are not ready to bake with your starter, you need to feed it by doings Steps 1-5 and discarding the other half.  BETTER YET, after feeding, put half of it into a jar and offer it to a friend.  Their starter is live and ready to use.
    –
    IF YOU RECEIVED A START SPONGE FROM A FRIEND.
  8. This is the point where you probably got your starter from another friend.  Tell your friend, when they get home, return to the top of this page, THE BEGINNING, and start the process on their own.  If you don’t have printed instructions for them, tell them to go to www.grandpacooks.com and enter the code SDP2 into the search box.
    –
    USING YOUR SOUR DOUGH SPONGE
  9. What you actually have now is a Sourdough Sponge.  You placed half of it back into the fridge for next time, this will talk about how to use the half that you kept out.
  10. To use 1 C *** renewed starter, just add 2 C bread flour  (*** 4 C for a double batch) to the mixture. Add 1 tsp of yeast to help with the rise. At this point you should also add 1/2 tsp salt and just enough water to help the dough come together.  This depends on the humidity in the air, the temperature, and some other factors, so just dribble in water with your machine running.  You will see it start to come together.
    • DO NOT OVERWATER.  If you do accidentally, just add flour ( 1 TBL at a time ) until you get a dough ball.
    • You can substitute 1/2 C wheat flour for 1/2 C of the bread flour.
    • DO NOT add yeast to the part that is going back in the fridge.

BASIC RECIPE

  1. If you have a bread machine, just follow the timing instructions on your bread machine.  if you have a Kitchen Aid, stir with a bread hook until it starts to come together.  After it has balled, stir for 10 minutes.
  2. Cover and let rest 20 minutes
  3. Mix and knead by hand on a floured surface for about 5 minutes.  Fold into thirds, then flatten, and repeat.  Place in a lightly greased covered glass bowl for an hour.
  4. Mix and knead by hand on a floured surface; folding in thirds, flattening and repeating two more times.
  5. Form into the end product in bread tin or whatever you are using and let rise for 1 hour
  6. Let finish rising for another 30 minutes.  Meanwhile, put a baking stone or cast iron skillet into the oven to help with heat regulation, and preheat the oven to 400º
  7. Brush the top of your loaves with a mixture of 1/4 C water and 1 TBL cornstarch
  8. Bake about 30-40 minutes or until internal temperature is between 195º and 205º – – NOTE:  Water boils at 212º.  If your internal temperature hits 210º or above you will have a very dry and awful loaf because the water has evaporated out of it.  198º is the perfect temperature.
  9. Wait at least 30 minutes before cutting the loaf.

If you would like more information about the history of this particular batch of Sour Dough Starter, plus some recipes, visit GrandpaCooks.com and enter GSDSC into the search box.


Cheese Bread

Robert’s Cheese Bread

This uses a sour dough sponge for an extra twang

  • 3/4 C sourdough sponge
  • 1 C bread flour
  • 2 TBL potato flakes
  • 1/2 tsp salt
  • 1 TBL yeast
  • 1/2 C buttermilk
  • 1 TBL sugar
  • 1 egg yolk
  • 2 TBL softened butter
  1. Mix all ingredients in a Kitchen Aid
  2. Scrape down sides trying to get the contents to ball together
  3. Add bits of water and flour as necessary to promote formation of a ball
  4. After ball forms, mix 5-7 more minutes
  5. Put in covered glass bowl to rise 60 minutes
  6. Turn out onto floured surface
  7. Press flat, then fold together 4-5-6-7-8 times, adding grated cheddar at each fold.  Repeat until it starts to be springy
  8. You can substitute on Step 7 with onion, black olive, etc.
  9. Form into two loaves and put into a greased bread pan
  10. Spray top with oil, then cover and let rise 120 minutes
  11. Put into preheated oven to 425º
  12. Close door and immediately turn down to 350º
  13. Bake 20 minutes – If you have an internal temperature probe, cook until internal temp should be at least 190º but not over 205º
  14. Let cool 30 minutes before slicing or wrapping

Here is another good recipe

  1. In a mixing bowl, combine
    • 3 C potato starch
    • 2 tsp salt
    • 1/2 tsp baking powder
  2. In a sauce pan, combine and heat
    • 2/3 C milk
    • 1/2 C canola oil
    • 2 TBL butter
  3. Pour hot liquid into the mixing bowl and mix 2-3 minutes
  4. Add 1 large egg, and stir to incorporate
  5. Add another egg, and stir to completely incorporate
  6. While still mixing, add 1 C Parmesan cheese
  7. Continue mixing and add 1 C Romano cheese
  8. Once mixture is completely mixed, wrap in plastic and refrigerate for 2 hours
  9. After mixture has cooled, remove from fridge and cut into 8 pieces
  10. Preheat oven to 450º
  11. Place a baking dish of water in the bottom of your oven
  12. Dampen hands and roll the pieces into balls
  13. Flatten just slightly and brush top with egg wash
    (1 egg, 1 tsp water, 1/4 tsp salt)
  14. Place rolls on silicone mat
  15. Place in preheated oven and immediately lower temperature to 350º
  16. Cook 20 minutes, the rotate pan
  17. Cook another 20-25 minutes

Grandpa’s Notes # 20

Sides and Appetizers

[tv-note]

BBQ Sauce

  • While I like to MAKE MY OWN BBQ sauce, ATK or CC tested sauces.
  • Bulls Eye came out the winner, Stubbs was the runner up, and Kraft was the looser.

Mozzarella Cheese

  • Pre-shredded cheese is tossed in cellulose to keep it from sticking together
  • Plus it dries out, losing some of that incredible meltability
  • Do a taste test yourself
  • Low moisture is stretchier and is 45-52% moisture
  • Fresh is about 60% moisture
  • Your best bet is to buy your own block or ball of mozzarella and shred it yourself.

Sour Dough Oven Stuffing

  • 1 TBL salt
  • 1/2 C shredded carrot
  • 1 C chopped celery
  • 1 C diced pears
  • 1 C diced onion
  • 1/2 C fresh cranberries
  • Sauté above 2 minutes
  • Add 1 tsp each thyme, sage, rosemary, parsley
  • Add 1 TBL chopped pecans
  • Toss 6 C bread crumbs with 3/4 C EVOO
  • Combine all with 2 C chicken broth and 1 TBL balsamic reduction
  • Spread out in 9×12 baking dish
  • Bake covered for 1/2 hour
  • Finish bake uncovered for another 1/2 hour

Date and Gorgonzola Prosciutto Roll

  • Slice dates lengthwise and remove pit
  • Stuff with a piece of gorgonzola cheese
  • Wrap in prosciutto
  • Lay in pan
  • Brush all with garlic, olive and EVOO mixture
  • Bake 400º for 5-8 minutes

Truffle Notes

  • OK to wash truffle, then pack in rice to dessicate
  • Black truffle should be used to accent a more complex dish
    – $2,000 per pound
  • White truffle should be featured and be used in a simple dish
    – $6,000 per pound – $400 per ounce
    – October, Nov and Dec in Piedmont Italy
  • Black Périgord truffles cost $575 per pound from farmer’s markets and $2000 per pound from retail sellers.
  • Black summer truffles cost $670 per pound
    – Year round in Umbria Italy and Burgundy France
  • Pecan truffles cost $100 per pound
    – Australia, Oregon and Tennessee

Simple White Truffle Recipe

  • Egg, butter, cream – shave white truffles over the top

Puff Pastry Baskets

  • Puff Pastry squares 4″ each side
  • Put in center – turkey, mozzarella, pesto
  • Wrap up and tie in four or eigh sections
  • Bake 15 minutes at 400º
  • Remove string – top with rosemary sprig

Cranberry Salad

  • Jello and hot water
  • Lemon zest
  • Chopped raw cranberries
  • Orange
  • Grapes – light chop
  • Apple – diced

Refrigerate 4 hours

Buns / Bread / Muffins

This recipe was adapted from one posted at Genius Kitchen.

INGREDIENTS

  • 1 level tablespoon active dry yeast
  • 1 cup warm water (100-105º F or 37-40º C)
  • 3 TBL sugar
    – PROOF ABOVE MIXTURE FOR 5 MINUTES
  • 1/4 cup vegetable oil
  • 2 TBL softened butter
  • 1 egg
  • 3  cups bread flour – plus more 1 TBL at a time
  • 2 tsp xanthan gum (keeps it from drying out)
  • 1 teaspoon salt

    If using whole wheat or AP flour, add 1 tsp gluten

STEP BY STEP

  1. In a large (preferably glass) mixing bowl, dissolve yeast and sugar in water
  2. Let proof for 5 minutes – If it does not proof, do not use it.
  3. Put into Kitchen Aid
  4. Add oil, the egg and 2 C of the flour
  5. Stir enough to create a loose dough
  6. Add the xanthan gum
  7. Add salt and 1 C flour
  8. Add more flour 1 TBL at a time until your dough ball is fairly soft.
  9. Beat the dough with your Kitchen Aid for 5-10 minutes scraping from sides occasionally
  10. Keeping a fairly soft dough, knead for 5 minutes more on a floured surface
  11. DO NOT LET RISE
  12. Divide into 12 pieces for slider buns, or 8 pieces for 1/4 pounder buns
  13. Shape each piece into a ball
  14. Coat your hands lightly with olive oil and rub each ball with olive oil
  15. Place 3″ apart on a baking tray lined with parchment paper.
  16. Preheat oven to 425º
  17. Let buns rise on stovetop (on top of a cookie cooling rack) for 25 minutes
  18. Bake at 425º for 6 minutes
  19. Rotate tray
  20. Bake another 6 minutes and check to see if they have browned
  21. If necessary, bake another 3 minutes
  22. Remove from pans to wire rack to cool.

This recipe will make eight buns for 1/3-1/2 pound burgers, or twelve buns for smaller burgers and shredded BBQ sandwiches.

A few things that I will be trying with it:

  • SOUR DOUGH BREAD:  Substitute in 1 C sour dough starter for  1 C flour at Step 4.  The sour dough will inhibit the formation of mold, and I am hoping this will increase shelf-life.
  • ONE LOAF OF BREAD:  Next, I will try making this into a small sandwich loaf. One medium loaf pan and two hamburger buns.  For bread, start with the step after DO NOT LET RISE.  For hamburger buns, continue with above recipe.
      1. Roll in 1/4 C flour until you can get some of the cracks and folds out of the loaf.  Smack it on the table occasionally, trying to force out any air bubbles.
      2. Coat your hands lightly with oil, and wipe them on the outside of the dough ball.
      3. Let dough rise in a greased loaf pan for 45 minutes
      4. Cover with lightly oiled foil
      5. Bake at 400º for 20 minutes
      6. Remove foil, rotate and bake for another 10 minutes
      7. Test internal temperature.  If not yet (TARGET) 190º cover loaf and cook an additional few minutes
      8. Remove and set on rack to cool
  • ENGLISH MUFFINS:  Last, I am going to try to make a looser dough and create English Muffins. – with the following modified recipe:
    • Add 2 T non-fat powdered milk at Step 6
    • Replace Steps, beginning with 7,  with these steps
      1. Do not add the last cup of flour.  You want an EXTREMELY wet dough.
      2. Let rise in a GLASS bowl for 45 minutes
      3. Put 1/2 C dough into each WELL-GREASED ring.  No muffin rings?  Use canning jar lids without the cap
      4. Let dough rise for a full hour – more time = more bubbles
      5. Gently lift muffin rings using a spatula, and slide onto preheated HOT skillet and cook for 7 minutes.
      6. Remove ring, flip and cook for 7 more minutes.
      7. Remove from pans to wire rack to cool.

Brown Bread

Ingredients:

  • 1 TBL brown sugar
  • 2 tsp Rapid Rise Yeast or proofed Dry Active Yeast
  • 1/4 C warm water
    PROOF THE ABOVE IF NECESSARY
  • 2 C sour dough starter
  • 1 C bread flour
  • 1 1/2 C whole wheat flour
  • ½ cu honey
  • ½ cu molasses
  • 1 tsp baking soda
  • 1 tsp salt
  • 1 TBL instant coffee
  • 1 TBL cocoa powder
  • 2 TBL butter – softened
  • 1 C whole milk
  • 1 C dry milk
  • 1 C raisins – OPTIONAL

Step by Step:

  1. Mix till combined – add splashes of water in necessary to bring together
  2. Then mix 6 more minutes
  3. Let rest 20 mintues
  4. Mix 4 more minutes
  5. Cover and rise 1 hour
  6. Fold in thirds four times – beating flat in between folds
  7. Finally, form into 2 balls and put on a baking sheet
  8. Drizzle with EVOO
  9. Cover loosely with plastic wrap
  10. Let rise another hour
  11. Slash an X in the top, then bake 325º for 60 minutes
  12. Let cool


Reviving your Starter

Questions? Always start out at GRANDPA'S SOURDOUGH COLLECTION INDEX


Historically some families used their starter as part of the filling between logs in their cabin.  When a new family moved in, they broke off a piece of their starter, gave it to the new neighbor, and filled in the crack with more starter.  Yes, it is that dry and that durable.

Reviving Sour Dough Starter

Whether you get your dried starter from Carl, Grandpa or another source, it will have to be reawakened before it can be used.  Here are “Step by Step” notes that are easy to follow.

    1. All of the steps are done with the mixture on the counter (covered) and NOT in the refrigerator
      To help you with times, I’ve selected a timeline FOR ME that you can choose to follow, or just follow the approximate times.
    2. •   11 AM:  Chop half a potato into small very tiny pieces
    3. Heat 1/2 C water in the microwave for about 60 seconds
    4. Mix the potato in with the hot water and let set until it cools (about 30 minutes) Very warm, but not hot to the touch.
    5. Meanwhile, pulverize (or break apart) your chunk of starter.  The smaller the pieces, the better.
    6. Begin with 3-4 TBL of warm potato water and stir in 1-2 TBL of your pulverized starter.  (1 if it’s dust, 2 if it’s pieces) Let stand for a few minutes to soften the start granules.
    7. Crush the granules with a fork, then mix in 2 TBL of AP flour.  You want the mixture to be like a thin pancake batter.
    8. Cover, and let the mixture get bubbly (8-12 hours)
    9. •  9 PM:  Transfer mixture to a larger glass container.
    10. Stir in 1/4 cup of flour and 1/2 tsp sugar and let rise 4-8 hours.
    11. •  5 AM: The Next Day:   When that mix rises up (4-8 hours) add 1/2 cup of distilled or bottled water and 1/2 cup of flour and let bubble for another 6-8 hours
    12. •  NOON: When this bubbles up (4-8 hours) you are nearly there.
    13. Discard half of the mixture (or give to a friend) and add another 1/2 C distilled or bottled water and 1/2 C flour.  Let ferment all day on the kitchen counter.
    14. •  8 PM:  You will have about one cup of very active starter that is ready for storage in your refrigerator.  Store it and start using it as early as the next morning.

It is now time to CLICK HERE to check out some recipes

If you plan on using your starter tomorrow morning, give it its first real feeding:  Combine 1 C of your starter, 2 C flour, 1 C water and 1 tsp sugar.  Let feed overnight.

    1. •  7 AM – 10 AM:  You are ready to use your starter.  If it still looks kind of weak (not a lot of bubbles) you might want to consider FEEDING YOUR STARTER (Step 16) and then returning to Step 15 tomorrow.
    2. FEEDING YOUR STARTER:  This is how you will start every single time you use your starter.  CLICK HERE.

Tips:

o I use the baby formula wrist test to judge the temperature of the water. A few drops on your wrist should feel barely warm or cold.

o A baby food jar and an 18-ounce peanut butter jar work well for the small and large containers.

o Established starter will do fine in any room temperature that is comfortable for humans. Warmer room temperature is helpful when reviving start, but do not go over 85ºF if at all possible. Cooler temperatures just extend the time required. If room temperature is under 68ºF, I find a warmer spot such as the top of my refrigerator or a cold oven with the light on.

o Vigorous stirring of the mixture from time to time will slightly shorten the time between growth stages, but is not necessary for success. I use this method to test start before shipping and just stir enough to mix the ingredients.

Regarding the vinegar “kick”, and the use of dry yeast in a few of the recipes Carl transcribed, we don’t do it, but heck, it might work for you.

Good luck with your sourdough,

—
Originally written by “Carlos” October 19, 2003

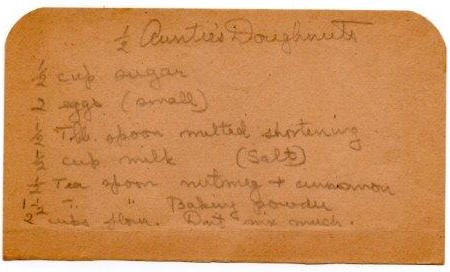
Auntie Goman’s Doughnuts

  • 1/2 tsp nutmeg and cinnamon
  • 1 tsp baking powder
  • 1/2 C milk
  • salt
  • 1/2 C sugar
  • 2 small eggs
  • 1/2 TBL shortening
  • 2 C flour – mix gently

Alternate Recipes

Regular Donuts

  • 1.5 C whole milk – about 150º
  • 2.5 oz veg shortening
  • 5 tsp Instant Yeast (or just under 2 TBL) in 1/3 C warm water
  • 2 whole eggs
  • 1/4 C sugar
  • 1 tsp freshly ground nutmeg
  • 1.5 tsp salt
  • 1 gallon hot vegetable, safflower, or peanut oil for frying
  • 23 oz AP flour (by weight)

Sour Dough Donuts

  • Reduce the dough by 3/4 C
  • Reduce the milk by 1/4 C
  • Add 1 C sour dough starter
  • Add 1/4 C dried milk
    • Add all of this mixture as part of Step 1
  1. Combine yeast mixture, shortening, eggs, salt, nutmeg, sugar and half of the flour in your food processor – Paddle stir to mix
  2. Add 1/4 more of the flour, stir
  3. Put on dough hook, then add the remainder of the flour
  4. Knead for bout 5-8 minutes
  5. Cover and let rise for 1 hour in cold oven with 4 C container of boiling hot water placed in the oven next to the dough
  6. Tap the dough down and fold the dough into thirds – twice
  7. Roll to about 3/8 inch thickness – Use two baking trays or sticks for a spacer to get even thickness
  8. Sprinkle your baking sheet with flour
  9. Cut big circles and place them on your baking sheet
  10. Cut a smaller hole in the center
  11. Let the holes rise on their own tray for donut holes
  12. Use all of the leftover dough to make more
    Roll back into a ball and let rise for 30-60 minutes
    Roll flat and cut into squares or more donuts
  13. Let the donuts (and holes) rise for 30 minutes
  14. Heat your oil up to 365-370º in a Dutch oven
  15. Put four in at a time
  16. Flip after 60 seconds per side
  17. Let drain on cooling rack placed over newspaper
  18. Optional:  Put into paper bag with confectioner sugar and shake
  19. Optional:  Glaze with Sugar Glaze as follows:
    1. Combine 1/4 milk and 1 tsp vanilla in a double boiler
    2. Heat to 150º
    3. Put 2 C confectioner sugar in a whisk together
    4. Dip donuts into the mixture then put on rack again
    5. Rest at least 5 minutes
  20. Optional:  Create a Chocolate Glaze as follows:
      1. Combine 1/4 milk and 2 tsp vanilla in a double boiler
      2. Heat to 150º
      3. Put 2 C confectioner sugar in a whisk together
      4. Add 1/2 C butter (one stick) and 1 TBL corn syrup
      5. Add 4 oz bittersweet chocolate or Cocoa Mix
      6. Don’t overheat
      7. Dip donuts into the mixture then put on rack again
      8. Rest at least 5 minutes


Grandpa’s Easy Sourdough Starter

Questions? Always start out at GRANDPA'S SOURDOUGH COLLECTION INDEX

Grandpa’s Sour Dough STARTER from SCRATCH

If you would rather make your own starter, you can use this simple recipe. We’ve tested it, so know that it works.

Ingredients to get started

1 C flour
– – – Ideally start with 1/4 C rye flour and 3/4 C AP flour
1 C BOTTLED water (some people prefer to use milk instead)
 – – – DO NOT USE TAP WATER
1 package yeast mixture (or 1 TBL)
2 tsp sugar
NO SALT ! ! ! !

Step by Step

      • DAY ONE (Saturday)
    1. Mix yeast and sugar in 1/2 CU warm water.
    2. Let stand 5-10 minutes.
    3. Mix all other ingredients together and put in glass container with loosely fitting lid (to allow gasses to escape) OR Plastic Wrap with a toothpick hole in the top
    4. Let sit at room temperature overnight (12 hours) on first day
      • DAY TWO (Sunday)
    5. On the Second Morning, stir in 1/2 C more water and 1/2 C more flour
    6. Mix well and place back in the fridge
      • DAY THREE (Monday)
    7. On the Third Morning Share or Discard 1/2 of the mixture.  Keep approx 1/2 C starter in a container with a lose fitting lid or a glass bowl as described in Step 3.
      If you share it, tell the other person to start with Step 8 & 9 tonight, and then continue with Day Four tomorrow
    8. Stir in 1/2 C more water and 1/2 C more flour
    9. Mix well and place back in the fridge
      • DAY FOUR (Tuesday)
    10. Nothing to do today.  Just let it continue to age in the fridge
      • DAY FIVE (Wednesday)
    11. Your starter is alive and ready to use
    12. Remove half your starter to a mixing bowl and add to pancakes, bread, rolls or biscuit dough
    13. Feed your remaining starter by adding 1/2 C more water and 1/2 C more flour – Mix well
    14. Place back in the fridge in a glass jar with a loose fitting lid, or a lid with a tiny hole in the top.
    15. Repeat from Step 11 at least once a week
    16. About once a month, add just a pinch of sugar

Sour dough from places such like San Francisco have their “special” taste because of the molds and yeasts indigenous to that area. If you pay for a Sour Dough Starter, it will have the taste of the area from which it originates initially, but as you halve the starter (each time you use it) the tell-tale taste will diminish each time, until it takes on the characteristics of YOUR region.

Maintaining Your Starter Grandpa’s Way

Questions? Always start out at GRANDPA'S SOURDOUGH COLLECTION INDEX

When I first started baking with Sourdough Starter thirty years ago, the amount of the starter quickly overwhelmed me. Here is a way that you can maintain your starter, and create just enough for two people or a small family.

This assumes that you now have about 3/4  cup of active starter kept in a glass or plastic jar in the refrigerator with a plastic screw lid that IS NOT tightened too tightly.

Here is a label for your container:

Sour Dough Sponge
Before use: Transfer sponge into glass bowl.
Add 3/4 C each flour and water. Mix well.
Very occasionally add a sprinkle of dried milk or potato water
Rest covered on counter overnight. Clean container.
Next day, save 3/4 container and use remainder.
Return to refrigerator until next use. Feed weekly.
www.grandpacooks.com/recipes/sourdough
  1. Start with your jar of refrigerated starter.
  2. Again, this depends on how many you are cooking for. If you are preparing loaves for a potluck or for a larger family, look below for instructions on how you can increase the amounts. Be sure you decrease to your sustainable level after all the excitement has died out.
  3. Transfer your jarred starter to a large glass bowl. Add 3/4 C AP flour
  4. Add 3/4 C water
  5. Occasionally, add 1 tsp sugar OR 1 tsp dry milk.  ONLY ONE, NOT BOTH
    – Once every month (or if your starter starts to look sick,  add 1 TBL non-salted potato water, 1 tsp cider vinegar, 2 TBL AP flour
  6. Mix and let sit (covered) overnight to ferment (at least 10-16 hours)
    – Meanwhile, wash your storage jar. Contamination WILL ruin your starter.
  7. Next morning, fill your CLEAN glass jar with your amount of starter (same amount as in Step 1) and return the jar to the refrigerator.
  8. Use the remainder for your recipe.

NOTE: You must use/feed your starter at least once every week, or the starter will die. Even if you don’t bake, feed it and discard (or share) the part you would normally use.

You can make potato water by grating half a potato and microwaving 1/2 C water for a minute.  Put the potato into the water, and when it cools, your potato water is ready to use.

Never use salt, as it can kill your starter.  Add salt only at step number 8 above.

——-

Increasing your amount of starter for things such as a potluck.

So we will assume that you have taken your starter out of the refrigerator, added flour and water to it, and it has been setting on the table overnight.

Since you now have twice as much starter as the day before, you will need twice as much flour and twice as much milk as the day before.

Let it set on the counter again overnight, fill your starter jar and put it in the fridge, and then prepare the loaves for your potluck. If you have extra starter, take them in small containers to give to people who want to start their own sourdough starter. Please refer them to this website for maintenance instructions.

What puts the SOUR in Sour Dough?

Questions? Always start out at GRANDPA'S SOURDOUGH COLLECTION INDEX

A bit of speculation from Carl – the inspiration for Carl’s Friends.

There is a lot of speculation about creating a sourdough sponge that will make the best tasting sourdough bread.

  • One idea is every once in awhile use dark rye flour to feed the starter or some in the bread dough.
  • Another is to let it rise at a lower temperature (60?) so it rises longer and gives the bacteria a longer time to do their work.
  • I have been told that the special San Francisco flavor is created by the bacteria they have in the water there which comes from the Sierra Mountains under the ground.  (That’s possible, but it’s more likely that the natural floras in the area have contributed to the special taste.  Grandpa.)

History

All I know is that it started west in 1847 from Missouri. I would guess with the family of Dr. John Savage as one of his daughters (my great grandmother) was the cook.

    • It came on west and settled near Salem Oregon.
    • Doc. Savage’s daughter met and married my great grand father on the trail and they had 10 children.
    • It was passed on to me though my parents when they passed away.
    • I am 76 years old so that was some time ago.

I first learned to use the starter in a basque sheep camp when I was 10 years old as we were setting up a homestead on the Steens Mountains in southeastern Oregon. A campfire has no oven, so the bread was baked in a Dutch Oven in a hole in the ground in which we had built a fire, placed the oven, scraped in the coals from around the rim, and covered with dirt for several hours. I used it later making bread in a chuck wagon on several cattle drives – again in southeastern Oregon.

Considering that the people at that time had no commercial starter for their bread, I do not know when it was first caught from the wild or where, but it has been exposed to many wild yeasts since and personally I like it. I hope you enjoy it.

Grandpa’s Sourdough – BEGINNERS INFO

Questions? Always start out at GRANDPA’S SOURDOUGH COLLECTION INDEX


Sour Dough bread making is a bit different than the yeast breads and quick breads you probably grew up with. A sour dough culture is ALIVE as much as a cat or dog or hamster is. Being alive, it requires regular feeding, or it will die. Not daily, but rather weekly.

First, you will need to REVIVE YOUR STARTER

Once a week, you will need to MAINTAIN YOUR STARTER by following an easy ten minute process.  If you do not, it will die.

There are many different ways and places to get the sour dough starter that you will grow into your live culture.

For the more adventurous, you can CREATE YOUR OWN FROM SCRATCH. Part of the mystique of sour dough starters though, is their history. I got mine from CARL’S FRIENDS. Because of an agreement with his grandfather, CARL T GRIFFITH provided a sour dough starter FOR FREE that had its origins along the 1847 Oregon Trail.  Carl has since passed away, but  HIS LOYAL FOLLOWERS help keep Carl’s legacy alive.

You may be on this page because of your CSA Share that you bought from the INTERNATIONAL RESCUE COMMITTEE‘s CSA program. The SUPPORTED AGRICULTURE movement of the IRC is designed to help refugees coming in from areas where they faced likely execution just for professing peace. Imagine that!

Anyway, I am planning to give some of my own Carl’s starter to the IRC/CSA for THEM to distribute to you for free. If you are interested in receiving a free dried starter (Carl’s Starter) FILL OUT THIS FORM and you will receive it in as little as a few weeks, but perhaps up to a month; depending on which part of the drying process your request was received. It takes about 30 days for me to completely dry the starter that will ultimately be shipped to you.

You can read Carl’s Brochure here.
– How to reactivate your dried starter, Sourdough Biscuits, Sourdough Hotcakes, Alaskan Sourdough Bread, The Doctor’s Sourdough Bread, San Francisco Sourdough Bread, Potato Bread, and Adaptations for Bread Machines

If you want to get your starter from the source, VISIT CARL’S PAGE and get the starter directly from him.

Here is a link if you want to get it from me.

Here is how you can make your own dried starter once you have successfully created a viable starter.

Here are some more links that you will need.

FOUR SOUR DOUGH RECIPES
– Basic Bread, Rustic Bread, Pizza Dough, Sweet Rolls

Here is another recipe I got from the TV

Royal Caribbean – This is the recipe for Sour Dough Rolls that I got from one of the chefs on the ship.

Four Sour Dough Recipes

Questions? Always start out at GRANDPA'S SOURDOUGH COLLECTION INDEX

BASIC BREAD

  • 1 C of sourdough starter
  • 5 1/2 to 6 C of all-purpose flour
  • 1 package of active dry yeast (1 TBL)
  • 1 1/2 C of water
  • 3 TBL of sugar
  • 3 TBL of margarine or butter
  • 1/2 tsp of baking soda
  • 1/2 tsp of salt

You need to have the sourdough starter at room temperature, so if you have your starter in the refrigerator, put a cup of it out on the counter for a while before you start mixing the bread.

  1. You combine half of the flour and the yeast in a big bowl (a 4-quart glass bowl will do) then set aside
  2. Heat the water, sugar, butter and salt until warm (110 degrees Fahrenheit or so).
  3. Add the liquid to the flour and yeast mixture.
  4. Then you pour in the sourdough starter.
  5. Mix with an electric mixer on low speed for 30 seconds.
  6. The mixture looks very smooth and creamy at this point, and smells very yeasty.
  7. Then you mix with the mixer on high speed for 3 minutes.
  8. This is when you begin to see the elasticity develop in the dough.
  9. It practically climbs up the beaters to the mixer!
  10. You need to keep a scraper or a spoon on hand to push the dough back down.
    READY TO MAKE THE DOUGH
  11. Combine 1/2 of the remaining flour with the soda in a separate bowl. Then add it to the yeast mixture. Stir this until the dry ingredients and the starter mixture are combined. Then try to add as much of the remaining flour — 1/2 to 1 cup — as you can. The dough gets pretty stiff at this point.
    MANUAL KNEADING
  12. The next step is kneading — a part of making bread that many bakers find most satisfying, because you can feel the dough changing in your hands as you knead.
  13. Put the dough on a floured surface and start pushing and pulling. It will take about six to eight minutes to get the dough to the right stiffness. You will know it is done when you can push on it with your finger and it pops right back instead of denting.
  14. Shape the dough into a ball and put it into a greased bowl. Cover it and put it in a warm place to rise until it doubles in size — about 45 to 60 minutes.
  15. When it has doubled, punch it down — another satisfying part of bread baking.
  16. Put the dough on a floured surface and divide into two parts.
  17. Cover these two lumps for about 10 minutes and let them rest.
  18. Make them into two round loaves.
  19. Put the two loaves on a greased baking sheet, and cover again to let them rise until they are about double in size (about 30 minutes).
  20. Then it’s time to bake the loaves, in a 375-degree oven for about 30 to 35 minutes.

You should get a crusty bread with a hearty, chewy texture and that amazing sourdough taste!

RUSTIC BREAD

  • 2 C warm water
  • 1 TBL maple syrup
  • 2 TBL yeast
  • 5 C unbleached white bread flour
  • 1 C whole wheat flour
  • 2 tsp salt
  1. Put the water in a large bowl and mix in the maple syrup.
  2. Add the yeast and mix it into the water.
  3. Let it sit for about five minutes. If the yeast is active, it will begin to froth.
  4. Begin to mix in the flour with a spoon by adding two cups.
  5. After the first two cups of flour are mixed in, add the salt.
  6. Add the rest of the flour one cup at a time until you get the right consistency. It may not take all the flour.
  7. Knead the dough for at least five to seven minutes.
  8. Put the kneaded dough into a greased bowl and cover with plastic wrap.
  9. Let the dough rise for about 6-8 hours on the counter or overnight in the refrigerator.
  10. Punch down the dough and shape it into two small loaves or one large loaf.
  11. Preheat the oven to 450 degrees.
  12. Let it rise for about 1/2 hour.
  13. Bake the bread for 20-30 minutes at 450 degrees.

PIZZA DOUGH

  • One recipe basic bread dough
  • 4 TBL olive oil
  • 3 TBL olive oil
  • 4 cloves of garlic
  • 1 1/2 tsp oregano
  • 1 tsp basil
  • 1 28-oz. can crushed tomatoes
  • salt and pepper to taste
  • 3-4 C grated mozzarella cheese or soy cheese
  1. Make the basic bread dough adding four tablespoons of olive oil when you add the salt.
  2. Let it rise as in the basic recipe.
    MAKE THE SAUCE
  3. Sauté crushed or chopped garlic in olive oil for one minute.
    1. Add oregano and basil.
    2. Sauté for 15 seconds.
    3. Add can of tomatoes and salt and pepper.
    4. Cook at medium high heat for 15 minutes.
    5. Let the sauce cool before putting it on the pizza.
  4. Preheat the oven to 500 degrees.
  5. Punch down the dough and shape it into two 12-inch pizzas.
  6. Ladle on the sauce and spread the cheese on top.
  7. Bake at 500 degrees for about 15 minutes.
  8. The bottom should be light brown and the cheese bubbly.

SWEET ROLLS

  • One recipe basic bread dough
  • 4 TBL of butter
  • 1/2 C or more maple crystals *
  • 4 TBL cinnamon
  1. Make basic bread dough and let rise.
  2. Butter a 9×9 inch baking pan.
  3. Scatter some maple crystals and cinnamon on the bottom to make it gooey.
  4. Punch down the dough and divide it into two pieces.
  5. Roll one piece into a rectangle.
    1. Spread half the butter on the dough leaving a one-inch margin on the top.
    2. Sprinkle on half the maple crystals and half the cinnamon.
    3. Starting at the shorter end of the rectangle, roll dough into a log.
    4. Slice the log into 3/4 inch pieces and place them in the pan.
    5. Leave room between the rolls for them to expand.
  6. Repeat with the second piece.
  7. Let them rise for about 30 minutes.
  8. Put the rolls into the oven cold.
  9. Set the temperature at 425 degrees.
  10. Let the rolls bake for 15 minutes.
  11. Turn the temperature down to 350 degrees and cook until done, about 15-20 more minutes.

* Maple crystals can be found at health food stores or ordered from food co-ops. Date sugar and regular granulated sugar may be used.

Hot Dog Buns / Hamburger Buns

This was originally a recipe for bread sticks. If that is what you want, just roll them a little skinnier and shorten the cooking time by 2-3 minutes.  For hamburger buns, roll them into small baseballs and press them flat to about 1/2 inch thickness – they will rise and thicken.  I frequently roll them into a sheet about 3/4 inch thick, and use a 3 inch biscuit cutter to make the buns.  They end up being about 3.5 inches in diameter.

bunsINGREDIENTS

  • 1 package (or 1 TBL) active dry yeast
  • 2 TBL sugar (split in half for use at two different times)
  • 1/4 C warm water – very warm to the touch, but not hot
  • Three-quarter C milk
  • 1/4 C dried (instant) milk powder
  • 1 tsp Xanthan gum
  • 2 tsp salt
  • 1/4 C soft shortening or lard (bacon grease)
  • 3 C sifted all-purpose flour
  • 1 C spelt or whole wheat flour
  • 1 egg, beaten
  • (optional) 1/4 C sour dough starter

STEP BY STEP

  1. ACTIVATE YOUR YEAST
    Mix your yeast, water, and half your sugar in a small glass bowl
    Stir to mix
    Set aside
  2. SCALD YOUR MILK
    Put into microwave for a minute
    Set aside to let it cool
    Put your lard, salt and the rest of your sugar into the milk
  3. PREPARE HALF OF YOUR FLOUR
    In a large mixing bowl…
    Add your sourdough starter if you are using it
    Add the milk mixture and 1/2 cup flour.
    Add the yeast mixture, dried milk, xanthan gum and everything else
    Mix in bread maker at medium speed until smooth, scraping the bowl occasionally. 100 strokes if by hand.
  4. FINISH YOUR DOUGH
    Add more flour, a little at a time, until dough leaves the sides of the bowl, and surface of dough springs back when pressed.  Dough should not be sticky.
    You may not use all of your flour (or you may need more)
    Turn dough onto lightly floured board.
    Knead until smooth and elastic: 4-8 minutes.
    Place in lightly oiled bowl.
    Turn dough over to oil the top also.
    Cover and refrigerate overnight for a more complex flavor
    When ready to make the buns, cover and let rise in warm place for about 30 minutes.
  5. SHAPE YOUR BUNS
    Form your buns on a greased baking sheet, keeping in mind that they will increase in size by about 125%
    Let them rise for about an hour in the (not turned on) oven
  6. BAKE YOUR BUNS
    Pull the trays of buns out of the cold oven and turn oven to 350º
    Brush the tops of your buns with melted butter
    Sprinkle with sesame seeds or lightly with coarse sea salt if you wish
    Bake at 350º for about 10-12 minutes or until browned
    Let cool 10 minutes before removing from tray

RCL – Sourdough Rolls

Questions? Always start out at GRANDPA'S SOURDOUGH COLLECTION INDEX

SERVED ABOARD ROYAL CARIBBEAN – This recipe came from one of the chefs.

Ingredients

  • 3 C High Gluten Flour
  • 1/4 C Sour Dough Base
  • 2 tsp Yeast
  • 1.5 C Water – more or less – adjust database

Instructions as modified by Grandpa

  1. Mix all ingredients for 5 minutes slow, and 4 minutes medium-fast until well developed
  2. Scale the dough into 3 LB batches
  3. Divide into rolls and place on the sheet pan
  4. Proof for 30 minutes
  5. Make a shallow cut on the top of each
  6. Bake with steam for 5 minutes at 500 degrees
  7. Then lower the temp to 400 and cook until browned

Original Recipe to serve to approximately 200 people

  • 25 pounds High Gluten Flour, 99PRD011113
  • 2.5 LBS Sour Dough Base 10%, 99PRD011441
  • 5 oz Dry Yeast, 99PRD012140
  • 7.5 Liters Water
  • Served on Days 1, 2, 3, 4, 5, 6, 7


Sourdough – COLLECTION INDEX

Care and Feeding of your Sourdough (Printable Summary)

Questions? Always start out at GRANDPA'S SOURDOUGH COLLECTION INDEX

Thinking about venturing into the world of Sourdough?  Read Grandpa’s Sourdough BEGINNERS OVERVIEW as one of your first steps.

It’s started to get too confusing with so many recipes and notes on my web page, so this is the ONLY page that will link to the other pages.

More accurately called Sourdough, the entire process has taken on a nearly cult following. Click here to read what Wiki has to say about Sourdough.

Much of this page is based on (or was taken from) CarlsFriends.NET which offers Carl Griffith’s 1847 Oregon Trail Sourdough Starter. This page is not intended to take away from Carl’s Friends, but rather be a continuing legacy of Carl T Griffith. (Reciprocal information here.)

BACKGROUND INFORMATION

About Carl T. Griffith :: Carl is an actual descendent of those who came west on the Oregon Trail. He has inspired hundreds, if not thousands, of bakers to explore sourdough bread. He got me started!!!!

Carls Brochure :: This gives a bit of background information about this starter that has been alive since 1811. (Backup page) :: (Grandpa’s note: check recipes from above link)

About Carl and the 1847 Oregon Trail Starter :: A legacy that spans over 170 years

Musings from Carl :: The inspiration behind Carl’s Friends

BEGINNERS

Print out this page :: This is a VERY brief overview that will be handy to have on hand until you are familiar with the sourdough process.

Obtaining Dried Starter

Getting Starter from Carl T Griffith :: SASE required

Getting Starter from Grandpa :: SASE OR $1 required

Making Your own Starter from Scratch

Basic Sourdough Starter :: This is a very basic recipe to make your own sourdough starter

Susan’s Easy Sourdough Starter :: by Susan Payne

Honey Sourdough Starter :: A recipe from one of our church ladies

Rita’s Sourdough Starter :: From Rita Davenport

Son of Norway Sourdough Starter :: From Fedrelaudet Lodge 23 – Petersburg, Alaska

Maintaining your starter

How to Revive your Sourdough Starter :: Unless you are given a live sponge, you will need to bring it back to life. Click here to get a live sponge.

Regular Care and Feeding of your Starter :: Feed your starter at least every 7-10 days

OK… My Starter is alive – Now what? :: You must feed your starter weekly or it will die

OK… My Starter is alive – Now what? :: Here is a brief printable sheet that all beginner and intermediate sourdough bakers should have handy.

INTERMEDIATE BAKERS

Making your own dried starter :: Grandpa’s way and Carl’s way.  You ‘ve learned… now you want to share.

ADVANCED BAKERS

External Links :: There is soooooo much to learn about sourdough. Here are some links that will help you expand your knowledge.

NOTHING BUT RECIPES

Grandpa’s Sourdough Bread :: This is the recipe that I make most of the time.

Sour Dough Cinnamon Rolls :: By our of the Church Ladies at Phoenix First UCC.

Sourdough Braided Wheat Rolls :: Unknown source

Sourdough Parker House Rolls :: by Trysha Mapley – Mapley’s Morsels

Irish Soudough Soda Bread :: Traditional soda bread with the tang of sourdough.

Royal Caribbean Cruise – Sourdough Rolls :: provided through the courtesy of Royal Caribbean Cruise Lines

Four Sourdough Recipes :: Two Breads, Pizza Dough and Sweet Rolls

Basic Bread :: Basic recipe from a TV show


xxxxxxxxxxxxx :: zzzzzzzzzzzzz

Sour Dough Bread

Questions? Always start out at GRANDPA'S SOURDOUGH COLLECTION INDEX

Ingredients

You must have Sour Dough Starter to complete this recipe.

  • 1 CU Sour Dough Starter (or half of whatever is in your container – See Step #5)
  • 1 CU flour (or equal amount to starter)… more flour later
  • 3/4 CU water (heated)
  • 1/2 TBL (or 1/2 package) yeast mixture
  • 1 tsp sugar

Instructions

  1. Heat water to VERY warm to the touch, but not so hot that it is uncomfortable – about 40 seconds in the microwave.   If too hot, add an ice cube.
  2. Mix yeast, sugar and water and let stand 5-10 minutes to activate (or proof)
  3. Mix yeast mixture into Sour Dough Starter and mix well
  4. Add flour to mixture
  5. Split the flour mixture, returning half to the Sour Dough Starter container
  6. Add flour to doughball, and keep adding until ball won’t absorb any more dry flour.
  7. Knead for 8-10 minutes… (really!!)  Dough should eventually be tough like Play Dough, but more elastic.
  8. Form into a glass bowl (for pizza) or bread pan to raise.
  9. Let loaf rise for one hour
  10. Bake (covered with foil) at 350 degrees for 20 minutes
    …
    Leave replenished starter on the counter for about five hours, then put it back in the fridger.

Special Steps

If your sour dough starter is running low, just double the items on the Ingredients list, and proceed with the Instructions as normal.

Sour dough from places such like San Francisco have their “special” taste because of the molds and yeasts indiginous to that area. If you pay for a Sour Dough Starter, it will have the taste of the area from which it originates initially, but as you halve the starter (each time you use it) the tell-tale taste will diminish each time, until it takes on the characteristics of YOUR region.

Make your own starter. See the recipe for Sour Dough Starter at this site.


Tenderloin on a Budget

Ingredients

1 Pork Loin or very thick Pork Chop
10 Shallots (peeled and thinly sliced)
3 carrots (unpeeled and cut into two inch pieces)
2 red potatoes (unpeeled and cut into large chunks)
1 CU vegetable broth (homemade is best)
4 TBL Olive Oil
3/4 CU white wine
2 TBL Balsamic Vinegar
2 tsp brown sugar
Salt to taste

Instructions

1. Preheat oven to 350 degrees
2. Toss carrots, potatoes and shallots in a bowl with olive oil, salt and balsamic vinegar
3. Remove all items (except the liquid, of course)
4. Set the pork into the liquid to marinade for an hour
5. Place 2 TBL of the liquid into an “oven-approved” pan, and heat until very hot
6. Put pork into pan and cover. Cook 2 minutes, allowing to brown..
7. Uncover, flip pork, cover, and brown another minute.
8. Remove pork and set aside.
9. Add remaining marinade, and heat.
10. Add shallots and saute for 3-4 minutes.
11. Add back the pork, followed by all other ingredients
12. Cover and roast in oven for 45 minutes.
13. Spoon some liquid from bottom of pan over top of the pork to moisten.
14. Serve with Sour Dough Bread (recipe is at this site)

Variations

You can substitute a thinly sliced red onion for shallots if more convenient.


Cinnamon Rolls – COLLECTION

Cinnamon Roll Icing

Cinnamon Roll Icing

VIDEO – Cinnamon Rolls Class

https://www.grandpacooks.com/recipes/video-cinnamon-bread/

Grandpa’s Cinnamon Rolls

https://www.grandpacooks.com/recipes/roberts-cinnamon-rolls/

  • OPTIONAL:  Spread thin layer of very soft cream cheese
  • OPTIONAL:  Sprinkle very lightly with powdered ginger

Domino Cinnamon Rolls

https://www.grandpacooks.com/recipes/domino-cinnamon-rolls/

Quick Cinnamon Rolls

https://www.grandpacooks.com/recipes/quick-cinnamon-rolls/

Women’s Day Magazine Recipe

https://www.grandpacooks.com/recipes/cinnamon-rolls-3

Courtney Luper’s Cinnamon Rolls

https://www.grandpacooks.com/recipes/cinn/

Cinnamon Spiral Breakfast Rolls

https://www.grandpacooks.com/recipes/cinnamon-spiral-breakfast-rolls/

Sour Dough Cinnamon Rolls

https://www.grandpacooks.com/recipes/sourdough-cinnamon-rolls/

HTML Snippets Powered By : XYZScripts.com