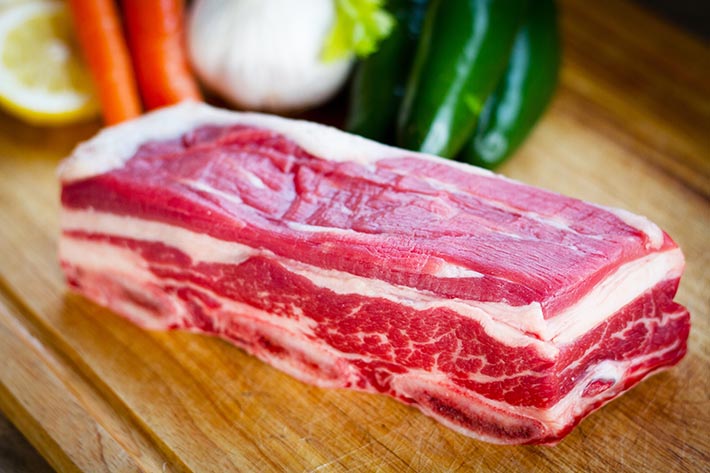
- You need to season it based upon the thickness of the cut. Most of our cuts are at least an inch thick so you need a good amount of seasoning because that seasoning is only going to be on a VERY small portion of each bite. So, you need a LOT of it to actually season the ENTIRE bite.
- I
XFor a hard sear – Regular sear
Bring cast iron skillet up to 425º and sear.
Brush with hoisin and put in oven at 400º till 120-125º
Let rest 8 minutes before serving
Cooking a lot of steaks for a group – Reverse sear
If you have guests that want their meat cooked to different levels of doneness, here is something that you can do. The only drawback is that it takes a bit longer to cook the meat, but because of that you have more control.
INGREDIENTS
- Preheat your oven to 225 – 250º.
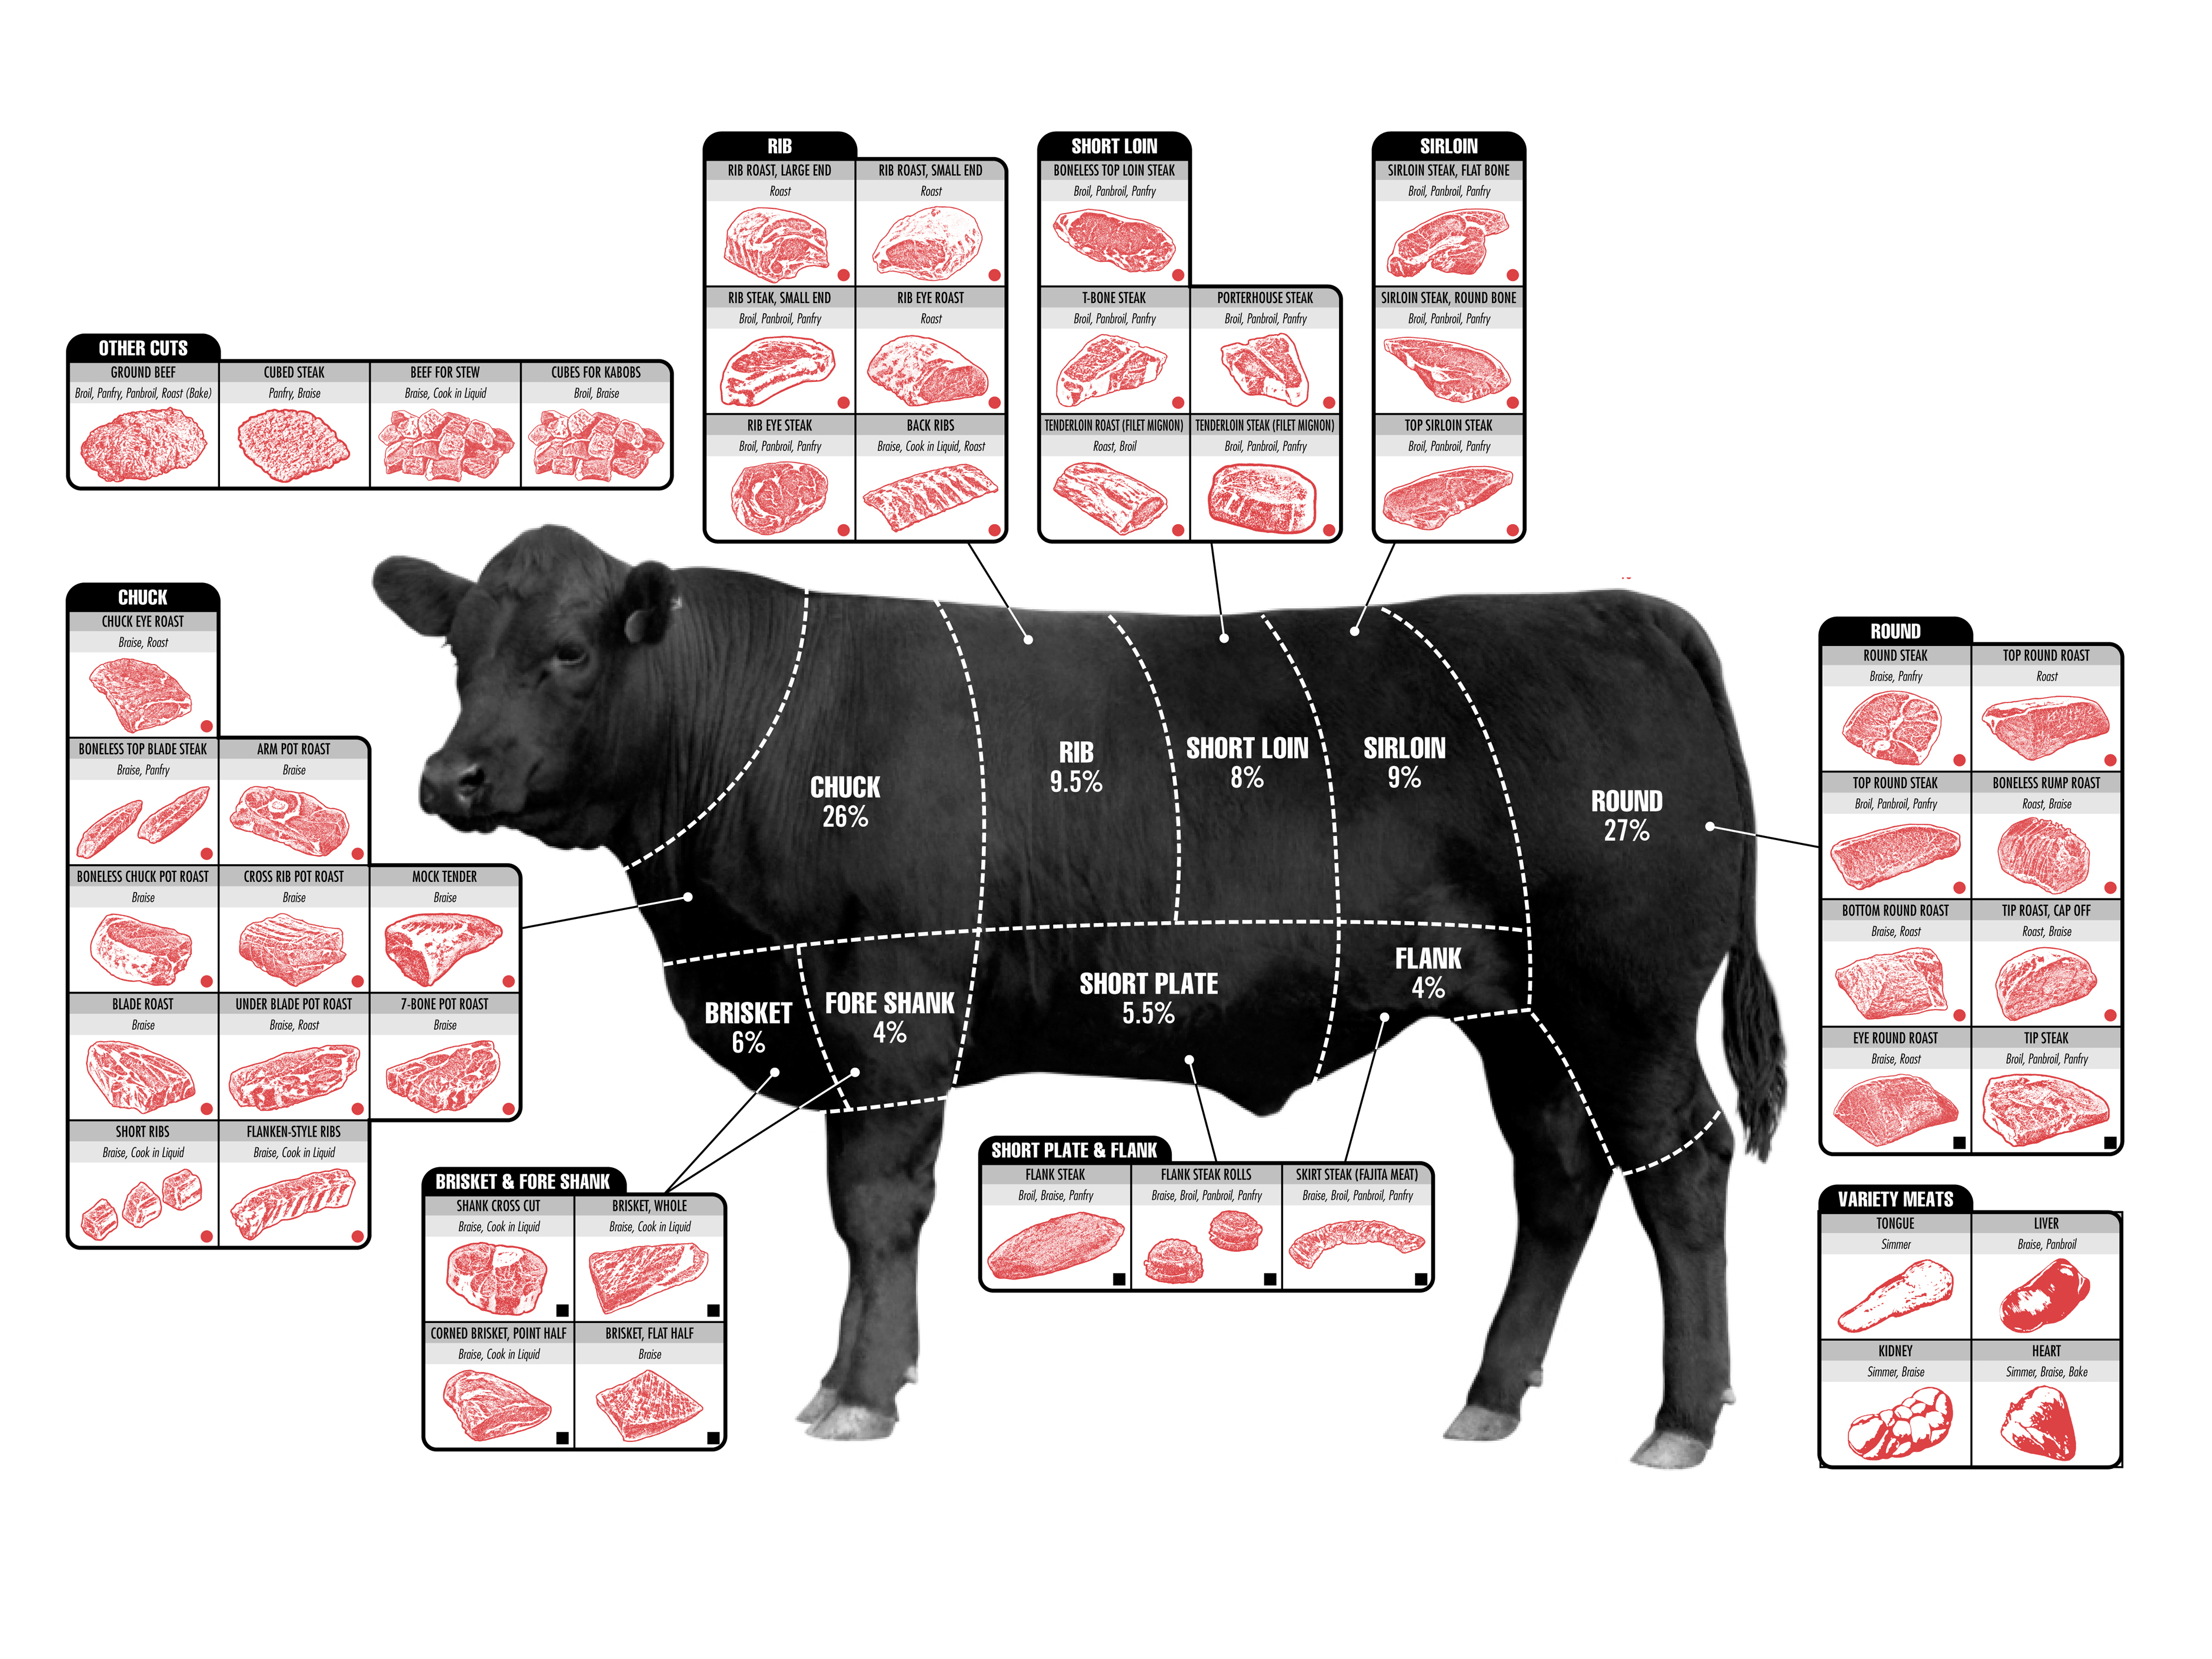
- This is assuming a standard one inch bone-in T-bone, Porterhouse or Tenderloin, but (special times) are also posted for a two-inch ribeye. If you are serving Filet Mignon, and your guest wants it well done; send them home.
- This is not for lesser cuts of meat such as a skirt steak. They do better quickly cooked at a high heat.
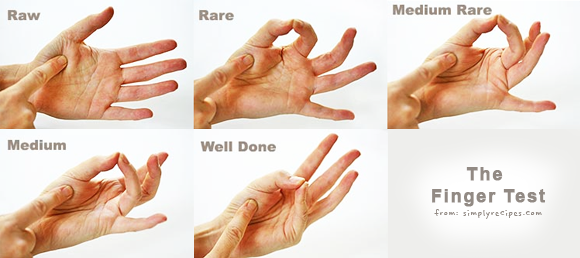
- You will be placing the meat on a rack that is set within a cooking tray. Use toothpicks to indicate level of doneness.
(5) Well done (4) Medium well (3) Medium (2) Medium rare (1) Rare - Start cooking meat for the person who wants their meat well done first. This will cook for eight minutes for a one-inch steak (and twelve minutes for a thick ribeye).
- After the eight (or twelve) minutes has elapsed, put in the meat that will be medium well. Baste all pieces.
- Eight minutes later, put in the meat that will be medium. Baste all pieces.
- Eight minutes later, put in the meat that will be medium rare. Baste all pieces.
- Eight minutes after that, put in the meat that will be rare. Baste all pieces.
- Cook all pieces of meat together for another 45 minutes from this point forward.
- At this point, if you are cooking for a group, you can set them aside, or refrigerate overnight. If storing overnight though, be sure to bring them up to room temperature for an hour before cooking.
- With 10 minutes left on the clock, bring a cast iron skillet up to about 500º
- Bring out the trays of meat. DO NOT baste this time. You want them relatively dry.
To reverse sear the steaks
Make sure your skillet is at least 450º before you start
- Starting with the steak with five toothpicks, sear it in the skillet for 60 seconds.
-
- After a minute, add a second steak and flip the first.
- In 60 seconds, the first will be ready to come off, and you can flip the next.
- Continue searing two at a time, working your way up so that you are eventually serving a steak about every 60 seconds.
Two-inch ribeye works well for this. You should also consider purchasing one or two nice thick Rib Eye Steaks. You will be able to cook them more efficiently, control the temperature better, and enjoy the party.
NOTES FROM AN EMAIL
- You need to season it based upon the thickness of the cut. Most of our cuts are at least an inch thick so you need a good amount of seasoning because that seasoning is only going to be on a VERY small portion of each bite. So, you need a LOT of it to actually season the ENTIRE bite.
- I lke to ‘reverse sear’ my steaks. That means I put them in the oven, bring them up to temperature and THEN I throw them on the grill to sear the outside. That usually gets them up to about 150 degrees or so total. Then I let them rest for about 10 minutes, during that time they continue to cook and the temperature continues to rise. The juices also soak back into the meat making it nice and juicy.
We also REGULARLY sell quite a few variations.
- ‘Choice’ steaks – these are grass fed until the last 90 days of the animal’s life, at which point the animal is fed grain. They are labeled as ‘Choice or higher’ because the inspectors are looking at the outside of the primal. The meat might be ‘Prime’ but they can’t see the inside so often it’s ‘Prime’ meat.
- Dry Aged Steaks – less water and a more concentrated flavor.
- Prime steaks – more internal marbling, very nice but not as nice as Dry Aged.
- Grass Fed – a phenomenon, as these steaks actually lack EVERYTHING that makes a steak good. It’s very lean, tends to be small and a very ‘gamey’ flavor.
NONE of our steaks are EVER given antibiotics or steroids.
Cook it right and it will taste as good as a restaurant steak.
 If you are making a lot of guacamole, after you halve the avocado, press it through a bread drying rack that has metal struts going both directions creating a grid. Just press the avocado through this into a bowl.