Grandpa’s Farina

Cream of Wheat is what you are used to calling it, but Farina is what it really is.  There are many different types of Farina, but farina is farina is farina.  Some like it thick, some like it thin.  I personally like my farina thinner than is common, so I have included my quantities as well as those from the Farina box.  Most box recipes suggest water, but I’ve changed the water to half water and half lowfat milk plus a beaten egg… just for a bit of protein.

INGREDIENTS

Servings Thinner Standard
Water
1 Cup 1 Cup
Lowfat Milk 1 Cup 1 Cup
Farina 1/2 Cup 1/3 Cup
Egg (Beaten)
1 1
Salt (Optional)
1/4 tsp 1/4 tsp

STEP BY STEP

  • HEAT water and salt to boiling.
  • STIR in Farina Cereal gradually. Return to boiling while continuing to stir; then reduce heat to maintain a low boil.
  • COOK 2 1/2 minutes or until thickened, stirring constantly.
  • Serve hot with milk and your choice of toppings.
  1. Put the egg in a separate bowl, and then add a few tablespoons of water. Beat until very well mixed.
  2. Put the water (with the salt) over medium heat on the stove.
  3. Heat the milk in a microwave so that it is very warm to the touch.
  4. SLOWLY sprinkle the farina into the milk stirring constantly
  5. When the water is near boiling, pour the milk mixture in with the water
  6. Continue to stir, and drizzle the egg mixture into the pan
  7. The cereal will start to thicken. When it is exactly how you like it, remove it from the heat and serve.

Alternate methods and serving suggestions

  • We have some cubes of guava paste left over from our trip to Spain. This dissolves and sweetens the cereal if crushed and added at step 2.
  • No guava paste? Dried raisins or cranberries or cran-raisins (or other dried fruit) is a great additive, and should be added just after step 5.
  • I personally like my egg to be visible (kind of like egg drop soup) so if that is your case too, eliminate the water from step 1, and just drizzle the beaten egg in at step 6.
  • My wife likes her farina served with a dollop of yogurt.  I like mine with two pads of butter and some sugar.


Good Gorilla Banana Bites

INGREDIENTS

  • 1 or 2 Bananas
  • 1 C chocolate chips
  • 1 C smooth peanut butter

STEP BY STEP

  1. Slice bananas into 1/2 inch pieces, poke a toothpick all the way into each one
  2. Fill coffee cup half way with peanut butter
  3. Melt (soften) smooth peanut butter in microwave for 30 seconds
  4. Remove and stir
  5. Repeat steps 2 and 3 if necessary – peanut butter should be runny, but not watery
  6. Using toothpicks, dip bananas into peanut butter covering the entire thing, and put onto waxed paper
  7. Put into refrigerator for 1 hour
  8. Melt (soften) chocolate in microwave for 30 seconds
  9. Remove and stir
  10. Repeat steps 8 and 9 if necessary – chocolate should be runny, but not watery
  11. Dip peanut butter bite into chocolate only half way
  12. Put onto waxed paper to cool
  13. Put into refrigerator for 1 hour
  14. Serve cold

ALTERNATE:  Use fresh strawberries and do just steps 8-14 with chocolate only.

Learning to Cook: Basic Skills

Basic Kitchen Skills


The information below this section is from a third party. It is part of Grandpa's Personal Recipe box. Feel free to browse, but know that this information is from someone else.

Here are some lessons that you can learn so that you can do basic meal preparation safely. They are all Third-Party videos from YouTube, but still… I’ve reviewed each of them, and these are basic skills that all people, young and old, should know about or how to do.

  1. Saute – Just a touch of EVOO or butter will improve taste, and not add too many calories.
  2. Dice
  3. Roasting a Chicken – Part 1 – Part 2 – Part 3
  4. Scramble Eggs
  5. Make a Roux
  6. How to Mince Garlic
  7. Cross-Contamination – Poultry is the biggest culprit, but there are many offenders.
  8. Sharpening a Knife – There is a difference between sharpening and honing the blade of a knife
  9. Honing a Knife
  10. Basic Knife Skills – Keep your finger tips clear
  11. Keeping a clean work area – A can of Chlorox bleach wipes is a good kitchen companion
  12. Respecting your kitchen and kitchen tools
  13. Storing leftovers
  14. Simmer vs boil
  15. What does mis-en-place mean… and why? – A bit of foresight can keep you from being rushed
  16. Steam vs hot water – Water will wash away many of the nutrients
  17. Handling fires – Water on a grease fire could kill you.
  18. Washing your Hands – Staph germs can live on your hands for hours.  A bit of soap and 30 seconds could save your life.
  19. Expiration Date – Spoilage – Commercially canned products can be kept for up to ten years as long as the cans are not damaged or bulging.
  20. Mirepoix – Carrot, celery and onion
  21. Trinity – Carrot, celery and bell pepper – South eastern United States

WikiLearn: http://www.wikihow.com/Category:Basic-Cooking-Skills

Review later: http://www.lifehack.org/articles/lifehack/cooking-101-20-lessions-to-kick-start-your-cooking-skill.html

http://www.southernliving.com/food/healthy-light/simple-cooking-skills-every-kid-can-master-00400000009914/

http://www.paklinks.com/gs/household-affairs-and-cuisine-corner/294776-basic-kitchen-skills.html

http://www.youtube.com/results?search_query=Culinary+School+of+the+Rockies+Chef+Michael+Montgomery&aq=f

Cooking with Skinny and Mini – http://www.youtube.com/user/chefskinnyandmini#g/a

Apple Galette

INGREDIENTS

  • Puff pastry
  • Apples (green)
  • Butter
  • Granulated sugar
  • Ground cinnamon

STEP BY STEP

  1. Cut puff pastry into 3-4 inch rounds, using a small plate as your template or a large biscuit cutter
  2. Put pastry round onto a greased sheet pan or pie pan
  3. Slice apples very thin and spread onto the pastry – leaving a slight border
  4. Drizzle melted butter onto the sliced apples
  5. Sprinkle liberally with sugar and cinnamon
  6. Bake at 375 F for about 20 minutes

Six Layer Dip

This is a good recipe for a beginning chef. While it is not complicated, it is ALWAYS a hit at parties and potlucks. Substitute to your heart’s desire on this recipe.

INGREDIENTS

  • 1 (16-ounce) can refried beans
  • 1 (8-ounce) container prepared guacamole (see Recipe at this site)
  • 1 (16-ounce) container sour cream
  • 1 (1¼-ounce) package * dry taco seasoning mix
  • 2 cups (8 ounces) shredded Mexican cheese blend
  • 1 medium-sized ripe tomato, chopped or 1 can tomato pieces (drained)
  • 4 scallions, thinly sliced into 1/8 inch pieces

STEP BY STEP

  1. Spread the refried beans over a 12-inch round serving platter
    This is very pretty in a glass casserole dish because you will be able to see the many colored layers.
  2. Spread guacamole over beans.
  3. In a medium bowl, combine sour cream and taco seasoning; mix well then spread over guacamole.
  4. Sprinkle with cheese
  5. Carefully spread the tomato, followed by the scallions.
  6. Serve immediately, or cover and chill until ready to serve.
  7. Serve with corn chips
  • If you don’t have dry taco seasoning mix, use about 1/2 tsp each of dried garlic, onion, cumin, corriander, parsley, cilantro, salt

The information below this section is from a third party. It is part of Grandpa's Personal Recipe box. Feel free to browse, but know that this information is from someone else.

VIEW THIRD-PARTY VIDEO HERE

For an example of another multi-layer dip, check out this video.

Oatmeal Cookies

This recipe was actually perfected for my mother. She wanted an oatmeal cookie with her green tea in the morning. She asked… I baked… this was the result. She actually preferred the rounded cookies flatted a bit more than I made them, but they are good either way.

INGREDIENTS

  • 1/2 C butter (softened)
  • 1 C brown sugar
  • 2 eggs
  • 1 tsp vanilla
  • 1/4 C milk
  • 2 C uncooked oats (regular)
  • 1/2 C AP flour
  • 1/2 C wheat flour
  • 1/2 tsp salt
  • 1/2 tsp baking powder
  • 1/2 tsp baking soda
  • 2 tsp ground cinnamon
  • 3/4 C raisins
  • zest and juice from one lemon

STEP BY STEP

  1. Preheat oven to 350°F.
  2. Mix and sift dry ingredients
  3. Soak the raisins in lemon juice
  4. In a large bowl, combine all dry ingredients except sugar and oats.
  5. Sift into second bowl, mix in oats, then set aside.
  6. Cream together the butter and the sugar with a fork.
  7. Mix in eggs, vanilla and raisins (add lemon juice too)
  8. Mix in everything and mix just until moistened.
  9. Scoop out using a small ice cream scooper and pack
  10. Eject onto ungreased baking sheet 2 inches apart on baking sheet.
    Flatten out if you like flatter cookies.
  11. Bake in a 350°F oven for 10 to 14 minutes or until light brown, being careful not to over-bake.
  12. Cool 2 minutes on baking sheet
  13. Remove cookies to cooling rack

SPECIAL TIPS

  • Don’t use Minute Oats. Use actually oatmeal, or your cookies will come out mushy.
  • Most oatmeal cookies call for raisins. I personally don’t like raisins (in cookies, anyway) so this recipe does not call for them, but if you were to use raisins, use about 1/2 C.


Super Duper Egg Sandwich

sdesWhen I was a child, none of us would eat scrambled eggs. Yech!!!

One morning my father walked into the kitchen and took away the can of Instant Oats, clapped his hands together and said with enthusiasm “We’re not going to eat oats today. Today we are going to eat Super Duper Egg Sandwiches.”

Presentation might not be everything, but it’s huge!

INGREDIENTS

  • 1 egg for each child
  • 2 slices of bread each
  • 1 slice cheese
  • 2 pieces of bacon (optional)
  • condiments

STEP BY STEP

  1. Optional:  Toast your bread
  2. Optional: Cook your bacon
  3. Scramble one egg in a small bowl
  4. Pour it into a hot skillet
  5. Just as it starts to jell, push it into the shape of a patty
  6. Continue cooking, and flip like a burger to finish
  7. Top with a slice of cheese
  8. Flip a coin to see who gets the first one

SPECIAL TIPS

  • If this is a con job, like my first S.D.E.S. make sure that you give it your all

Image provided by Bryant’s Breakfast, Memphis, Tennessee

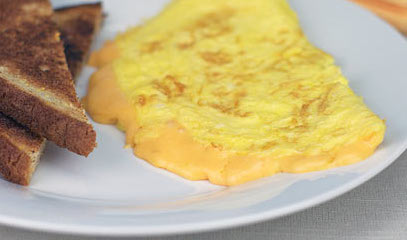
Cheese Omelet

omeletA FEW STARTING COMMENTS

  • An omelet is a good first meal for budding chefs.  This is nearly foolproof, healthy and versatile.
  • You hear a lot about omelet pans. They’re nice, but not really necessary. You can make a decent omelet in a skillet just as easily. Here’s how…

INGREDIENTS

  • 1-2 eggs for each person
  • Cheddar cheese (grated)

OPTIONAL FILLINGS

  • black olives
  • green onions
  • mushrooms
  • salsa
  • … etc

STEP BY STEP

  1. Preheat flat surface to medium-low heat (ideally 300-350º if you have an infrared thermometer or electric skillet)
  2. Pour on about 1 tsp olive oil
  3. Beat the egg well and pour onto skillet
  4. Tip skillet so that egg flows over a wide area BEFORE it hardens
  5. Allow to cook so that egg is soft, but no longer runny
  6. Flip omelet
  7. Put grated cheese on 1/2 of the surface
  8. Put fillings also on 1/2 of surface
  9. Use your spatula to flip bare side over onto the fillings
  10. Slide onto a plate

Tomato Salad

This simple garden salad is easy enough for a beginner, but complex enough that it could be served at a high-end restaurant.

INGREDIENTS

  • 1/4 cup olive oil
  •  TBL red wine vinegar
  • 1 teaspoon sugar
  • 1 sprinkle garlic powder
  • 1/2 tsp teaspoon salt
  • a pinch of teaspoon black pepper
  • 4 roma tomatoes, chunked
  • 1/2 green bell pepper, chunked
  • 1-2 scallions (green onions), sliced
  • several sprigs chopped fresh basil

STEP BY STEP

  1. In a large bowl, combine olive oil, vinegar, sugar, garlic powder, salt, and black pepper
  2. Whisk well
  3. Add remaining ingredients and gently toss until evenly coated.
  4. Serve immediately, or cover and refrigerate until ready to serve.

NOTES

  • Tomatoes are at their tastiest when eaten at room temperature.
  • If you’re assembling this salad in advance and refrigerating, just let it sit out on the counter for 30 minutes or so before serving.
  • Serve with French bread. Sop up oil from the bottom of the bowl.
HTML Snippets Powered By : XYZScripts.com