This recipe has been provided by Rowena Stallings – on the condition that it NEVER be brought to one of the First Church Potlucks by anyone other than her.
2 large russet potatoes – peeled and chopped ( see note below )
2 cups water
1/2 teaspoon salt
3 ounces cheddar, grated – about 1 cup)
2 TBL chopped chives or scallion tops
STEP BY STEP
In a large saucepan, cook the bacon until crisp
Remove the bacon and set aside on a paper towel
Pour off all but 1 tablespoons of the bacon fat
If you don’t have 1 tablespoons, add a bit of canola oil
Reduce the heat to low
Add the onion and cook until softened – about 5 minutes
Stir in the potato pieces until they start to brown
Add water and salt and bring to a boil
Simmer, stirring occasionally, until the potatoes are tender, 15 to 20 minutes
If you want a creamy soup, pour the soup into a blender and puree
For a more rustic soup, use a potato masher to do most of the work.
Return the potatoes to the pan
Still over low heat, add the cheese bits and stir until melted
Remove the pan from the heat
Taste the soup and season with salt, pepper or cumin to the desired taste
Serve the soup topped with the bacon and chives, and a dollop of sour cream
MORE STUFF YOU NEED TO KNOW
Boiling potatoes have less starch than baking potatoes and consequentially hold together better when boiled. This is why they are used in dishes such as potato salads. Not in this soup, though. Since we want most of the potato to break down into smaller pieces and thicken the soup, baking potatoes are preferred.
For Vichyssoise, prepare soup as above, then add 1/2 cucumber – peeled and seeded and 1 TBL light cream. Let soup chill, then add Vichy ingredients and blend in a blender until smooth. Refrigerate several hours. Garnish with chopped chives.
SAFETY TIP: If you blend your hot soup, DO NOT put the lid tightly on the blender. The explosion of hot air will spread hot potato soup all over your kitchen, ceiling and face. Leave the lid off, and cover the top with a heavy towel or wash cloth.
1/4 cup diced bell pepper (green and yellow or red)
1/4 cup chopped cilantro (1/8 bunch)
1/4 cup sliced olives
salt and pepper to taste
1 TBL tomato paste to thicken if necessary – Should be kind of like meat loaf
STEP BY STEP
Brown the ground beef and pork
Add Onions and cook until start to brown
Add sofrito and peppers
Add the olives, capers, salt and pepper, and tomato sauce.
Add chopped cilantro
Cook another 5-10 minutes IF NECESSARY to cook down any extra liquids.
MORE INFO
Picadillo needs to be moist but not runny, so not a lot of tomato sauce is used. But if you are serving it as a side dish use more tomato sauce. Usually a dish like this uses more sofrito, but I like to see the chopped spices so I reduce the amount of sofrito and add chopped ingredients – more like a pico de gallo.
Someimes all you want is quick and easy. Still… don’t just open a can of beans and have at it. After all, would you open a can of Tuna Fish and use it plain to make a Tuna Fish Salad Sandwich? Anyway, here is a quick recipe guaranteed to make life better.
INGREDIENTS
1 can refried beans
1/2 onion – chopped small
1 clove garlic – minced
1 TBL EVOO
Liquid – water is OK, reserved liquid, stock or broth is better
Pico de Gallo translates as “Beak of the Rooster.” It is a sharp tangy staple and a great side to any Mexican recipe.
INGREDIENTS
2 medium tomatoes, seeded and finely diced
1 medium red onion, finely diced
2 tablespoons olive oil
1/4 cup fresh lime juice
4 serrano or jalapeño chilies, seeded and finely diced
2 tablespoons minced fresh cilantro
2 tablespoons tomato juice
1/4 teaspoon salt
1/8 teaspoon freshly ground pepper
STEP BY STEP
Mix all ingredients in large bowl.
Cover and refrigerate until ready to use, but let marinate at least an hour.
VARIATIONS
Serrano and jalapeno chilies are available in most supermarkets. Store up to a week in a plastic bag in the refrigerator.
You may also find the dark green shiny poblano. This chili is milder, but must be roasted and peeled before using.
FROM SCANNED NOTES:
RECIPE
Pico de Gallo
4 medium tomatoes, diced
11/2 cups canned, diced tomatoes
1/2 cup diced red onion
3 tablespoons chopped scallions
1/2 cup diced yellow bell pepper
1 tablespoon diced jalapeno pepper
1/4 cup chopped cilantro
11/2 tablespoons fresh lime juice
1 teaspoon salt
1/4 teaspoon black pepper
1/2 teaspoon dried oregano leaves
1/4 teaspoon garlic powder
Place all ingredients in a food processor and mix briefly.
~
Makes 3 cups salsa, each 2-tablespoon serving containing approximately:
1 O calories
2 gm. carbohydrate
Trace fat
O mg. cholesterol
Trace protein
122 mg. sodium
Trace fiber
3/99
Americas Test Kitchen did some extensive testing and determined that there is just no competing with the commercial canned beans that are available today. We trust them, so you can feel confident that you can use canned beans and this recipe will work well, although by pure definition they are not. If you want to REALLY start from scratch, start at the next section… otherwise, jump to the INGREDIENTS header.
REPLACING THE CANNED BEANS WITH TRUE SCRATCH BEANS
Wash 1 C each of dried pinto beans, black beans, white beans, kidney beans
Do this just before you go to bed.
Soak the beans for 8-12 hours in lots of cold UNSALTED water with 2 TBL white vinegar added
Adding salt at this point will toughen the skins of the beans.
Drain the beans one last time, and put the hydrated beans into 3 C water and 1 C chicken broth
Add 2 strips of bacon
Bring liquid to a boil, then reduce to a simmer for 1-2 hours
If necessary, add more chicken broth – beans should stay covered
This is a very easy ceviche recipe that you can do as a side dish, an appetizer, or even an entire meal. We made this with our friend Cinthia while living in Velez-Malaga, Spain. Ceviche is very flexible as long as your ingredients are extremely fresh. Below is a good video from AllRecipes about ceviche.
INGREDIENTS
This recipe must be made at least 2 hours ahead of time – 4 hours is better PROTEINS
1-2 LB FRESH Mahi (Tuna) or other delicate white fish
– cut into 1/4 – 1/2 inch pieces
– You can also use Rock Fish, Sea Bream, Grouper, Seabass, Halibut, Talapia, Cod or Red Snapper – cut thinly and blanched 30 seconds
– DO NOT use swordfish or tuna, as these are long-lived fish and are more likely to have parasites
Scallops – blanched* 20-30 seconds
Shrimp – blanched* 20-30 seconds
Crab – blanched* 20-30 seconds
Squid or Octopus – blanched* 20-30 seconds * Blanched means that you plunge it into boiling water for about 30 seconds, and then remove it to an ice bath to stop the cooking. REQUIRED VEGETABLES and LIQUIDS
One Lemon and one lime – zest and juice
1 C FRESH real lime juice (this is because the acidity is well-controlled)
1 TBL tomato juice or green tomato
Cucumber – Small cubes
Roma Tomato – Deseeded and chopped fairly small
1/2 red onion – Chopped fairly large – blanched 30 seconds
Blanche all raw seafood for no more than 30 seconds, then plunge into ice water to stop the cooking process
1/2 fresh squeezed lime juice – enough to cover
Sprinkle with a bit of salt and set aside for 10-20 minutes
Dry Pack Scallops are another good thing to use in your ceviche.
– – – To find out why Dry Pack are better than Wet Pack, CLICK HERE.
Optional: Plunge shrimp (deveined) and other seafood into boiling water for 30 seconds, then into ice water. I actually prefer this step.
In a second large mixing bowl, combine the following:
Cut 1 red onion into very thin julienne strips
2-3 large tomatoes – thinly slice tomato flesh, discarding seeds and juice
Finely chop 2-4 TBL EACH – Depending on taste
– Optionally: strips of pepper – mild or hot
– green olives – quartered
– parsley – chopped
– cilantro – some chopped, some fairly whole
– celery pieces (1 stalk, ribs removed before cutting)
2 TBL EACH
– ketchup
– EVOO (emulsified with whisk)
– Worcestershire sauce
– oregano and salt to taste
– minced garlic
Combine all of the above in the glass bowl and refrigerate for AT LEAST 2 hours, but for as long as five. Not longer though, they will become chewy.
Serve topped with slices of avocado, cubed papaya or mango, salt, pepper, and chopped cilantro
If you want to see a ceviche recipe in action, use the below video.
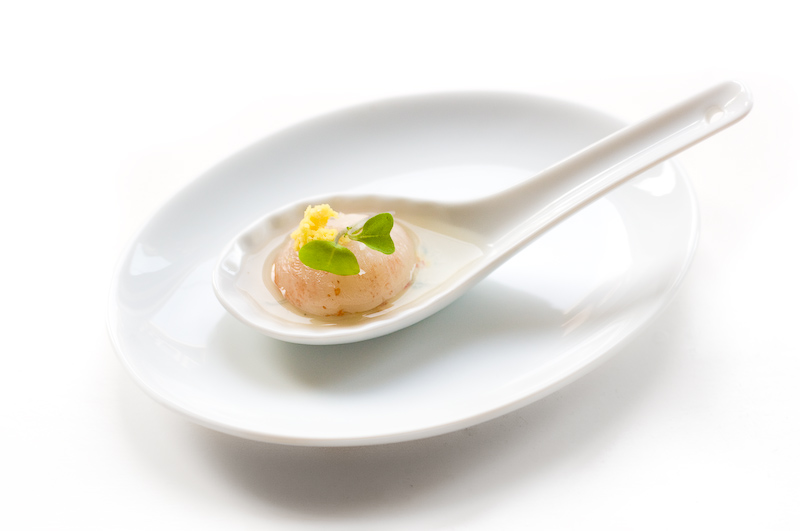
This amuse bouche is classic. Small and for the individual.
An amuse bouche, also called an amuse gueule. The direct translation is something to amuse your mouth. It is a tiny bite-sized morsel traditionally served before the first course of a meal. It does not have to be related to the upcoming meal, but it can be.
An amuse bouche is different than an appetizer, in that they are not ordered from a menu, but are at the discretion of the chef. The treats sometimes differ for each person at the table. Guest should be able to eat them in ONE bite. If two bites, it is on the verge of too big. Three bites is an epic fail.
These are sometimes accompanied by a complementing wine, and are served as an excitement of taste buds to both prepare the guest for the meal and to offer a glimpse into the chef’s approach to cooking.
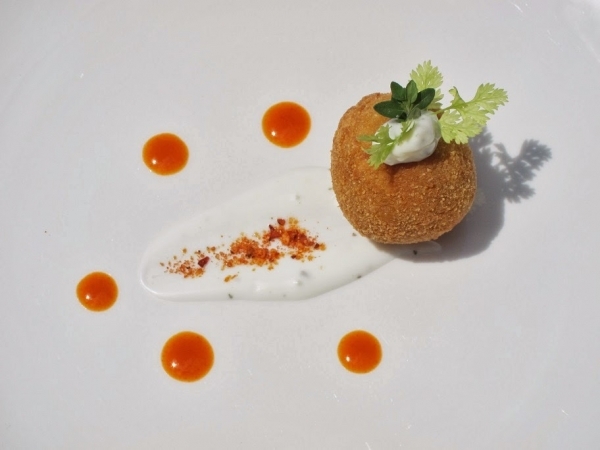
This amuse is complex, but still is only one bite, when you get right down to it.
Whatever strikes your fancy. Here are a few examples:
INGREDIENTS
Chocolate strawberry
Toothpick with blueberry and raspberry
Chocolate waver with fancy white chocolate design
One scallop with passion fruit jelly
Smoked salmon on cracker
Lokum
Bitter chocolate truffle
The below amuse bouche is one of my favorites. Ideally this would be for a table of ten people. It would spark discussion, and allow the chef to show off some of their culinary skills to their diners. This does, however, offer the possibility of disappointment in being the last to choose, but that is part of the fun.
An amuse bouche is something that you serve before you even get started. It tells your people that they are in for a special treat. Generally it is just about one (maximum two) bites.
The appetizers generally follow your amuse bouche, but come before the main course.
Appetizers should be tasty, but not too filling. Familiar examples are taco chips with salsa at Mexican restaurants or egg drop soup at Chinese restaurants.
Here are a lot if suggestions and ideas from other cooking sites:
When we lived on our Urban Farm we had more peppers than we could keep up with. This gave us an option to enjoy our jalapeños all year.
INGREDIENTS
1 CU of peppers, any size
1/2 onion . Sliced very thin
Alt Mix 1
1 CU white or rice vinegar
1/4 CU sugar
3 TBL salt (preferably pickling salt)
Alt Mix 2
1/2 C red wine vinegar
1.5 TBL sugar
1.5 tsp salt
1 tsp mustard seed
STEP BY STEP
Mix vinegar, salt and sugar in some type of jar and microwave 2 minutes
Agitate for a few seconds every few minutes until the solids are dissolved
Cut a slit in your peppers, or cut into medallions, removing the seeds if desired
Mix onion slices and peppers, then place into the jar and then into the refrigerator
Let pickle for at least three days
SPECIAL NOTES
If these are for cooking, you don’t need to add anything else to the mix.
If they are for nibbling, add a clove or two of garlic and some sprigs of dill into the jar at step 1.
JUST WHAT IS A PECK OF PICKLED PEPPERS?
A peck is a traditional unit of volume, formerly used for both liquids and solids but now used mostly for dry commodities such as grains, berries, and fruits.
A peck is 2 gallons, 8 quarts, or 1/4 bushel.
In the U. S. customary system, a peck holds 537.605 cubic inches or approximately 8.8098 liters.
In the British imperial system, a peck is a little larger, holding 554.84 cubic inches or approximately 9.0923 liters.
The word “peck”, originally spelled “pek”, comes from the name of a similar old French unit; the origin of the French unit is not known.
So if Peter Piper Picked a Peck of Pickled Peppers, he would have a lot.
This is a good recipe for a beginning chef. While it is not complicated, it is ALWAYS a hit at parties and potlucks. Substitute to your heart’s desire on this recipe.
INGREDIENTS
1 (16-ounce) can refried beans
1 (8-ounce) container prepared guacamole (see Recipe at this site)
1 (16-ounce) container sour cream
1 (1¼-ounce) package * dry taco seasoning mix
2 cups (8 ounces) shredded Mexican cheese blend
1 medium-sized ripe tomato, chopped or 1 can tomato pieces (drained)
4 scallions, thinly sliced into 1/8 inch pieces
STEP BY STEP
Spread the refried beans over a 12-inch round serving platter
This is very pretty in a glass casserole dish because you will be able to see the many colored layers.
Spread guacamole over beans.
In a medium bowl, combine sour cream and taco seasoning; mix well then spread over guacamole.
Sprinkle with cheese
Carefully spread the tomato, followed by the scallions.
Serve immediately, or cover and chill until ready to serve.
Serve with corn chips
If you don’t have dry taco seasoning mix, use about 1/2 tsp each of dried garlic, onion, cumin, corriander, parsley, cilantro, salt
The information below this section is from a third party. It is part of Grandpa's Personal Recipe box. Feel free to browse, but know that this information is from someone else.
I have since found out that this recipe CAN produce bacteria that is bad for you. Use a Fermentation Lock to assure that your Counter Kraut does not contain any of the bad stuff. On the other hand, I’ve made this three times and am still living. Perhaps just by chance, but there you go! If anything looks or smells “off” just throw it away and start over. Usually it will be great.
PREPARE THIS RECIPE THOUGH AT YOUR OWN RISK.
This sauerkraut takes some time, but it is just about as easy as you can get, and it tastes GREAT. Is it a German recipe, or a Polish recipe? Who knows? Who cares? This goes perfectly with BBQ Bratwurst and German potato salad.
INGREDIENTS
1 head green cabbage
lots of salt
distilled water
Lots of TIME and a little bit of dedication
STEP BY STEP
Cut a head of green cabbage in half, then start cutting off thin slices.
About every two or three cuts, put the slices into a GLASS pitcher or other tall container.
Sprinkle 1-2 tsp salt over the top of the cabbage
Keep cutting the cabbage, and keep putting salt on the top until your container is full.
Pack down the cabbage and put in one or two more layers, packing in between.
Use the lid to a margarine tub (or similar) to hold the cabbage in place.
Slowly pour water over the top completely covering the cabbage.
Put a LOOSE FITTING lid on the container to keep bugs and dust out.
Place the container where overflow will not damage anything… perhaps in a pie pan.
Let sit on the counter for fourteen days, topping off with water each morning.
Keep cabbage submerged under the water
At the end of the fermentation process, pour the liquid into a large measuring cup
Remove the sauerkraut into clean canning jars, filling and spacing as necessary, making sure to leave about an inch of clearance to the top of the jar. Discard the salt which has collected in the bottom of the container.
Top the jars with liquid, cap and refrigerate. Keeps for a month.
SPECIAL TIPS
You should use distilled water rather than tap water because of the potential for chemicals in the water.
I prefer to use Kosher salt. I think it dissolves more appropriately in the water.
If you use a tight-fitting lid, there is a good chance the container will explode.
YOU MUST allow the fermentation gasses to escape.
The information below this section is from a third party. It is part of Grandpa's Personal Recipe box. Feel free to browse, but know that this information is from someone else.
This is adapted from a recipe from Arizona Republic published July 9, 2010. It was called Chickpea and Raisin Salad. I thought that it could be adapted to an unusual four-bean salad by substituting other beans for all those chickpeas. Here is my adaptation of their recipe, and my altered recipe which creates this Four Bean Raisin Salad side dish.
INGREDIENTS
3 cans (15.5 oz each) chickpeas
1 CU raisins (golden raisins would be my choice)
1/2 CU Red Wine Vinegar
2 tsp sugar
1 CU fresh cilantro (rinsed and lightly chopped)
4 scallions, thinly sliced
1/2 CU extra virgin olive oil
1/4 CU sesame oil
1 tsp ground cumin
salt and pepper to taste (scant)
STEP BY STEP
In a small saucepan, combine raisins, vinegar and sugar
Bring to simmer, then remove from heat to cool
Toss chickpeas, cilantro, scallions and raisins with EVOO, cumin , salt and pepper
Refrigerate for about two hours before serving to allow flavors to meld
MY ADAPTATIONS
First, I’ve already modified their recipe, but I’ll not tell you where.
I think that a Vidalia onion, VERY thinly sliced and tossed in the red vinegar before combining would be good.
Rather than three cans of chickpeas, use one of chickpeas, one of red beans, one of wax beans and one of green beans.
Yes, I know that ends up being four cans, but go with it…