If Alternate Finish 1
Cut uncooked Ahi Tuna to approx 1/2 inch squares (or smaller)
If Alternate Finish 2
Sear Ahi Tuna for 45-60 seconds per side
Cut into thin strips against the grain
–
In a small bowl, toss tuna in bowl with lemon and lime juice and set aside
Plunge soy beans in boiling water. Let steep for 5 minutes.
Drain and place in ice water in a medium bowl to stop cooking.
Drain the bowl, and put half in a blender and half back into the medium bowl.
Puree 1/2 of cooked soy beans with both oils and soy
Add other half of soy beans with shallots to the blender
Blend till coarsely chopped and mixed together.
Put blender contents back into medium bowl
Add some coarsely chopped (not blended) cilantro the the mixture if desired
Pour excess juice from the small bowl into the medium bowl
Blend to assure consistency
See alternate finish 1 or 2
You can get multiple sizes of rings quite reasonably at Amazon. CLICK HERE or search Amazon for Stainless Steel Food Ring. These are great for making hamburgers too.
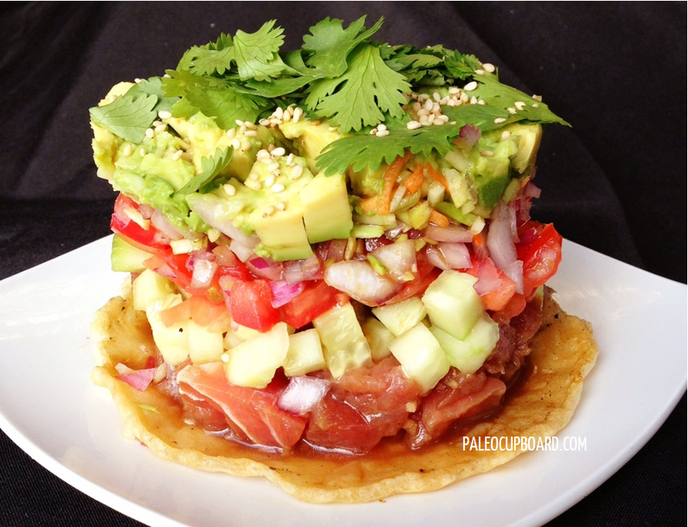
Alternate Finish 1
In Ring place a layer of bean/soy mixture, then top with a layer of the tuna
Carefully remove the metal ring
Top with sprig of cilantro and sprinkle plate with some cracked pepper
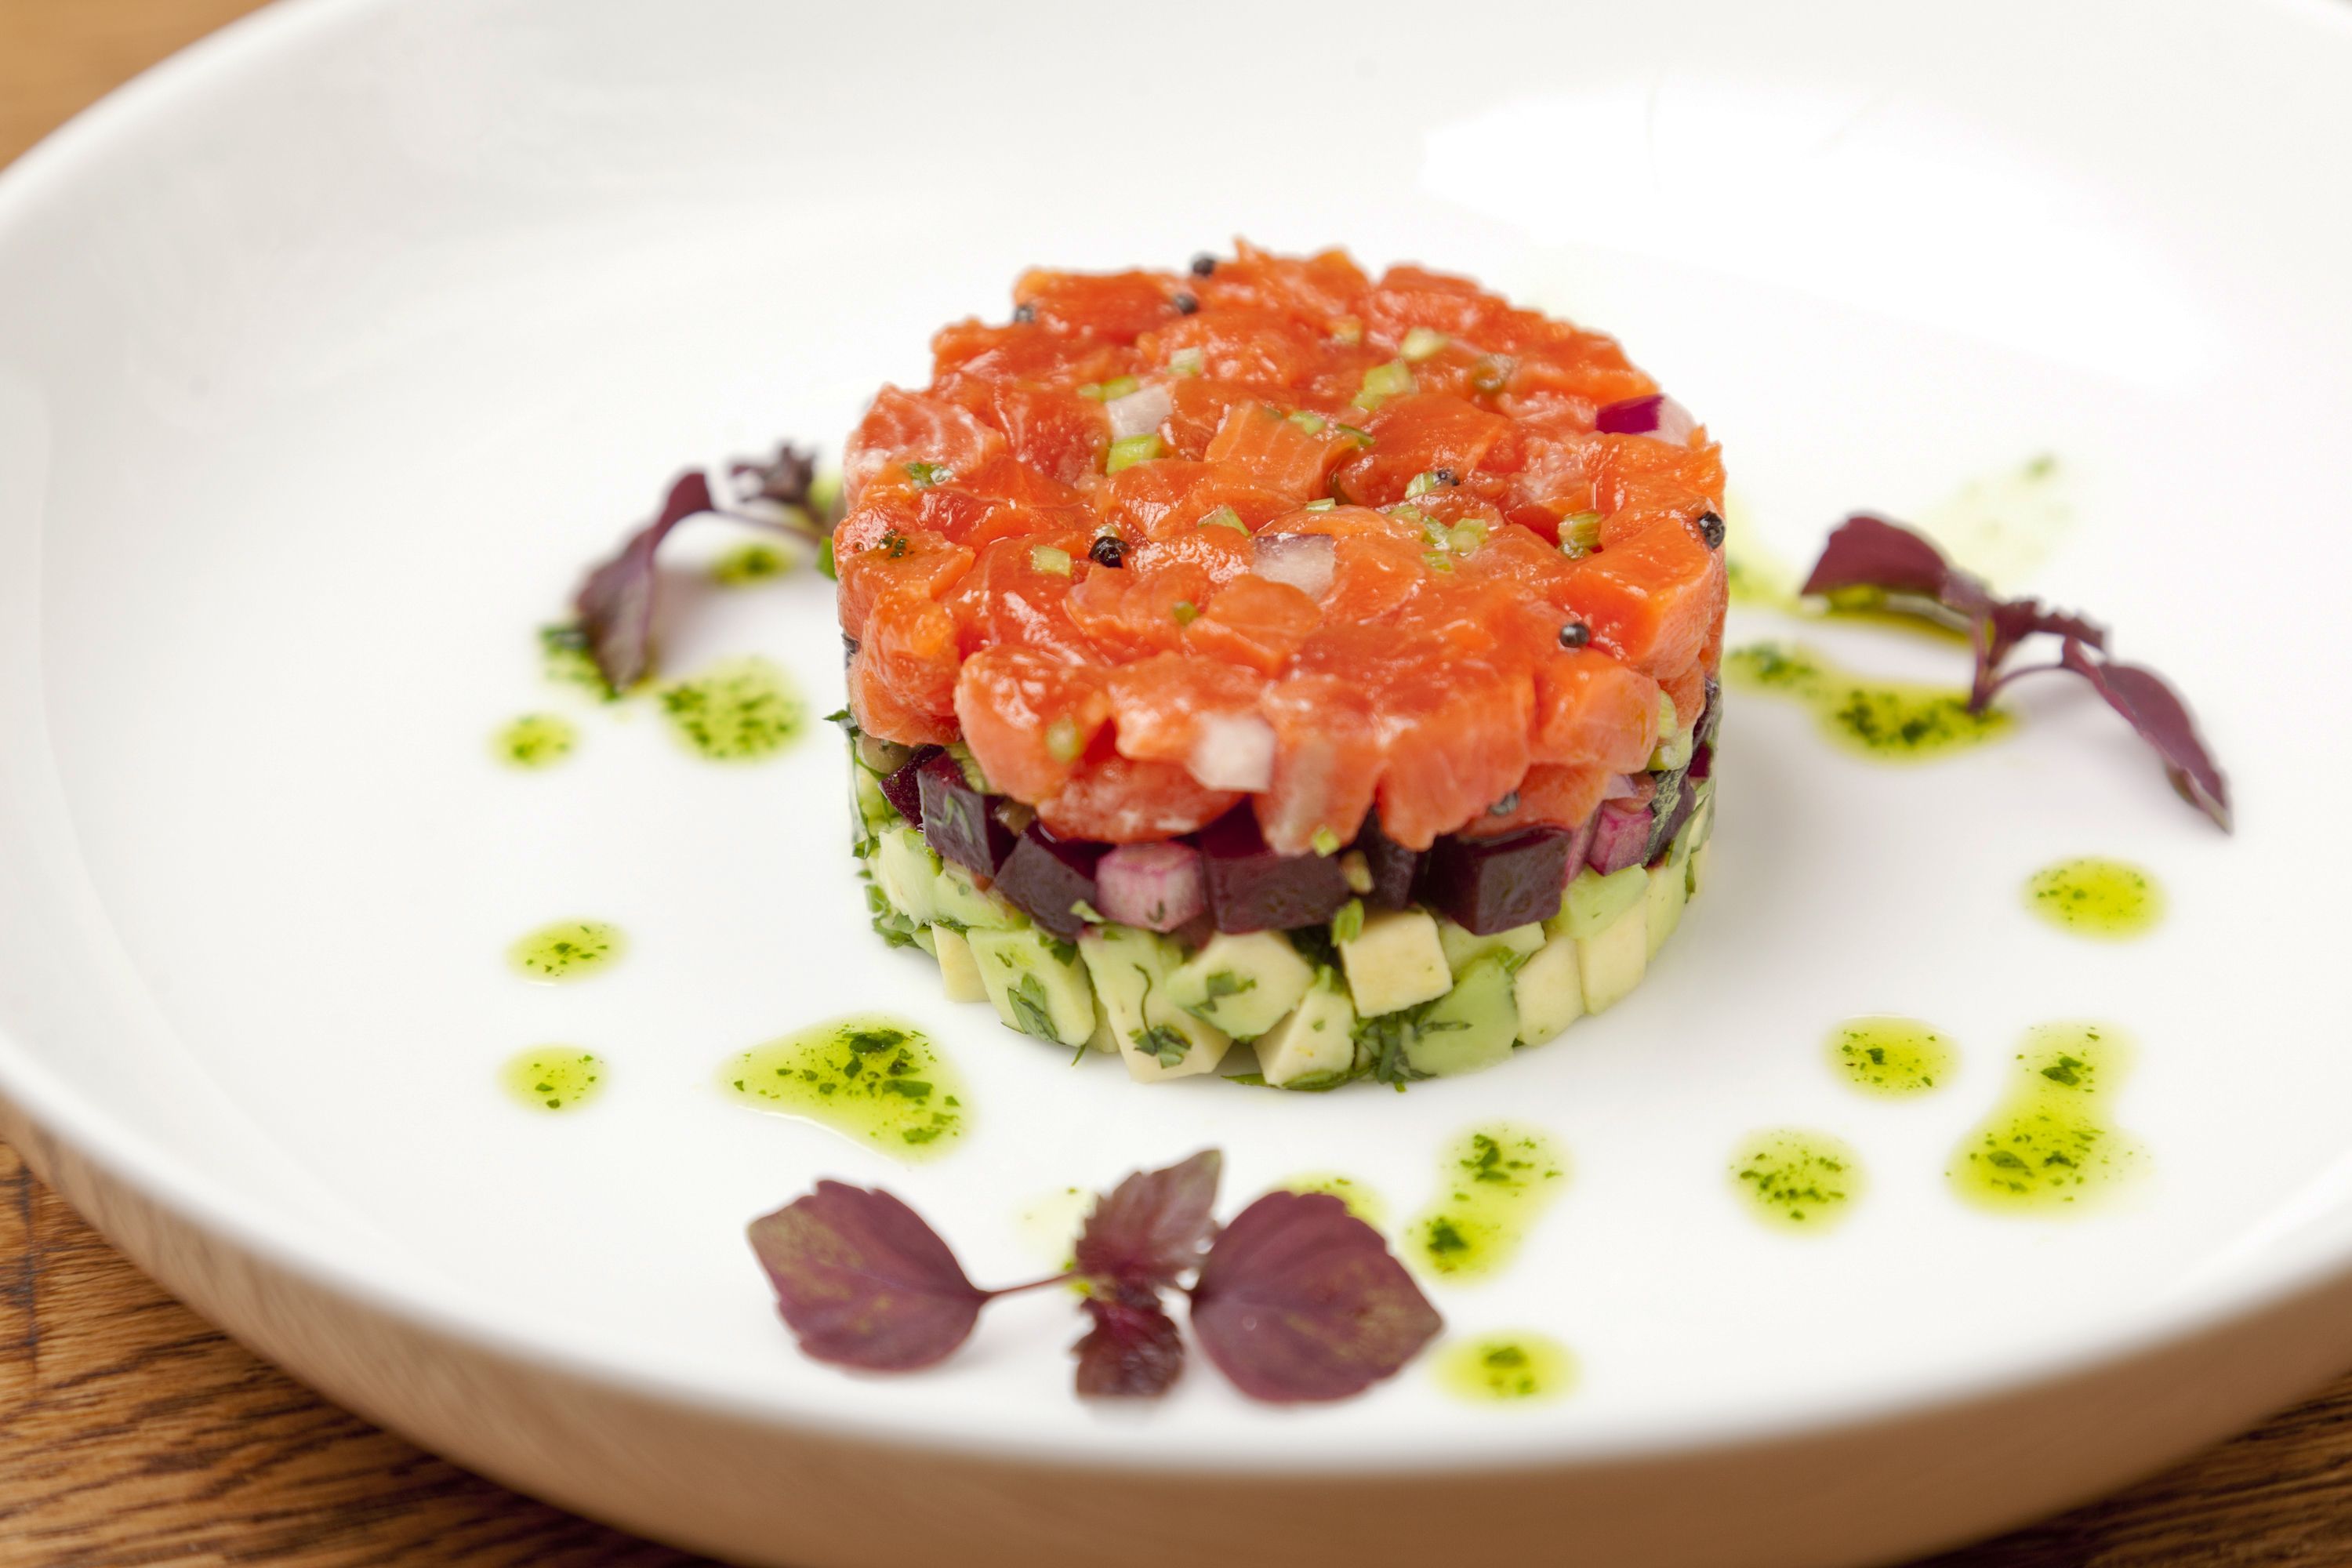
Alternate Finish 2
Place tuna strips along the sides of your metal form
Pack the bean/soy mixture into the center of the tuna
Carefully remove the ring and top with cilantro.
Images from PaleoCupboard.com, Great British Chefs, and Pinterest.
I never make these the same way. The basics are the same, but feel free to shake it up. This page is a compilation of many different CAKES that you can use quite a variety of seafood to make. Feel free to browse, and take inspiration from each. Don’t feel compelled to follow any single recipe.
Basic Recipe
INGREDIENTS
1-2 CU Panko bread crumbs
2 large eggs (lightly beaten)
1 can Tuna in oil or water (drained)
Optional: long leg crab, lump crab and/or jumbo shrimp
1 TBL olive oil – ONLY IF using tuna in water
1 TBL fresh cilantro or parsley (coarsely chopped)
1 TBL Miracle Whip
1 TBL fresh lime or lemon juice plus the zest
shavings from the peel of the same lemon
1 tsp some sort of “heat” like chili powder or yellow mustard
1 tsp Old Bay Seasoning
2 tsp Worcestershire
Optional ingredients: garlic, jalapeño, shallot, Worchestershire, Dijon mustard, etc.
STEP BY STEP
Mix together all ingredients
Divide into six portions
Using emptied can with bottom removed (or other ring) press each portion into shape using a fork
Heat 1/4 inch hot oil in fry pan to 375º
Cook about 2-4 minutes each side
If cooking in the oven, use 350º and cook for 35 minutes or until internal temperature is 140º
Serve with some sort of dipping sauce
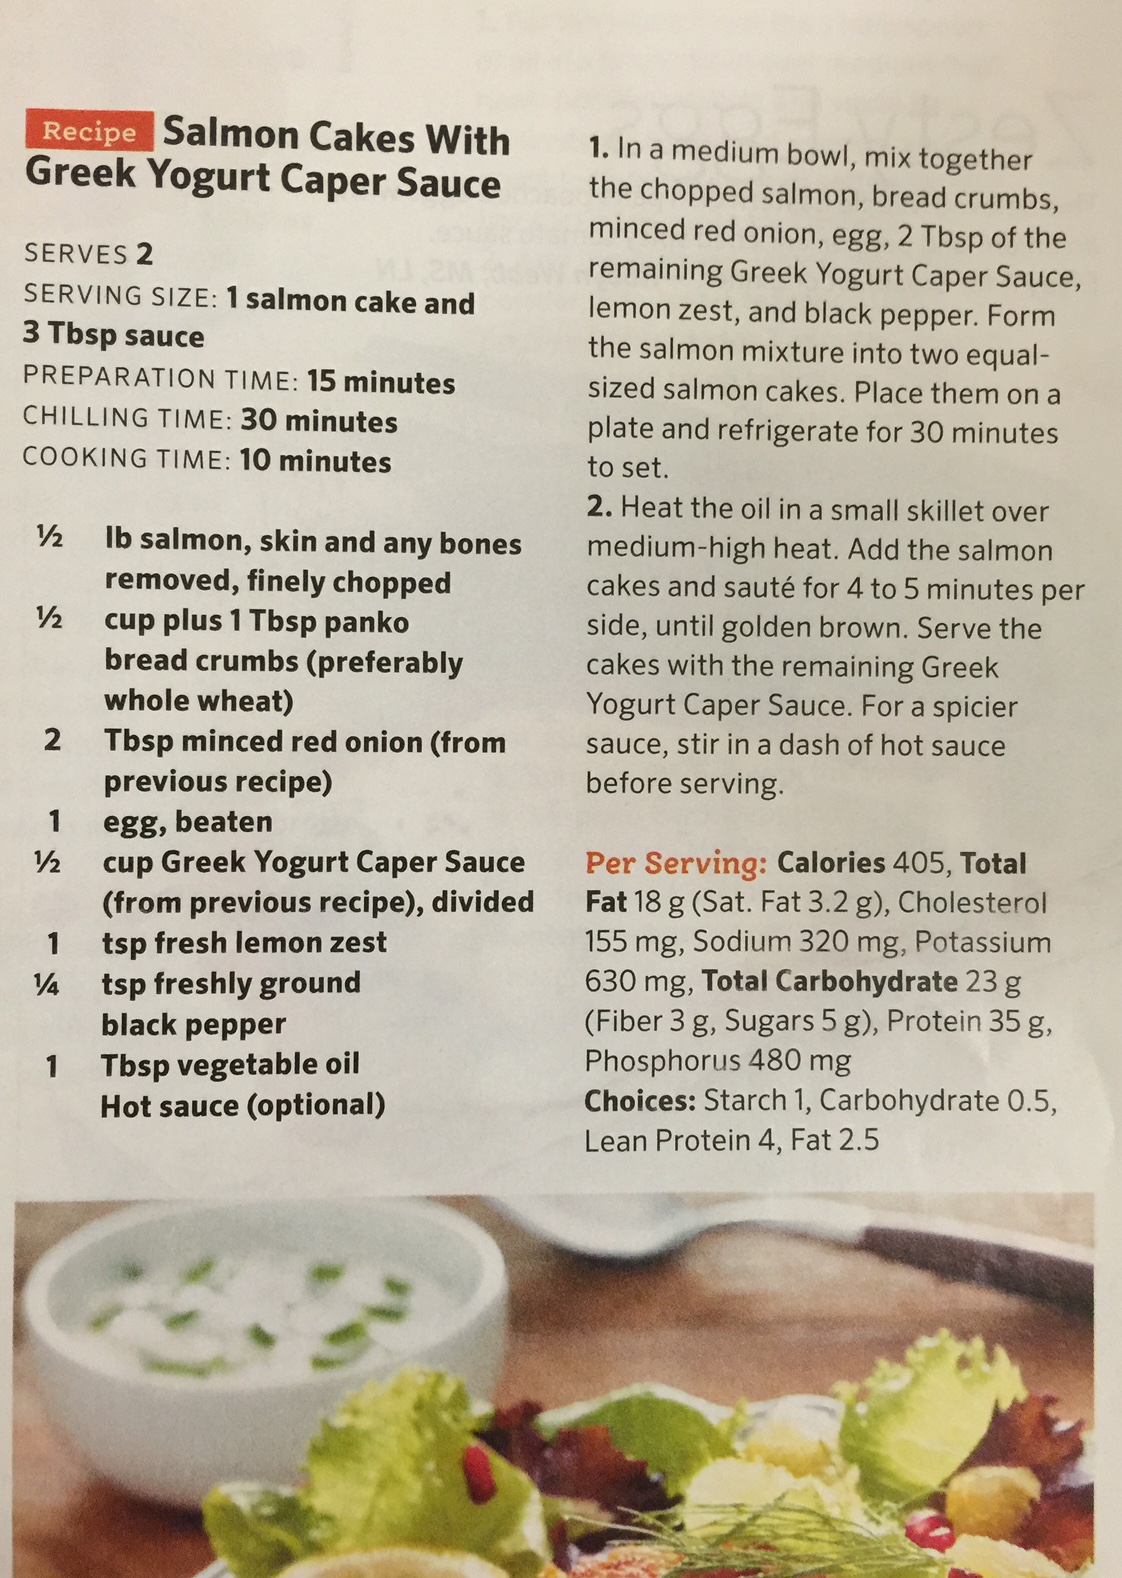
Salmon Cakes
Pull some of these tips into my crab cake recipe.
Spinach Salmon Cakes
Spinach Salmon Cakes
BASIC SALMON CAKE BELOW THIS RECIPE
1 bunch spinach (rinsed)
1/2 lb cooked fish (flaked)
2 eggs
2 stalks green onion or purple garlic
1 TBL horseradish sauce
3-4 pieces day-old bread
1 tsp chili powder
2 TBL Olive Oil
2 TBL Balsamic vinegar
one onion
OPT: 1 tsp TAJIN or one lime
salt and pepper to taste
Equipment: 3-4 inch biscuit ring or a tuna-fish can with
the top and bottom removed (careful edges will be sharp)
Another plating option:
1. Steam spinach for 10 minutes
2. Flake fish in a large bowl
3. Add two eggs (beaten)
4. Four pieces day-old bread (chopped) and add
5. Add 1 TBL horseradish and chili pepper to taste
6. Mince one whole onion
7. Add salt and pepper to taste
8. Add Tajin or zest and juice from one lime
9. Add 2 TBL EVOO and 2 TBL balsamic vinegar
10. Add chopped chives or purple garlic
11. Chop and squeeze liquid from cooked spinach
12. Mix into other ingredients
13. Press TIGHTLY into rings
14. Eject salmon disks onto greased sheet of foil
14. Cook at 350 degrees for 20 minutes
15. Serve with lemon, tartar sauce, or cocktail sauce
See a video summary of the entire process at www.TinyURL.com/irc2012a
Published in Grandpa’s Corner – IRC Volume 1, Issue 8
####################
Basic Salmon Cake
Ingredients
1 can pink salmon
1 med onion (minced)
2 eggs
1 TBL dried mustard
1 TBL mayonnaise
1 tsp Worcestershire sauce
black pepper and salt
onion powder
garlic powder
paprika
flavored bread crumbs
Instructions
1. Flake salmon apart
2. Combine all ingredients except salmon
3. Gently combine everything with salmon
4. Form into patties
5. Bake 350 degrees for 45 minutes
This page has been repeated three times, for each of the above recipes.
This is a 45 minute video of a cooking class given aboard the Holland America MS Rotterdam on our way back from Spain.
Fish Cake Crowns
Meat Cakes
6 OZ cooked Halibut, Salmon or Crab
1/4 C Cream Cheese
1/4 C Sour Cream or Mayonnaise
1/4 C Parmesan Cheese
1/2 C Panko bread crumbs
1 TBL sugar
1 TBL white vinegar
1 Egg
1 Orange
1 Lemon
2 Chives (chopped)
Salt and Pepper to taste
1-4 dashes Cayenne Pepper
Crown
1/2 C Panko Bread Crumbs (or Crushed Doritos)
1/4 C Parmesan Cheese (shredded)
2 TBL butter (melted)
2 Chives (chopped)
Mix together all CAKE ingredients except Fish or Crab
In a separate bowl, mix together all CROWN ingredients
In an small third bowl, flake Fish/Crab Meat apart
GENTLY fold MEAT into the CAKE ingredients
Grease a cupcake pan with the miniature cupcake cups
Don’t use a full size cupcake pan, or they will not cook properly
If you don’t have a miniature cupcake pan, go to “ALT DIRECTIONS” below RIGHT NOW
Put a small amount of CROWN on the bottom of each cup
Put a small amount of MEAT on top of the first layer
Top with enough CROWN to stick out of the cup
Go to BAKING INSTRUCTIONS
ALT DIRECTIONS
These directions are in case you don’t have a miniature cupcake pan
Make “golf-ball-sized” rounds, and then flatten slightly on a greased cookie sheet
Top each “cookie” with as much CROWN crumbs as you can get on them
BAKING INSTRUCTIONS
Bake at 350 degrees for 25 minutes
Remove and let cool 5 minutes before trying to serve them
It saddened me when we had to downsize, and I lost my five-burner gas range. This has caused a rethinking of how I cook. When you turn gas to low, the heat is immediately low. When you turn an electric range from high to low, it takes several minutes for the temperature to adjust. Here are some tips that will help you when cooking with an electric range.
When cooking on an electric stove, use two burners. Set one on high to bring to a boil, then move to another burner and set to low for the simmer you know is coming right up.
When you broil in a gas oven, you close the door. This doesn’t work with electric. You must keep the door ajar slightly in order for the broiler to function properly.
The temperature regulator of the stove top will turn the burner on and off, so 350º really just means that it will average 350º
One of the best investments you can make will be an IR InfraRed Thermometer by ThermoWorks. No, I don’t get a kickback. They are only about $40 and you will use it practically every day. NEVER heat your teflon pan over 450º and never take cast iron over 550º.
Preheat pans with care because electric gets hot very quickly. Your IR Thermometer will help you with this task. A drop of water in your pan will help in absence of a thermometer
Don’t use abrasive cleaners with a ceramic stovetop. It will scratch it. There are non-abrasive cleansers that you must use.
Don’t ever run your stove top on HIGH. It is like flooring your car all the way to work. Use one notch above high as your high heat setting.
You can still use your cast iron skillets as long as they set flat. You can’t use the ones with a rim around the bottom edge (like a reversible grill pan / griddle) Do not EVER slide your cast iron across your ceramic cooking surface.
Also, my cast iron wok does not work very well on the electric stove top. I bought an inexpensive gas wok that I keep on the patio. I also use the wok for blackening peppers, which you can’t do on the electric range.
I have two heavy cast iron skillets that I keep on the bottom rack of my oven. It takes longer to preheat, but it maintains a steady temperature better.
The burners retain their heat for an inordinately long time. I set a bread cooling rack on the hot burner as a reminder.
If your lid leaks water over the edge of the pot, it will pop and crack as the water hits the coil. Always a shock. Boil-overs are pretty awful too.
After turning on a burner, pause 10 seconds and put your hand over the burner you THINK you turned on to make sure you got the right one.
Resist turning the knob 180º when you turn it on. Maintain the visual reminder of a burner ON knob turned slightly to the left or right.
If you have old pans and skillets with a warped bottom, get rid of them and get some new ones – even if they are second hand. The warped bottoms do not come in contact with the heating element and will not heat properly.
Try to match the size of your pan with the burner that is close to its size. If the pan is larger, it will heat unevenly with a hot-spot in the middle. If it is smaller, you could melt your handle or mixing spoon with the heat escaping up the sides of the pan.
Soy sauce is naturally fermented and aged up to two years.
One trick to Spring Rolls is having ingredients as dry as possible.
Shop at local Asian markets for Thai and Vietnamese ingredients. While many can be found in your supermarket, ethnic food shops are adventures and a great way to learn about other cultures. Besides, prices are often lower and items are of quality higher.
Cut at an angle and serve w/ ginger peanut dipping sauce.
Serve garnished with sprigs of mint and with individual bowls of dipping sauce.
Serve with dipping sauce – Variations of this add the final seasoning.
Place ingredients within easy reach of everyone at the table.
STEP BY STEP
Prepare all your ingredients ahead of time. Small, thin and delicate ingredients is a rule.
Moisten rice paper by rubbing or immersing in very hot water for 3-5 seconds.
On the bottom third of the rice paper round, make a small pile of rice noodles, a few shreds of meat, half a shrimp, some lettuce, carrot, and a leaf of each herb.
Roll up the rice paper over the filling, taking it halfway up the uncovered portion of rice paper.
Now fold in the side flaps and continue rolling until you have a tight cylinder.
With rice paper on towel, fill with 2-3 tbl of filling and fold sides in and roll.
Put on a plate and keep covered with a damp cloth.
1 Grilled chicken breast – shredded – OPTION: Pork
1 C vermicelli rice noodles
3 Chipotle chiles – chopped
1/2 C Carrot – shredded
1/4 C Cilantro
Zest and juice from one orange
1 clove Garlic – minced
2 TBL Hoisin sauce
STEP BY STEP
Soak noodles in boiling water until tender – about 3-5 minutes
Drain, rinse, and leave in colander to finish draining
Put shredded chicken breast in a mixing bowl
Toss with chopped chilies, cilantro and orange parts
Add garlic, carrots, or other vegetables – shredded
Bell pepper or zucchini is good
Toss in Hoisin sauce
12 butter or bibb lettuce leaves, washed and dried
Wrap in lettuce leaves – Tie with butcher twine.
Serve with Hoisin or peanut dipping sauce
A Surgeon’s Knot is a good knot for tying these shut. Use a little piece of butcher’s string.
This is a good opportunity to try learning the Butcher Knot. This is a knot that you will use many times once you are familiar with it. Here is a link to an ULTRA ULTRA Slowdown of a demo video by The Scott Rea Project.
6-9 lasagna noodles or very thin white or sweet potato slices *
1/2 cup chopped onion
1 stalk celery – cut thinly
1 large carrot – peel or julienne strips
1 small can corn
1 handful basil – chiffonade
1/2 tsp coarse salt
1/4 tsp black pepper
4 TBL butter
1/4 C AP flour
3 C low-fat milk
1/2 C low-fat cottage cheese
1/2 C Parmesan cheese – grated
1/2 C Ricotta cheese
1 cup shredded mozzarella or provalone cheese
STEP BY STEP
Preheat oven to 350 F
Heat EVOO in a large nonstick skillet over medium-high heat
Add celery, onion, and carrot
Sauté 8-10 minutes or until browned
Remove from heat and stir in salt, pepper, corn, basil, salt and pepper
Set aside vegetable mixture
Melt butter in a saute pan
Slowly spoon in flour stirring to incorporate
When the flour has browned, gradually add milk, stirring with a whisk
Cook over medium heat until mixture comes to a boil and starts to thicken
Remove from heat and stir in cottage cheese, Ricotta cheese, and Parmesan cheese
Set aside sauce
Spread 1/2 cup of the sauce in the bottom of a large glass greased baking dish
Arrange 3 noodles over sauce – or substitute hard slices of potato
Top with half the vegetables
Add one-third of the white sauce
Top with 3 noodles
Add remaining vegetables
Add half the remaining sauce
Add 3 more noodles
Add the last of the white sauce
Cover with foil and bake at 350º F for 60 minutes
Uncover, sprinkle with mozzarella
Bake an additional 25 minutes or until golden brown
Let stand 15 minutes before cutting
ROOT VEGETABLE LASAGNA
Slice root vegetables, lightly toasted in EVOO and sprinkle with salt
Bake mandolin-thin hard veggies at 400º for 20 minutes
Slice softer veggies into thin slices or strips
Sautee and reduce slivered onion, spinach, garlic and salt
In casserole dish, layer: Béchamel or veg puree, veggies, spinach, spag squash, Béchamel, veggies, spag, veggies, spinach, Béchamel, and cheese
Bake 15 minutes
Béchamel is 3 T flour, 1 C cream, 1 C whole milk, 1/4 C butter, 1 shallot (or a slice of onion) 1/2 tsp salt, and spices to taste (eg) nutmeg, black pepper, cayenne, paprika
1 entire arm of broccoli (finely chopped in food processor)
STEP BY STEP
Boil all ingredients EXCEPT BROCCOLI 30 minutes
Pour hot mixture into blender
Add 2 CU cold water
Puree
IMPORTANT NOTE: DO NOT put lid on blender, or the top will explode off – spewing hot vegetable matter all over the place. Use a dish cloth as a cover.
2 metal rings – BUY THEM HERE An old tuna can will work if you do not have metal rings.
Carrots
Green beans
2 CU squash
1/2 CU spinach
STEP BY STEP
Mix cooked squash with finely chopped spinach
Place julienne strips of carrots and green beans in alternating pattern along side of greased metal form.
Pipe or spoon into ring, making sure a flat side of the beans and carrots remain against the ring.
If the round side is against the ring, it will get buried.
Indonesian or Tahitian – Decent, but a little bland
Mexican – Cheap producers may use Tonka Beans, which taste like vanilla, but contain carcinogens
Madagascar – Deeper flavor and more vanillin in the bean (crystals) on the surface
Alternatives
Imitation Vanilla Extract – Completly a shot in the dark. May have been made from wood pulp – very inexpensive – marginally OK for baked things like brownies, where it is just a flavor enhancer, and not subjected to very high heat.
Imitation Vanilla Flavoring :: Contains who knows what ?!? – AVOID
Natural vanilla flavoring contains no alcohol – doesn’t evaporate
Pure Vanilla Extract – legally allowed to contain corn sweeteners and coloring :: 35% alcohol :: 13-14 beans per gallon
Best Vanilla Extract will contain vanilla bean and alcohol and water with no other additives
Moussaka is kind of a lasagna casserole very popular in the Egyptian, Arabic, Greek and Turkish cultures.
INGREDIENTS
For the Meat layer
1 LB ground lamb
1/2 LB ground beef
1 tsp EVOO
1 TBL butter
1 medium sweet onion – chopped fine or minced
2 cloves garlic – finely chopped or grated
1 carrot – grated
1/4 tsp ground cinnamon
1/4 tsp ground allspice
1/4 tsp thyme
1/4 tsp coriander
red pepper flakes
1 TBL tomato paste
1 bay leaf
1/4 C TBL red wine
1/4 C beef stock
1 TBL crushed oregano
1 (16 oz) can whole San Marzano tomatoes – crushed
Kosher salt and ground black or white pepper to taste
Other Elements
1 large eggplant – peeled and sliced into 1/2 inch thick slabs
2 TBL grated Parmesan cheese – for bottom of pan
For the Bechamel Cheese Sauce
4 TBL butter
4 TBL (1/4 C) flour
1 1/2 C milk
1/2 C plain yogurt
1/2 C grated Parmesan or Gruyere cheese
1/4 C grated Provolone cheese or 2 oz goat cheese
2 egg yolks, beaten
Stir just to dissolve/melt
STEP BY STEP
This has a lot of steps, but is very straight-forward. Don’t be put off by the complexity. It is not.
Preheat oven to 375º
Brush your eggplant with EVOO, then put into your oven for 15 minutes to soften – DO NOT UNDERCOOK
You can let this cook as your oven comes up to heat. No need to preheat.
Butter your baking dish and sprinkle 2 TBL of your Parmesan cheese on the bottom
Add half your chopped onion on top of that.
Brown your ground lamb and beef while the eggplant is cooking
When browned, add the rest of your onion and carrot in with the meat
In about 4 minutes, add your garlic in with the onion and cook another two minutes
Add the rest of your spices, and then deglaze with red wine and beef stock
Let it reduce for a few minutes, then add your crushed tomatoes and simmer uncovered for 15-20 minutes.
While this is simmering, layer your eggplant over top of the onion in your baking dish
Start your Bechamel in a small sauce pan by melting the butter over medium heat
Add flour and cook till the flour starts to clump and brown
Add milk slowly, whisking constantly until most of the clumps have been absorbed.
Add the remainder of your cheese to the sauce and cook until it starts to bubble, then remove from heat
Whisk together your yogurt and egg yolks, then temper your milk into your yogurt.
Spread your cooked meat over the eggplant
Pour the cheese sauce over the meat.
You can even do this in two layers if you wish
Bake at 375º until the cheese sauce begins to bubble and brown a little bit ( 40-45 minutes )
Remove and let cool 10 minutes before cutting and serving.
NOTE: Using Gruyere cheese gives this a very nice depth of flavor


